| Author |
Message |
maboyce
Samba Member

Joined: December 21, 2009
Posts: 182
Location: Olympia, WA

|
 Posted: Sun Feb 13, 2011 7:08 pm Post subject: Stock 1600 DP rebuild, step by step Posted: Sun Feb 13, 2011 7:08 pm Post subject: Stock 1600 DP rebuild, step by step |
 |
|
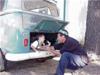
I acquired this engine with a dead Beetle I bought for parts a few months ago. I decided not to use it for my own car, a '68, since I'd rather use a retro-looking single port engine. I'm going to rebuild both this engine and the one from my car, for my own experience and edification, and sell this one. (One of the purposes of this thread is to protect the buyer by showing what was done.)
I'll refer to this engine as the AS41 after its Brazilian case - the other engine, whose parts appear in some of the following photos, will be built on an H case.
I'm using Tom Wilson's book How to Rebuild Your Volkswagen Air-Cooled Engine for direction.
Disassembly
I stripped all the external parts off the engine. This drain for the crankcase breather was hilarious:
Inside it was a toy fireman's hat.
Shortly after I got the tin off, I got access to a bead blaster for ten days. I blasted everything I could blast, from both engines.
I took the heads off, and found they were both cracked. The inside of the cylinders looked like this:
The gland nut came off the flywheel after a few minutes of impacting.
With the flywheel off, I put the engine on the stand to split the case. I pounded with two rubber mallets on overhanging bits of the case...like Thor for 15 minutes until the case finally opened up all the way. The two locating pins in the case were really, really tight.
I took everything out of the case and gave it a bath in purple degreaser cut with water. Next time I will take most of the crud off in diesel or some other non-polar solvent before I use degreaser on it. Super Clean is $10 a gallon.
|
|
| Back to top |
|
 |
my quite
Samba Member
Joined: October 04, 2010
Posts: 113
Location: Sarasota
|
| Posted: Sun Feb 13, 2011 7:45 pm Post subject: |
|
|
Subscribed!
Really looking forward to this process. |
|
| Back to top |
|
|
maboyce
Samba Member
Joined: December 21, 2009
Posts: 182
Location: Olympia, WA
|
| Posted: Sun Feb 13, 2011 7:46 pm Post subject: |
|
|
Painting, Cleaning, Machining
I looked for cracks in the case by passing a propane torch over it surface - oily water hides in cracks and will bubble out along the crack when heated. I didn't find anything, so the case went to Tim's ACVW in Federal Way to be align-bored and thrust cut. I had him look at the crank while I was there, and he said it didn't need to be ground.
In the meantime some tin got a degreasing and treatment with Ospho, followed by DupliColor Engine Enamel. I had previously welded and ground all the cracked spots.
I got these new pistons and rebuilt (by Morris Racing, the seller said) heads off craigslist for a good price. I wasn't going to get the heads, because the cylinder mating area had been cut deeper than stock, but the price compelled me. Tim said they would be usable with shims. The HD springs also need to be changed out for stock.
While I was waiting for the case (and a long while after...), I cleaned parts. Two engines worth of hardware is a LOT of degreasing - I had a method by the end. Small bits like nuts went into a yoghurt cup with Super Clean. After a soak, I used a large solvent brush like an agitator from a clothes washer to stir them around and scrub the outsides a little. I then poured most of the liquid off into another yoghurt cup and took the first cup outside to shoot water into it until it came up clear. Keeping the cup inside a larger tray kept me from losing parts that got washed out of the cup. Finally, I poured off the water, dumped the parts out onto a paper towel, and patted them dry. Nuts and things I usually let air dry, larger bits that I could be confident wouldn't fly away got compressed air.
Large pieces soaked in the tray for a while, then were scrubbed off and out, rinsed, and dried with compressed air. Things like rocker arms got their oil passages thoroughly blown out.
The intake manifold that came with the engine had heavily pitted heat risers, so I had to get another one. It looked a lot better, but its heat risers were plugged, so I had to get out the drill and steel cable.
|
|
| Back to top |
|
|
maboyce
Samba Member
Joined: December 21, 2009
Posts: 182
Location: Olympia, WA
|
| Posted: Sun Feb 13, 2011 8:17 pm Post subject: |
|
|
Carburettor & Distributor
The engine had come with a Bocar 34PICT-3 and a 009 distributor. After research on the Samba I decided the best plan was to trade both away for other parts. I was able to pick up this real German 34PICT-3 and the dual vacuum distributor that goes with it. Both were cheap and in very, very nice condition.
I took apart the carburettor in order to clean it. Out came the fuel shutoff solenoid.
Next the two halves of the body came apart.
Then the float, gasket, and spring bracket. The bowl is really clean.
The air emulsion tube screws out.
Choke hardware and bowl check valve.
Vacuum diaphragm and rod.
Here the choke and the plastic piece under it came out, but I don't seem to have taken a picture. The choke was only wiped clean on the outside and blown out.
Main jet and its plug.
Air screw.
Volume control screw.
Auxiliary fuel jet and plug.
Idle jet.
Accelerator pump.
Throttle lever. The lever remaining on the shaft is for the throttle positioner, part of the emission control system; I couldn't get it off.
All the metal parts got an extended bath in Berryman's Chem Dip, then were scrubbed with a toothbrush, rinsed with water and blown dry with compressed air. Everything looked tight and free from wear, so it all went back together with a new gasket from the rebuild kit.
It looks brand new.
|
|
| Back to top |
|
|
gt1953
Samba Member
Joined: May 08, 2002
Posts: 13848
Location: White Mountains Arizona
|
| Posted: Sun Feb 13, 2011 8:33 pm Post subject: |
|
|
The return spring bracket on the carb just does not look correct to me.
Glad to see you are using proper safety gear, and documentation on you progress.
_________________
Volkswagen: We tune what we drive.
Numbers Matching VW's are getting harder to find. Source out the most Stock vehicle and keep that way. You will be glad you did.
72 type 1
72 Squareback
({59 Euro bug, 62, 63, 67, 68, 69, 73 type ones 68 & 69 type two, 68 Ghia all sold}) |
|
| Back to top |
|
|
maboyce
Samba Member
Joined: December 21, 2009
Posts: 182
Location: Olympia, WA
|
| Posted: Sun Feb 13, 2011 9:01 pm Post subject: |
|
|
Carburettor & Distributor (Cont.)
When I bought the carburettor, I picked up a 113 905 205 AN dual vacuum distributor from the same seller. It was the only distributor in his collection of the right vintage, and the number looked right according to Samba user Glutamodo's list. The base flange number of the carb. is VW325-1, which, while not on the list, would fall immediately before VW325-2, which wants this distributor. The carburettor also has the right hole in the throttle plate for use with a dual vacuum distributor.
The distributor had no shaft wobble and the lobes were clean. I couldn't get the diaphragm to resist a pull on its shaft when I plugged the vacuum ports, so I judged it to be no good.
I took off the vacuum can, and took out the old points, condenser, and clips for the cap.
I drove out the pin with a punch and took off the driving dog from the bottom, freeing the shaft. I had to heat the end of the shaft with a propane torch to get the pin to move at all - it's very tight.
Removing the shaft freed the points plate. The mechanical advance unit can be seen in the middle of the shaft.
Everything metal had a bath in Chem-Dip and a scrub, except the shaft. The mechanical advance unit was clean and well-lubricated already, so I didn't want to take it apart. I carefully wiped the ends of the shaft and left the rest alone.
The felt from inside the body was briefly soaked in oil before being put back in.
I put grease back between the two halves of the points plate where they move past one another.
The points plate went back together.
The washers went back on the bottom of the shaft, followed by the drive dog with its pin and pin retainer.
Later, I scrounged another vacuum canister (still with '889' on the shaft) to finish the job.
The distributor and carburettor went into the parts box until called for. |
|
| Back to top |
|
|
maboyce
Samba Member
Joined: December 21, 2009
Posts: 182
Location: Olympia, WA
|
| Posted: Sun Feb 13, 2011 10:17 pm Post subject: |
|
|
Case and Crank
With the case back from Tim, I checked the bearings for fit. The case was bored out 1.5 mm / 0.060" over and thrust cut 2 mm / 0.080". I found that #1 main bearing wouldn't fit into its seat due to a slight interference with the thrust surface - maybe only a thousandth or two.
(In the picture, #2 bearing fits, I just wasn't brave enough at this point to push it into place.)
Tim and the VW shop I bought the bearings from both said that this is common when both bearings and case are machined to the large end of their tolerance range, and that I should have the bearing's shoulder turned down at another machine shop.
I measured and polished the crank in prior to taking it and the case to a local machinist to be washed in the jet washer.
Main Bearings (0.50 mm / 0.020" undersize):
2.1450"
2.1455"
2.1455"
1.5540
Rod Bearings (in order front-to-back, not cylinder order)(1.00 mm / 0.040" undersize):
2.1255"
2.1255"
2.1250"
2.1265"
These measurements show that this case and crank are on their last rebuild. I'm building this engine to be reliable and run well, but it won't take hot-rodding or a lead foot. Buyer beware.
I polished the crankshaft journals with 320-grit emery paper from the auto parts store - I would have preferred 400, but there wasn't any to hand.
I was careful to travel evenly around the journals and not linger on any one spot. I also tried to err on the side of caution by removing less material than I probably could have.
Once polished, the crank and case were sent away to Johnson's Performance Machine to be washed, and #1 bearing to be turned.
Once back, I readied the crank for assembly by giving it a final wash with Simple Green. I scrubbed out the oil passages with a nylon bottle brush - it's a good thing, too, because even after a trip through the wash tank there was dirt in there.
Once back at the bench, #3 bearing went on with a coating of assembly lube.
I heated the timing gear and distributor drive gear in motor oil over a camp stove, which moved to the floor after the picture was taken.
I picked up the timing gear with a long screwdriver and quickly slipped it onto the crankshaft, bevelled end first. It went on very easily, followed by the spacer and the distributor gear. The expanding ring was last to go on, using the surprisingly expensive pliers.
I lubricated and put on the other bearings, and test fit the crank in the case. It appeared to seat.
I tested my two used camshafts, a 0 and a +2, for backlash.
It was actually hard to feel any difference between the two. I decided that the 0 fit best, and ordered a new camshaft in that size.
Next I put the connecting rods on. I got them as exchanges for my old rods at Northwest Connecting Rod (fitting, isn't it?) in Seattle. I first checked the weights, which were all within one gram of 600 g.
I took them apart and washed them with Simple Green, especially the bolt threads, and blew them dry.
Then I put them on the crank one at a time with a strip of Plastigauge between the bearing and journal. I torqued the bolts 15, 20, and finally 24 ft./lb., being careful not to move the rod and smear the Plastigauge.
I took the rod back off and checked the width of the Plastigauge against the chart:
This one was about 0.0025", that is, between 0.002 and 0.003". I scraped the wax off with my fingernail and put assembly lube on the journal and bearing (and I decided to put the rods on from the bottom up instead of from the middle!).
A dab of red Loctite went on the bolt threads...
...and they were torqued down for good.
I checked the side clearance with a feeler gauge.
All the rods on, with bumps facing up.
Oil Clearances (again in front-to-back order, not cylinder number):
0.003"
0.002"
0.0025"
0.002"
Side Clearances:
0.012"
0.013"
0.015"
0.013" |
|
| Back to top |
|
|
Lakrum
Samba Member

Joined: November 21, 2010
Posts: 277
Location: Texas
|
| Posted: Sun Feb 13, 2011 10:27 pm Post subject: |
|
|
| Im watching this bad boy, very well done so far! |
|
| Back to top |
|
|
ethierbach
Samba Member
Joined: November 07, 2010
Posts: 19
Location: Ann Arbor, MI, USA
|
| Posted: Fri Feb 18, 2011 9:37 pm Post subject: |
|
|
Not only are you guiding me through my rebuild later this year, you're also showing me exactly how to take pictures of it, as Wilson and others suggest.
Thanks so much for sharing this with us. This thread is a lot of extra work on top of your rebuild, and I appreciate it.
-Ed- |
|
| Back to top |
|
|
imadechili
Samba Member

Joined: January 14, 2011
Posts: 236
Location: San Diego, CA
|
| Posted: Fri Feb 18, 2011 11:23 pm Post subject: |
|
|
| Great thread. Plan on doing this later next week. Thanks! |
|
| Back to top |
|
|
PatterBon
Samba Engine Connoisseur

Joined: September 27, 2008
Posts: 3446
Location: Copperas Cove, TX
|
| Posted: Sat Feb 19, 2011 12:02 am Post subject: |
|
|
I worked for Morris Race Engines, John Morris really knows his stuff..Though unlikely, I may have been the one who rebuilt those heads.
_________________
PNW Dub Folk & Kitsap dub Folk (KdF)
Austin Aircoolers VW Gang
2020 Ford F-150
1973 Standard Beetle
1969 Cessna 172K Airplane
1959 Karmann Ghia
US Army CH-47 Chinook Helicopter Repairer |
|
| Back to top |
|
|
burdpete
Samba Member
Joined: October 24, 2007
Posts: 544
Location: Nebraska
|
| Posted: Sat Feb 19, 2011 12:20 am Post subject: |
|
|
I really enjoy these great posts with pics but I can only wonder how in the hell do you have the time or patience to document your work like this. Maybe when I retire I can do the same.
_________________
72 Beetle |
|
| Back to top |
|
|
priss
Samba Member

Joined: May 06, 2010
Posts: 348
Location: bradford MA
|
| Posted: Sat Feb 19, 2011 2:51 pm Post subject: |
|
|
Wicked Awesome posts and pics. Even if you never build an engine yourself its great to see what goes into doing it.
Thankyou |
|
| Back to top |
|
|
gooser
Samba Member
Joined: February 21, 2008
Posts: 766
Location: danville virginia
|
| Posted: Sat Feb 19, 2011 4:24 pm Post subject: |
|
|
| red loctite on the connecting rod threads? |
|
| Back to top |
|
|
PatterBon
Samba Engine Connoisseur
Joined: September 27, 2008
Posts: 3446
Location: Copperas Cove, TX
|
| Posted: Sat Feb 19, 2011 7:35 pm Post subject: |
|
|
| gooser wrote: |
| red loctite on the connecting rod threads? |
It's one hell of a good way to make good and sure you'll never get a rod knock, and it'll come off. I worked at Morris Race Engines and we had some engines with red loctite on the connecting rod threads. And they were easy enough to get loose. It's just peace of mind.
_________________
PNW Dub Folk & Kitsap dub Folk (KdF)
Austin Aircoolers VW Gang
2020 Ford F-150
1973 Standard Beetle
1969 Cessna 172K Airplane
1959 Karmann Ghia
US Army CH-47 Chinook Helicopter Repairer |
|
| Back to top |
|
|
maboyce
Samba Member
Joined: December 21, 2009
Posts: 182
Location: Olympia, WA
|
| Posted: Mon Mar 07, 2011 7:38 pm Post subject: |
|
|
Oil Pump
Sorry for the hiatus. It takes longer to write about the work than to actually do it.
With the crank ready to go into the case, I turned to the oil pump and cover. The pump was good, but there was some scoring inside the cover I wanted to get rid of - I also had paint overspray on that surface. The flat tablesaw table and some PSA-backed sandpaper make a good lapping surface.
After many, many strokes it came up clean and flat. The heavy lifting was done with 80 grit, then 180 to finish. I didn't think it needed to be polished any smoother when using sealant on the gaskets.
I lapped the pump housing also, with the gears in place, to clean up the mating surface. The aluminum of the housing laps much faster than the steel cover.
I made sure the clearance between gears and cover was 0.004" or less.
All the parts were thoroughly cleaned with Simple Green and water, blown off and set aside.
Oil Pressure Valves
Next, the oil-pressure relief and oil control valves needed to go in the case. It's a simple matter of lubing the valves and putting them in with their springs and plugs. I sealed around the plugs with RTV silicone.
Valve...
...spring...
...and cap.
The same at the pulley end of the case:
I also put this plug back in, with sealant. I think most people don't even bother taking it out. What's it for?
I took the opportunity to goop around the studs where they come out of the case - the threads open inside the case, so it's a potential leak site.
I did the job with my finger, but a small brush would make less of a mess. It'll be hidden under the tin anyway. |
|
| Back to top |
|
|
christiancarpenter
Samba Member
Joined: June 08, 2010
Posts: 192
Location: edmond, ok
|
| Posted: Mon Mar 07, 2011 8:34 pm Post subject: |
|
|
| great thread. while i'm not comfortable building an engine yet, i'll be keeping an eye on this for when the time comes. keep up the good work. |
|
| Back to top |
|
|
SwitchThrottle
Samba Member

Joined: July 15, 2010
Posts: 40
Location: Canton, CT
|
| Posted: Tue Mar 08, 2011 10:28 am Post subject: |
|
|
I hit myself in the forehead when I saw the case half soaking in the bin. I have the same bin sitting right next to the motor I am tearing down. Without a parts washer I was stumped on something large enough to take a case half, and the bin never even occurred to me.
_________________
You can be part of the problem or part of the solution, but being part of the problem is more fun! |
|
| Back to top |
|
|
flyboat
Samba Member
Joined: April 21, 2010
Posts: 2752
Location: Bath NC
|
| Posted: Tue Mar 08, 2011 1:19 pm Post subject: |
|
|
If the job is worth doing, its worth doing right. It looks good
_________________
79 super Vert
62 Ragtop Bug
66 tintop Westy
Porsche 914
09 Z06 Vette track car |
|
| Back to top |
|
|
emtbasics
Samba Member

Joined: June 24, 2010
Posts: 7
Location: Bassett, VA
|
| Posted: Wed Mar 09, 2011 8:20 am Post subject: |
|
|
| I've enjoyed following this post. Look forward to more. Reading this, I don't feel quite as intimidated on doing a rebuild myself. |
|
| Back to top |
|
|
|


