| Author |
Message |
Gregorio
Samba Member

Joined: March 29, 2006
Posts: 288
Location: Chico, CA

|
 Posted: Sat Feb 13, 2010 12:11 pm Post subject: Wiper Switch & Motor Wiring Posted: Sat Feb 13, 2010 12:11 pm Post subject: Wiper Switch & Motor Wiring |
 |
|
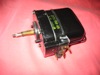
So yesterday I decided to tackle my windshield wipers from parts that I've gathered over the past year or two. My car is actually a baja that I've been building up, so there was no existing wiring, etc.
Anyways, I opened up the motor and cleaned out all of the old grease. Re-greased it and wired it up without installing it to test the motor. However, I noticed that it would only run correctly when I grounded it to the vehicle (by touching the motor to the body). I've done a number of searches here and read that the motor is grounded through the switch, so I have the switch ground going to the brass ground strip where the motor connects to the body.
After installing everything, I turn on the ignition and the motor moves and causes the wipers to move about 1/4", no matter if the 2-speed dash switch is on or off. Can someone point me in the right direction here? I have a feeling it's something to do with how I'm grounding everything.
My parts: 2-speed dash mounted wiper switch, SWF 12V 2-speed motor
Thanks,
Greg |
|
| Back to top |
|
 |
glutamodo 
The Android

Joined: July 13, 2004
Posts: 26325
Location: Douglas, WY
|
| Posted: Sat Feb 13, 2010 3:53 pm Post subject: |
|
|
The motor is not grounded through the switch. It grounds to the body. The additional ground terminal going from the switch to the motor is for the self-parking circuit.
The bottom diagram here shows the wiring for the wiper, note the ground on the wiper motor:
-Andy
|
|
| Back to top |
|
|
Gregorio
Samba Member
Joined: March 29, 2006
Posts: 288
Location: Chico, CA
|
| Posted: Sat Feb 13, 2010 4:51 pm Post subject: |
|
|
Thanks for the clarification, Andy.
I noticed that the ground on the motor doesn't have a terminal like the others; does this mean that the motor grounds itself where it connects to the body, or am I supposed to run a ground wire to one of the small screws above the 31 on the motor?
Thanks!
Greg |
|
| Back to top |
|
|
Gregorio
Samba Member
Joined: March 29, 2006
Posts: 288
Location: Chico, CA
|
| Posted: Sat Feb 13, 2010 5:22 pm Post subject: |
|
|
I think I may have found my issue; one of my wiper shafts was broken in half which was causing everything to bind up I believe. I'm gonna order a kit to replace both wiper shafts and give it a go.
Greg |
|
| Back to top |
|
|
glutamodo
The Android
Joined: July 13, 2004
Posts: 26325
Location: Douglas, WY
|
| Posted: Sat Feb 13, 2010 5:24 pm Post subject: |
|
|
I never did ask what year wiper rack/motor you have here. Up to like 1969 the motor grounds to the rack, then there was a copper tab that flipped up over the grommet the 10mm-head bolt goes through to mount the rack to the body, that was the ground path on those. Later they had a dedicated 31 terminal for a ground wire.
-Andy |
|
| Back to top |
|
|
Gregorio
Samba Member
Joined: March 29, 2006
Posts: 288
Location: Chico, CA
|
| Posted: Sat Feb 13, 2010 5:26 pm Post subject: |
|
|
| Yeah, it's a '69 motor I believe which has the brass grounding tab that sits below the motor where it mounts under the hood. I'll get those shafts replaced and I think she'll be ready to roll. |
|
| Back to top |
|
|
79bugman
Samba Member
Joined: February 06, 2010
Posts: 279
Location: NEW JERSEY, USA
|
| Posted: Tue Feb 16, 2010 6:54 pm Post subject: similar problem |
|
|
| glutamodo, I seem to have a similar problem with my 79 wipers. I cannot get my wipers to work at all. It seems that there are extra wires and I do not know how to hook them up. I also think that I have a grounding issue. Do you have any experience with 79's? Thanks. |
|
| Back to top |
|
|
glutamodo
The Android
Joined: July 13, 2004
Posts: 26325
Location: Douglas, WY
|
| Posted: Tue Feb 16, 2010 7:14 pm Post subject: |
|
|
In 1979 the intermittant wiper option became standard on US convertibles. But it never made it into the factory wiring diagrams. I've never messed with that setup on a Bug before. I do think it is similar to what they used on other models around that time. It's probably similar to what you find in the 1980 Vanagon wiring diagram, which is here: (click on the photo to enlarge)
Then again, it might not be, as the vanagon had that electric washer pump that was part of the system.
-Andy |
|
| Back to top |
|
|
pafree
Samba Member

Joined: August 16, 2005
Posts: 2298
Location: dayton, the one in texas
|
| Posted: Tue Feb 16, 2010 7:41 pm Post subject: |
|
|
here is a simple diagram that might help you wire the motor.
|
|
| Back to top |
|
|
79bugman
Samba Member
Joined: February 06, 2010
Posts: 279
Location: NEW JERSEY, USA
|
| Posted: Fri Feb 19, 2010 7:13 pm Post subject: |
|
|
Thanks for the diagrams. I have the diargam for my car which I got from samba. In a nutshell here is what I have done:
1. tested relay by connecting 12v to terminal 15 on relay and 31 to ground. It began clicking so I know that it is good.
2. green wire (53e) from SWITCH hooked directly to motor.
3. black wire (53) from SWITCH hooked directly to motor.
4. black and yellow wire (53b) from SWITCH hooked directly to motor.
5. brown wire ground (31) from motor to grounding block behind dash.
Now here is the problem........I have an additonal 4 wires that I cannot figure out how they hook up.
There are two wires coming from the SWITCH, a solid black and a brown/black wire. And from the MOTOR there is another solid black wire and a black and grey wire (53a) which I believe is the power source.
I know that the black and grey wire (53a) hooks into the #10 fuse but all of my terminals are full with other wires.
How many wires are supposed to be connected to the relay???????
I really appreciate all of your help. Sorry for the long explanation, but I never thought 4 wires could be so confusing. |
|
| Back to top |
|
|
Gregorio
Samba Member
Joined: March 29, 2006
Posts: 288
Location: Chico, CA
|
| Posted: Mon Mar 15, 2010 6:58 pm Post subject: |
|
|
Ok, so I'm much further along but still hung up a bit. When I install the wiper assembly, tighten everything down, the passenger side seems to bind up or hit the body above the wiper shaft. If I completely remove the assembly and test it outside of the vehicle, it works great.
I notice that on the wiper shafts there are nuts and stops, is there a specific distance that these need to be set to in order for everything to work properly?
Thanks!
Greg |
|
| Back to top |
|
|
Al Capulco
Samba Member
Joined: October 31, 2005
Posts: 532
Location: Northridge, CA.
|
| Posted: Mon Mar 28, 2011 10:38 pm Post subject: |
|
|
| The relay has five wires, The black/gray is hot when the key is in the on position and goes to terminal 15 on the relay. The brown/ blk goes to terminal S on th relay. The black wire from the switch goes to 53s and the black wire from the motor goes to 53m on the relay. You should have a ground wire (brown) that goes to terminal 31. Do you see were the relay plugs in and the wires go? Makes me wonder why those wires are not pluged in to the terminal box above the fuse panel. |
|
| Back to top |
|
|
Joel
Samba Member

Joined: September 04, 2006
Posts: 11099
Location: NSW Australia
|
| Posted: Mon Mar 28, 2011 10:59 pm Post subject: |
|
|
| glutamodo wrote: |
It's probably similar to what you find in the 1980 Vanagon wiring diagram,
Then again, it might not be, as the vanagon had that electric washer pump that was part of the system.
-Andy |
Nah The Vanagons used the later postive feed intermittent system, Air cooled VWs used a negative feed,
I did an article on aussieveedubbers on how to fit the later watercooled vw variable delay intermittent into aircooled cars but the wiring for that differs to the stock system.
Heres a diagram for the stock air cooled intermittent relay.
_________________
Quick little bug, you got a Porsche motor in that?
1974 Germanlook 1303 2.5 Suba-Beetle |
|
| Back to top |
|
|
1965mt
Samba Member
Joined: April 13, 2012
Posts: 79
|
| Posted: Fri Jun 03, 2016 8:02 am Post subject: |
|
|
| pafree wrote: |
here is a simple diagram that might help you wire the motor.
|
This drawing is not accurate. |
|
| Back to top |
|
|
|


