| Author |
Message |
chojinchef
Samba Member

Joined: February 17, 2011
Posts: 1539
Location: Central Massachusetts

|
 Posted: Tue Nov 22, 2011 6:19 pm Post subject: Thingamajigger thread Posted: Tue Nov 22, 2011 6:19 pm Post subject: Thingamajigger thread |
 |
|
Thought that I should consolidate my efforts towards the Thingamajigger this winter in hopes that sharing my quagmire of projects to get done may actually assist someone else.
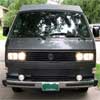
EDIT - Subject vehicle is a 1984 Westy. Has had some significant love in its past, but more recent PO allowed it to sit. She is a dirty girl, she has been around.  Dog show participants, chased the Dead, 7 years in Hawaii, a year in Italy, and then back to Connecticut and New England winters. Thats when I rescued her. Dog show participants, chased the Dead, 7 years in Hawaii, a year in Italy, and then back to Connecticut and New England winters. Thats when I rescued her.
Today's efforts were towards replacing the brake master cylinder, but first post is last weeks radiator replacement.
The offending core. Rotted on the bottom, support band was broken off due to rot.
Definately a candidate for replacement.
After jacking the front end of the van and draining the coolant. I prepped the area with plenty of paper towels and the tools I would require. Pulled off the hoses, disconnected the wires to the fan switch and the fan itself.
The first issue was the bolts holding the radiator support brackets. The nuts on the backside spun in the support carrier. Ended up cutting two of them off.
went to nearby FLAPS to get these spiffy body shop version and then to Lowes to get matching stainless bolts.
After the support brackets were off, I was able to lower the radiator/fan assembly.
Disassembled the fan assy from the radiator, pulled fan out of the shroud and blasted the shroud. Cleaned it up, primed and plainted it black. Allowed to cure under a heat lamp bulb while I attacked the hoses. Also did the radiator support brackets with blaster and paint.
These were the old and the new replacements for the front two hoses. Some new clamps and a visual check of the coolant tubes checked out. PO (Bill) replaced them about 12 years ago, and I am due for a SS set, but not until I go for that new powerplant 
Took opportunity to install some more sound deadener, a few spot blasts and clean up the front end behind the radiator.
Put the radiator fan/shroud back together. Installed a new fan temp switch and slid my aching self back under the van to reinstall the radiator assembly with the new SS bolts, radiator support washers and nut clips (that sounds wrong).
Now completely reinstalled, wires attached and everything buttoned up I headed to the heater lines (another post). Need to acquire a couple new pieces of the funky cardboard that directs air into the radiator. You can see the added sound deadening mat in back of the radiator.
_________________
Its a mistress; an expensive, whiney, needy bitch of a mistress. She is a chunky, dirty girl with bad skin, little motivation and yet she always makes me smile. She sure has been around before shacking up with me. She has a direct line to my wallet, plays with my emotions, is consistantly jovial yet with a sarcastic and sardonic side, is consistant in her inconsistancy, and every once in a while gives me a great ride and a fantastic memory.
Last edited by chojinchef on Wed Nov 23, 2011 2:33 pm; edited 1 time in total |
|
| Back to top |
|
 |
Syncroincity
Samba Member

Joined: April 15, 2007
Posts: 1557
Location: New York City
|
| Posted: Tue Nov 22, 2011 6:48 pm Post subject: |
|
|
Cool, looking forward to the new series! 
I made new air deflectors using the crumbling originals as molds. I discovered that POR-15 makes a great matrix for fiberglass cloth; I laid up a few layers on each piece.
After it sets up, it is easily cut with scissors, and is completely waterproof.
_________________
'86 Syncro CHC Top AAZ Turbodiesel
'04 Passat Variant 4Mo 5MT
Vanagon Build: http://www.thesamba.com/vw/forum/viewtopic.php?t=466866&highlight= |
|
| Back to top |
|
|
trailnewt
Samba Member

Joined: February 17, 2008
Posts: 248
Location: Northern California
|
| Posted: Tue Nov 22, 2011 6:56 pm Post subject: |
|
|
Nice work!
Go Westy is making some pretty nice reproductions of the cardboard pieces that flank the radiator on either side and direct the air towards it. I just installed a pair yesterday. They seem to be some sort of plasticized composite that looks like it will hold up to the weather better than the old decomposing VW ones. VW Classic Parts is also making the lower one and at least one of the sides again.
Brent
_________________
'87 Syncro Westy TDI
Too many bicycles
Maybe an old unicycle around here somewhere |
|
| Back to top |
|
|
chojinchef
Samba Member
Joined: February 17, 2011
Posts: 1539
Location: Central Massachusetts
|
| Posted: Tue Nov 22, 2011 7:47 pm Post subject: Brake master cylinder |
|
|
Following the Bentley (sort of) and using this reference as well (http://www.vanagonauts.com/Brake-master-cyclinder190.htm), removed gauge cluster and cover. Did not really need to, but I also removed the steering wheel to have better access. Also pulled the steering column covers just in case I spilled some fluid. Would make for easier clean up. 
Started by draining the reservoir. Attached a line and bottle to the left front brake bleeder screw, opened it and pumped away until the reservoir drained through the line.
Pulled the wire connectors off and away fromt he work area. Placed a wad of rags under the old master cylinder and started disassembly. Cracked the two nuts holding the master. Pulled off the vacuum line, unscrewed the hard lines, and then finished with the nuts attaching the booster to the master cylinder.
Pulled the cylinder / reservoir assy out.
Installed a new brake switch (these wear out, and are pressure activated - just do it).
This was what residue I was left with in the reservoir.  Cleaned it out with some brake cleaner, blew a bunch of air through, wiped completely clean and reinstalled into new master cylinder. Cleaned it out with some brake cleaner, blew a bunch of air through, wiped completely clean and reinstalled into new master cylinder.
Installed new seal ring on back of master cylinder with some lube jelly.
Reinstalled with new nuts and washers, attached hard lines, reinstalled the wire connectors and filled her up with new fluid.
I had recently flushed the system (twice in 6 months) due to brakes repair and clutch master cylinder a month ago. The wife graciously assisted in a bleeding of the system, and I will probably do it again tomorrow because I still feel some sponginess. I have run three quarts of fluid through these lines in the past few months due to various repairs. Its new, clean and almost ready to run.
As I stated, one project leads to another. The steering column had a slight movement to it. Upon delving into the problem, I determined it to be the mount bolts. There are two conical mount bolts that took a pair of vice grips to get out. Thought they might have been allen centered, but if they were at one time they were not now.
Went to local hardware store and found some 8x1.25 bolts in a 1 inch length, spun them in with some new lock washers and a drop of loctite.
Now I have a tight steering column.
_________________
Its a mistress; an expensive, whiney, needy bitch of a mistress. She is a chunky, dirty girl with bad skin, little motivation and yet she always makes me smile. She sure has been around before shacking up with me. She has a direct line to my wallet, plays with my emotions, is consistantly jovial yet with a sarcastic and sardonic side, is consistant in her inconsistancy, and every once in a while gives me a great ride and a fantastic memory. |
|
| Back to top |
|
|
DAIZEE
Samba Member
Joined: January 26, 2010
Posts: 7552
Location: Greater Toronto Area Ontario West Side
|
| Posted: Wed Nov 23, 2011 6:55 am Post subject: |
|
|
Do you have a list of the projects you are going to address?. I realize the list of what you actually do will undoubtedly expand. If you have a list of the major projects, could you post them here so I can follow them for my major projects? It would be really helpful. Thanks
When I had my rad and cooling system changed I did not install the directional wind sides and I've have no problems with temps at all. Are they really necessary and perhaps they impede cooling the back of the rad? I haven't made a final decision on the matter.
_________________
'09 2.5L Jetta 5 cylinder, 5 spd, super turbo, see thread in H2O Cooled Jetta, etc...
83.5 Vanagon L Riviera Model with 98 1.9L TD AAZ 4 speed Daily Driver 3 out of 4 seasons (sold)
84 Vanagon GL Wolfsburg Westy WBX 4 speed (sold) |
|
| Back to top |
|
|
campism
Samba Member
Joined: September 07, 2007
Posts: 4492
Location: Richmond VA
|
| Posted: Wed Nov 23, 2011 7:29 am Post subject: |
|
|
| Aren't those steering column bolts designed to be shear bolts that will break if sufficient force (collision) is applied? I think I heard/read that somewhere, so replacing with "better" ones might not be the best approach. |
|
| Back to top |
|
|
bquigs
Samba Member
Joined: March 01, 2008
Posts: 116
Location: Kittery, ME
|
| Posted: Wed Nov 23, 2011 7:38 am Post subject: |
|
|
| campism wrote: |
| Aren't those steering column bolts designed to be shear bolts that will break if sufficient force (collision) is applied? I think I heard/read that somewhere, so replacing with "better" ones might not be the best approach. |
I believe the "sheer" refers to the fact that the bold head sheers off when proper torque is reached upon assembly at the factory, leaving a headless bolt for anti-theft purposes. Bently refers states tighten until bolt sheers or somthing like that, sorry dont have it in front of me.
_________________
-----------------
87 Syncro Zetec |
|
| Back to top |
|
|
chojinchef
Samba Member
Joined: February 17, 2011
Posts: 1539
Location: Central Massachusetts
|
| Posted: Wed Nov 23, 2011 7:48 am Post subject: |
|
|
| DAIZEE wrote: |
| When I had my rad and cooling system changed I did not install the directional wind sides and I've have no problems with temps at all. Are they really necessary and perhaps they impede cooling the back of the rad? I haven't made a final decision on the matter. |
I am not sure they are truly necessary in my climate, but I will re-install them anyway.
As for other projects, and not to pigeonhole myself into getting everything done right away:
Next major job is the front suspension with Powerflex bushings
dash removal for heater core/heater box refurbishment (inclusive of wiper motor), followed by some panel replacement in the rear wheel archs and corners
.
Also the front panel behind the bumper and spiffy new rear hatch
.
Have others, with parts accumulated, but since the wife got T-boned the other day in her Honda (she is OK), I may need to replace that before considering the powerplant transplant or complete paint job.
As soon as I download my camera, I can post pictures of the heater line replacement.
_________________
Its a mistress; an expensive, whiney, needy bitch of a mistress. She is a chunky, dirty girl with bad skin, little motivation and yet she always makes me smile. She sure has been around before shacking up with me. She has a direct line to my wallet, plays with my emotions, is consistantly jovial yet with a sarcastic and sardonic side, is consistant in her inconsistancy, and every once in a while gives me a great ride and a fantastic memory. |
|
| Back to top |
|
|
chojinchef
Samba Member
Joined: February 17, 2011
Posts: 1539
Location: Central Massachusetts
|
| Posted: Wed Nov 23, 2011 7:56 am Post subject: |
|
|
| bquigs wrote: |
| campism wrote: |
| Aren't those steering column bolts designed to be shear bolts that will break if sufficient force (collision) is applied? I think I heard/read that somewhere, so replacing with "better" ones might not be the best approach. |
I believe the "sheer" refers to the fact that the bold head sheers off when proper torque is reached upon assembly at the factory, leaving a headless bolt for anti-theft purposes. Bently refers states tighten until bolt sheers or somthing like that, sorry dont have it in front of me. |
There is a step groove on the original, so the sheer theory does hold water. Although, the sheer seems to only be able to be performed in a side collision. A front end collision probably would not sheer the column bolt prior to tearing the driver in half, so its a moot point. I did go with a lower grade rather than a grade 5 or higher for just that possible reason. One way or another, the originals could not be tightened and the steering column moved. Something needed to be done, and placing the photo here has opened the conversation. Just what it was intended to do.
_________________
Its a mistress; an expensive, whiney, needy bitch of a mistress. She is a chunky, dirty girl with bad skin, little motivation and yet she always makes me smile. She sure has been around before shacking up with me. She has a direct line to my wallet, plays with my emotions, is consistantly jovial yet with a sarcastic and sardonic side, is consistant in her inconsistancy, and every once in a while gives me a great ride and a fantastic memory. |
|
| Back to top |
|
|
RadioRental
Samba Member

Joined: June 30, 2009
Posts: 555
Location: stow, ma
|
| Posted: Wed Nov 23, 2011 10:22 am Post subject: |
|
|
Great thread. If you ever need an extra pair of hands I'm more than happy to come out. I also want to pick your brains about lowering and stiffening the front end.
PM me if you ever need some brute force and ignorance. Cheers /pauric
_________________
__________________________________
'87 2.1. 125K 4spd Not rebuilt "Red Dwarf" |
|
| Back to top |
|
|
vanagonjr
Samba Member

Joined: October 07, 2010
Posts: 3431
Location: Dartmouth, Mass.
|
| Posted: Wed Nov 23, 2011 12:04 pm Post subject: |
|
|
| RadioRental wrote: |
| Great thread. If you ever need an extra pair of hands I'm more than happy to come out. |
Ditto for me too. I can also drink beer and simply supervise so I'm not in the way. I'm pretty good at drinking beer, hanging around and saying stupid stuff. I think every garage is supposed to have one of those. 
_________________
John - 86 Wolfsburg Westfalia "Weekender"
Flint reversed 1.8T W/Passat 5-Speed
LiMBO (late model bus club) www.limbobus.org
LiMBO is on Facebook too! https://www.facebook.com/groups/
FAQ thread: http://www.thesamba.com/vw/forum/viewtopic.php?t=525798 |
|
| Back to top |
|
|
SWbySWesty
Samba Member

Joined: July 01, 2010
Posts: 327
Location: Adventureville, CA
|
| Posted: Wed Nov 23, 2011 12:35 pm Post subject: |
|
|
subscribed.
_________________
1986 Westy - Billie Jean
A Westy with a Jeep heart (Pura Vida)
www.theadventurebrigade.blogspot.com - Latest update: Johnson Valley - Nov 22, 2011 |
|
| Back to top |
|
|
PDXWesty
Samba Member

Joined: April 11, 2006
Posts: 6246
Location: Portland OR
|
| Posted: Wed Nov 23, 2011 1:11 pm Post subject: |
|
|
| chojinchef wrote: |
| bquigs wrote: |
| campism wrote: |
| Aren't those steering column bolts designed to be shear bolts that will break if sufficient force (collision) is applied? I think I heard/read that somewhere, so replacing with "better" ones might not be the best approach. |
I believe the "sheer" refers to the fact that the bold head sheers off when proper torque is reached upon assembly at the factory, leaving a headless bolt for anti-theft purposes. Bently refers states tighten until bolt sheers or somthing like that, sorry dont have it in front of me. |
There is a step groove on the original, so the sheer theory does hold water. Although, the sheer seems to only be able to be performed in a side collision. A front end collision probably would not sheer the column bolt prior to tearing the driver in half, so its a moot point. I did go with a lower grade rather than a grade 5 or higher for just that possible reason. One way or another, the originals could not be tightened and the steering column moved. Something needed to be done, and placing the photo here has opened the conversation. Just what it was intended to do. |
They are NOT supposed to shear in a collision, just on installation. That is the pivot point for the steering column in a collision.
_________________
89 Westy 2.1 Auto |
|
| Back to top |
|
|
dubbified
Samba Member
Joined: March 03, 2010
Posts: 1406
Location: Redmond, WA
|
| Posted: Wed Nov 23, 2011 1:51 pm Post subject: |
|
|
I replaced mine with 10 grade hardware, thick washers.
This thread looks real good.
I am so bummed I didnt take the time to pickup those powerflex bushings..
It actually cost me more to track down all new OE.. and I'm so not happy with the new rubber.. the van still wanders a little, but I'm sure itd be even better with a full powerflex setup..
Jealous!!!! |
|
| Back to top |
|
|
wasserbox
Samba Member
Joined: April 08, 2008
Posts: 533
Location: Durango, CO
|
| Posted: Wed Nov 23, 2011 2:16 pm Post subject: |
|
|
| PDXWesty wrote: |
They are NOT supposed to shear in a collision, just on installation. That is the pivot point for the steering column in a collision. |
That makes no sense. Why would they want it to shear during installation?
It's a safety thing - the steering column is designed to move up and away from you when you slam head-on into a wall or another car. The pivot point is the knuckle down at the floor.
Look at the bolts themselves - noticeably thinner at the top. Just like a shear pin on a snowblower.
Replacing the actual pins with cheaper grade bolts is not the ideal solution. |
|
| Back to top |
|
|
vanagonjr
Samba Member
Joined: October 07, 2010
Posts: 3431
Location: Dartmouth, Mass.
|
| Posted: Wed Nov 23, 2011 2:52 pm Post subject: |
|
|
| wasserbox wrote: |
| PDXWesty wrote: |
They are NOT supposed to shear in a collision, just on installation. That is the pivot point for the steering column in a collision. |
That makes no sense. Why would they want it to shear during installation?
|
Some bolts have heads that shear off during installation one, or possilby more, of several reasons
1) limit torque to a specific value
2) make removal impossible or difficult
3) make it obvious that the bolt has been removed
It's hard to tell from that picture, but it appears the unthreaded area under the head is simply "blank" diameter - the diameter of the headed bolt prior to roll threading. If so, the bolt will likely break in the threads. A necked down area to intentionally shear will be smaller than the minor diameter of the threads. If my cellar wasn't such a mess, I'd try to find my old ones that I removed. Anyone want to send me their used ones, I can test to see if they shear in the threads and and what property class they are.
_________________
John - 86 Wolfsburg Westfalia "Weekender"
Flint reversed 1.8T W/Passat 5-Speed
LiMBO (late model bus club) www.limbobus.org
LiMBO is on Facebook too! https://www.facebook.com/groups/
FAQ thread: http://www.thesamba.com/vw/forum/viewtopic.php?t=525798 |
|
| Back to top |
|
|
wasserbox
Samba Member
Joined: April 08, 2008
Posts: 533
Location: Durango, CO
|
| Posted: Wed Nov 23, 2011 2:56 pm Post subject: |
|
|
| vanagonjr wrote: |
It's hard to tell from that picture, but it appears the unthreaded area under the head is simply "blank" diameter - the diameter of the headed bolt prior to roll threading. I |
I just had mine out last week - they were noticeably thinner.
1 - I'd assume VW has a torque wrench laying around somewhere.
2 & 3 -- I think it's more likely that they want reinstallation to be difficult or impossible, and force the service centers to install brand new ones. |
|
| Back to top |
|
|
chojinchef
Samba Member
Joined: February 17, 2011
Posts: 1539
Location: Central Massachusetts
|
| Posted: Wed Nov 23, 2011 3:01 pm Post subject: Playing with electricity |
|
|
Was not something I was going to tackle pre-winter given the disassembly the van will endure, but the aforementioned accident involving my wife's Honda has made it necessary for me to drive the Thingamajigger a couple weeks longer while she uses my car.
After checking in on the auto body that has the door and fender I bought for fixing the Honda, I got some time to tinker.
Needed to address some lighting issues. The first I noticed was that my spiffy relay upgraded H4 headlight housings were filling up with water.
When I removed the grille, and then the headlight retaining ring the headlight itself fell into two pieces - the lens and the rear of the housing.
The condition of the gasket was useless at best, and the housing's reflective coating is becoming pitted and when I tried to wipe out the residue from the water, the brown color of the plastic started coming through. Guess its time for new ones. I did seal up the headlight housing with some silicone to attempt to keep my bulb from blowing prior to acquiring new housings. Reassembled per usual manner - beer and cigar in hand.
The second part of the tinker session started with figuring out why my tailight directional was not working. Turned out, it was a contact thing and easily fixed. But while I was in there I started looking at the unused portion of the taillight and thought about the box of bits Rubbachicken had graciously donated. (Thank you RC!) I pirated the little spring contacts from an older cracked tailight backing that was in said box and installed them in the Thingamajigger's taillights. I had to run a wire to the open spot in the harness clip, and splice it into a power source. But here is the result:
I have doubled my taillight running light output. In order to get the bulbs I wanted through the back of the lens, I needed to break out the dremel and carve out the existing hole a bit. I have not installed so high a wattage that the plastic will melt, but it will increase visability.
I know someone here did this, and many of you may have already done this, I accept that the idea is not original. But I am pleased with the end result.
_________________
Its a mistress; an expensive, whiney, needy bitch of a mistress. She is a chunky, dirty girl with bad skin, little motivation and yet she always makes me smile. She sure has been around before shacking up with me. She has a direct line to my wallet, plays with my emotions, is consistantly jovial yet with a sarcastic and sardonic side, is consistant in her inconsistancy, and every once in a while gives me a great ride and a fantastic memory. |
|
| Back to top |
|
|
chojinchef
Samba Member
Joined: February 17, 2011
Posts: 1539
Location: Central Massachusetts
|
| Posted: Wed Nov 23, 2011 3:16 pm Post subject: |
|
|
| wasserbox wrote: |
| vanagonjr wrote: |
It's hard to tell from that picture, but it appears the unthreaded area under the head is simply "blank" diameter - the diameter of the headed bolt prior to roll threading. I |
I just had mine out last week - they were noticeably thinner.
1 - I'd assume VW has a torque wrench laying around somewhere.
2 & 3 -- I think it's more likely that they want reinstallation to be difficult or impossible, and force the service centers to install brand new ones. |
Bentley states - 48.2 - Shear bolt Drill out to remove. Before installing, first set gap between hub and switch, then tighten until head of bolt shears off.
Not really definative as to whether its called a shear bolt due to its design to have head shear off during installation, or that its function after installation (and initial shear) is again as a shear bolt. Double shear?
Usual warning on bottom corner of the page - Do not reuse fasteners . . .
Anyone with a source, I will replace them to stop the bickering 
_________________
Its a mistress; an expensive, whiney, needy bitch of a mistress. She is a chunky, dirty girl with bad skin, little motivation and yet she always makes me smile. She sure has been around before shacking up with me. She has a direct line to my wallet, plays with my emotions, is consistantly jovial yet with a sarcastic and sardonic side, is consistant in her inconsistancy, and every once in a while gives me a great ride and a fantastic memory. |
|
| Back to top |
|
|
vanagonjr
Samba Member
Joined: October 07, 2010
Posts: 3431
Location: Dartmouth, Mass.
|
| Posted: Wed Nov 23, 2011 3:26 pm Post subject: |
|
|
[quote="wasserbox"]
| vanagonjr wrote: |
I just had mine out last week - they were noticeably thinner.
1 - I'd assume VW has a torque wrench laying around somewhere.
|
Well I've never seen torque wrenches used on (body/chassis)assembly lines (well except by the Japanese on seat belt bolts, but I digress). The torque is controlled by clutches, air stall and, thank god, mostly by DC tools today. I see shear bolts to limit torque in special applications every few years. It is not common, but they certainly exsist - I am going on 34 years in the fastener industry. The unthreaded area has to be smaller than the stress diameter of the screw, which is slightly bigger than the minor diameter of the thread.
On bolts that I have seen with a necked down area (to stretch with more precision at a specific load than you can do relying on the threaded area) this section will be obviously smaller than the thead minor diameter. I'm not 100% saying that was not the intention with this bolt, but from the picture it certainly does not look like it.
If my cellar wasn't such a mess, I'd go get mine that I took out. If anyone wants to send some to me, I'll test them and also identify the property class.
God, I took the day off and I am still working with threaded fasteners today - someone shoot me now!
_________________
John - 86 Wolfsburg Westfalia "Weekender"
Flint reversed 1.8T W/Passat 5-Speed
LiMBO (late model bus club) www.limbobus.org
LiMBO is on Facebook too! https://www.facebook.com/groups/
FAQ thread: http://www.thesamba.com/vw/forum/viewtopic.php?t=525798 |
|
| Back to top |
|
|
|


