| Author |
Message |
baxsie
Samba Member
Joined: August 09, 2005
Posts: 606
Location: Eastern Washington State

|
 Posted: Thu Jul 17, 2014 3:00 pm Post subject: New Tubing For Sliding Steel Sunroof Drains Posted: Thu Jul 17, 2014 3:00 pm Post subject: New Tubing For Sliding Steel Sunroof Drains |
 |
|
Thanks for the kind words VWCOOL and Chanbob.
The old tubing for the sunroof drains was still intact, and in pretty good condition, but where it connected to the metal tubes, it was kinda loose, and one of the rear ones was cut off short.
We got some polyethelene tubing at Home Depot, used the heat gun to gently warm it up to where we could work it over the metal tube and then secured it with a clamp:
For the front two runs, we just followed the factory routing, and the sunroof will drain into the body and from there hopefully through the drain holes and onto the ground.
For the rear runs, the hose was still embedded in more of that darn foam of death. We found that by relentlessly twisting the tube in a single direction, it will collapse on itself and pull out of the foam. The new tubing in the back follows about the same path as the original, but instead of dumping out into the engine compartment as the original did:
We diverted it and made it drain into the wheel well:
_________________
1975 LaGrande Super Beetle Build Log / Farm boy hinge pin puller / Farm Boy Chassis Rotisserie
"I'm not getting older, I'm getting bitter." |
|
| Back to top |
|
 |
baxsie
Samba Member
Joined: August 09, 2005
Posts: 606
Location: Eastern Washington State
|
| Posted: Wed Jul 23, 2014 2:25 pm Post subject: Getting ready to paint the inside of the body |
|
|
We have a paint shop lined up -- third time is a charm. Since the chassis is painted and the body is not painted, we decided that the best approach would be to take the body to the paint shop and have them paint all the interior surfaces. Next we will install the body to the pan and deliver it back to the paint shop. Then they will do the collision repair to the front of the car, complete the body work, then paint.
Here are some shots of the prep on the body before taking it to paint.
Below the pocket for the passenger-side rear pop-out window actuator, the metal was not rusted all the way through, but it was pretty darn thin, so we added an extra patch below that:
We wanted to coat inside the foam of death area. We got a round brush at the grocery store, and used RustSeal black to coat as best we could inside that area:
The coverage is pretty good where the brush could reach, and coverage on my face was excellent. We have some RustSeal cavity coater, so we will spray that in the hole after paint is done to try to catch the last places.
We then welded both the rear pop-out window actuator buckets in:
Ground them down, and bead blasted:
Here is a shot of the interior front, seam-sealed, cleaned and ready for paint:
and the rear:
The fender wells had survived quite well, they were undercoated and to a large extent the factory paint was intact, protected by the undercoating. Some time wearing a filter and rubber gloves, using brush cleaner worked in with a chip brush, rag and a small wire brush for the fender wells cleaned up good:
You can see some of the RustSeal paint that we brushed inside has leaked out a fender mounting hole:
Off to the paint shop:
_________________
1975 LaGrande Super Beetle Build Log / Farm boy hinge pin puller / Farm Boy Chassis Rotisserie
"I'm not getting older, I'm getting bitter." |
|
| Back to top |
|
|
baxsie
Samba Member
Joined: August 09, 2005
Posts: 606
Location: Eastern Washington State
|
| Posted: Wed Jul 30, 2014 6:27 am Post subject: Engine Tin Painted, Body In Primer |
|
|
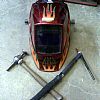
We asked the body shop to shoot the engine tin for us in the body color. It looks very pretty, can't wait to see it assembled:
The body shop has been working on smoothing and straightening the car. Here are some early shots in primer:
Those guys can do more in a couple of weeks than I can do in a couple of years.
_________________
1975 LaGrande Super Beetle Build Log / Farm boy hinge pin puller / Farm Boy Chassis Rotisserie
"I'm not getting older, I'm getting bitter." |
|
| Back to top |
|
|
Chochobeef
Samba Member
Joined: May 01, 2013
Posts: 811
Location: Ft. Worth, Texas
|
| Posted: Wed Jul 30, 2014 6:43 am Post subject: |
|
|
| Holy hell that is nice. Awsome color to (my favorite of course). Cannot wait to see this one come together as you have done a very nice job. How much to paint all the tins and body work? |
|
| Back to top |
|
|
fabricator john
Samba Member
Joined: October 09, 2009
Posts: 510
Location: manassas va. now Venice Fl.
|
| Posted: Wed Jul 30, 2014 6:36 pm Post subject: |
|
|
| you should fab up some sort of strut tower brace ,like on early mustangs that ties to the top of the cowl then connected like they called an export brace ....just a thought .......................................fabricator john |
|
| Back to top |
|
|
Maddel
Samba Member
Joined: February 12, 2013
Posts: 935
|
| Posted: Wed Jul 30, 2014 9:33 pm Post subject: |
|
|
| fabricator john wrote: |
you should fab up some sort of strut tower brace
like on early mustangs that ties to the top of the cowl
then connected like they called an export brace
....just a thought |
Something like this?
May be the additional "X-braces" are a bit over the top...
Here's the link to the (old) forum-thread:
(all in German  ) )
http://boxergasse.forumieren.de/t63-1303-aus-belgien |
|
| Back to top |
|
|
talljordan
Samba Member

Joined: January 10, 2012
Posts: 967
Location: San Francisco, CA
|
| Posted: Wed Jul 30, 2014 9:37 pm Post subject: |
|
|
Those braces are only $60 from CIP. Sorry for the Canadian link, they do have an american site too. http://www.cip1.ca/ProductDetails.asp?ProductCode=C26-412-011
_________________
1972 Super Beetle, Parked until adequate restoration funding is acquired in restoration!
Wanted: Male computer diagnostic plug end |
|
| Back to top |
|
|
baxsie
Samba Member
Joined: August 09, 2005
Posts: 606
Location: Eastern Washington State
|
| Posted: Thu Jul 31, 2014 6:57 am Post subject: |
|
|
| Chochobeef wrote: |
| Holy hell that is nice. Awesome color to (my favorite of course). Cannot wait to see this one come together as you have done a very nice job. . . |
Thanks for the kind & encouraging words 
| Chochobeef wrote: |
| . . . How much to paint all the tins and body work? |
Frankly I do not know on the paint price yet. It is a time-and-materials on a handshake with a long-time neighbor that owns a body shop. I hope we are not surprised!
| fabricator john wrote: |
| you should fab up some sort of strut tower brace . . . |
We have a Topline Stress Bar / Strut Brace:
Our plan is to get the body back from the body shop as soon as they paint the inside. Then we will mount the body to the pan, and that would be a good time to install the strut brace, just before they do the collision work that still needs to be done in the front.
_________________
1975 LaGrande Super Beetle Build Log / Farm boy hinge pin puller / Farm Boy Chassis Rotisserie
"I'm not getting older, I'm getting bitter." |
|
| Back to top |
|
|
fabricator john
Samba Member
Joined: October 09, 2009
Posts: 510
Location: manassas va. now Venice Fl.
|
| Posted: Thu Jul 31, 2014 8:58 pm Post subject: |
|
|
| http://www.maiermotorsports.com/images/content/IMG_3564.jpg like this is the kind of design i prefer leaves access to the front ,would leave useable space and triangulates everything to the firewall , maybe you could sneak in between the tank and the superbeetle air box n tie in to the bottom of the dash area... the early mustangs .. http://home.netcom.com/~skent/mustang/1967/clutchcable.jpg us this setup then tie the towers together with a aftermarket "export brace " is what they call the tube that goes from fender to fender ,, i like the tower to cowl design ,,, im sure you could come up with somthing crafty and functional/attractive ........ fabricator john.. |
|
| Back to top |
|
|
Maddel
Samba Member
Joined: February 12, 2013
Posts: 935
|
| Posted: Fri Aug 01, 2014 1:06 am Post subject: |
|
|
There are also ways to improve the rear axle mounting/suspension:
But I guess there's a good chance it wont fit because of your tight engine, oil cooler and condenser setup.
May be the heater boxes will cause some trouble too. |
|
| Back to top |
|
|
baxsie
Samba Member
Joined: August 09, 2005
Posts: 606
Location: Eastern Washington State
|
|
| Back to top |
|
|
baxsie
Samba Member
Joined: August 09, 2005
Posts: 606
Location: Eastern Washington State
|
| Posted: Fri Aug 08, 2014 7:04 am Post subject: Catching up: Firehose of pictures |
|
|
Body back from the paint shop, with the interior and jams painted:
Once we installed the emergency / parking brake handle and cables, we could not adjust it to where the rear disc calipers emergency lever would actuate properly. The cable was too long. Additionally, we would have liked the bowden tubes to be a bit longer so we could curve them at least slightly away from the axel drive shaft. We ended turning a spacer/extender on the lathe that extends the tube by 18mm:
The parking brake bowden tube now routes acceptably:
We installed the pedal cluster and master cylinder, as well as new brake lines:
For whatever reason, the struts seemed to be a bit closer to the wheels than we remembered from the first test assembly. We clearanced the strut a bit where it holds the spring, that gives us about 3/16" more room. Still damn close, but better:
Getting ready to lower the body onto the pan / chassis:
After 3 days of intense hours, we were on our way back to the body shop:
Back at the shop, fenders installed, hood installed, they are getting ready to do the collision repair on the front end:
_________________
1975 LaGrande Super Beetle Build Log / Farm boy hinge pin puller / Farm Boy Chassis Rotisserie
"I'm not getting older, I'm getting bitter." |
|
| Back to top |
|
|
TedzBug
Samba Member

Joined: May 26, 2004
Posts: 272
Location: Michigan, USA
|
| Posted: Sat Aug 09, 2014 3:39 am Post subject: |
|
|
This is a really spectacular project! My dream car right here, absolutely love that color. Really nice, can't wait to see it done. I think you will have inspired me to correct some of the wrongs in my car.....[/img]
_________________
'75 Super Beetle
http://www.pbase.com/tedzillich/1975_super_beetle |
|
| Back to top |
|
|
baxsie
Samba Member
Joined: August 09, 2005
Posts: 606
Location: Eastern Washington State
|
|
| Back to top |
|
|
baxsie
Samba Member
Joined: August 09, 2005
Posts: 606
Location: Eastern Washington State
|
|
| Back to top |
|
|
Maddel
Samba Member
Joined: February 12, 2013
Posts: 935
|
| Posted: Sun Aug 17, 2014 8:03 am Post subject: Re: Catching up: Firehose of pictures |
|
|
| baxsie wrote: |
For whatever reason, the struts seemed to be a bit closer to the wheels than we remembered from the first test assembly.
We clearanced the strut a bit where it holds the spring, that gives us about 3/16" more room. Still damn close, but better:
Back at the shop, fenders installed, hood installed, they are getting ready to do the collision repair on the front end:
|
Keep up the great work! Just a marginal note:
When looking at the installed fenders there may be some room left to use
0.4'' wheel spacers... IMHO it's inadvisable to alter the spring seats 
5x130 are available too: http://csplink.de/Yo97cHCrmj
|
|
| Back to top |
|
|
baxsie
Samba Member
Joined: August 09, 2005
Posts: 606
Location: Eastern Washington State
|
| Posted: Sun Aug 17, 2014 8:33 am Post subject: Re: Catching up: Firehose of pictures |
|
|
| Maddel wrote: |
. . . Keep up the great work! Just a marginal note:
When looking at the installed fenders there may be some room left to use
0.4'' wheel spacers... IMHO it's inadvisable to alter the spring seats
5x130 are available too: http://csplink.de/Yo97cHCrmj . . . |
Thanks for the nice words.
I stressed about modifying the spring bracket. I think it will be OK, but of course it is weaker and might fail. Something to monitor.
We may end up going with a wheel spacer, or maybe finding a wheel with a different offset. I think I can find some e-bay wheels for the cost of that spacer! These look a bit less costly, at $12.95 each):
http://www2.cip1.com/ProductDetails.asp?ProductCode=C26-603-109
As it is right now, the tires "just barely" rub at the limits of steering travel. By widening the fenders, there is now some extra room to move the tire out. So by using a different offset or a spacer we could solve two problems.
I think the school has a lathe big enough to do the job, maybe my son can make that a school project. Side benefit: the spacer's hole could match the OD of the step on the brake rotor, and the ID could fit into the wheel, helping locate and strengthen the system.
_________________
1975 LaGrande Super Beetle Build Log / Farm boy hinge pin puller / Farm Boy Chassis Rotisserie
"I'm not getting older, I'm getting bitter."
Last edited by baxsie on Sun Aug 17, 2014 8:57 am; edited 1 time in total |
|
| Back to top |
|
|
baxsie
Samba Member
Joined: August 09, 2005
Posts: 606
Location: Eastern Washington State
|
| Posted: Sun Aug 17, 2014 8:52 am Post subject: Throttle Cable Bracket: Second Try with Pulley |
|
|
A while back, we made some throttle cable brackets that worked with the Sync Link pulleys we have.
On testing, we found that the motorcycle throttle cable tube that we used to make a 90 degree bend in the cable path makes too much friction. It is plastic lined, and we tried cable lube, but there is still a lot of friction in that tube. We think the high force of the IDF return springs are making the cable dig into the plastic liner, where a smaller force would just ride along the top as it is designed.
Additionally, since that design used two of the IDF mounting studs, there is a conflict with the fuel injector manifold hold down clamp on the center stud on one side -- the side we did not test on.
So now we have a new design, that uses a ball-bearing pulley for a near frictionless turn.
We started with the CAD model and FDM 3d prints as usual:
Stuck it on the mill -- getting better at that process:
Link
Then gave it a test on the bench:
The action is much better. The force to actuate (both) throttles looks to be about two times the force needed to operate a stock carb. We have a lined throttle cable from the pedal to the splitter, so I guess we will have to cross our fingers that the increased force will not lead to short throttle cable life.
The cable adjuster and stop nut are from a Lokar throttle cable kit.
_________________
1975 LaGrande Super Beetle Build Log / Farm boy hinge pin puller / Farm Boy Chassis Rotisserie
"I'm not getting older, I'm getting bitter." |
|
| Back to top |
|
|
fabricator john
Samba Member
Joined: October 09, 2009
Posts: 510
Location: manassas va. now Venice Fl.
|
| Posted: Sun Aug 17, 2014 7:25 pm Post subject: |
|
|
ayep , like that ...
fabricator john |
|
| Back to top |
|
|
baxsie
Samba Member
Joined: August 09, 2005
Posts: 606
Location: Eastern Washington State
|
| Posted: Sun Aug 17, 2014 9:07 pm Post subject: Installing Megasquirt CHT sensor in factory VW location |
|
|
| fabricator john wrote: |
| ayep , like that ... |
It took a lot of time, but an "ayep" from fabricator john makes it all worth while
Mario from The Dub Shop included a CHT sensor as part of the MS3 Pro package. Typically he installs it under a tin screw that is threaded into the head.
Well, with the FI tin and a head that has a boss on it for mounting a factory CHT sensor, I just had to put the sensor at the factory location.
Drilling and blind tapping a M6x1 hole into the cylinder head had some pucker factor going on, but as far as I can tell I did not drill into the combustion chamber
Here is a shot of the boss drilled and tapped (and prepared with anti-seize). The keyhole shaped opening in the tin is to let the sensor pass through with a minimal size hole:
The sensor is attached to the head one of the stainless steel button head screws we are using for the tin. A standard grommet cleans up the hole:
Under the tin looks reasonably clean:
_________________
1975 LaGrande Super Beetle Build Log / Farm boy hinge pin puller / Farm Boy Chassis Rotisserie
"I'm not getting older, I'm getting bitter." |
|
| Back to top |
|
|
|


