| Author |
Message |
vladve
Samba Member

Joined: May 15, 2010
Posts: 67
Location: Australia

|
 Posted: Sun Jul 20, 2014 1:10 am Post subject: Posted: Sun Jul 20, 2014 1:10 am Post subject: |
 |
|
Recently I have finished doing the carpets and door cards. Carpets came from TMI and were specific for the year, however they were not pre-cut, which made it a bit fiddly to get the gearbox shifter and the heater knob to look tidy. The quality of the carpet itself is good - thick and sturdy. A tip mentioned elsewhere before that also did the trick for me - use soldering iron to make holes, as well as weld the edges you cut off for tidy look. Here is the result:
Then I moved on to finish door covers. Cards were also sourced from TMI and are actually of a fantastic quality - very pleased with these. The hardest part was fitting the springs/handles. I made a mistake thinking that ashtray from sedan would fit. I've got mine re-chromed and it actually looked so damn good only to realise it was hitting the window mechanism behind when fitted. Thanks to Samba - I've got correct replacement, which isn't perfect but still looks tidy.
And just recently I've finished tidying up the engine. I've got the correct distributor for the engine which also was rebuilt, with a NOS cap. Here is the result:
_________________
Vlad [ 1962 RHD Oz Vert resto ] |
|
| Back to top |
|
 |
vladve
Samba Member
Joined: May 15, 2010
Posts: 67
Location: Australia
|
| Posted: Mon Aug 25, 2014 6:19 am Post subject: |
|
|
Hi all,
Most recently I've completed seats upholstery work using covers sourced from TMI (through Chuck Convertibles). I ordered seat foams, however after long consideration decided not to use those and stick to the original padding. I probably should have ordered replacement coconut pads, but anyway - that's too late now.
Needless to say I've approached this step with a great deal of caution, given this is the first time ever I really did any upholstery work. There are countless manuals/videos on the subject; here is the video that helped me most to understand where to start and how to proceed. The model shown there is different however the principal in general is the same: http://www.classicvwbugs.com/2013/02/28/classic-vw...parts-1-2/
I'll use the seat base as an indicative example. I might have done something wrong there, so take it for whatever it is.
Step 1: prepare the frame (powder-coating is the best), by fitting the spring base and fixing/replacing springs (don't weld broken springs!)
Step 2: use canvas-type material to cover the base. Ideally it will be tight as a drum, which would further support the padding and prevent it from sagging:
Step 3: place the padding and line it up. I used the old one I had, exactly as it came, with some residual original covers on the top:
Step 4: use some sort of thick (3mm) material to "wrap" the top section. Make sure the material doesn't bunch around corners on the upper side (underneath is ok). You can also add extra layers of padding/foam under the material, which would give it an extra volume. Only make sure the shape of the padding is maintained:
Just for comparison - this is what the "standard" TMI foam padding would have looked like:
Step 5: place the cover, make sure it lines up correctly. Mine went over quite easily and was spot-on straight away. Some people suggest to keep the cover in the sun for 30 min to give vinyl an extra flex - wouldn't hurt I reckon, but I didn't do any of that:
Step 6: turn the seat upside down, get ready to fix the vinyl. I used 3mm steel wire sections cut out from some free dry-cleaning cloth hangers - get 3 pieces: front and two sides. Some people suggest using long steel wire going all way around the seat - yet I didn't think this would have done any better job.
Note the yellow plastic rope already threaded. That's what is "supposed" to hold the vinyl in place. It would probably do the same job; steel rods though seem to be somewhat more robust and distribute tension more evenly along the side and front edges.
And that's basically it. Pull the vinyl with the wire onto the hooks, bend them a little and that should hold the cover in place nice and tight. The order I did it was: rear, front then left and right.
Now to the most important step.
Step 7: This is an absolutely invaluable advice for the job I have received. After fitting and tightening the cover it will still look pretty poor, which would be quite depressing, after all the efforts you would have gone through. But hold on the tears, grab an industrial heat gun and see what magic it is capable of doing. I have to say I personally was a bit sceptical about it, however it literally made the vinyl look stunning everywhere! With some patience you can straighten out even major wrinkles, just work it out slowly and steadily. The most important before you start is to set the right temperature (I think about 50C-55C - vinyl should be getting very soft, but not melting - literally on the verge. If fingers start leaving marks or vinyl gets sticky - that's too hot!). And obviously also try it in the safe location first.
That's it - here is the result. It didn't turn out absolutely perfect for both seats, yet is probably 8.5 out of 10 for me, so should be good enough at this stage.
Cheers,
Vlad
_________________
Vlad [ 1962 RHD Oz Vert resto ] |
|
| Back to top |
|
|
vladve
Samba Member
Joined: May 15, 2010
Posts: 67
Location: Australia
|
| Posted: Sun Oct 05, 2014 4:58 am Post subject: |
|
|
The interior has been finished. The rear seat wasn't too bad - the only tricky part was how to fit the rear backing. The TMI top section upholstery comes with the full back cover already stitched together. Normally the back plate would come after fitting the cover, whereas I fixed the plywood plate to the seat frame first, then pulled the cover over and fixed it at the bottom.
Note that I attached the back plate with only two screws at the top, so that I could lift it just a little bit and fold the extra material around the edge at the bottom:
The bottom part was quite straightforward, besides some springs' brackets requiring repair.
Finished rear seat:
Front seats finished as well:
_________________
Vlad [ 1962 RHD Oz Vert resto ] |
|
| Back to top |
|
|
vladve
Samba Member
Joined: May 15, 2010
Posts: 67
Location: Australia
|
| Posted: Sun Oct 05, 2014 5:05 am Post subject: |
|
|
I had to move the car out during the weekend to clear the way for some bulky deliveries. And after parking it next to the house and looking back whilst walking (like all of us do) - it looked so stunningly good in the sun! A history's living piece ...
Cheers all!
_________________
Vlad [ 1962 RHD Oz Vert resto ] |
|
| Back to top |
|
|
vladve
Samba Member
Joined: May 15, 2010
Posts: 67
Location: Australia
|
| Posted: Sat Nov 15, 2014 6:59 pm Post subject: |
|
|
Moving on to the soft-top installation.
I decided to post a detailed write-up for soft-top installation separately, to make it easier for people to search for future reference. Browse it for extra details:
http://www.thesamba.com/vw/forum/viewtopic.php?p=7446170#7446170
Below are couple of highlights so far.
Frame installed.
Headliner and dome light installed.
Rear glass frame restored and installed, padded and covered again.
The top cover installed.
Hinge covers and carpets fitted.
_________________
Vlad [ 1962 RHD Oz Vert resto ] |
|
| Back to top |
|
|
vladve
Samba Member
Joined: May 15, 2010
Posts: 67
Location: Australia
|
| Posted: Sat Jan 03, 2015 5:20 am Post subject: |
|
|
After finishing the installation of the top (http://www.thesamba.com/vw/forum/viewtopic.php?p=7446170#7446170) I pressed on to get the car back on the road, especially taking the benefit of long Christmas break.
After getting unregistered vehicle permit from VicRoads (State of Victoria transport authority) - this was the first trip to the nearby petrol station to get fuel.
Another visit to the suspension/tyres place to get wheel alignment done. My alignment by the eye, expectedly, was way out of norm.
And yesterday I dropped the car to the local Volkswagen dealer for roadworthy inspection.
To get roadworthy for a unregistered vehicle it has to pass about 10 page long set of inspection points. My car came back only with the following three (!) items:
- Wipers, after a full cycle, don't come back to its exact initial position.
- Master cylinder top intake hose fitting is a bit loose and leaking.
- Apparently the fuel filter should be secured to the body.
And that's it! No comments about brakes, engine, oil leaks, steering, suspension, controls etc. - they said the car was absolutely fine everywhere else. They were happy to pass the wipers due to the age, fix the rest and bleed the brakes. They did a great job actually and treated the car really well.
Now the next step is an appointment with VicRoads for an inspection to endorse the roadworthiness, register the vehicle, get the plates, and that's it! This will hopefully conclude the 4.5 years of this restoration endeavour.
_________________
Vlad [ 1962 RHD Oz Vert resto ] |
|
| Back to top |
|
|
zuggbug
Samba Member

Joined: June 17, 2008
Posts: 3479
Location: Anderson SC
|
| Posted: Sat Jan 03, 2015 8:47 pm Post subject: |
|
|
Very nice very, great job on the resto.
_________________
SOUTHERN INTEGRITY AIRCOOLERS
58 15 window
56 westy |
|
| Back to top |
|
|
vladve
Samba Member
Joined: May 15, 2010
Posts: 67
Location: Australia
|
| Posted: Sat Jan 24, 2015 4:32 am Post subject: |
|
|
This is probably the most important post in this thread.
Well... after 4.5 years the RHD Beetle restoration project can be considered finished!
I've got the roadworthy from the local VW dealer, booked and passed the VicRoads unregistered vehicle inspection and have had the car fully registered! It almost felt surreal when I was handed the plates by the inspector - at that moment all I could think was where would I get the screws from, to attach the plates.
I've done a quick summary of the expenses and the time spent. In total I spent $32,000 on parts and services, and I invested myself about 2,000 hours of labour. As a matter of fact I'm sure I spent more money and time - there would be smaller things I forgot, but I'd say it is 85% accurate.
Here are couple of pictures, depicting my proud driving on the first day:
Cheers all!
Vlad
_________________
Vlad [ 1962 RHD Oz Vert resto ] |
|
| Back to top |
|
|
EverettB 
Administrator

Joined: April 11, 2000
Posts: 69800
Location: Phoenix Metro
|
|
| Back to top |
|
|
bobnorman
Samba Newfoundlander

Joined: August 09, 2010
Posts: 1389
Location: Newfoundland
|
|
| Back to top |
|
|
Rich's 50
Samba Member
Joined: February 18, 2004
Posts: 10781
Location: San Diego, CA
|
| Posted: Sun Jan 25, 2015 5:54 pm Post subject: |
|
|
Incredible job  |
|
| Back to top |
|
|
Weezle
Samba Member

Joined: February 07, 2014
Posts: 685
Location: ORLANDO
|
|
| Back to top |
|
|
hsosa1
Samba Member
Joined: January 17, 2005
Posts: 1897
Location: Fontana
|
| Posted: Wed Feb 04, 2015 1:05 pm Post subject: |
|
|
| bobnorman wrote: |
Congratulations!! Must be an awesome feeling of accomplishment.
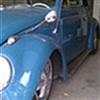
Imagine, from this:
To this:
Wicked. |
awesome work goes to show you saw that pile of ish and made it back to the OG version
_________________
Just Cruzin Sur Califas VW Car Club est♤1998 |
|
| Back to top |
|
|
vladve
Samba Member
Joined: May 15, 2010
Posts: 67
Location: Australia
|
| Posted: Mon Feb 09, 2015 3:47 am Post subject: |
|
|
Hey folks, thanks so much for your recent replies and appreciation! It actually means a lot.
And I'd like to share another moment of reinforcement I had during the weekend. I took the car to my first "Show&Shine" type of event. It was an annual event for one of the major car clubs not far from where I live (the criteria for me was not to drive hundreds of miles at this stage). The local AFL oval was filled with absolutely stunning selection of hotrods, muscle cars etc., both local (Holdens and Fords) and best of ex USA impalas, caddies etc. Which, I have to admit, made me feel very humble being with my beetle over there. Anyway, long story short - my car has won the most prestige award for the day - President's Award! I was so pleased - can't describe it. Especially when after the announcement groups of respected car restores and panel beaters came over to have a chat and inspect the quality of the resto. Was a great way to conclude the weekend.
Here is some documentary:
Cheers all!
Vlad
_________________
Vlad [ 1962 RHD Oz Vert resto ] |
|
| Back to top |
|
|
bobnorman
Samba Newfoundlander
Joined: August 09, 2010
Posts: 1389
Location: Newfoundland
|
|
| Back to top |
|
|
|


