| Author |
Message |
Matt K.
Paint and Body Nutcase

Joined: January 14, 2005
Posts: 2598
Location: Hemet, So Cal.

|
 Posted: Fri Jul 20, 2007 9:19 pm Post subject: Posted: Fri Jul 20, 2007 9:19 pm Post subject: |
 |
|
| Vintage Split wrote: |
Should I be taking out the orange peel with 800 (or 1000) and then taking out those scratches with the finer grit? Or am I taking out peel as I work my way up? For example, knock somewhat flat with 800 (still orange peel), knock a little flatter with 1000 (still orange peel), knock a little flatter with 1500 so on and etc.
Also, certain spots I am able to flat (i.e a flat panel) better than others (i.e. near the belt line). Should I be flattening these with my fingers or work the block in a different direction - side to side, circular??
Thanks.
Mike |
Mike it sounds to me like you have the idea on the sanding part, if i put on the clear i make sure to have more than enough on it to flatten it out, i will usually completely rid the panel of orange peel within the 800-1000 mark then use the rest of the grits to work out the scratches.
If you are not sure if there is enough clear then i would do it the way you
described.
On the hard to sand areas make sure you can get the buffer in these areas safely to rub these areas out otherwise it will get tough on you and you can use your hands or a really soft block for the rounded areas.
_________________
This is my 23rd year in the Auto Body/Paint Game!
*Take a look at some of my custom paint: http://s110.photobucket.com/albums/n119/mrpaint_2006/ .( NOTE: these are some older jobs but still neat.) |
|
| Back to top |
|
 |
Vintage Split
Samba Member

Joined: September 10, 2002
Posts: 222
Location: Southern California
|
| Posted: Fri Jul 20, 2007 9:35 pm Post subject: |
|
|
| Matt K. wrote: |
| Vintage Split wrote: |
Should I be taking out the orange peel with 800 (or 1000) and then taking out those scratches with the finer grit? Or am I taking out peel as I work my way up? For example, knock somewhat flat with 800 (still orange peel), knock a little flatter with 1000 (still orange peel), knock a little flatter with 1500 so on and etc.
Also, certain spots I am able to flat (i.e a flat panel) better than others (i.e. near the belt line). Should I be flattening these with my fingers or work the block in a different direction - side to side, circular??
Thanks.
Mike |
Mike it sounds to me like you have the idea on the sanding part, if i put on the clear i make sure to have more than enough on it to flatten it out, i will usually completely rid the panel of orange peel within the 800-1000 mark then use the rest of the grits to work out the scratches.
If you are not sure if there is enough clear then i would do it the way you
described.
On the hard to sand areas make sure you can get the buffer in these areas safely to rub these areas out otherwise it will get tough on you and you can use your hands or a really soft block for the rounded areas. |
Thanks Matt. I should have mentioned it is SS. |
|
| Back to top |
|
|
fireman9027
Samba Member
Joined: July 01, 2007
Posts: 178
Location: East Coast FL
|
| Posted: Thu Aug 02, 2007 5:20 am Post subject: |
|
|
Can you use an orbital buffer, or do they not spin fast enought?
Dave |
|
| Back to top |
|
|
Matt K.
Paint and Body Nutcase
Joined: January 14, 2005
Posts: 2598
Location: Hemet, So Cal.
|
| Posted: Thu Aug 02, 2007 7:57 am Post subject: |
|
|
| fireman9027 wrote: |
Can you use an orbital buffer, or do they not spin fast enought?
Dave |
Those unfortunately spin to slow and they are orbital which really does not work for buffing, they are great for applying/ taking off wax or polish but thats it. What you need is a buffer that spins at least 1500 R.P.M.
_________________
This is my 23rd year in the Auto Body/Paint Game!
*Take a look at some of my custom paint: http://s110.photobucket.com/albums/n119/mrpaint_2006/ .( NOTE: these are some older jobs but still neat.) |
|
| Back to top |
|
|
BUGTHUG
Samba's Rented Mule
Joined: April 22, 2007
Posts: 833
Location: KANSAS toto's fire hydrant
|
| Posted: Sat Oct 13, 2007 11:42 pm Post subject: |
|
|
Mat K, I just had my bug painted @ a well reputed business, plus I've know the guy for about 20 years. He painted the bug Gloss black, then I had him shoot some red pearl ontop of that. I'm going to talk to him next week, I have the bug home and under my floresent lights I see some dirt spots and a couple small runs on the roof, and down by the drip rail. The dirt spots poke up from the paint and it kinda scratches when you wipe a diaper over it. Do you think this could be worked out, or do you forsee a paint job being redone? Can the red pearl be wet sanded down without leaving a spot that looks like its missing the pearl color?
Hes a friend so I'm hoping he will do the right thing and fix it. But since I'm not a paint expert (But I did stay in a motel 6 ,ONCE) I was just wanting a little more knowledge on how this is done so I can make sure we are on the same page.
Thanks BUGTHUG |
|
| Back to top |
|
|
spook
Samba Member

Joined: December 30, 2003
Posts: 2038
Location: in the shop 35750
|
| Posted: Sat Dec 08, 2007 3:49 pm Post subject: |
|
|
I had a few peeps ask me about
cutting and buffing and color sanding again,
(seems to be a time of year thing, )
and I have Locknar's new ride in the shop right
now at this stage.
so here you go, remember, this is how I do this,
I always let fresh paint set and cure ( out gas)
for at least a week , never more than a month.
| Quote: |
alll wet sanding by hand sanding should be done with
as long and as hard of a block as is possible
buff w/ compound ( electric variable speed buffer)
(3 progressively finer compounds)
1 wool pad |
I havn't glazed the panels yet, I won't do that till every thing is polished out
_________________
www.airkooledkustoms.com
SBS US #10
feedback on the shop : http://tinyurl.com/yc7jgkl
Welcome to he darkside, its lower here. |
|
| Back to top |
|
|
j.goodspeed
Samba Member

Joined: May 03, 2004
Posts: 325
Location: Ripon, CA
|
|
| Back to top |
|
|
Bad Karma
Samba Member
Joined: April 17, 2008
Posts: 90
Location: Maryville, IL
|
| Posted: Fri May 30, 2008 6:48 am Post subject: |
|
|
| I have light orange peel in the paint. Should I lay down the clear and then start the sanding process, or do I need to get the paint smooth first? |
|
| Back to top |
|
|
j.goodspeed
Samba Member
Joined: May 03, 2004
Posts: 325
Location: Ripon, CA
|
| Posted: Fri May 30, 2008 9:55 am Post subject: Orange Peel |
|
|
Are you spraying a single stage color and then planning to clear, or are you spraying a base-coat followed by a clear coat? Second: is it a solid color or a metallic? Let me know and I will be happy to assist you.
Jeremy Goodspeed
www.goodspeedmotoring.com |
|
| Back to top |
|
|
Bad Karma
Samba Member
Joined: April 17, 2008
Posts: 90
Location: Maryville, IL
|
| Posted: Fri May 30, 2008 2:39 pm Post subject: |
|
|
| Its a base coat followed by a clear. Solid color. |
|
| Back to top |
|
|
M_Fish
Samba Member
Joined: June 18, 2008
Posts: 51
Location: Bay Area
|
| Posted: Tue Jul 01, 2008 4:41 pm Post subject: The Man Knows his Stuff |
|
|
I used to work at a union Auto-Body shop and was I-CAR certified for color sanding, paint matching, prep techniques, etc. I have to say that Matt K knows his stuff. That was one of the best tutorials I have ever seen regarding color sanding.
I would stick with what matt indicated and only go down to 1000 for the orange peel. Unless you have some thick clear coat, 800 may be a bit risky.
Also, another guy talked about going up to 3000 for the final sanding - in my experience 3000 is so fine that it really doesnt make a huge difference - the 1st stage rubbing compound will take off quite a bit of material itself - making the extra sanding with 3k a waste of effort.
One last bit of advice (I did not read every single post) I keep a small rubber squeegee (sp?) from 3M while I color sand - you can wipe off the water and see the texture with out using a rag to dry it off. (its a tiny little rubber square - not a full sized squeegee)
PS - We used to use foam pads for the final stage of buffing. It was all 3M products for the most part.
Good posts!
_________________
Fish |
|
| Back to top |
|
|
derRHDmeister
Samba Member

Joined: June 22, 2004
Posts: 560
Location: worldwide
|
| Posted: Sun Sep 28, 2008 11:08 pm Post subject: 65 ruby red |
|
|
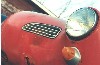
older repaint on 65 bug, faded badly.
wetsanded then machine polish w/ heavy cut compound then hand wax. Not looking for killer finish but just nicer than "dark salmon pink" but this was after I hand rubbed the entire bug w rubbing compound (waste of time!) last year.
looks like deep ruby red now, sorry poor quality photos
before (other side)
after (czech out the reflection!)
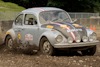
when i bought it:
_________________
Ask not what your bus can do for you, but ask what you can do for your bus.
| unclespanky wrote: |
| Piercy could dip those wheel cylinders between his cheek and gums and spit them out rebuilt. |
Check us out @
Instagram: DeafVolks & BarndoorBuggy |
|
| Back to top |
|
|
spotfreerynse
Samba Member

Joined: November 09, 2007
Posts: 440
Location: ROCKWALL TX
|
| Posted: Mon Oct 27, 2008 6:15 pm Post subject: |
|
|
some more great info sanding and orange peel that i found online
--------------------------------------------------------------------------------
Being able to wet sand (or color sand) scratches and other blemishes that are too deep to be buffed out, is something that every detailer should be able to do if called upon. As a detailer, this added skill raises your level of professionalism, saves the customer money by keeping the vehicle out of the paint shop, puts you ahead of your competition who may not be able to perform this type of work, and adds a profit center to your shop.
Another aspect of wet sanding that can generate the kind of income that detailing alone cannot, is wet sanding the entire vehicle to bring the appearance of the paint to show-car like quality. While jobs like these may not be an everyday occurrence, it can be a niche that you can fill for the car enthusiast, show car owner, or a discriminating customer who demands perfection in the paint appearance of his vehicle.
Knowing the basics
Before a detailer attempts to touch a car with sandpaper, he must know exactly what will be happening once the process starts. During the wet sanding process, you are actually "shaving" the clear coat off the panel. Much the same as the Zamboni machine shaves off a layer of ice on the rink, sanding is the same thing. What you must remember however is that even the least aggressive method of wet sanding is still more aggressive than the heaviest method of compounding. If you are not careful at all times you run the risk of sanding through the clear coat into the base coat, and that spells trouble. Over-aggressiveness in sanding will mean a trip to the paint shop for the vehicle.
Type of paper and other tools needed
Sandpaper comes in many different grades. There is paper as aggressive as 60 or 80 grit for sanding metal or body filler. This is certainly not to be used on a painted surface. As the numbers of the paper increase the aggressiveness decreases. Don't be fooled however. A piece of 600 or 1,000 grit sandpaper can quickly do damage. A detail shop should have paper ranging from 1000 or 1200 grit as the most aggressive, and 2000- 2500 being the least aggressive. The reasoning is this: Anything more aggressive than 1000 can do far too much damage. You run a high risk of sanding through the clear coat, or not being able to remove the deep sand scratches from aggressive paper. Paper less aggressive than 2500 is a waste of time.
You may as well just compound the area. Finishing the job with 2000 or 2500 paper will mean fairly easy sand scratch removal when it comes time to buff.
You also need a soft foam or rubber backing pad so that the paper may be wrapped around this pad (not around your fingers!) The backing pads can be harder or softer depending on what you need to accomplish and how aggressive you want to be with a particular piece of paper.
You will also need a bucket of water to keep cleansing the paper. This removes bits of clear coat that have been sanded off that may clog the paper or scratch the panel. A water bottle is a good idea to keep handy to spray the area as you come upon it. A small rubber bondo squeegee to wipe water away and check your progress is also a good idea to have available, as well as clean towels and an air hose to fully dry an area you want to examine as you finish it.
If you choose, there are orbital air powered sanders made exclusively for color sanding. The sander is speed adjustable and some come with a water hose to continually cleanse the surface as you work. The sanding discs come in the same grade as hand sandpaper. This method will save time, but it is a more risky way to do the job.
Why sand an entire vehicle?
You may wonder why it would be necessary to sand an entire vehicle? Or, why wet sand a car after it has been painted? Shouldn't a new paint job look great? You may also ask that if wet sanding is so aggressive, how is it supposed to make the paint look better? Many vehicles have what's called "orange peel" in their paint. This is a hill and valley effect, or as the name implies, looks like the skin of an orange. Orange peel is caused by the clear coat not flowing or "laying out" as smooth as you would like. This gives a slight hill and valley effect that some people just don't like in their paint jobs. This effect will slightly diminish the overall gloss and clarity of the paint job, so some people choose to have this sanded out of the paint job to increase the vehicles shine.
Most factory paint jobs have some degree of orange peel, as well as many refinish paint jobs. Some paint jobs have other blemishes such as dirt nibs, dust, runs or sags, or environmental problems that have penetrated deep into the clear coat. In all these instances simple compounding or polishing alone will not eliminate the problem.
Wet sanding, followed by compounding and polishing is the only way to create that absolutely perfect finish. So, what's involved in doing this and how difficult is the process?
Buffing to perfection
The whole idea of wet sanding the entire vehicle is to make it look absolutely flawless. The buffing step is critical to achieving this goal. Having the correct buffing products, pads, and of course skill in buffing, is critical to achieving a perfect finish.
With the entire vehicle totally sanded, it will have no gloss. It will look horrible! The goal now is to buff the finish to perfection, remove every single scratch and mark, so the finish is absolutely perfect. This will take many steps and many hours. Your first goal is to completely remove all the sand scratch marks. Subsequent buffing steps will involve swirl mark removal and polishing for maximum gloss and clarity. You can't be in a hurry in any buffing step or you risk missing some imperfections such as sand scratches, or any other blemish in the paint. It needs to be flawless. |
|
| Back to top |
|
|
mackteck
Samba Member

Joined: March 31, 2006
Posts: 372
Location: trim,Ireland
|
|
| Back to top |
|
|
66buggie
Samba Member
Joined: October 25, 2008
Posts: 302
Location: wa.st
|
| Posted: Mon Nov 17, 2008 3:08 pm Post subject: wow |
|
|
| how many coats of clear did u put on ? ...never seen anyone do that many steps of sanding . Is it garage kept ? Iwould be scared of uv protection if the car isnt in a garage,... jus wondering |
|
| Back to top |
|
|
weekendwarrior
Samba Member
Joined: November 23, 2008
Posts: 52
Location: Charlotte, NC
|
| Posted: Sun Nov 30, 2008 10:46 am Post subject: |
|
|
I would never advise doing the final machine polish with wool. You need to finish with foam, and a finishing polish to avoid leaving buffer trails. Many polishes leave some of their lubricating oils behind that fill in buffer trails that your wool pad is leaving. Many times, polishers (especially body shop polishers) apply a wax or glaze immediately after polishing with wool, and the wax or glaze fills in the buffer trails. After the car gets washed or rained on a few times, the glaze or wax washes away, and you are left with the buffer trails. 3m Ultrafina SE or Menzerna Final Polish are great finishing polishes (when used with a finishing pad) to ensure a buffer trail free finish.
Additionally, it is best to use a microfiber towel, and some IPA aclohol to wipe the car down after polishing, before waxing. The IPA will remove a lot of the polishing oils left behind, so you can get a true picture of what your polishing job really looks like. Also, by removing these oils, it will help the wax to bond better, and last longer. |
|
| Back to top |
|
|
66buggie
Samba Member
Joined: October 25, 2008
Posts: 302
Location: wa.st
|
| Posted: Sun Nov 30, 2008 11:16 am Post subject: buffing |
|
|
| first and foremost ...if u jus painted a car u must wait at least 3 months to wax it. If not u run the risk of blistering ..some people call it solvent pop. You do not seal the paint with wax since it is still curing . The paint needs to release the solvents before u wax. u can use GLAZE because it still lets the paint breath...doesnt last long but u can use it after each wash . |
|
| Back to top |
|
|
owdlvr
Samba Member
Joined: June 23, 2008
Posts: 684
Location: Squampton BC
|
| Posted: Sun Mar 29, 2009 11:29 am Post subject: |
|
|
I've read through the sticky, and have a few questions.
In a couple of weekends I'll be taking four days to paint my '69. The car is currently my daily driver, and I'm trying to minimize the down-time for the ride (a necessity, since my other car is a fully caged rally car that's marginally street legal). I fully realize that my plan is 'rushed' and I won't necessarily get a 'show' quality finish...but we'll do the best we can.
I'll be laying down a single stage paint, still deciding between enamel (which I've sprayed on my rally car before) or a urethane.
When it comes to color sanding...
Definitely wait at least week?
How bad an idea is it to drive the car in between painting and color sanding?
-Dave
_________________
---
Instagram: @DaveHord
1971 1302s - Salzburg Tribute the #RallyBug
1958 Beetle
1975 Beetle
1973 Super Beetle
1993 C3500 with Cummins swap
1967 MGB
1963 MG Midget |
|
| Back to top |
|
|
Matt K.
Paint and Body Nutcase
Joined: January 14, 2005
Posts: 2598
Location: Hemet, So Cal.
|
| Posted: Sat Aug 08, 2009 7:31 pm Post subject: |
|
|
| owdlvr wrote: |
I've read through the sticky, and have a few questions.
In a couple of weekends I'll be taking four days to paint my '69. The car is currently my daily driver, and I'm trying to minimize the down-time for the ride (a necessity, since my other car is a fully caged rally car that's marginally street legal). I fully realize that my plan is 'rushed' and I won't necessarily get a 'show' quality finish...but we'll do the best we can.
I'll be laying down a single stage paint, still deciding between enamel (which I've sprayed on my rally car before) or a urethane.
When it comes to color sanding...
Definitely wait at least week?
How bad an idea is it to drive the car in between painting and color sanding?
-Dave |
Actually waiting a week or more is fine......driving it is no problem either.
_________________
This is my 23rd year in the Auto Body/Paint Game!
*Take a look at some of my custom paint: http://s110.photobucket.com/albums/n119/mrpaint_2006/ .( NOTE: these are some older jobs but still neat.) |
|
| Back to top |
|
|
TreeHugger63
Samba Member

Joined: August 21, 2009
Posts: 178
Location: Ironton, OH
|
| Posted: Sat Aug 29, 2009 10:54 pm Post subject: |
|
|
I heard that if you color sanded between coats of paint it would make the finish deeper. Is that true? Great info on here, thanx!
Just curious, TH |
|
| Back to top |
|
|
|


