| Author |
Message |
jjwebb123
Samba Member

Joined: November 27, 2008
Posts: 205
Location: Queensland,Australia

|
 Posted: Tue Jan 13, 2009 4:30 pm Post subject: Clean Oil Bath Filter Posted: Tue Jan 13, 2009 4:30 pm Post subject: Clean Oil Bath Filter |
 |
|
Hey Guys whats up
Happy New Year.
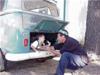
i have been trying to clean up my engine in the past couple of days.I previously Got a Tooth Brush and degressed the spots around the engine and made it look shiny and clean lol 
And yesterday i removed the Oil Bath filter and painted it which made it look much better.Now in the manual it says that a dirty filter can cuase bad starts.I was wondering how you clean the oil bath filter.Sorry i dont have any pics of it(my site is down) but i would be happy to discribe it if anyone is lost. Also what do you think is better,?i have seen some people just have standered air filters instead of the oil bath filter.They do look better but i am trying to keep mine original.What is best?
Cheers |
|
| Back to top |
|
 |
66foot 
Samba Member

Joined: November 19, 2006
Posts: 394
Location: Pacific Grove, California
|
| Posted: Tue Jan 13, 2009 4:51 pm Post subject: |
|
|
I prefer oil bath.
Pat (66foot)
_________________
"The perfect race car crosses the finish line in first place and then falls to pieces."
Ferdinand Porsche |
|
| Back to top |
|
|
jjwebb123
Samba Member
Joined: November 27, 2008
Posts: 205
Location: Queensland,Australia
|
| Posted: Tue Jan 13, 2009 4:54 pm Post subject: |
|
|
oh ok do you know how to clean them?
_________________
"Age does not affect the passion for Volkswagens" |
|
| Back to top |
|
|
66foot
Samba Member
Joined: November 19, 2006
Posts: 394
Location: Pacific Grove, California
|
| Posted: Tue Jan 13, 2009 5:19 pm Post subject: |
|
|
I just empty the old oil - properly disposed of it.
Use some parts cleaner to get the gunk out.
If you really want it clean, then follow the parts cleaner with some dish washing soap and hot water.
Let dry and refill with clean oil.
Pat (66foot)
_________________
"The perfect race car crosses the finish line in first place and then falls to pieces."
Ferdinand Porsche |
|
| Back to top |
|
|
Randy in Maine
Samba Member

Joined: August 03, 2003
Posts: 34890
Location: The Beach
|
| Posted: Tue Jan 13, 2009 6:10 pm Post subject: |
|
|
This works pretty well....
From www.type2.com
Oil Bath Air Filter Cleaning
by John Anderson
--------------------------------------------------------------------------------
I read an SAE report a few years ago comparing oil bath wicking filters to some popular pleated paper and oiled gauze element filters. The oil bath was superior on all counts. VW knew what they were doing. It lasts forever and maintainence isn't really all that involved.
I had to wash the filter element on the '70. I sat the top part with the horsehair in a 5 gallon bucket of kerosene for an hour. As it became evident I'd go through kerosene forever, I went to TSP and very hot water. I went through 3 water changes then finished back in the kerosene. It was AMAZING what came off the horse hair, and scary. But when I was finished the hair appeared brand new and clean as a whistle. After the last water wash I hooked a compact hair drier into the outlet with duct tape and let it blow dry for a good half hour. The whole thing was toasty warm with no moisture left. Then I dipped it once into kerosene, dried it, then reassembled with a cleaned bottom half and new oil.
Has your filter had regular maintainence its entire life? And, just what did VW figure its life was? I'm quite happy with the result and feel much better about what the truck now sucks its air though. |
|
| Back to top |
|
|
adams77
Samba Member

Joined: September 12, 2008
Posts: 221
Location: Statham, GA
|
| Posted: Tue Jan 13, 2009 7:39 pm Post subject: |
|
|
| Anyone know where to get the replacement coconut hair for the oil baths? I am running without any right now. |
|
| Back to top |
|
|
gt1953
Samba Member
Joined: May 08, 2002
Posts: 13848
Location: White Mountains Arizona
|
| Posted: Tue Jan 13, 2009 8:23 pm Post subject: |
|
|
Should have cleaned it prior to painting. The oil bath is the best hands down. Plus a velocity stack built in it.
_________________
Volkswagen: We tune what we drive.
Numbers Matching VW's are getting harder to find. Source out the most Stock vehicle and keep that way. You will be glad you did.
72 type 1
72 Squareback
({59 Euro bug, 62, 63, 67, 68, 69, 73 type ones 68 & 69 type two, 68 Ghia all sold}) |
|
| Back to top |
|
|
jjwebb123
Samba Member
Joined: November 27, 2008
Posts: 205
Location: Queensland,Australia
|
| Posted: Tue Jan 13, 2009 9:28 pm Post subject: |
|
|
ok so bath filter is the best.
but can anyone tell me how to clean them your spose to pull the top off arnt you.
pictures would be great.there is no way to clean it the way it is.
_________________
"Age does not affect the passion for Volkswagens" |
|
| Back to top |
|
|
Jeckler
Samba Member
Joined: September 27, 2005
Posts: 2718
Location: Mesa, AZ
|
| Posted: Tue Jan 13, 2009 10:26 pm Post subject: |
|
|
| jjwebb123 wrote: |
but can anyone tell me how to clean them your spose to pull the top off arnt you. |
Were there too many words in Randy's reply?
_________________
Andy
'63 Bug rebuild here.
Did you know that sellers can't charge a fee to accept PayPal?
| bill may wrote: |
| I am the crabby old guy. |
Knowledge is knowing that a tomato is a fruit.
Wisdom is knowing not to put it in fruit salad. |
|
| Back to top |
|
|
jjwebb123
Samba Member
Joined: November 27, 2008
Posts: 205
Location: Queensland,Australia
|
| Posted: Wed Jan 14, 2009 3:49 am Post subject: |
|
|
no randy was good and i understand that is how you would clean it, BUT HOW? and what is this horsehair? he says he" then reassembled with a cleaned bottom half and new oil." which means he pulled it apart to clean it.i need to know how to do that part.and i dont know when it was last done probally never in its life.
_________________
"Age does not affect the passion for Volkswagens" |
|
| Back to top |
|
|
homeworld8118
Samba Member

Joined: September 21, 2007
Posts: 374
|
| Posted: Wed Jan 14, 2009 7:47 am Post subject: |
|
|
| jjwebb123 wrote: |
| no randy was good and i understand that is how you would clean it, BUT HOW? and what is this horsehair? he says he" then reassembled with a cleaned bottom half and new oil." which means he pulled it apart to clean it.i need to know how to do that part.and i don't know when it was last done probably never in its life. |
yes you have to take it apart. remove it from the car and there should be 4 clips, or something similar depending on your year, and the oil sits in the bottom half. If you have the one like pictured below the oil can be hard to get out because there is a slight lip, that is your oil fill line. The top part is where your "horse hair" is located in a tube looking thing with holes it it. Dump the oil out of the bottom part and follow the instructions posted by 66foot. I would take detailed pics of the one bellow but it is not here right now, but I do have some other types that i can post if you would like.
As you can see undo the 4 clips seen on the filter, two in front, two more in back. If you have this model specifically, or at least with mine, it is easiest if you remove it from the car to open it.
|
|
| Back to top |
|
|
homeworld8118
Samba Member
Joined: September 21, 2007
Posts: 374
|
| Posted: Wed Jan 14, 2009 9:42 am Post subject: |
|
|
here are the filters after the tops have been removed, the 4 clip style on the left and 2 clip style to right.
here is what the under side of the tops will look like
here is where you can see the horse hair filter in the 4 clip style one, the 2 clip style one is basically the same as well (this one has not been cleaned)
here is the difference between a clean bottom and a moderately dirty one, If yours has not been cleaned in a wile expect worse or possible a dry bottom most likely. the earlier round one has that orange line inside where you would fill the oil to, and the other you can see that there is a lip that goes all the way around it, that is where you fill the oil one these, there should also be a arrow stamped some where in there pointing to the fill line. I think they used the lip in these larger later versions to prevent the oil from sloping up the sides so bad, or at least that is my guess. the round one is my favorite out of the three i have as far as collecting, because it is and actual German one, the instructions on the side are printed in German.
when cleaning try not to use any thing too strong or you will soften the paint and rub it off like I accidentally did on the one that I have installed as you can see, but I plan to powder coat so I'm not to worried lol. also If you have ones with writing on them like my German one and you still would like to keep the writing intact I would take great caution seeing as the writing is more prone to rubbing off. I accidentally used something a little to strong on mine and faded the writing a little  |
|
| Back to top |
|
|
Billy Byars
Samba Member
Joined: January 14, 2009
Posts: 38
Location: Clarkesville, Ga
|
| Posted: Wed Jan 14, 2009 2:26 pm Post subject: oil bath filter |
|
|
| Good Afternoon. the material inside the top portion of the oil bath air filter is the "mature outer husk of coconuts, called coir"-according to Bob Hoover. The cross section of the material allows for the best depth filterable material available. You should clean the top and bottom portion of the housings with gas(very carefully)...allow to air dry, and then soak the upper portion(with husk material) in kerosene and allow to dry for several hours. This will leave a sticky oily residue on the husk material to catch dust particles. Fill the bottom portion of the housing up to the tip of the stamped arrow, or to the orange line-which ever your filter base has with 30 weight oil. Replace top portion(with coir) into the bottom housing and secure the clips. Attach to carb. As air enters the inside of the air filter, it meets the vertical side portion of the inside housing element and is forced down. Then it (air flow) is forced back up to enter the bottom of the filter housing into the "coir" filter. As the air makes this change, dust and dirt particles are heavier than air and will hit the oil bath and stick there. If smaller particles do make the "turn" the kerosene soaked "coir" will catch any remaining particles. As the air flow leaves the top of the filter housing it is forced down into the "velocity stack" and into the carb... |
|
| Back to top |
|
|
jjwebb123
Samba Member
Joined: November 27, 2008
Posts: 205
Location: Queensland,Australia
|
| Posted: Wed Jan 14, 2009 11:33 pm Post subject: |
|
|
Ok thank you
sorry i sounded rude i am not annoyed with any of you just needed to find out.Thanks that should do it i think.
Cheers
_________________
"Age does not affect the passion for Volkswagens" |
|
| Back to top |
|
|
jjwebb123
Samba Member
Joined: November 27, 2008
Posts: 205
Location: Queensland,Australia
|
| Posted: Wed Jan 14, 2009 11:39 pm Post subject: |
|
|
looking at that i realise that mine must be a little stuck becuase i could not pull the top off.Must be a little seized.
Thanks again
_________________
"Age does not affect the passion for Volkswagens" |
|
| Back to top |
|
|
jamesdagg
Samba Member
Joined: August 18, 2007
Posts: 3364
Location: B.C.Canada
|
| Posted: Fri Jan 16, 2009 2:44 am Post subject: |
|
|
| gt1953 wrote: |
| The oil bath is the best hands down. Plus a velocity stack built in it. |
x2 I've had both on the same car.
jim
_________________
'72 FI Westy
'71 Super rear inside defrost vents no longer available |
|
| Back to top |
|
|
jjwebb123
Samba Member
Joined: November 27, 2008
Posts: 205
Location: Queensland,Australia
|
| Posted: Fri Jan 16, 2009 4:39 am Post subject: |
|
|
hey guys
i did the oil bath filter today.Took me alday becuase i also painted the drainage system thing inside the hood lid.Irealized now why i was so confused i thought that the coconut hair filter part came apart and that you would clean in there but i was wrong.I soaked it in Kero for a while and then washed it out with warm water.And with the top part i pored kero in there and scrubbed at it with a toothbrush and then washed it as well.After drying in rags for about half hour.I got the hair dryer and dryed it all out.I will put oil in there tommorow as i ran out of time today.and yes you were right it did remove a little of the paint and i should have waited to respray but i bought a new can anyway.As you can see i used all you guys ideas and put them together so thanks heaps,this is the best site for VW Knowledge.
Thanks
_________________
"Age does not affect the passion for Volkswagens" |
|
| Back to top |
|
|
cajun jamie
Samba Member
Joined: September 13, 2008
Posts: 176
Location: Lima, Peru
|
| Posted: Fri Jan 16, 2009 6:40 am Post subject: |
|
|
| I have one and all I did was full a bucket with a couple gallons of hot water with laundry detergent and a 1/2 cup or so of pine-sol. I soaked the entire filter in there for an hour then just started dunking it and letting the solution pour through the hair. I did this for about 5 minutes, let it soak, repeated a few times, let it soak. Finally I hung it to drip dry in the sun for the afternoon and overnight, reinstalled and it was fine. |
|
| Back to top |
|
|
jon-boy
Samba Member

Joined: January 06, 2009
Posts: 76
Location: Chattanooga, TN
|
| Posted: Fri Jan 16, 2009 7:57 pm Post subject: |
|
|
Mine is currently soaking in hot water and Purple Power... amazing what came out of it with the first soak/rinse.
I know some people said kerosene because it will cause the coir to become "sticky"... but I'm taking mine to get powdercoated, so I'm thinking I'll skip that step. |
|
| Back to top |
|
|
Lingwendil
Samba Member

Joined: February 25, 2009
Posts: 3988
Location: Antioch, California, a block from the hood
|
| Posted: Sun Jan 24, 2010 3:18 am Post subject: |
|
|
On my aircleaner, there seems to be a cutout on the side for something else, in the middle of the panel, not the edge. it is a very clean, factory looking edge, any ideas? my other is not like this. It's the 70' style. heres where the cutout is:
|
|
| Back to top |
|
|
|


