| Author |
Message |
locky
Samba Member

Joined: May 08, 2008
Posts: 573
Location: Nelson, British Columbia

|
 Posted: Wed Mar 30, 2011 6:16 pm Post subject: Posted: Wed Mar 30, 2011 6:16 pm Post subject: |
 |
|
So I hit the pans with the Duplicolor Bed Armour. I started out using the schutz gun. The psi from my big new compressor is set at 100 and I don't have a regulator on it yet. Way too much. Didn't do a good job at all. I stopped using that and went with the roller brush combo that is supplied with the kit. After checking on it I wasn't too impressed, it looked like shit. So plan B for second coat. I plugged in my smaller compressor and dialed it down to 55 psi and sprayed a coat on. Way better, it came out even and looks half decent. For the floors, this product is fine but as far as using it in my interior (Rockers, firewall, etc), no way. I am going to get the Proform bedliner from Lordco auto parts in town and use that. I used it on a truck bed before and was happy with the results. It is alot smoother than the Bed Armour. Armour was just too chunky.
|
|
| Back to top |
|
 |
locky
Samba Member
Joined: May 08, 2008
Posts: 573
Location: Nelson, British Columbia
|
| Posted: Sat Apr 02, 2011 9:00 pm Post subject: |
|
|
Heres some more shots of the interior. Por 15 then Proform bedliner. Stoked with the results.
Still have to finish spot welding in the pans and then I will por15, seam seal and finish up the bedliner.
The smell of the exhaust of Chico's build is near. EXXXXXXXCITING!!!!! |
|
| Back to top |
|
|
sgotwalks
Samba Member
Joined: April 07, 2011
Posts: 7
Location: Slocan
|
| Posted: Thu Apr 07, 2011 4:20 pm Post subject: |
|
|
I am really anxious to view the finished project. Hopefully you'll post some pictures. I can't wait!!! When you fire it up it might chug a little and make some back firing sounds, but fear not, it will only mean you have some wires crossed somewhere. You'll figure it out alright because you are the man. Look how far you've come with this 'THING'.
For the record, I hope you have some mountains where you live because that engine is begging to climb some hills. Look at that 'THING'! It is quite the car. I bet you learned a lot while working on this project. welding, sand blasting, painting.......all sorts of things necessary to get to that point. I bet you could probably weld something like a chin-up bar in a snap now. That's cool.
I might rebuild a 'THING' or two before i get too old. Maybe I'll just get my wife to build me something instead. Ya, that's probably what I will do. She's a better builder than me. She's awesome.
Anyways, I really like your 'THING'. Not that thing.........this 'THING' you sick bugger. Great work. Let's see some finished photos. The final deal. End game so to speak. More updates please!!! |
|
| Back to top |
|
|
90runner
Samba Member
Joined: July 24, 2006
Posts: 118
Location: Vancouver Island, British Columbia
|
| Posted: Sat Apr 09, 2011 10:07 am Post subject: |
|
|
Very nice work. Your Thing at the start of your project looks to be about the same as mine only hope mine goes as well as your project.
_________________
74 Thing stock lots of rust figured someone needed to save it. |
|
| Back to top |
|
|
locky
Samba Member
Joined: May 08, 2008
Posts: 573
Location: Nelson, British Columbia
|
| Posted: Sun Apr 10, 2011 8:52 am Post subject: |
|
|
Thanks Boys. 90, I may have her down in Van City one day, lets hit some dirt.
Got the motor fired a few days ago. I had a few things to trouble shoot. I have a starter relay installed beside the starter a bunch of years ago, as well as the push button start up front, so the wiring was a little different than standard. It wasn't turning over at first try and couldn't figure it out. then I looked at a pic of Sam W's relay and noticed it had a ground. Mine was not grounded so I fixed that and Boom she turned over. So I hooked up a metal fuel can with a ground and tried to fire. Would turn over but woudn't fire. Putting the circuit tester to the coil I would not get the light on, but did get a light at the fuse panel. So where was the end of that wire? Not on the coil. I had the reverse wire setup hooked up but that was it. I had electrical taped some wires around where the oil pressure wire came out, so I pulled that off and hit each one with the circuit tester. Light!!!!! Plugged it onto the coil and it fired...... but was backfiring bigtime. Took a moment, then went back and looked at my plug wires. I had number 1 and 2 crossed, fixed that and then I had it.
Sounds so mean, Thanks Chico.  Iit has really stoked me to get the bodywork, and everything else done now and get her on the road in the next month. Iit has really stoked me to get the bodywork, and everything else done now and get her on the road in the next month.
Yes!!!!!!!!!! |
|
| Back to top |
|
|
Mountain man
Samba Member
Joined: February 19, 2011
Posts: 37
Location: Sevierville, Tennessee
|
| Posted: Sun Apr 24, 2011 9:49 pm Post subject: Build up |
|
|
| Bee waiting forthe next post and anxiously awaiting the finished product. I am doing almost the exact same mods as your car and learning quite a few things. I don't have the welding skills so I have to pay a little more. Looks great so far. |
|
| Back to top |
|
|
locky
Samba Member
Joined: May 08, 2008
Posts: 573
Location: Nelson, British Columbia
|
| Posted: Tue Apr 26, 2011 3:46 pm Post subject: |
|
|
Away from home for a few weeks, so work stoppage on the thing. I did get to drive it out of the shop last week for the first time in three years. I relized that the Suspension is much too stiff and I will have some adjusting to do. Firstly, when I welded in the adjusters, I did so with way too much preload which explains why it was so tough to get the ball joints in the spindles. With some help from Nectar1 in the offroad forum I figured that I have to cut them out, adjust and re-weld. Not a huge deal. At least this time I won't have to use a crazy amount of force to get the torsions in posistion to go in the spindles. So heads up those of you welding in adjusters. Make sure you line up the grub screw in the same posistion as your stock screw. Secondly, I re-indexed 2 outside splines in the rear and it is resting on the stops and way stiff as well. So I will back that off 1 spline and it should be good. Right now I can jump on the front and back and get zero movement. I want to be able to feel those bilsteins plushness.
When I get home I will be sanding and priming and getting the body ready for paint. Hope to have it painted by the end of May.
Here is my purchase today while in the big city
Momo Drifting 350mm with 90mm dish
I had to buy the Momo adapter part number 248. My car must be early 74 due to the 27mm nut I had to remove to get the stock steering wheel off.
I will update when back home.
Lets see some shots Mountain Man. |
|
| Back to top |
|
|
sgotwalks
Samba Member
Joined: April 07, 2011
Posts: 7
Location: Slocan
|
| Posted: Wed Apr 27, 2011 1:18 pm Post subject: |
|
|
| Sweet steering wheel. Drifting. Drifting makes good wheels. I like it. |
|
| Back to top |
|
|
Shielsy68
Samba Member
Joined: May 07, 2011
Posts: 19
Location: Northern Ireland
|
| Posted: Sun May 08, 2011 1:23 pm Post subject: |
|
|
| class just as bad as mine , think mine lead a hard life after it left the german army , fibre glass patches ,patches of old metal , card board , and a pair of ole nickkers to bridge a hole lol , loven the work so far , are you keeping it yellow owen nw |
|
| Back to top |
|
|
locky
Samba Member
Joined: May 08, 2008
Posts: 573
Location: Nelson, British Columbia
|
| Posted: Mon May 09, 2011 11:56 am Post subject: |
|
|
Hey Shielsy, yes I am going to stick with the stock Sunshine Yellow L-11E.
I have been sanding down the old paint with the DA sander and a 120 grit to rough it up for High Build 2K Primer. The spots I can't get with the Sander I am using a block. Pretty close to having everything ready. Just have the hood left. I have been doing a ton of reading in the paint forum and there are alot of opinions and experts on there with there own ways. I have pretty much narrowed it down to this. Keeping in mind all of the body work is done
1)Sand everything with a 120 grit
2) Clean everything really well with soap and water and then a wax and grease remover. Then tack rag everything.
3) Since I sanded through to bare metal in a few spots I will use a rattle can etch primer on those spots and then do everything with the High build primer, with proper flash times in between, I will hit it with 3 coats.
4) I will then sand everything down with a 320 grit on the DA and block. And then hit it with a 400 on a block to knock the edges down.
5)I will then clean everything again and use a sealer just prior to first coat of paint.
I had to decide on what type of paint to use and again did lots of reading and discussing. My parts store carries PPG and Omni. I called the Rep and told him what I was doing and that it was my first time. He recommended the Omni Single Stage low VOC MTX.
I told him it was not a show car and it would be seeing some offroad action. I also told him that I wasn't into sanding until next year, with Wet 2000 or anything like that.
So now I just have to finish the sanding and clean up and I can bust out the paint gun. Keeping my fingers crossed.
Pics to come. |
|
| Back to top |
|
|
sgotwalks
Samba Member
Joined: April 07, 2011
Posts: 7
Location: Slocan
|
| Posted: Thu Jun 02, 2011 10:28 am Post subject: |
|
|
| Say brother, I was sitting around last night watching the game and wondering what's up with that Thing on Samba? What's up? Are you on the road yet? Would love to see some more pics. Maybe you can share a few pictures of you driving? How about some video, that would be even better. |
|
| Back to top |
|
|
locky
Samba Member
Joined: May 08, 2008
Posts: 573
Location: Nelson, British Columbia
|
| Posted: Mon Jun 20, 2011 12:22 pm Post subject: |
|
|
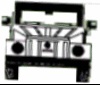
Ok, been priming and sandinglike a madman. 2-3 coats of high build 2k urethane primer on everything. I managed to get the inside of the doors, scoop, under the hood and deck lid painted with Dupont Nason single stage L11-E yellow, due to Omni not being able to mix the proper code. Guys in the paint forum said to stay away from the Omni anyway. Said the Dupont was much better. Turned out pretty good. Made a paint booth out of Tyvek paper. Had some good in and out ventilation with 8 inch fans and charcoal filters. Now everything is back on the car and ready for paint. I built another paint booth on the main floor of the shop out of tyvek and hung a bunch of flourescant lights and work lights so that it is well lit. Here are a bunch of shots from the past month.
Had some bent sheet metal on the deck lid due to a seized hinge. Cut out hinge got it loose and welded back in with patch.
Here is my paint setup. laid the parts flat and shot them
|
|
| Back to top |
|
|
locky
Samba Member
Joined: May 08, 2008
Posts: 573
Location: Nelson, British Columbia
|
| Posted: Mon Jun 20, 2011 1:09 pm Post subject: |
|
|
|
|
| Back to top |
|
|
locky
Samba Member
Joined: May 08, 2008
Posts: 573
Location: Nelson, British Columbia
|
| Posted: Mon Jun 20, 2011 1:12 pm Post subject: |
|
|
2k Primer
Epoxy sealer
|
|
| Back to top |
|
|
locky
Samba Member
Joined: May 08, 2008
Posts: 573
Location: Nelson, British Columbia
|
| Posted: Mon Jun 20, 2011 1:21 pm Post subject: |
|
|
|
|
| Back to top |
|
|
locky
Samba Member
Joined: May 08, 2008
Posts: 573
Location: Nelson, British Columbia
|
| Posted: Mon Jun 20, 2011 1:26 pm Post subject: |
|
|
|
|
| Back to top |
|
|
Semper_Dad
Samba Member
Joined: May 14, 2005
Posts: 3509
Location: Indiana
|
|
| Back to top |
|
|
joescoolcustoms
Samba Member

Joined: August 08, 2006
Posts: 9054
Location: West By God Virginia
|
| Posted: Mon Jun 20, 2011 1:42 pm Post subject: |
|
|
That is a lot of work, that pays off in smiles!
I like the way it sets up too. I have my rear that height, but have not touched the front. What have you done to the front suspension?
_________________
Bad News Racing 2018 NORRA 1000 3rd in Class
Best Day Ever Racing 2022 NORRA 1000 2nd in Class and first All Female team to complete the race
Everyone is gifted. Some just do not open the package.
Looks like it was painted with a live chicken,polished with a brick and buffed with a pine cone |
|
| Back to top |
|
|
locky
Samba Member
Joined: May 08, 2008
Posts: 573
Location: Nelson, British Columbia
|
| Posted: Mon Jun 20, 2011 1:52 pm Post subject: |
|
|
| Well that is a bit of an issue that I am going to address after paint. Welded in adjusters, but put in too much preload. Front end does not move when I jump on the bumper. Fellow member Nectar1 has helped me out with measurements and it looks like I am going to have to pull the beam and rotate them down so that preload is not an issue. Stiffer leafs up front as well. Rear same deal too stiff and sitting on stops. I turned 2 on the outside splines so will have to pull and rotate back 1. So the height is going to drop a little, but no biggie. Have some really nice Bilstien remote res shocks that will eat up the dirt. Getting close. Can't wait. |
|
| Back to top |
|
|
locky
Samba Member
Joined: May 08, 2008
Posts: 573
Location: Nelson, British Columbia
|
| Posted: Mon Jun 20, 2011 1:55 pm Post subject: |
|
|
| Well that is a bit of an issue that I am going to address after paint. Welded in adjusters, but put in too much preload. Front end does not move when I jump on the bumper. Fellow member Nectar1 has helped me out with measurements and it looks like I am going to have to pull the beam and rotate them down so that preload is not an issue. Stiffer leafs up front as well. Rear same deal too stiff and sitting on stops. I turned 2 on the outside splines so will have to pull and rotate back 1. So the height is going to drop a little, but no biggie. Have some really nice Bilstien remote res shocks that will eat up the dirt. Getting close. Can't wait. |
|
| Back to top |
|
|
|


