| Author |
Message |
randywebb
Samba Member

Joined: February 15, 2005
Posts: 3815
Location: Greater Metropolitan Nimrod, Orygun

|
 Posted: Wed Nov 23, 2011 3:27 pm Post subject: Posted: Wed Nov 23, 2011 3:27 pm Post subject: |
 |
|
steering column bolts (after a certain year) are similar in German vehicles I've looked at, and I'm sure they are designed to shear on installation so as to create a theft deterrent
_________________
1986 2.1L Westy 2wd Auto Trans. |
|
| Back to top |
|
 |
DAIZEE
Samba Member
Joined: January 26, 2010
Posts: 7552
Location: Greater Toronto Area Ontario West Side
|
| Posted: Wed Nov 23, 2011 4:06 pm Post subject: |
|
|
HEY I have double rear running lights now too thanks to Danfromsyracuse parting them forward to me and delivering them to Watkins Glen.  Now with the 3rd top brake light, my rear end is much more visible. I think that this doubling up of the rear running lights is an excellent upgrade for everyone to consider. Now with the 3rd top brake light, my rear end is much more visible. I think that this doubling up of the rear running lights is an excellent upgrade for everyone to consider.
_________________
'09 2.5L Jetta 5 cylinder, 5 spd, super turbo, see thread in H2O Cooled Jetta, etc...
83.5 Vanagon L Riviera Model with 98 1.9L TD AAZ 4 speed Daily Driver 3 out of 4 seasons (sold)
84 Vanagon GL Wolfsburg Westy WBX 4 speed (sold) |
|
| Back to top |
|
|
JoshG
Samba Member
Joined: March 16, 2005
Posts: 189
Location: Boston, MA
|
| Posted: Wed Nov 23, 2011 4:26 pm Post subject: |
|
|
| DAIZEE wrote: |
| HEY I have double rear running lights now too thanks to Danfromsyracuse parting them forward to me and delivering them to Watkins Glen. Now with the 3rd top brake light, my rear end is much more visible. I think that this doubling up of the rear running lights is an excellent upgrade for everyone to consider. |
Sorry to highjack the thread slightly but what is involved in adding the second set of rear running lights?
Please, do elaborate. |
|
| Back to top |
|
|
DAIZEE
Samba Member
Joined: January 26, 2010
Posts: 7552
Location: Greater Toronto Area Ontario West Side
|
| Posted: Wed Nov 23, 2011 4:37 pm Post subject: |
|
|
 I didn't do it, Dan did it some time ago and I inherited them when he was replacing his with another design. I didn't do it, Dan did it some time ago and I inherited them when he was replacing his with another design.
It looks simple, Chef described it but perhaps he could post pics (when he has time) or Dan could describe it when he has time. The empty space is there already. So you have 2 bulbs per side rather than just one.
_________________
'09 2.5L Jetta 5 cylinder, 5 spd, super turbo, see thread in H2O Cooled Jetta, etc...
83.5 Vanagon L Riviera Model with 98 1.9L TD AAZ 4 speed Daily Driver 3 out of 4 seasons (sold)
84 Vanagon GL Wolfsburg Westy WBX 4 speed (sold) |
|
| Back to top |
|
|
chojinchef
Samba Member

Joined: February 17, 2011
Posts: 1539
Location: Central Massachusetts
|
| Posted: Wed Nov 23, 2011 5:17 pm Post subject: |
|
|
| JoshG wrote: |
| DAIZEE wrote: |
| HEY I have double rear running lights now too thanks to Danfromsyracuse parting them forward to me and delivering them to Watkins Glen. Now with the 3rd top brake light, my rear end is much more visible. I think that this doubling up of the rear running lights is an excellent upgrade for everyone to consider. |
Sorry to highjack the thread slightly but what is involved in adding the second set of rear running lights?
Please, do elaborate. |
Best I can do right now is try to explain, sans pictures.
First, you need a donor tailight back plate. That is the part you snap into the back of the lens and holds the bulbs. You will need to remove the melted plastic tabs that hold the metal strips powering and grounding the various bulbs.
Then you can pry out the metal strips that descend into the bulb wells to get at the individual contact tabs at the bottom of the bulb wells. Thats the piece you need, and you will get four of them from the typical US backing plate.
Practice removing them carefully from the donor, as you will need to do the same thing to install them into your taillight backing plates but in reverse. So the less obtrusive and destructive you can be, the better the end result.
The bottom bulb well will not have one of these contacts in it. You will need to reverse the procedure (of sorts) by removing melted plastic tab, slightly pry up the metal strip so you can hook the contact tab under, and then pry the metal tab back into the well making contact with the newly inserted bulb contact. A drop of epoxy will secure the metal strip from moving, and needs to cure before reinstallation.
You will then notice that the tab that would power that well does not have a wire attached to it from the harness/plug. There is an open hole with exposed spade terminal that you will need to power at your discretion. I found that my rubber boots that protect the harness plug are starting to deteriorate and I did not want to add stress to the inner part of that boot by splicing within the boot.
I made up a female spade terminal / wire lead that I shrink tubed and ran through the end of the rubber boot and spliced the wire with the power lead for the side marker lights. Make sure to seal up any splice using shrink tubing or whatever you prefer. The other issue I had was that my installation of the brake light bar in the rear window was spliced into the wires within the right side boot, so thereby needing to find an alternate location to power.
The final task is to ream out the hole in the back of the lens to accept your lightbulb. There are smaller glass bulbs that can fit in the hole as is, but I wanted a slightly more powerful bulb. I bored out the hole with a dremel.
Reinstall your lights and enjoy.
I will probably go back and rethink this wiring setup when I obtain some better rubber boots, making up a new harness for the rear lighting, but this is where I am at right now. It was an experiment to day to determine functionality, and it worked.
_________________
Its a mistress; an expensive, whiney, needy bitch of a mistress. She is a chunky, dirty girl with bad skin, little motivation and yet she always makes me smile. She sure has been around before shacking up with me. She has a direct line to my wallet, plays with my emotions, is consistantly jovial yet with a sarcastic and sardonic side, is consistant in her inconsistancy, and every once in a while gives me a great ride and a fantastic memory. |
|
| Back to top |
|
|
Timwhy
Samba Member
Joined: January 01, 2009
Posts: 4002
Location: Maine
|
|
| Back to top |
|
|
chojinchef
Samba Member
Joined: February 17, 2011
Posts: 1539
Location: Central Massachusetts
|
| Posted: Wed Nov 23, 2011 5:38 pm Post subject: |
|
|
| Timwhy wrote: |
Here's some pics of said tail light mod.
Chef you have been a very busy man, looks good!! Oh yeah Happy Turkey Day!! |
Did not think to do a jumper within the taillight, BRILLIANT! Guess I should cut down on the Guinness when tinkering.
Thanks, enjoy your tryptophan buzz.
_________________
Its a mistress; an expensive, whiney, needy bitch of a mistress. She is a chunky, dirty girl with bad skin, little motivation and yet she always makes me smile. She sure has been around before shacking up with me. She has a direct line to my wallet, plays with my emotions, is consistantly jovial yet with a sarcastic and sardonic side, is consistant in her inconsistancy, and every once in a while gives me a great ride and a fantastic memory. |
|
| Back to top |
|
|
canasync
Samba Member
Joined: June 28, 2010
Posts: 656
Location: BC
|
| Posted: Thu Nov 24, 2011 12:31 am Post subject: |
|
|
A quicker, easier, and cleaner looking way to jumper the light is to simply jump the two together by jamming a washer or piece of metal between the two leads. Kind of hard to explain, I'll have to take pictures of mine.
To sort of clarify... If you look at the following picture you can see where the white stamp says V4439603.
Jam a washer in by the V thereby connecting the leads that go to the contact piece.
_________________
1987 Syncro
3 knobs
PumpeDüse TDI (17mm Garret Turbo, bigger injectors, stage 4 malone tune, intercooled)
Cruise Control
Remote Start/locks
Custom Lift
Custom Bumpers with receivers
Coast Mountain Hightop - Comming Soon
1985 2wd Vanagon Pre-runner in the making
soon to be powered by 2.5L Subaru
Custom Lift |
|
| Back to top |
|
|
rubbachicken
Samba Member

Joined: October 05, 2004
Posts: 3058
Location: socal
|
| Posted: Thu Nov 24, 2011 5:28 am Post subject: |
|
|
nice work chef
when i took lucy to pieces, i welded a nut on the end of the sheer bolts to take them off, much much quicker than drilling them out
as for replacing them with popper sheer bolts, pointless IMHO
if there was ever a front collision there'd be so many other things to get you without worrying about the steering column
if the bolts ARE there for their sheering properties in case of an accident, and they sheer, the whole steering column is going to hit you anyway, where else is it going to go
more likely they are there for security, potentially stopping someone taking out the column to move it when they shouldn't be, and again not much of a deterrent
_________________
lucy our westy
lucy's BIG adventure
meet 'burni'
markswagen {mobile mechanic} san diego area all early VW's cared for.
619 201 0310 or 617 935 4182 |
|
| Back to top |
|
|
DAIZEE
Samba Member
Joined: January 26, 2010
Posts: 7552
Location: Greater Toronto Area Ontario West Side
|
| Posted: Thu Nov 24, 2011 6:04 am Post subject: |
|
|
That's it, my rear running lights are jumped together.
_________________
'09 2.5L Jetta 5 cylinder, 5 spd, super turbo, see thread in H2O Cooled Jetta, etc...
83.5 Vanagon L Riviera Model with 98 1.9L TD AAZ 4 speed Daily Driver 3 out of 4 seasons (sold)
84 Vanagon GL Wolfsburg Westy WBX 4 speed (sold) |
|
| Back to top |
|
|
GrindGarage
Samba Member

Joined: October 14, 2008
Posts: 710
Location: Ocean City, NJ
|
| Posted: Thu Nov 24, 2011 6:12 am Post subject: |
|
|
| rubbachicken wrote: |
nice work chef
when i took lucy to pieces, i welded a nut on the end of the sheer bolts to take them off, much much quicker than drilling them out
as for replacing them with popper sheer bolts, pointless IMHO
if there was ever a front collision there'd be so many other things to get you without worrying about the steering column
if the bolts ARE there for their sheering properties in case of an accident, and they sheer, the whole steering column is going to hit you anyway, where else is it going to go
more likely they are there for security, potentially stopping someone taking out the column to move it when they shouldn't be, and again not much of a deterrent |
There is a good pic of a front end collision in which those bolts did their job and the steering collum went up instead of into the driver. BMWS use similar fasteners and I always used a air hammer or a good old hammer and chisel. Installation is reverse of removal. i like to clean the threads and locktite it back in.
_________________
-cliff
91 Vanagon AUTO
97 Single Port EJ22 all smallcar.com |
|
| Back to top |
|
|
chojinchef
Samba Member
Joined: February 17, 2011
Posts: 1539
Location: Central Massachusetts
|
| Posted: Sun Nov 27, 2011 5:37 pm Post subject: Headlights |
|
|
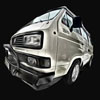
Couldn't deal with the decreased headlight lighting after having all the upgrades. Scored a pair of Hella replacements as part of a larger parts buy. The Thingamajigger came with H4's, so I had not even thought about them until the water incident. Some Autopal brand made in India, were fine until they started deteriorating.
I want two pairs of these up front.
_________________
Its a mistress; an expensive, whiney, needy bitch of a mistress. She is a chunky, dirty girl with bad skin, little motivation and yet she always makes me smile. She sure has been around before shacking up with me. She has a direct line to my wallet, plays with my emotions, is consistantly jovial yet with a sarcastic and sardonic side, is consistant in her inconsistancy, and every once in a while gives me a great ride and a fantastic memory. |
|
| Back to top |
|
|
rubbachicken
Samba Member
Joined: October 05, 2004
Posts: 3058
Location: socal
|
| Posted: Sun Nov 27, 2011 5:46 pm Post subject: |
|
|
chef, have you done your brakes yet ?
drop your spare wheel and check the metal brake pipes, mine had rusted/worn though and were leaking fluid into the spare wheel tray
vibration had worn the metal pipe rather than the plastic clips 
they're tied up with cable ties so it'll not happen again
_________________
lucy our westy
lucy's BIG adventure
meet 'burni'
markswagen {mobile mechanic} san diego area all early VW's cared for.
619 201 0310 or 617 935 4182 |
|
| Back to top |
|
|
chojinchef
Samba Member
Joined: February 17, 2011
Posts: 1539
Location: Central Massachusetts
|
| Posted: Sun Nov 27, 2011 6:06 pm Post subject: |
|
|
| rubbachicken wrote: |
chef, have you done your brakes yet ?
drop your spare wheel and check the metal brake pipes, mine had rusted/worn though and were leaking fluid into the spare wheel tray
vibration had worn the metal pipe rather than the plastic clips
they're tied up with cable ties so it'll not happen again |
RC, sorry to hear about your on-road brake woes, and thank you for thinking of the Thingamajigger.
I did go through the brakes before putting on the road. The brake lines up front were decent, but I will have another look. I did buy SS braided corner lines to replace the rubber ones, and could only install the front two as the connectors in the rear need replacing up to and including the rear T fitting. Another project on the list for the winter.
Speaking of brakes, I did have an issue yesterday. The rear shoes I bought from GW (need to look up brand I got) had some crappy metal pieces that were supposed to fondle the adjusters appropriately. Well one snapped off into a few pieces, wedged themselves in the shoe and gouged my new drums making a horrible squealing sound. Pulled the other side, it was broken too. Just now wedged into wrong place.
Guess I need some new shoes, dont want adjusters backing off.
_________________
Its a mistress; an expensive, whiney, needy bitch of a mistress. She is a chunky, dirty girl with bad skin, little motivation and yet she always makes me smile. She sure has been around before shacking up with me. She has a direct line to my wallet, plays with my emotions, is consistantly jovial yet with a sarcastic and sardonic side, is consistant in her inconsistancy, and every once in a while gives me a great ride and a fantastic memory. |
|
| Back to top |
|
|
chojinchef
Samba Member
Joined: February 17, 2011
Posts: 1539
Location: Central Massachusetts
|
| Posted: Sun Dec 11, 2011 8:10 am Post subject: |
|
|
Bought a couple doors off a 90 Carat. That way I can have the doors stripped and prepped without haveing the van open to elements.
Also started the process of rebuilding a heater box. Again for the purpose of having it ready to pop in when I pull the briken one in there now. Have some pictures I will upload later (after Dim Sum), but flaps have been blasted and painted. Deteriorated foam seals replaced with felt, everything scrubbed clean. Just waiting on blower motor to show up to put it all together again.
Radiorental stopped by yesterday to discuss some projects (his and mine). Good to see the progress he is making on his rust removal process.
LP
_________________
Its a mistress; an expensive, whiney, needy bitch of a mistress. She is a chunky, dirty girl with bad skin, little motivation and yet she always makes me smile. She sure has been around before shacking up with me. She has a direct line to my wallet, plays with my emotions, is consistantly jovial yet with a sarcastic and sardonic side, is consistant in her inconsistancy, and every once in a while gives me a great ride and a fantastic memory. |
|
| Back to top |
|
|
rubbachicken
Samba Member
Joined: October 05, 2004
Posts: 3058
Location: socal
|
| Posted: Sun Dec 11, 2011 8:44 am Post subject: |
|
|
pictures, come on chef, we need pictures
_________________
lucy our westy
lucy's BIG adventure
meet 'burni'
markswagen {mobile mechanic} san diego area all early VW's cared for.
619 201 0310 or 617 935 4182 |
|
| Back to top |
|
|
chojinchef
Samba Member
Joined: February 17, 2011
Posts: 1539
Location: Central Massachusetts
|
| Posted: Sun Dec 11, 2011 12:42 pm Post subject: Heater box rebuild |
|
|
As I stated prior, I obtained a second heater box for the purpose of rebuilding it prior to the dismantling of the van. We call it Mise en Place in the kitchen, having everything in its place, or rather having everything you need ready to go before starting the job. Guess you can take the Chef out of the kitchen, but cant take the kitchen out of the Chef.
I am sure there are other threads on this very topic, but maybe my pics might help in translations?
Anyway, the box, out of an '85 I believe. Later model boxes are a bit different I think, as are those with A/C, but I could be wrong. I know Radiorental stated his was a bit different yesterday, but I do not know if that is due to a different year, or that his van came equipped with A/C?
I did not take any chances and got a close year. So the box was split at its seams. I found the best way to break the glued tabs was with a good quality razor knife and some gentle prying with a wide blade screwdriver.
I got all of the box apart as much as I could.
As you can see, it was quite dirty in there from sitting and 25 years of use. Some extensive cleaning, a couple toothbrushes for the crevices, and a bunch of cleaner yielded a nice clean box (insert off color joke here  ) )
The heater core that was in it has seen better days.
And the new one that is almost ready to go in.
I pulled the flappers apart as the foam that was on them was deteriorating into dust in my hands.
I thought this would be easily taken care of with a wire wheel on my cordless, but it needed more than that. Here in the Northeast we get rusty parts, and need to know what to do. In my case, I hit up the neighbor for use of his sandblaster. 15 minutes later, they were clean and ready for some paint. I used a can of engine paint I had on the shelf left from a Suburban engine rebuild. Baked it hanging above my propane fired garage heater while I cleaned out the box some more.
From some other thread on this topic, I got the idea of using insulation felt instead of another foam product for the flappers. Thought that was a good idea (wish I could give credit to the one who suggested it), and procured this stuff from local Lowes. Given that it is a synthetic, I will worry less about deterioration and moisture holding.
This stuff stretches a bit, and planning for that I found I could get the ideal width for the flappers. Sliced small incisions in center of felt for the retaining plastic nibs to protrude through the felt and clip into flapper. I also used a bit fo silicone to lock the felt from moving at all after box is together.
Looks a bit like these:
and
The next process was installation of the flappers, which is reverse of what was just performed. I made sure no paint was left on the contact surfaces between the flapper shafts and the plastic of the box. I also added a bit of lubrication in there for good measure and to keep from rusting up right away now that I blasted those parts.
The heater core requires a seal around the perimeter of itself. This, I would guess is to prevent air from getting around, but I also see that as possible noise prevention. I used a single sticky sided foam of a 1/2 inch in width and height. Stuck well, and sealed up the gaps very well. No movement noted.
Now for the blower motor (when it arrives) and I can button up the box.
_________________
Its a mistress; an expensive, whiney, needy bitch of a mistress. She is a chunky, dirty girl with bad skin, little motivation and yet she always makes me smile. She sure has been around before shacking up with me. She has a direct line to my wallet, plays with my emotions, is consistantly jovial yet with a sarcastic and sardonic side, is consistant in her inconsistancy, and every once in a while gives me a great ride and a fantastic memory. |
|
| Back to top |
|
|
chojinchef
Samba Member
Joined: February 17, 2011
Posts: 1539
Location: Central Massachusetts
|
| Posted: Sat Jan 07, 2012 7:53 am Post subject: |
|
|
Got the new front doors gutted, and the new rear hatch. Prepped the power mirror housings.
Worst part was getting the rear window out in tact, then once cleaned the glass I realized it has some deep use scratches (like someone sanded them?)
Sold 6 crates of Harley parts as a lot this week, so a few extra bucks helps pay for the paint edging materials and I have more space on the shelves for VW parts.
Now off to the body shop so I have floor space to completely strip and prep for new paint.
Picking up some other parts today with Radiorental - front door seals (both around door and wind stopper in front of dsoor), another set of rear bumper mounts, Westy kitchen cabinetry pieces, and some other miscellaneous crap.
_________________
Its a mistress; an expensive, whiney, needy bitch of a mistress. She is a chunky, dirty girl with bad skin, little motivation and yet she always makes me smile. She sure has been around before shacking up with me. She has a direct line to my wallet, plays with my emotions, is consistantly jovial yet with a sarcastic and sardonic side, is consistant in her inconsistancy, and every once in a while gives me a great ride and a fantastic memory. |
|
| Back to top |
|
|
vanagonjr
Samba Member

Joined: October 07, 2010
Posts: 3430
Location: Dartmouth, Mass.
|
|
| Back to top |
|
|
mtwrench540
Samba Member
Joined: October 25, 2009
Posts: 351
Location: monterey,va
|
| Posted: Sat Jan 07, 2012 5:24 pm Post subject: shear bolts |
|
|
times at least 5,6 maybe more,THEFT DETERRENT!
| randywebb wrote: |
| steering column bolts (after a certain year) are similar in German vehicles I've looked at, and I'm sure they are designed to shear on installation so as to create a theft deterrent |
_________________
87 wolfsberg,74 181w/1915 and lots of patina! learned to fix vw's from hot vw mag in 1964,VWOA instructor,DSM,69 to73,service mgr at different porsche-audi dealers etc,etc,now retired!!! first vw new 64,transplanted 356 eng in 65,400characters are not enough space!! |
|
| Back to top |
|
|
|


