| Author |
Message |
pondoras box
Samba Member
Joined: March 22, 2004
Posts: 1226
Location: Eerie PA

|
 Posted: Fri Sep 27, 2013 6:33 am Post subject: Posted: Fri Sep 27, 2013 6:33 am Post subject: |
 |
|
Any time you have a sharp edge it becomes a stress riser and the potential for a crack to form or get larger over time increases. The hole drilled allows for a round smooth area that is larger in size for the stress to transition smoothly over a larger area. Think of a snow cat to car float over snow because of a larger area to spread out the force of gravity acting on the mass of the vehicle. Larger area to spread out the force equals smoother transition of the force.
This would relieve any potential built up stress in the area but since you are welding the area there is no need to do this as the end of the crack is where the stress riser exists. Once you weld it the vibrations will flow through the area almost like it was a solid piece of steel.
With all that said it wouldnt hurt to drill the end of the crack before welding if you want to for peace of mind but shouldnt be necessary. It is a repair for sheetmetal that is very thin or "plexiglass" where welding isnt an option or it doesnt have to look pretty.
_________________
Looking for anything from Hal Casey Motors out of Hamburg New York, from license plate surrounds to matchbooks.
1961 23 Window (Bobo)
1965 11 Window (Zelda)
1965 13 Window (Lucas)
1957 Oval ragtop
1988 Cabriolet VR6 conversion
Plus a lot of other rusty junk |
|
| Back to top |
|
 |
54ovsemi
Samba Member

Joined: April 15, 2008
Posts: 1818
|
| Posted: Fri Sep 27, 2013 12:52 pm Post subject: |
|
|
^^^ wow....thanks for sharing..... Are you Walter White?  JK...thx for the reply. JK...thx for the reply.  |
|
| Back to top |
|
|
54ovsemi
Samba Member
Joined: April 15, 2008
Posts: 1818
|
| Posted: Mon Oct 07, 2013 8:50 pm Post subject: |
|
|
So, I took a break from working on the 55 the last few weekends (27 years wedding anniversary celebration with wifey one weekend / Surf session the other weekend) but getting back on it this weekend
The Resurrection Project (Jason) was kind enough to form a metal piece that I was absolutely stumped on bending myself....pics to follow.
Thx TRP 
Patiently waiting for UPS driver to knock on door |
|
| Back to top |
|
|
54ovsemi
Samba Member
Joined: April 15, 2008
Posts: 1818
|
| Posted: Sat Oct 12, 2013 11:49 am Post subject: |
|
|
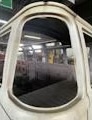
Weld on the stress crack on B pillar is completed. We did something completely different then what was recommended. Instead of risking the body lines not lining up correctly we decided to cut out a small circular hole (large enough for the welding tip to fit into) inside the door post. I must say it turned out really nice and I'm extremely satisfied with the repair.
A little body filler to finish off with and it's done. |
|
| Back to top |
|
|
54ovsemi
Samba Member
Joined: April 15, 2008
Posts: 1818
|
| Posted: Sat Oct 12, 2013 12:01 pm Post subject: |
|
|
TRP.....thx
One of the last details before paint. |
|
| Back to top |
|
|
54ovsemi
Samba Member
Joined: April 15, 2008
Posts: 1818
|
| Posted: Sat Oct 19, 2013 5:39 pm Post subject: |
|
|
| Body work is finished, next on the to do list is spray sealer and primer. I will not post any more pics (with the exception of a few teaser photos) until the 55 is painted. |
|
| Back to top |
|
|
54ovsemi
Samba Member
Joined: April 15, 2008
Posts: 1818
|
| Posted: Sun Nov 03, 2013 4:40 pm Post subject: |
|
|
Removed the 4tip exhaust today off the motor. Stripped off all the old gunk, grease and paint. Cleaned up all the nuts, bolts and springs. Sanded and wired brushed all the rust. Applied rust converter to all sheet metal, then painted the exhaust with 1500 degree high-heat black paint. Tips and housings painted with high temp engine paint.
Turned out half way decent for a back patio Sunday project |
|
| Back to top |
|
|
54ovsemi
Samba Member
Joined: April 15, 2008
Posts: 1818
|
| Posted: Fri Nov 08, 2013 11:37 pm Post subject: |
|
|
36 horse all cleaned up and detailed
Last edited by 54ovsemi on Sun Nov 10, 2013 7:53 pm; edited 1 time in total |
|
| Back to top |
|
|
54ovsemi
Samba Member
Joined: April 15, 2008
Posts: 1818
|
| Posted: Sun Nov 10, 2013 7:43 pm Post subject: |
|
|
Test fit with 4 tip
|
|
| Back to top |
|
|
54ovsemi
Samba Member
Joined: April 15, 2008
Posts: 1818
|
| Posted: Fri Nov 15, 2013 11:06 pm Post subject: |
|
|
Pan nearly done |
|
| Back to top |
|
|
54ovsemi
Samba Member
Joined: April 15, 2008
Posts: 1818
|
| Posted: Wed Nov 27, 2013 10:29 pm Post subject: |
|
|
|
|
| Back to top |
|
|
54ovsemi
Samba Member
Joined: April 15, 2008
Posts: 1818
|
| Posted: Fri Dec 06, 2013 8:53 pm Post subject: |
|
|
Expecting temperatures in the high 30's tomorrow.... Not letting the cold stop the progress, guess I'll have to bundle up in the a.m.  |
|
| Back to top |
|
|
54ovsemi
Samba Member
Joined: April 15, 2008
Posts: 1818
|
| Posted: Thu Dec 26, 2013 9:00 pm Post subject: |
|
|
Picked these up a few weeks go....
Decoded
RX= Prescription
3+2=5
2+3=5
Prescription55....my medicine 
_________________
2013 Jetta
2009 Rabbit
2006 GLI
1955 Semaphore Oval |
|
| Back to top |
|
|
54ovsemi
Samba Member
Joined: April 15, 2008
Posts: 1818
|
| Posted: Wed Jan 01, 2014 6:49 pm Post subject: |
|
|
Took two weeks off from work so I could get some work done on the 55...... So far the first week I've been in bed with the freek'n flu  
Now just hoping to get at least a few days in before returning to work.
_________________
2013 Jetta
2009 Rabbit
2006 GLI
1955 Semaphore Oval |
|
| Back to top |
|
|
GM Industries
Samba Member
Joined: October 05, 2008
Posts: 96
|
| Posted: Wed Jan 01, 2014 7:43 pm Post subject: |
|
|
| Bro that bites man..hope you can get some time in on her.. Can't wait to cruise with ya!!! |
|
| Back to top |
|
|
54ovsemi
Samba Member
Joined: April 15, 2008
Posts: 1818
|
| Posted: Sat Feb 01, 2014 6:05 pm Post subject: |
|
|
| thrdreich wrote: |
| Bro that bites man..hope you can get some time in on her.. Can't wait to cruise with ya!!! |
Thx Gabe
Update.... Fast forward to February 1, 2014
Was finally able to get back to the shop today with my friend Michael to finish up a few last metal work details. When I removed the body I snapped two of the front pan head bolts located underneath the heater channel which are held by the captive fasteners underneath the front firewall. If you have snapped one of those bolts you understand the pain it is to remove the snapped bolt from the fastener.
I had to order a front heater channel replacement bottom plate from Wolf (excellent replacement part) that would be eventually sacrificed. We had to cut out a small section of the bottom heater channel plate to remove the captive fastener in order to access the broken bolts. Once we had access to the captive fastener we found that the retaining plate that holds the captive fastener was rusted a little heat from the torch and the bolts were removed.
Michael thank you so much for your expertise and coming up with a plan to remedy this tricky repair! Basically Michael formed a replacement retaining bracket (which houses the captive fastener) positioned the captive fastener and then welded onto the Wolf replacement heater channel bottom.
This is not a fun repair to have to do....I'll post a few pictures so you can see the progress.
BIG SHOUT OUT to Michael for all your help!!
_________________
2013 Jetta
2009 Rabbit
2006 GLI
1955 Semaphore Oval |
|
| Back to top |
|
|
54ovsemi
Samba Member
Joined: April 15, 2008
Posts: 1818
|
| Posted: Sun Feb 02, 2014 9:28 am Post subject: |
|
|
For those of you that may have the same problem here is one way to access the captive fastener in order to remove the broken bolts.
1.Cut a flap in the heater channel bottom plate and fish out the captive fastener.
2.Get the plate out, it's about 3/4"W x1"L x1/8"T.
3. Once you have removed the faster you will have to somehow back out the broken bolts. We chose to heat them up with a torch and then were able to back them out quite easily.
4. There is a little sheetmetal cage spotwelded over the plate on the inside of the channel which almost always rust away, mine did. Michael fabricated a new cage out of a piece of sheet metal and formed the replacement cage.
5. You will need a small replacement heater channel bottom plate piece in order to marry the cage to the replacement bottom channel. I had to purchase a front section bottom heater channel plate and I chose to go with Wolf part.
6. Cut the replacement channel plate to desired length, position captive fastener, tack weld cage into place. This will prevent the fastener from getting lost in the heater channel and allow for proper adjustment as well.
7. Because the bottom of the heater channel is double walled you will have to cut out the additional metal in order for the replacement piece to fit properly.
8. Grind down excess metal on the bottom of the heater channel where it marries to the front fire wall. We just ground down the spot welds enough to allow the metal to be removed with a metal chisel.
9. Test fit all parts before final welding.
Again this is not a fun repair to do but in order to do it will require some cutting, welding and fabricating.
Cutting out a flap to gain access to captive fastener.
Replacement bottom channel plate, captive fastener and fabricated cage.
Cut the front foremost bottom part of heater channel plate to use as replacement.
Weld the parts together.
Before welding the replacement part back to body you may want to apply some rust converter while you have access to the inside of the heater channel.
I'll post a few more pics showing end result soon.
Obviously....it helps when you have someone helping you that has dealt with this in the past, Michael thank you so much again!!
_________________
2013 Jetta
2009 Rabbit
2006 GLI
1955 Semaphore Oval |
|
| Back to top |
|
|
54ovsemi
Samba Member
Joined: April 15, 2008
Posts: 1818
|
| Posted: Wed Feb 05, 2014 9:11 pm Post subject: |
|
|
Placed my order for a 4" narrowed beam w/shock towers dropped German spindles cross drilled rotors and red ceramic Wilwood calipers from Russell @ Old Speed.....gonna be SIC
1 NARROWED BEAM AND BARS POWDERCOATED MODEL
1 DROP SPINDLE WILWOOD DISC BRAKE KIT
2 FRONT SHOCKS
1 MODIFIED PITMAN ARM
1 COMPLETE FRONT END CORE CHARGE
1 20.6MM DUAL MASTER AND BOTTLE
1 PAIR TIE RODS WITH ENDS
4 TORSION ARM SEALS
1 STEERING DAMPENER
1 ASSEMBLE AND GREASE COMPLETE
Mama Mia!!!!!
_________________
2013 Jetta
2009 Rabbit
2006 GLI
1955 Semaphore Oval |
|
| Back to top |
|
|
54ovsemi
Samba Member
Joined: April 15, 2008
Posts: 1818
|
| Posted: Mon Feb 17, 2014 1:47 pm Post subject: |
|
|
Just listed these in classified section....
First-generation flat four BRM's... 5" and 6.5" x 15. I decided to go different direction with wheels.
_________________
2013 Jetta
2009 Rabbit
2006 GLI
1955 Semaphore Oval |
|
| Back to top |
|
|
mr. warehouse
Samba Member

Joined: February 27, 2001
Posts: 5001
Location: Nor Cal 707
|
| Posted: Mon Feb 17, 2014 1:58 pm Post subject: |
|
|
| Did you every get your air cleaner sorted out? |
|
| Back to top |
|
|
|


