| Author |
Message |
'69Custom
Samba Member
Joined: September 16, 2008
Posts: 2497
Location: Ventura, California

|
 Posted: Sat Apr 14, 2012 11:36 am Post subject: Posted: Sat Apr 14, 2012 11:36 am Post subject: |
 |
|
Very pretty. I did mine up in flat black BBQ paint that didn't hold up well. I couldn't find any high heat primer for it to save my life.
_________________
-Tim
1969 Frankenbug
1965 Ford Mustang
:2gunfire: F-U-M-P!
~"I thought I was wrong once, but I was mistaken." ~The Boss
Please excuse any typos as my iPhone doesn't speak English very well.
| tham64 wrote: |
Why tune a big round again and again????? For me.... 1 hour will solve the case  |
www.endlesscustomz.com |
|
| Back to top |
|
 |
jasoncardenas21
Samba Member
Joined: February 19, 2008
Posts: 207
Location: Hawthorne, NV
|
| Posted: Thu Aug 09, 2012 7:26 pm Post subject: |
|
|
Just a quick update dor you. Just got the following yesterday. Progress is still ongoing. As soon as I start putting it all in, I'll update you with pics.
The Ultimate Narrowed and Adjustable Front Beam
What year?: 66-75 (+ $20.00)
How narrow?: 4 inch (+ $140.00)
Do you need torsions?: No
Do you need tie rods?: No
LHD or RHD: Left_Hand_Drive_(US_Standard)
Raw or Powder Coated or Chrome: Gloss Black Powder Coat (+ $75.00)
With or without adjusters?: With out - for air ride (- $25.00) NFE-001 $535.00 $535.00
1966-79 Drop Drum Spindles
Do you need bearings?: No
Do you need outer tie rod ends?: No DT1-003 $160.00 $160.00
Complete Air Ride Kit
What year?: 1969-1979
Air Management Kit: 4_Valve_Manual_(STD)
Need the Billet Gauge Panel?: No ARK-001 $1,725.00 $1,725.00
Subtotal: $2,420.00
Shipping and Handling Fee: $155.31
_________________
Today is the youngest you will be for the rest of your life, live it that way.
Stanford Cardinal for Life
Restore of my 1969 Beetle
http://www.thesamba.com/vw/forum/viewtopic.php?t=501338
1970 Bay Window Bus Project
http://www.thesamba.com/vw/forum/viewtopic.php?t=541529
1969 VW Westy is current project |
|
| Back to top |
|
|
jasoncardenas21
Samba Member
Joined: February 19, 2008
Posts: 207
Location: Hawthorne, NV
|
| Posted: Fri Aug 24, 2012 4:32 pm Post subject: |
|
|
I received my Airkewld parts, going to be putting the rear air ride on this weekend and then I'll be able to take the pan in for powder coating. I'm going to be riding on the ground.
Here are the pics:
Ultimate 4" Narrowed Beam
Air Ride Kit and Dropped Spindles
_________________
Today is the youngest you will be for the rest of your life, live it that way.
Stanford Cardinal for Life
Restore of my 1969 Beetle
http://www.thesamba.com/vw/forum/viewtopic.php?t=501338
1970 Bay Window Bus Project
http://www.thesamba.com/vw/forum/viewtopic.php?t=541529
1969 VW Westy is current project |
|
| Back to top |
|
|
jasoncardenas21
Samba Member
Joined: February 19, 2008
Posts: 207
Location: Hawthorne, NV
|
| Posted: Sun Oct 21, 2012 6:24 pm Post subject: |
|
|
Just another update. I'll post some pics next week.
Got the Airkewld Air Ride welded on and installed, dry fit everything in and took it all apart for powder coating.
Dropped the pan off at Old Iron in Fallon to get sandblasted and powdercoated. Making a lot of progress, just haven't been able to post much.
_________________
Today is the youngest you will be for the rest of your life, live it that way.
Stanford Cardinal for Life
Restore of my 1969 Beetle
http://www.thesamba.com/vw/forum/viewtopic.php?t=501338
1970 Bay Window Bus Project
http://www.thesamba.com/vw/forum/viewtopic.php?t=541529
1969 VW Westy is current project |
|
| Back to top |
|
|
jasoncardenas21
Samba Member
Joined: February 19, 2008
Posts: 207
Location: Hawthorne, NV
|
| Posted: Sun Nov 11, 2012 4:55 pm Post subject: |
|
|
OK, I'm back. This may be a fairly long post, but I have a lot to catch up on.
First off, since I've received the Air Ride Kit from Airkewld, I've gotten a lot done. Below are just a few pics of the air ride install. I wanted to get this completed before the pan was repaired and went to powderoat.
Made a small modification to the rear brackets that mount to the support bar to get the bags positioned a little bit better.
Support bar, brackets and bags installed.
Now on to the pan repair. I purchased a rear quarter floor section at a shop and wasn't real satisfied with the quality of it. I ended up ordering one from Wolfsburg West and you can tell the difference. WW on left.
This is the mess of the pan that I was repairing.
With new WW pan welded in.
After all of the grinding and sanding, the pan was finally to take to Old Iron in Fallon for the blast and powder coat.
I've also purchased the Eastwood Hot Coat system so I can powder coat my own pieces and here are a couple that I've done.
Backing Plates
Before
After
Transmission Bracket
Before
As you can see, I've definitely been going at it, but it's difficult with no garage and only having a few hands to help.
I've changed my mind many times, but for now, this may be the goal that I'm shooting for and the color.
I will do my best to keep this updated as I go. I've already received my brake rebuild kit, all of the rubber and other stuff to get this to a rolling chassis. I've also gotten the CV joints and axle's completely rebuilt too.
Thanks for looking.
_________________
Today is the youngest you will be for the rest of your life, live it that way.
Stanford Cardinal for Life
Restore of my 1969 Beetle
http://www.thesamba.com/vw/forum/viewtopic.php?t=501338
1970 Bay Window Bus Project
http://www.thesamba.com/vw/forum/viewtopic.php?t=541529
1969 VW Westy is current project |
|
| Back to top |
|
|
jasoncardenas21
Samba Member
Joined: February 19, 2008
Posts: 207
Location: Hawthorne, NV
|
| Posted: Tue Nov 13, 2012 7:36 pm Post subject: |
|
|
Got some more detail work done this week in the evenings and now my rear brakes are ready to install.
Brake Parts Before
Brake Parts After Powdercoat
Rusty Nuts...Before
Not Rusty Nuts...After
This week I'll be assembling my rear brakes. Here's the before and I'll post the after when I'm done.
After
Hope everyone is enjoying my story of the 69.
I've set a goal of May '13 for completion.
_________________
Today is the youngest you will be for the rest of your life, live it that way.
Stanford Cardinal for Life
Restore of my 1969 Beetle
http://www.thesamba.com/vw/forum/viewtopic.php?t=501338
1970 Bay Window Bus Project
http://www.thesamba.com/vw/forum/viewtopic.php?t=541529
1969 VW Westy is current project
Last edited by jasoncardenas21 on Sun Nov 18, 2012 7:48 pm; edited 1 time in total |
|
| Back to top |
|
|
19-VW-74
Samba Member
Joined: June 28, 2009
Posts: 757
Location: Utah
|
|
| Back to top |
|
|
Jon65
Samba Member

Joined: September 29, 2012
Posts: 2417
|
| Posted: Thu Nov 15, 2012 2:38 pm Post subject: |
|
|
| 19-VW-74 wrote: |
| That car looks SOLID. |
X2. Nice car.  |
|
| Back to top |
|
|
jasoncardenas21
Samba Member
Joined: February 19, 2008
Posts: 207
Location: Hawthorne, NV
|
| Posted: Thu Nov 15, 2012 7:35 pm Post subject: |
|
|
Yeah, not a ton of rust out here in NV to worry about. Pretty happy about no bolts snapping off.
Today I got some more goodies from the FedEx guy. I decided against the Watson's Streetworks Wiring Harness mainly because of some of the reviews I've read and I'm not going to have a lot of extra electrical stuff anyways.
Here are the goods...
Wiring Works Wiring Harness, Clutch Cable, T/O Bearing and Shaft Arm Rebuild Kit for the Transmission.
Black Friday, I will be ordering my six shooter clutch cable nut since Pete at Airkewld is having a 10% off sale.
Weekend Goals:
Powdercoat my trailing arms, move pan into my little garage...smaller than a shed and start doing some assembly. More updates as they come.
_________________
Today is the youngest you will be for the rest of your life, live it that way.
Stanford Cardinal for Life
Restore of my 1969 Beetle
http://www.thesamba.com/vw/forum/viewtopic.php?t=501338
1970 Bay Window Bus Project
http://www.thesamba.com/vw/forum/viewtopic.php?t=541529
1969 VW Westy is current project |
|
| Back to top |
|
|
Airkewld
Samba Member

Joined: November 14, 2003
Posts: 3150
Location: Goodyear, AZ USA
|
|
| Back to top |
|
|
Ferguson
Samba Member

Joined: October 23, 2010
Posts: 433
Location: Avon, Indiana
|
| Posted: Fri Nov 16, 2012 10:08 am Post subject: |
|
|
your drawing looks a lot like a car i built a couple of years ago, i wish i would have never gotten rid of the car
_________________
(o)\!/(o) Proud owner of a 1972 Beetle, 72 Super Beetle, 76 convertible Beetle and a 69 Fastback
www.CCVW.org |
|
| Back to top |
|
|
Machinegunnjo
Samba Member

Joined: April 10, 2006
Posts: 390
Location: Los Angeles, CA
|
| Posted: Fri Nov 16, 2012 3:35 pm Post subject: |
|
|
| '69Custom wrote: |
| Very pretty. I did mine up in flat black BBQ paint that didn't hold up well. I couldn't find any high heat primer for it to save my life. |
BBQ paint works great for our heater boxes and exhaust system. The trick is to get the heater boxes blasted then follow up with the paint. For some reason it just works really well. If you do not have access to a local blaster near by. You can buy one from eastwood.com for about 250-300. Harbor freight sells a 15 gallon and a 40 gallon blaster pretty cheap.They are messy, however are great for many parts on our vws.
_________________
My 69 Bug Body Off Restoration |
|
| Back to top |
|
|
Machinegunnjo
Samba Member
Joined: April 10, 2006
Posts: 390
Location: Los Angeles, CA
|
| Posted: Fri Nov 16, 2012 3:40 pm Post subject: |
|
|
Jason- your pan is looking great. I am really looking forward to seeing more of your progress. Keep up the good work.
_________________
My 69 Bug Body Off Restoration |
|
| Back to top |
|
|
jasoncardenas21
Samba Member
Joined: February 19, 2008
Posts: 207
Location: Hawthorne, NV
|
| Posted: Fri Nov 16, 2012 7:06 pm Post subject: |
|
|
| Ferguson wrote: |
your drawing looks a lot like a car i built a couple of years ago, i wish i would have never gotten rid of the car
|
Compare to:
That is Crazy how close my mock up is to your old bug. Still not set on color, but that is where I'm leaning right now.
| xsocalpbx wrote: |
| '69Custom wrote: |
| Very pretty. I did mine up in flat black BBQ paint that didn't hold up well. I couldn't find any high heat primer for it to save my life. |
BBQ paint works great for our heater boxes and exhaust system. The trick is to get the heater boxes blasted then follow up with the paint. For some reason it just works really well. If you do not have access to a local blaster near by. You can buy one from eastwood.com for about 250-300. Harbor freight sells a 15 gallon and a 40 gallon blaster pretty cheap.They are messy, however are great for many parts on our vws. |
I'm not really too worried about the heater boxes anymore as I decided to bypass the heater as this will primarily be my cruiser and put away in the winter.
| xsocalpbx wrote: |
| Jason- your pan is looking great. I am really looking forward to seeing more of your progress. Keep up the good work. |
Thanks, Got the pan moved into my miniature garage today and will be working on it tomorrow. I'll keep you updated on the progress through the weekend.
_________________
Today is the youngest you will be for the rest of your life, live it that way.
Stanford Cardinal for Life
Restore of my 1969 Beetle
http://www.thesamba.com/vw/forum/viewtopic.php?t=501338
1970 Bay Window Bus Project
http://www.thesamba.com/vw/forum/viewtopic.php?t=541529
1969 VW Westy is current project |
|
| Back to top |
|
|
jasoncardenas21
Samba Member
Joined: February 19, 2008
Posts: 207
Location: Hawthorne, NV
|
| Posted: Sun Nov 18, 2012 7:46 pm Post subject: Weekend Update |
|
|
Well, didn't get a ton done this weekend, but anything is better than nothing.
First thing I did was complete my chassis caddie and put my pan in the garage, now I can roll it around and work on it. I'll also be able to roll it right out of my garage when I need the room in my mini garage.
Second, I transferred my body back to the horses and completely covered with the tarp for the winter weather.
Welded the brake line brackets back onto the trailing arms, sandblasted and powder coated them. I started to put the trailing arms on, but unfortunately I bought the wrong outer bushings for the spring plates. I bought 1 3/4 and I need 1 7/8 I.D. I'll pick the correct ones up sometime when in Reno.
Lastly, I assembled my brakes with my powder coated parts.
On Deck:
Get the rear axle and wheel bearings put back into the trailing arms and put the backing plates and brakes back on.
_________________
Today is the youngest you will be for the rest of your life, live it that way.
Stanford Cardinal for Life
Restore of my 1969 Beetle
http://www.thesamba.com/vw/forum/viewtopic.php?t=501338
1970 Bay Window Bus Project
http://www.thesamba.com/vw/forum/viewtopic.php?t=541529
1969 VW Westy is current project |
|
| Back to top |
|
|
TexasAirCooler
Samba Member

Joined: October 31, 2005
Posts: 933
Location: Lone Oak, TX
|
| Posted: Fri Nov 23, 2012 7:21 am Post subject: |
|
|
Looking good!
_________________
Terry
Common Sense Is A Flower That Doesn't Grow In Everyone's Garden. |
|
| Back to top |
|
|
jasoncardenas21
Samba Member
Joined: February 19, 2008
Posts: 207
Location: Hawthorne, NV
|
| Posted: Fri Nov 23, 2012 9:01 pm Post subject: |
|
|
| TexasAirCooler wrote: |
| Looking good! |
Thanks Terry.
I'm heading to Reno tomorrow to get the correct size spring plate bushings and some other parts so I can start the assembly of the chassis.
I'll also be picking up the Quick Roof stuff to do the sound proofing with. Saw a product on Cool Tools this morning by WD40 called rust and soak which removes rust so I'm going to try that out on all my old bolts. I'll let you know how it works.
_________________
Today is the youngest you will be for the rest of your life, live it that way.
Stanford Cardinal for Life
Restore of my 1969 Beetle
http://www.thesamba.com/vw/forum/viewtopic.php?t=501338
1970 Bay Window Bus Project
http://www.thesamba.com/vw/forum/viewtopic.php?t=541529
1969 VW Westy is current project |
|
| Back to top |
|
|
jasoncardenas21
Samba Member
Joined: February 19, 2008
Posts: 207
Location: Hawthorne, NV
|
| Posted: Fri Jan 25, 2013 9:07 am Post subject: |
|
|
Well, it's been a while once again since I've updated you on my progress. I believe it's time to do my fellow samba readers some justice. Last time I updated you was over 2 months ago and I have been working on it so I'll get to the progress.
Mid December a friend of mine out of the blue asked if I wanted to use his heated garage to finish my chassis and I jumped on the offer since I don't have a garage. On December 17th I moved everything over there and started working on it over the Christmas holiday.
New Master Cylinder with On Top Reservoir...Easy Stuff First.
New 4 inch narrowed Airkewld Ultimate Beam
New Shift Rod Bushing and Clip, cleaned up the shift rod and re-installed.
Cleaned up and new bushings on Shift Rod Coupler
Got stub axles ready for assembly into trailing arms. Went over and over again with this part as I didn't want anything to be incorrect.
Installed trailing arms
Then came the part of installing the transmission. This was by far the hardest part of the build so far. When I installed the support bar for the air ride, I should have put it about a 1/4 inch higher so the transmission was a tight fit. I ended up having to take the Transmission Flanges off and putting the transmission in from the bottom and sliding it up through the transmission mounts. I reinstalled the flanges with new drive flange caps and everything is fine again. Took my son and I a while to complete this though.
Son acting busy
Transmission in
Airkewld Six Shooter Clutch nut
Ran Air Lines. Just used a long copper tube through the front and pushed to back then put lines all the way through. Pretty simple process.
Don't have pics, but got all of the hard brake lines finished too. I'll get some pics of that this weekend.
Section of floorpan with the quickroof on it.
As of right now, Rear end is 98% complete, only thing left on the rear is to put the drums on and torque the nut.
This weekend I will be hopefully completing the front end of the ultimate beam. Some parts I didn't mention in the above pics that I've done was disassembled the old beam, worked like hell pressing the old ball joints out, holy shit that was a pain in the ass. Got everything cleaned up and powder coated, trailing arms are like new again, new lowered ball joints pressed in, new german tie rods and much more. Let's just say it's getting closer and I haven't given up on it.
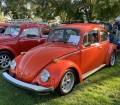
Color choice has changed. I have decided on a color and it is Electric Orange, PPG Code 925676
In the mean time, last weekend I scored the Bay Window Bus that I've been trying to score for a while now. A 1970 Deluxe, so stay tuned in the Bay Window Bus Forum for my next project. Here's a pic of the bus.
Here is the thread on that one.
http://www.thesamba.com/vw/forum/viewtopic.php?t=541529
_________________
Today is the youngest you will be for the rest of your life, live it that way.
Stanford Cardinal for Life
Restore of my 1969 Beetle
http://www.thesamba.com/vw/forum/viewtopic.php?t=501338
1970 Bay Window Bus Project
http://www.thesamba.com/vw/forum/viewtopic.php?t=541529
1969 VW Westy is current project |
|
| Back to top |
|
|
Airkewld
Samba Member
Joined: November 14, 2003
Posts: 3150
Location: Goodyear, AZ USA
|
|
| Back to top |
|
|
jasoncardenas21
Samba Member
Joined: February 19, 2008
Posts: 207
Location: Hawthorne, NV
|
| Posted: Wed Jan 30, 2013 8:06 pm Post subject: |
|
|
Well, I took my first video of the build this past weekend. Got the front end assembled, just need to put the drums back on and then the wheels and tires.
Air ride is in the process of being hooked up and should be done this weekend.
Here's the video.
Link
_________________
Today is the youngest you will be for the rest of your life, live it that way.
Stanford Cardinal for Life
Restore of my 1969 Beetle
http://www.thesamba.com/vw/forum/viewtopic.php?t=501338
1970 Bay Window Bus Project
http://www.thesamba.com/vw/forum/viewtopic.php?t=541529
1969 VW Westy is current project |
|
| Back to top |
|
|
|


