| Author |
Message |
V-Dub Guy
Samba Member
Joined: January 29, 2009
Posts: 222
Location: Canada

|
 Posted: Wed Apr 08, 2015 7:22 pm Post subject: Posted: Wed Apr 08, 2015 7:22 pm Post subject: |
 |
|
Geeeeze...!! :  |
|
| Back to top |
|
 |
kalymnos 
Samba Member

Joined: January 22, 2010
Posts: 112
Location: Hamburg/Germany
|
| Posted: Thu Apr 09, 2015 1:03 am Post subject: |
|
|
Kurt, you are my hero; fantabulous work and attitude.
I always loved SCs most, but it was you, who inspired me so much, that finally I bought me one.
Fortunately there is a lot of work to be done on my car! |
|
| Back to top |
|
|
KombiMadness
Samba Member

Joined: December 09, 2011
Posts: 388
Location: Sunshine Coast, Australia
|
| Posted: Thu Apr 09, 2015 4:50 am Post subject: |
|
|
I spot an Atos rigid wing in the background of photo 8.......
Flying season soon  for you....... for you.......
ours is coming to an end
Your attention to detail and craftsmanship on your Funky Truck build is amazing! It will almost be sad when this thread ends and Funky is jiving on the road again.
_________________
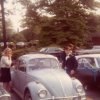
My brother & I on the roof of Dad's Splitty circa 1967 - I'm the half pint with the skinny legs! |
|
| Back to top |
|
|
glideking
Samba Member

Joined: February 02, 2013
Posts: 990
Location: California
|
|
| Back to top |
|
|
wedv907
Samba Member
Joined: November 21, 2010
Posts: 34
Location: ak ,ny
|
| Posted: Sat Apr 11, 2015 7:25 am Post subject: thankyou |
|
|
| i wanted to thank you for sharing all your tips and the types of tools your using for your project.i just put my new dust deputy in service yesterday for a fiberglass job.i had never heard of such an item till you mentioned one.its a boat project i am currently doing and i was climbing up and down a ladder often to blow out filter.you saved me hours on the stair master work out.and of course your truck is a testament of patience and quality work.thanks for taking the time to share it with us.jeff |
|
| Back to top |
|
|
BulliBill
Samba Member

Joined: July 09, 2004
Posts: 4573
Location: St Charles, MO
|
| Posted: Sat Apr 11, 2015 7:51 am Post subject: |
|
|
It is always fun and amazing to watch your work! Another in a long line of great "how I did it" videos! I hope to see you again next weekend at Kelley Park?!?
Bill Bowman
_________________
I'm looking for these license plate frames for my fleet:
Coeur D'Alene - Lake Shore Volkswagen
Mission VW - San Fernando
Thornton VW - Stockton
Thanks for any help! |
|
| Back to top |
|
|
Stocknazi
Samba Member

Joined: June 18, 2004
Posts: 5150
|
| Posted: Sat Apr 11, 2015 7:18 pm Post subject: Re: engine lid and treasure chest hinge mount plate repair |
|
|
| glideking wrote: |
This is a job that must be done. A single cab can have as many as 6 of these to repair. Due to my dual treasure chest conversion I now have all 6 to repair. Oh joy!
This is what a ripped hinge mount looks like from the inside. There is no connection to the outer skin whatsoever. They tend to fail when the hinge pin rusts solid.
I will start with my worst one.
I started with 1/4" x 3/4" bar stock and ground down the edges to an an angle by eye to a parallelogram shape. Does not have to be perfect. Then welded on spacers and ground them down to the right size.
This is a temporary holder. It is short enough I can plug weld each end into the spacers.
After the first two end plug welds are done I remove the holder and drill for the remaining plug welds. Two on the inside...
and four on the outside. This is the first time these hinge plates will have been supported from the outer skin. This also leaves the original rectangular hole intact.
Weld up the edges just for looks...
More grinding. Now only five more to do. Done!
Kurt |
Thanks for taking the time to post the pics of your decklid hinge repair; I have repaired my torn out hinges in the past using donor sections from bay decklids.
The method you suggested worked very well; I chose to not plug weld to the outter skin in case I ever wanted to take the decklid apart at the seams; welding to the outter skin would have made the repair stronger.
_________________
WANTED:
58 Westfalia cabinet knobs (3 needed), roof rack, and (7) privy tent poles (silver painted).
"When the people are afraid of the government, that's tyranny. But when the government is afraid of the people, that's liberty."
"Resistance to tyrants is obedience to God."
Thomas Jefferson |
|
| Back to top |
|
|
glideking
Samba Member
Joined: February 02, 2013
Posts: 990
Location: California
|
| Posted: Sat Apr 11, 2015 10:05 pm Post subject: Latch pivot relief bend |
|
|
As promised a long time ago I would come up with a way to recreate the latch pivot relief bend. The video above shows me doing it but if that goes away here are photos.
Single and double cabs have this clearance for the gate latch. Reproduction panels cannot include this detail because the top edge gets folded over anyway. I have been plotting and planing how to make this detail. The only way I could come up with was to pre bend the top flange on the entire upper separation panel with that detail somehow punched in before the installation and final crimp.
Photo of "Funky Truck" detail before I cut him up.
Partially pre bending the crimp only at the top leaving a space underneath allowed me to slide the panel down over the cab flange. I did the final tight crimp after all welding was done.
The gate latch does not fit nor is there room for the canvas top without that detail.
I made a die to match my old panel and pounded the new panel into the die with a ball peen hammer. I hoped that the sharp corners would crease and expand the metal if I pounded enough. I put shims under the crimp to keep it open.
I am surprised how well it worked. A little more finishing and it will be there.
Kurt
_________________
"The more I get done the less it looks like I did anything"
1959 Single Cab Restoration"Funky Truck"
http://www.thesamba.com/vw/forum/viewtopic.php?t=5...highlight=
1965 21 Window Restoration Thread (From old photos)
http://www.thesamba.com/vw/forum/viewtopic.php?t=6...highlight=
1963 Panelvan build "Tyvanosaurus Wrecks"
http://www.thesamba.com/vw/forum/viewtopic.php?p=8351639#8351639
Last edited by glideking on Sat Apr 11, 2015 10:46 pm; edited 1 time in total |
|
| Back to top |
|
|
glideking
Samba Member
Joined: February 02, 2013
Posts: 990
Location: California
|
|
| Back to top |
|
|
glideking
Samba Member
Joined: February 02, 2013
Posts: 990
Location: California
|
|
| Back to top |
|
|
Brian
Samba Moderator

Joined: May 28, 2012
Posts: 8340
Location: Oceanside
|
| Posted: Sat Apr 11, 2015 11:16 pm Post subject: |
|
|
Holy shit Kurt. That's a huge milestone, good job.
_________________
Wash your hands
'69 Bug
'68 Baja Truck
'71 Bug
'68 Camper
Only losers litter |
|
| Back to top |
|
|
BulliBill
Samba Member
Joined: July 09, 2004
Posts: 4573
Location: St Charles, MO
|
| Posted: Sat Apr 11, 2015 11:29 pm Post subject: |
|
|
Man! That is beautiful Kurt! Way to go!
Bill
_________________
I'm looking for these license plate frames for my fleet:
Coeur D'Alene - Lake Shore Volkswagen
Mission VW - San Fernando
Thornton VW - Stockton
Thanks for any help! |
|
| Back to top |
|
|
wcfvw69
Samba Purist

Joined: June 10, 2004
Posts: 13389
Location: Arizona
|
| Posted: Sun Apr 12, 2015 4:28 am Post subject: |
|
|
A serious milestone has been reached! Congratulations! I hope the ice cream was amazing.
_________________
Contact me at [email protected]
Follow me on instagram @sparxwerksllc
Decades of VW and VW parts restoration experience.
The Samba member since 2004.
**Now rebuilding throttle bodies for VW's and Porsche's**
**Restored German Bosch distributors for sale or I can restore yours**
**Restored German Pierburg fuel pumps for sale or I can restore yours**
**Restored Porsche fuel pumps or I can restore yours**
**Restored Porsche distributors or I can restore yours** |
|
| Back to top |
|
|
kafer60
Samba Member

Joined: January 17, 2005
Posts: 363
Location: Fredericksburg, Va
|
| Posted: Sun Apr 12, 2015 5:26 am Post subject: Clean metal |
|
|
What kind of acid are you using to do a acid wash?
_________________
Can't polish a turd!
"Midman- Seems to have worked well for Ted Bundy."
"seems like the right front tire is flat at the bottom, rest looks pretty good"
"The hardest part about business, is minding your own" |
|
| Back to top |
|
|
far rider
Samba Member
Joined: August 30, 2005
Posts: 773
Location: Rutland, VT
|
| Posted: Sun Apr 12, 2015 5:56 am Post subject: |
|
|
^x2, plus did you go over the skim coat with the wash or avoid it ?
_________________
67 zenith blue sunroof
Contentment; when what you have is what you want. |
|
| Back to top |
|
|
Eskimotom
Samba Member

Joined: May 18, 2007
Posts: 40
Location: Lake Wobegon MN
|
| Posted: Sun Apr 12, 2015 7:41 am Post subject: |
|
|
WOW! Pure inspiration.
I will be placing my funky green order next week. That and sandpaper, lots of sandpaper. |
|
| Back to top |
|
|
glideking
Samba Member
Joined: February 02, 2013
Posts: 990
Location: California
|
|
| Back to top |
|
|
far rider
Samba Member
Joined: August 30, 2005
Posts: 773
Location: Rutland, VT
|
| Posted: Sun Apr 12, 2015 8:38 am Post subject: |
|
|
Thanks Kurt, I made the mistake a few years ago of wet sanding over bondo  so I just wanted to clarify if the acid wash was also verboten. Thanks again. For taking the time to answer and for all your efforts in documenting Funky. so I just wanted to clarify if the acid wash was also verboten. Thanks again. For taking the time to answer and for all your efforts in documenting Funky.
_________________
67 zenith blue sunroof
Contentment; when what you have is what you want. |
|
| Back to top |
|
|
glideking
Samba Member
Joined: February 02, 2013
Posts: 990
Location: California
|
| Posted: Thu Apr 16, 2015 11:46 am Post subject: Pin welding, metal bumping and canvas |
|
|
Now that the body is complete and after a nice big bowl of ice cream I can move right into bodywork. The bed is done. All I need to do is the cab. I saved the most fun for last.
This dent and many others are inaccessible from both sides.
One BIG advantage etch primer has over epoxy (for areas to be repaired later) is that it can protect from flash rust during storage and be easily wiped off with lacquer thinner for welding.
I spent the money and got a quality pin welder. Pulled that dent out first attempt. Not bad for a beginner but I will use less heat next time. I think I can do this!
This is original lead filler from VW factory. Pins do not weld to it! Interesting that a small piece of lead is flaking away down at the corner.
"Funky" will be a pin cushion. If that is a bullet hole in the back of the cab it went right into my head. Why does it have to be right on that body line?
Paper thin filler.
Now my family is worried. They want to know why I am out in the garage hammering in the dark. A flashlight clamped to the side can show very small defects. This is an area where filler cannot be used. These are very subtle and delicate lines that show on both sides. This is a very important early single cab detail that is at eye level. I will do my best here.
Before
After
I made this jig to hold the bows together for welding. I could use a break from bodywork. These excellent hoops from Derek Gregg need to be welded after shipping as they did originally from VW. The black protective coating is easily wiped off with lacquer thinner before prime and paint.
The fabulous Busware canvas came today. I had to make sure everything fits before paint. Right?
Rotisserie is in the way of a full installation.
See you at Red Barn and Kelley Park!
Kurt
_________________
"The more I get done the less it looks like I did anything"
1959 Single Cab Restoration"Funky Truck"
http://www.thesamba.com/vw/forum/viewtopic.php?t=5...highlight=
1965 21 Window Restoration Thread (From old photos)
http://www.thesamba.com/vw/forum/viewtopic.php?t=6...highlight=
1963 Panelvan build "Tyvanosaurus Wrecks"
http://www.thesamba.com/vw/forum/viewtopic.php?p=8351639#8351639 |
|
| Back to top |
|
|
PeteSC
Samba Member

Joined: January 26, 2011
Posts: 881
|
| Posted: Fri Apr 17, 2015 5:15 am Post subject: |
|
|
| All very nicely done, Kurt. Paint will be flying soon and before you know it you'll be back to enjoying this truck. Keep it up! |
|
| Back to top |
|
|
|


