| Author |
Message |
22manybugs
Samba Member

Joined: March 30, 2006
Posts: 373
Location: Yorba Linda, Calif

|
 Posted: Wed Dec 25, 2013 7:26 pm Post subject: Ghia Air Conditioning Install Posted: Wed Dec 25, 2013 7:26 pm Post subject: Ghia Air Conditioning Install |
 |
|
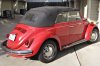
Well, after a long time of wishing I had A/C during the summer, I finally bought an air conditioning system to install. Actually it's a Christmas present from the wife (and it might cover a few Christmas's to come). I must be getting old, but it's just too hot to drive the car in 95+ degree summer days. I just got the kit, never installed one before, I thought I'd document the installation (and problems if any) for others.
I bought the Gilmore system. The biggest consideration for me was the condensor being mounted under the car instead of in front of the cooling fan intake. Preheating the engine cooling air when it's already 95degF or 100degF outside just didn't sound like a good idea.
Here are pictures before the installation:
Here's the dash. I have to do something with the gauges - either mount them below the A/C vent assembly or on top of the dash. I like on top of the dash, I like the looks and good gauge visibility, but I'm just not sure about having to drill holes through the dash.
This car must have had air conditioning previously - there are several existing holes that suggest an AC system, and the fuse box is raised up and flipped upside down. I read in some other post that the fusebox has to be moved to fit an AC system, although I haven't seen that yet in the directions for this system. The duct tape in the middle of the pictures (above and below) covers a big honkin' hole (that's a technical term) about 2" x 4" that I think all the refrigerant lines went through.
Back behind the battery are two existing holes. One is in the horizontal sheet metal (covered by black duct tape), one is vertical in the firewall (behind the insulation). I'm planning on reusing those holes if possible.
The car has a rear anti-sway bar, I guess installed by a PO. I probably have to remove that to fit the condenser. I'm not sure the anti-sway bar really does anything, I don't drive such that I need it, so it's not that big of a deal to remove it.
By the way, today (Christmas 2013) the Santa Ana winds are blowing, the temperature is 80 deg F, and it's great top-down driving weather. Great right now, but miserable when it's similar conditions in the summer and the temperature is another 20 deg hotter. I'm looking forward to having working A/C.
_________________
Lon
1969 Karmann Ghia convertible
1971 Westfalia camper |
|
| Back to top |
|
 |
djway3474
Samba Member
Joined: August 19, 2011
Posts: 2582
Location: The Real NDK So Cal
|
| Posted: Thu Dec 26, 2013 12:43 am Post subject: |
|
|
| I saw the coils mounted on the front beam with a fan on it in a Ghia once. |
|
| Back to top |
|
|
Kiptere
Samba Member
Joined: February 13, 2013
Posts: 419
Location: Houston
|
| Posted: Thu Dec 26, 2013 4:49 am Post subject: |
|
|
Believe me, you'll notice the ride difference if you remove that sway bar. You are also going to notice your horse power take a big dive. Everyone I ever knew who installed AC on an air cooled VW ended up removing it. It was simply never meant to be.
_________________
62 Bug
70 Bug
68 Bug
70 Bug Vert |
|
| Back to top |
|
|
Mark33563
Samba Member
Joined: November 13, 2005
Posts: 1667
Location: Tampa Bay. FL
|
| Posted: Thu Dec 26, 2013 12:15 pm Post subject: |
|
|
I have a '71 hardtop with an AC system in there. Have not paid much attention to it as I am still trying to get the title for it. I do not even know the brand of AC system.
I plan to take some pictures of the car and AC system as it is installed. It might help you on your pending project.
Two things: my fan shroud has the driver side air tube pointing towards the fender/battery, my fuse block was relocated to one of the dash support bars.
The fuse block is typically relocated as the air tube for the driver would obstruct it making fuse replacement a pain in the rump.
I will take some picture and post them up this weekend. I should be able to get my car onto a lift by then to take some underneath shots. |
|
| Back to top |
|
|
22manybugs
Samba Member
Joined: March 30, 2006
Posts: 373
Location: Yorba Linda, Calif
|
| Posted: Fri Dec 27, 2013 11:56 pm Post subject: |
|
|
Thank you for everyone's comments.
djway: As I understand it, the other major system (from Ice AC) uses two condensors, one up front at the beam and one in the rear mounted to the firewall. That may be the one you saw.
Kiptere: Ghias and Bugs did not come with rear sway bars originally, so I'm just taking it back to stock. I don't notice the difference between this car with the sway bar and our other Ghia that my son drives with no rear sway bar, so it should be okay. As to the horsepower, I'm to the point where I'll suffer a little slower acceleration in the summer if I can stay cool. I am a little concerned about the increased difficulty working on the car. I guess I'll find out first-hand.
Mark33563: Any pictures of other setups and lessons learned are always appreciated.
Status: I've installed the A/C pulley and the condenser. (I started with what looked like the easy stuff first!  ) )
A/C Pulley: Gilmore used to run the compressor using the same fanbelt for the generator and compressor, so the fanbelt formed a triangular path. I've seen other pictures here with this setup. In this kit, though, I got a second pulley to bolt behind the generator pulley, and the compressor runs off a separate fan belt. The instructions don't seem to be up-to-date with this change. It was a little confusing, so I called Ed at Gilmore and found out a few things that I'll pass along here:
- The pulley replaces the washer that is usually with the pulley bolt, it's the same thickness as the washer, so you discard the washer. The pulley fits onto the shoulder of the bolt.
- Ed recommends using a stock OEM VW bolt because the shoulder is better toleranced, so the A/C pulley is less likely to slip, wobble, etc. I have an aftermarket pulley & bolt installed, but was able to find the stock pulley and bolt in my boxes of old VW parts, so I took a side-by-side picture below. Test fitting the two bolts to the pulley, the OEM one does fit slightly better (less slop), but I'm not sure the aftermarket one would be a problem. If I didn't have the stock, I would go ahead and try the aftermarket bolt, but since I have the stock bolt I'll use it.
- The pulley comes with two bolts sticking out of the side of the pulley. See the picture below. I found out the bolt heads are intended to fit into the two slots in a stock VW crankshaft pulley Since I'm using an aftermarket aluminum pulley, Ed said to remove one of the bolts, then the remaining bolt head fits into one of the five holes in the aluminum pulley. The purpose is to prevent the pulley from slipping.
Here's the pulley fitted to the engine:
Now comes one of the items about increased difficulty working on the car: when adjusting valves, I rotate the crankshaft with a crescent wrench. Now the crescent wrench won't fit with the pulley in the way. Also, my 30mm socket has never fit between the pulley bolt and the back of the breastplate tin. I've looked for a "shallow" socket but have never found one. So now I will have to rotate the engine by turning the generator pulley. That's not really a big deal, just more of a nuisance.
Condensor: I mentioned that I thought I would have to remove the rear sway bar. Yes, after putting the condenser in position, it was obvious there was no way the sway bar would fit. So, off came the sway bar.
The condenser was really easy to install - removing the rear sway bar was far more work. To install the condenser, remove two torsion tube cover bolts and bolt it up. The only confusing part was the instructions said install one way with the bracket outside the torsion tube covers, but if you have dual spring plates, install it a different way with the brackets behind the torsion tube covers. What's a dual spring plate? After pondering through the Haynes manual, it looks like I do have dual spring plates (the plates from the torsion tubes to the rear axle/diagonal arm assembly). But then the condenser bracket seems to "split the difference" - they are slightly not wide enough to mount outside the torsion tube covers, and slightly too wide to mount under the torsion tube covers. It took a little persuasion to get everything to fit, but the brackets are aluminum so it wasn't very difficult. I just hope that doesn't stress the welds. Here's some pictures:
Oh, the instructions said to mount with 10mm x 35mm bolts, but there is only one 35mm bolt in the kit, and 35mm didn't seem long enough to replace the torsion tube cover bolts. There are two 45 mm bolts, so I assumed those are the correct ones. This is the hardware included in the kit (just nuts & bolts, not including brackets or refrigerant line clamps):
Here's another item about increased difficulty working on the car: The condenser blocks the support points that I use to support the body whenever I pull the engine. (I jack up the body at the jack points, and use the structure that stops the spring plates from extending as jackstand supports - that structure is now blocked by the condenser). I don't see a good alternate jackstand location, that could cause difficulty trying to raise the body to get the engine out.
One other thing I wanted to say, every time I have called Gilmore with questions, Ed answers the phone right away and is available to answer questions. I have been really pleased with the customer service.
Now on to the hard stuff - mounting the compressor and interior blower assembly. I'll be sidetracked for a few days - my other son's car is leaking coolant, so that's a higher priority. Darn those water-cooled cars! I'll add to this when I have more info.
_________________
Lon
1969 Karmann Ghia convertible
1971 Westfalia camper |
|
| Back to top |
|
|
mlhsquared
Samba Member

Joined: October 13, 2008
Posts: 1482
Location: Strasburg, VA
|
| Posted: Sat Dec 28, 2013 5:51 am Post subject: |
|
|
| Kiptere wrote: |
| You are also going to notice your horse power take a big dive. |
The newer AC units only drain a few HP. Nowhere near as much as the older units. Look up NovaAirhead's install thread here. He installed the Gilmore system and states no noticeable difference in power. He also states that it cools the car very well.
Edit: Here's a link.
http://www.thesamba.com/vw/forum/viewtopic.php?t=541940&highlight=
_________________
Mike
'67 Ghia Coupe
Last edited by mlhsquared on Sat Dec 28, 2013 6:03 am; edited 1 time in total |
|
| Back to top |
|
|
Altema
Samba Member
Joined: June 20, 2010
Posts: 2904
Location: Lower Michigan
|
| Posted: Sat Dec 28, 2013 9:12 am Post subject: |
|
|
| 22manybugs wrote: |
| Here's another item about increased difficulty working on the car: The condenser blocks the support points that I use to support the body whenever I pull the engine. (I jack up the body at the jack points, and use the structure that stops the spring plates from extending as jackstand supports - that structure is now blocked by the condenser). I don't see a good alternate jackstand location, that could cause difficulty trying to raise the body to get the engine out. |
I've used the same spots for jackstand placement. An alternative is using the torsion tubes that stick out past the spring plates that are shown in your photo below... I use that spot frequently, but only if both sides of the car are raised. If one side of the car is raised, there is a risk of the jackstand slipping sideways.
| 22manybugs wrote: |
| I'll be sidetracked for a few days - my other son's car is leaking coolant, so that's a higher priority. Darn those water-cooled cars! I'll add to this when I have more info. |
Yes, the water pumpers will keep you busy! I have used our KG to pickup no less than four radiators and two water pumps for other cars. Oh the irony 
Paul |
|
| Back to top |
|
|
Mark33563
Samba Member
Joined: November 13, 2005
Posts: 1667
Location: Tampa Bay. FL
|
| Posted: Sat Dec 28, 2013 12:29 pm Post subject: |
|
|
As promised, pictures of hos the AC system was installed in my recently acquired 1971 Karmann Ghia hardtop. Keep in mind that this car had been sitting in the back yard of a guy for the last 10 years or so. Nice collection of spider webs and dirt.
dash view. broken vent on end.
drain tube through front wall
compressor bracket, plastic jar with fasteners, melted plastic glove box (love the Florida heat), and ashtray. All safely located on passenger floor board.
mystery hole in dash above condenser unit - speaker wires going through it.
relocated fuse block
dash and fender holes for AC system tubing and control wires
passenger side front fender well. note fuel filler and vent hoses
tube running to rear of car, front fender well
rear fender well - as if the Ghia is not low enough, lets just dip the tube a bit lower.
My rear torsion bar clears. 
evidently they crossed the passenger side line above the tranny and through a hole on the driver side firewall
engine view: note turned air tube exiting fan shroud, lower turned air tube (missing flex line).
compressor tucked into left rear fender well. I can only guess that the compressor is bad as there is another one in the rear seat of the car.
Rain tray was notched to clear compressor. I wonder how much water actually gets to that drain tube.
condenser is mounted to front beam between spare tire sell and beam. Not much room in there.
The pressure line runs up the driver/left pan and the low pressure returns along the passenger/right pan. |
|
| Back to top |
|
|
Mark33563
Samba Member
Joined: November 13, 2005
Posts: 1667
Location: Tampa Bay. FL
|
| Posted: Sat Dec 28, 2013 12:56 pm Post subject: |
|
|
| I just noticed that the front torsion bar was relocated. Looks almost like a 914 bar.... |
|
| Back to top |
|
|
22manybugs
Samba Member
Joined: March 30, 2006
Posts: 373
Location: Yorba Linda, Calif
|
| Posted: Sun Dec 29, 2013 12:47 am Post subject: |
|
|
| Altema wrote: |
| I've used the same spots for jackstand placement. An alternative is using the torsion tubes that stick out past the spring plates that are shown in your photo below... I use that spot frequently, but only if both sides of the car are raised. If one side of the car is raised, there is a risk of the jackstand slipping sideways. |
Thank you, I didn't realize you could put jackstands on the torsion tubes outboard of the spring plates. I found another thread that says the same thing (see http://www.thesamba.com/vw/forum/viewtopic.php?t=419126&highlight= ). Intuitively, I've been leery about putting jackstands there because the entire weight of the rear would be carried through the rubber bushings on each side of the spring plates, but after thinking through the load path, I think those bushings take the entire rear end weight all the time anyways, so it's okay.
_________________
Lon
1969 Karmann Ghia convertible
1971 Westfalia camper |
|
| Back to top |
|
|
22manybugs
Samba Member
Joined: March 30, 2006
Posts: 373
Location: Yorba Linda, Calif
|
| Posted: Sun Dec 29, 2013 1:04 am Post subject: |
|
|
Mark33563, thanks for the pictures. That A/C system doesn't look like the ones I was considering, but it could be because it's an old system.
I don't see how the compressor would work when it's clear over in the fender well. Shouldn't it be mounted to the engine with a fanbelt running from the pulley?
Your front torsion bar (sway bar?) looks like an aftermarket rear sway bar. I've never seen that setup in the front before.
_________________
Lon
1969 Karmann Ghia convertible
1971 Westfalia camper |
|
| Back to top |
|
|
Altema
Samba Member
Joined: June 20, 2010
Posts: 2904
Location: Lower Michigan
|
| Posted: Sun Dec 29, 2013 8:16 am Post subject: |
|
|
| 22manybugs wrote: |
| I think those bushings take the entire rear end weight all the time anyways, so it's okay. |
That would be correct. If you notice in the picture from the other thread, the bushings are worn out on the top from movement and the weight of the car.
By coincidence, the yellow arrow in the picture below is pointing to were I place my jackstands.
|
|
| Back to top |
|
|
KGCoupe
Samba Member

Joined: July 01, 2005
Posts: 3580
Location: Putting the "ill" and "annoy" in Illinois
|
| Posted: Sun Dec 29, 2013 8:37 am Post subject: |
|
|
| Mark33563 wrote: |
As promised, pictures of hos the AC system was installed in my recently acquired 1971 Karmann Ghia hardtop. Keep in mind that this car had been sitting in the back yard of a guy for the last 10 years or so. Nice collection of spider webs and dirt.
...
engine view: note turned air tube exiting fan shroud, lower turned air tube (missing flex line).
compressor tucked into left rear fender well. I can only guess that the compressor is bad as there is another one in the rear seat of the car.
... |
If you look at the fan belt pulley mounted on the crankshaft, you'll notice that it has a place for a second belt in front.
That had to have been for the belt that drove the compressor, but it doesn't seem like there would be a straight path between the two.
I wonder if the fact that the left side fan shroud tubing is separated like that indicates that there used to be some sort of intermediate pulley mounted on the fan shroud there to couple the compressor to the crankshaft? |
|
| Back to top |
|
|
NOVA Airhead
Samba Member

Joined: July 20, 2005
Posts: 5221
Location: Richmond, VA
|
| Posted: Sun Dec 29, 2013 9:02 am Post subject: |
|
|
| mlhsquared wrote: |
| Kiptere wrote: |
| You are also going to notice your horse power take a big dive. |
The newer AC units only drain a few HP. Nowhere near as much as the older units. Look up NovaAirhead's install thread here. He installed the Gilmore system and states no noticeable difference in power. He also states that it cools the car very well.
Edit: Here's a link.
http://www.thesamba.com/vw/forum/viewtopic.php?t=541940&highlight= |
Gilmore says the system uses no more than 1.5 HP.
_________________
Ghia Owner Emeritus
Last edited by NOVA Airhead on Sun Dec 29, 2013 1:11 pm; edited 1 time in total |
|
| Back to top |
|
|
Altema
Samba Member
Joined: June 20, 2010
Posts: 2904
Location: Lower Michigan
|
| Posted: Sun Dec 29, 2013 11:14 am Post subject: |
|
|
| KGCoupe wrote: |
If you look at the fan belt pulley mounted on the crankshaft, you'll notice that it has a place for a second belt in front.
That had to have been for the belt that drove the compressor, but it doesn't seem like there would be a straight path between the two.
I wonder if the fact that the left side fan shroud tubing is separated like that indicates that there used to be some sort of intermediate pulley mounted on the fan shroud there to couple the compressor to the crankshaft? |
The compressor was mounted just to the left of the distributor, but the mounting brackets are missing and the compressor is just laying on the floor of the engine compartment, face-down. A photo below is of a similar unit in it's normal position...
|
|
| Back to top |
|
|
KGCoupe
Samba Member
Joined: July 01, 2005
Posts: 3580
Location: Putting the "ill" and "annoy" in Illinois
|
| Posted: Mon Dec 30, 2013 8:09 am Post subject: |
|
|
| Altema wrote: |
| KGCoupe wrote: |
If you look at the fan belt pulley mounted on the crankshaft, you'll notice that it has a place for a second belt in front.
That had to have been for the belt that drove the compressor, but it doesn't seem like there would be a straight path between the two.
I wonder if the fact that the left side fan shroud tubing is separated like that indicates that there used to be some sort of intermediate pulley mounted on the fan shroud there to couple the compressor to the crankshaft? |
The compressor was mounted just to the left of the distributor, but the mounting brackets are missing and the compressor is just laying on the floor of the engine compartment, face-down. A photo below is of a similar unit in it's normal position...
|
 Obviously I misunderstood when Mark33563 said "compressor tucked into left rear fender well" - I thought he meant that it was actually mounted there. Obviously I misunderstood when Mark33563 said "compressor tucked into left rear fender well" - I thought he meant that it was actually mounted there.
I did think that was pretty odd, as the only old A/C installs I have seen were like the one you posted a picture of.
My Ghia actually had some remnants of an A/C install when I bought it, but the two main pieces - the compressor and the under dash unit - were already missing.
After taking many pictures of all the remaining bits to document how they were installed, I removed them all and threw them up in the attic.
Unfortunately all those pictures are currently MIA, undoubtedly on one or another of the old computers whose login password has been long forgotten. |
|
| Back to top |
|
|
Mark33563
Samba Member
Joined: November 13, 2005
Posts: 1667
Location: Tampa Bay. FL
|
| Posted: Mon Dec 30, 2013 9:22 am Post subject: |
|
|
KGCoupe, sorry, the commentary for the pictures was not real detailed. But nonetheless, part of the posting of how my system is installed was to give everyone an idea of how to maybe do their differently or even better.
I plan to strip the car down and build it back up. When I do that I intend to install this system or parts of it a bit differently. I do not like the gaping holes they made for routing the pipes. I would rather install some A/C bulkhead units similar to this:
http://www.ebay.com/itm/Polished-Aluminum-Air-Cond...mp;vxp=mtr
I also plan to run hard lines from front to rear with insulation over them. Along with that I will source a more efficient compressor and convert the system to R134a. I am sure this system was designed to us R12 (aka: freon)
The biggest pain for me will be patching the gaping holes they created. |
|
| Back to top |
|
|
Greezy Joe
Samba Member

Joined: April 12, 2010
Posts: 1534
Location: Crawfordville, Fl
|
| Posted: Fri Jan 03, 2014 7:40 pm Post subject: |
|
|
This a good thread, I have fixed many Air Cooled AC systems in the past, back in the day, The mix of a Gilmore system and the original Knee Knocker unit would be nice. I work with guy that keeps Old Studebakers going. He sends some old units (Knee Knocker) to a place that puts in all 134 stuff inside, you have to furnish the housing, These guys do quality work. Just a thought
_________________
Current:74 Ghia Coupe w/ 2276
71 Ghia Vert w/ 1835
07 GMC Truck
12 Jeep Wrangler
73 Harley FLH 93 cid
89 Harley 883 Sportster (1200)
Owned before: 58, 69 Ghia Coupes, 64 Canvas Sunroof, 68, 72, 73, & 74 Bugs, 63 Single Cab, 65 Bus, 66 & 70 Camper
" Duct tape can't fix stupid, but it'll muffle the sound". |
|
| Back to top |
|
|
Mark33563
Samba Member
Joined: November 13, 2005
Posts: 1667
Location: Tampa Bay. FL
|
| Posted: Sun Jan 05, 2014 9:32 am Post subject: |
|
|
Greezy Joe,
Where does he send them?
--Mark R. |
|
| Back to top |
|
|
22manybugs
Samba Member
Joined: March 30, 2006
Posts: 373
Location: Yorba Linda, Calif
|
| Posted: Sun Jan 05, 2014 11:51 pm Post subject: |
|
|
Okay, I can finally get back to the A/C installation. (My son's car took MUCH longer than expected. Everything - especially the water pump - was a pain to get to, the car was designed with no consideration to making it easy to work on, and it seemed that as soon as one thing got fixed, something else needed fixing. Based on the experience, I'd say I would never own a Chrysler again, but most modern cars are probably the same. The Ghia is a joy to work on compared to that. Okay, I feel better, deep breath, enough editorializing...)
Here's a shot fitting together the compressor brackets.
It seems like I didn't have the right lengths of bolts, so I laid all the hardware out again. This time I included the hardware for the inside blower unit. (Compressor hardware on the right, blower hardware on the left.) I think I should have used shorter bolts and not so many washers on the condenser under the car - that would account for the additional compressor hardware I need. I can either redo the condenser or maybe buy some extra hardware. For the blower hardware, there are two hex-head bolts that should be the same, but one is different. And on one of the washers for the sheet metal screws, the hole is too big - the screw almost slips through. This is minor stuff - I made a trip to Ace and got some extra hardware.
Here's the main bracket fitted to the engine still in the car. I was wondering if the work could be done without removing the engine. Ha ha, yeah, right! I quickly gave up on that idea. Maybe you can do it that way, but it would be much harder, and you'd end up with metal shavings all over the engine.
The fresh air vent just behind the bracket needs to be removed - it won't fit with the compressor.
I'm still not sure where to put the coil. I thought maybe on top of the blower housing, here's as far as I can close the decklid before the coil hits the rain tray, so it obviously won't fit:
I had a brilliant idea! (Every once in a while my ideas actually work ) I have a ruler with a slip-piece on it, so I taped the slip-piece to the blower housing and closed the deck lid against the ruler. Ta-da! Here's how much space is between the blower and the rain tray:
A whole 1/2 inch. If anyone was wondering, there's your answer. I can't see fitting much in that space.
Now to remove the left fresh-air vent. I tried to remove this cleanly by just trimming away a few spots. No way. After about 1/2 hour, I gave up, broke out the sawzall and hacked the whole thing off. The photo below shows one spot weld on the outside. That was a bugger to remove, even the sawzall (which usually goes through sheet metal like butter) struggled with it.
I couldn't get a picture that showed this clearly, but inside the blower is a very nice curved channel that funnels the blower air out the fresh air vent. That channel is only for the fresh air vent. The new fresh air vent is just a round tube that you drill a hole in the blower and mount with sheet metal screws - there is no funnel to direct air into the vent. I don't know how much that impacts air volume for heat, but it doesn't look like you'd get the same air volume. On the other hand, it is still in the channel that is solely for the fresh air vent, so the air doesn't have anywhere else to go. I'm thinking about using a piece of vent/tin metal to rig up a deflector to help channel the air to the new fresh air vent. Maybe use sheet metal screws from the outside to hold it inside the blower housing. I don't think it'd be that difficult to rig up. I don't know where I'm mounting the outlet yet, most likely is on the side of the blower just slightly higher than where the original outlet sat. I want to get further along with the compressor mounting to make sure there's no interference.
Good as new! Except the paint on the blower has faded over the last few years. Well, wait six months or so and it will all look the same.
Interference spots: The main bracket interferes with the heat riser tube (spot marked in white). On the next picture, the bracket also interferes with the intake manifold (again spot marked in white) and the heads of the intake manifold hose clamps. I ground down the spots on the bracket and had to rotate the hose clamps.
I thought I read somewhere that I have to grind down the "nub" that sticks out of the dual port manifold (right in front in this picture). From the picture, obviously there is no interference, so that doesn't look to be an issue.
I do seem to have a problem here. There is a support bracket that bolts to the #3 exhaust and comes forward to hold the compressor. The bracket is about 1 inch too low and 1/2 inch inboard to bolt to the mating piece. (The picture is a little crooked, the compressor is actually sitting straight and level.) For this picture, the brackets are all bolted up tight, but the compressor is loose so I could wiggle it around. Don't know if I have something setup wrong or if the bracket really isn't lining up properly. At this point I stopped and sent the pictures to Gilmore to find out what Ed recommends.
That's it for now.
_________________
Lon
1969 Karmann Ghia convertible
1971 Westfalia camper |
|
| Back to top |
|
|
|


