| Author |
Message |
earlywesty
Samba Member

Joined: May 03, 2004
Posts: 2357
Location: In the woods, Ontario

|
 Posted: Wed Mar 05, 2014 4:38 am Post subject: Posted: Wed Mar 05, 2014 4:38 am Post subject: |
 |
|
| sled wrote: |
well I thought I might as well throw up another update for those who were interested in this thread.
Its been slow going, taking my time with stripping the old finish and trying to repair delaminating veneers as well as doing a bit of bleaching here and there.
with some pieces mocked up
I actually have the wash cabinet finished with new Alex-repro gold edging and polished formica. I'll get some pictures and post them cause its a thing of beauty  |
Do you have enough left for the table? I found another piece the other day which which you might be able to use to complete the table if not. |
|
| Back to top |
|
 |
j.pickens
Samba Member
Joined: December 03, 2002
Posts: 9789
Location: Exit 7, New Jersey
|
| Posted: Wed Mar 05, 2014 5:34 am Post subject: |
|
|
Great stuff, Jake!
Please show more details of your relamination process.
Fixing up those ragged, wavy, warped plywood edges must be a total pain.
_________________
Founder and Chairman Emeritus, ECMSAS
BBX BBXII and BBXXI Long Distance Award Winner
| BeaterBarndoor wrote: |
i wish more people would actually drive their vws rather than just talking about what they have in the garage. |
| Red Fau Veh wrote: |
If you've seen one sunroof swivel seat kombi, you've seen them all!  |
|
|
| Back to top |
|
|
zuggbug
Samba Member

Joined: June 17, 2008
Posts: 3479
Location: Anderson SC
|
| Posted: Wed Mar 05, 2014 6:07 am Post subject: |
|
|
Unbelievable, outstanding job. I would have never dreamed they would turn out thst nice. I commend you for taking on this time worthy task.
_________________
SOUTHERN INTEGRITY AIRCOOLERS
58 15 window
56 westy |
|
| Back to top |
|
|
jjjjack
Samba Member
Joined: August 08, 2005
Posts: 1013
Location: Gainesville, FL
|
|
| Back to top |
|
|
50ate
Samba Member

Joined: September 22, 2007
Posts: 1171
Location: Rainier/Olympia Washington
|
| Posted: Thu Mar 06, 2014 12:37 am Post subject: |
|
|
| Looks killer, I know what it was from the beginning.. I thought about leaving it along highway 20 just to save you the headache... I love the hardware... |
|
| Back to top |
|
|
Ran When Parked
Samba Member

Joined: September 26, 2013
Posts: 781
Location: Birmingham, AL
|
| Posted: Sun Mar 16, 2014 7:52 am Post subject: Any Updates? |
|
|
| Any updates? I am curious what you will do for the door and ceiling panel damage. |
|
| Back to top |
|
|
scholsie
Samba Member
Joined: January 05, 2013
Posts: 9
Location: Derbyshire, England
|
| Posted: Sun Mar 16, 2014 3:31 pm Post subject: |
|
|
Just starting the resto on my SO42 interior and have some water damage to the side panels, I was wondering if you use branded "wood bleach" or straight oxalic acid? If straight acid what strength do you mix it to?
Also what thickness scraper do you use for this kind of interior work? |
|
| Back to top |
|
|
sled
Samba Member

Joined: February 16, 2005
Posts: 6179
|
| Posted: Thu Mar 20, 2014 10:47 pm Post subject: |
|
|
been a while since an update..had other stuff going on and I lost a little steam at one point.
anyway, back at it. To answer a couple questions first.. With the wood bleach I am actually using straight Oxalic acid. The strength of the mix depends on how bad the water damage is but from my experience it is always better to start out mild and work your way into a stronger mix, to try and prevent too much lightening. I use small amounts at a time and usually go about 2 cups water to a heaping tablespoon of acid.
I have not tackled the ceiling panels yet, those and the long wall panel will be the last items to try and repair. The door panel was too far gone to save and it was sacrificed for other repairs as explained below.
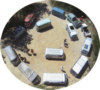
ok on to the wardrobe cabinet. previously I showed the door itself refinished but had not gotten to the bulk of the cabinet.
as seen previously the cabinet had extensive water discoloration/delamination down low and a big speaker hole heinously hacked into it, as well as a weird little picture-box thingy glued to it. I was fortunate enough to get the picture box off without ripping any veneer up. The glue didnt stick very well to the original finish on the cabinet.
like mentioned before I was going to just leave the speaker hole but then thought I would try my hand at doing a veneer patch.
here is a flitch of veneer I removed from the wasted door panel (not the actual flitch used for the patch) which shows how nice it really is after stripping the nasty old finish.
here is the offensive hole..
I decided I wanted to try and have the patch cover those two small random screw holes beneath the speaker hole. Plus, it is far more effective to use angles when patching across the grain, it helps the patch to blend rather than having a perpendicular line crossing the grain patterns.
once I had the patch cut nicely with a razor (very important to have perfectly straight CLEAN cuts) I laid it over the cabinet and traced it. Then carefully cut the tracing and slowly peeled the original veneer off the cabinet. I had some random 2.7mm lauan plywood kicking around that I used to patch the hole itself with. The tighter your patch, the better the result here as well. Of course one could always use filler to take up gaps and smooth it out.
here is the veneer patch glued in place with regular yellow wood glue and an iron applied to set the glue quickly and to flatten the veneer as much as possible.
and this is the cabinet after bleaching and finishing. Don't mind the lower area where it is up against the seat base, I chose not to spend any time on this area because it will soon be hidden again for the foreseeable future.
I think it came out pretty well all things considered. It was a bit of a mess before, but now I think it will look right at home next to the other cabinets.
lets just hope I can make the ceiling paneling look as nice
_________________
drive your split. |
|
| Back to top |
|
|
camerod
Volksfab

Joined: October 01, 2002
Posts: 606
Location: washington state
|
| Posted: Thu Mar 20, 2014 11:48 pm Post subject: |
|
|
whoa! that patch really came out nice!
_________________
DON'T SHIT WHERE YOU EAT! |
|
| Back to top |
|
|
jjjjack
Samba Member
Joined: August 08, 2005
Posts: 1013
Location: Gainesville, FL
|
|
| Back to top |
|
|
M183kombi
Samba Member

Joined: February 01, 2008
Posts: 288
Location: Kearns, UT
|
| Posted: Fri Mar 21, 2014 5:12 am Post subject: |
|
|
Holy awesome fix busman...that patch looks sweet...I love watchin' people take the time to do things right and preserving what you were given to work with...
_________________
1960 L31 M183 kombi |
|
| Back to top |
|
|
bubba
Samba Member

Joined: May 09, 2004
Posts: 2531
Location: Florida
|
|
| Back to top |
|
|
grailoc
Samba Member

Joined: March 25, 2004
Posts: 1441
Location: FRANCE and now QUEBEC city
|
|
| Back to top |
|
|
srfndoc
Samba Member

Joined: August 21, 2010
Posts: 3274
Location: SoCal
|
| Posted: Fri Mar 21, 2014 7:19 am Post subject: |
|
|
Damn speaker holes! I had two of those in my headbanger cabinet and took the easy route to fix them.... finding a replacement cabinet. Your repair looks great and all the cabinets still look matched to each other and appropriate for the rest of the bus.
_________________
RPM=(MPH*336* (R&P*4th*1.26))/Tire Diameter in inches |
|
| Back to top |
|
|
campingbox 
Samba Member

Joined: November 14, 2000
Posts: 10196
Location: Petaluma, CA
|
| Posted: Fri Mar 21, 2014 12:39 pm Post subject: |
|
|
| Very cool. Good work Jake! |
|
| Back to top |
|
|
adam beefcake bruno
Samba Member

Joined: April 12, 2000
Posts: 246
Location: Spokane Valley, WA
|
| Posted: Fri Mar 21, 2014 5:50 pm Post subject: |
|
|
Damn dude! That is true craftsmanship! Not like those wannabe's that buy some pre-made sorta-westy kit for their standard microbus.....oh, wait...
_________________
Don't take life too serious....you won't get out of it alive! |
|
| Back to top |
|
|
Ran When Parked
Samba Member
Joined: September 26, 2013
Posts: 781
Location: Birmingham, AL
|
| Posted: Fri Mar 21, 2014 7:28 pm Post subject: Very Nice |
|
|
| Very Nice! |
|
| Back to top |
|
|
zuggbug
Samba Member
Joined: June 17, 2008
Posts: 3479
Location: Anderson SC
|
| Posted: Fri Mar 21, 2014 8:19 pm Post subject: |
|
|
Awesome job jake
_________________
SOUTHERN INTEGRITY AIRCOOLERS
58 15 window
56 westy |
|
| Back to top |
|
|
sled
Samba Member
Joined: February 16, 2005
Posts: 6179
|
| Posted: Fri Mar 21, 2014 10:35 pm Post subject: |
|
|
Thanks!
only one more seat base to refinish and then its on to the wall/ceiling paneling! The snow has all but melted so I'm going to be itching to camp in this thing. The pressure's on.
_________________
drive your split. |
|
| Back to top |
|
|
nigel naughton
Samba Member
Joined: October 31, 2001
Posts: 122
|
| Posted: Sat Mar 22, 2014 1:47 am Post subject: |
|
|
| Man this is really really nice work! I can't wait to see it when it's finished. Good job documenting your work. |
|
| Back to top |
|
|
|


