| Author |
Message |
Squilly
Samba Member

Joined: March 01, 2011
Posts: 158
Location: Steamboat Springs, CO

|
 Posted: Fri Feb 14, 2014 8:16 pm Post subject: 1960 15 Window Posted: Fri Feb 14, 2014 8:16 pm Post subject: 1960 15 Window |
 |
|
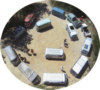
Figured that it was about time to start a build thread on this one. 1960 15 window from Florida, now in Colorado
First thing on the to-do list has to be safaris, obviously
Just some quick metal repairs until we can move it into the shop
And where it sits now, in the garage getting ready for all the new metal to go in and bodywork addressed
Last edited by Squilly on Sat Feb 15, 2014 7:31 pm; edited 1 time in total |
|
| Back to top |
|
 |
mr white
Samba Member
Joined: October 02, 2005
Posts: 1193
Location: beautiful Oregon & Mohave County, AZ
|
| Posted: Fri Feb 14, 2014 10:11 pm Post subject: |
|
|
| Pretty cool project. I just picked up a 60 15 as well. Needs roof work. Why did you choose not to install the complete short rocker behind the cargo doors? You made more work. Buy some cleco fastners.Way easier than the hf clamps although those work best in some applications. Keep the pics coming and ask questions o plenty. |
|
| Back to top |
|
|
Squilly
Samba Member
Joined: March 01, 2011
Posts: 158
Location: Steamboat Springs, CO
|
| Posted: Fri Feb 14, 2014 11:08 pm Post subject: |
|
|
| It was finished later that day, that was just a "during" photo. You may not be able to see that section in the photos of it in the shop because we sealed it and spray painted it, but it has been finished. I will definitely look into those other fasteners though if you say they make the work any easier or faster, anything to make the work easier (as there is a lot to do) is worth the investment to me. |
|
| Back to top |
|
|
joe56vw
Samba Member
Joined: June 24, 2004
Posts: 3202
Location: Olympia wa
|
|
| Back to top |
|
|
sled
Samba Member

Joined: February 16, 2005
Posts: 6179
|
| Posted: Fri Feb 14, 2014 11:28 pm Post subject: |
|
|
| joe56vw wrote: |
Welcome to the '60 15 window club  |
don't be frontin' now joe... 
_________________
drive your split. |
|
| Back to top |
|
|
volksaddict
Samba Member
Joined: August 19, 2003
Posts: 1724
|
| Posted: Sat Feb 15, 2014 7:09 am Post subject: |
|
|
Safaris? Cart before the horse?
Work it from the bottom up, inside to out. The outside rockers and patches go on last or else you can't get to the stuff underneath. You have your outer rocker on now so the inner rockers, door pillars and crossmembers are all good right? Metal inside the rockers is all rust free and sealed right? You can do jack points and outriggers from underneath but that other stuff is only accessable with the rocker skins off. |
|
| Back to top |
|
|
joe56vw
Samba Member
Joined: June 24, 2004
Posts: 3202
Location: Olympia wa
|
| Posted: Sat Feb 15, 2014 10:17 am Post subject: |
|
|
| sled wrote: |
| joe56vw wrote: |
| Welcome to the '60 15 window club |
don't be frontin' now joe... |
I was joking jake beside mine will be getting turn into a '56 anyways
_________________
'60 15 window walkthrough
http://www.thesamba.com/vw/forum/viewtopic.php?t=559931&highlight=
why is there no sarcasism button on here? |
|
| Back to top |
|
|
Squilly
Samba Member
Joined: March 01, 2011
Posts: 158
Location: Steamboat Springs, CO
|
| Posted: Sat Feb 15, 2014 6:13 pm Post subject: |
|
|
| volksaddict wrote: |
Safaris? Cart before the horse?
Work it from the bottom up, inside to out. The outside rockers and patches go on last or else you can't get to the stuff underneath. You have your outer rocker on now so the inner rockers, door pillars and crossmembers are all good right? Metal inside the rockers is all rust free and sealed right? You can do jack points and outriggers from underneath but that other stuff is only accessable with the rocker skins off. |
Rockers were just tacked in for now, we were planning on taking them out again, but wanted to cut the old ones out before we got over to the shop. Safaris went in because they were the first thing that showed up so we decided we'd do all the welding on there and get everything lined up. They're not completely installed either as they are coming out soon too. Some of the cross members are bad so we're going to replace all of them, then both halves of the floor. |
|
| Back to top |
|
|
Squilly
Samba Member
Joined: March 01, 2011
Posts: 158
Location: Steamboat Springs, CO
|
| Posted: Sat Feb 15, 2014 6:51 pm Post subject: |
|
|
Well we knew this was coming considering it being from Florida, but the outer parts of the floor were pretty bad as well as the outer sections of the cross members underneath them.
Of course it's best to do it right the first time so we will be replacing all of them and both halves of the floors. Unfortunately they hadn't been ordered earlier so work has been suspended until they arrive as to not risk the metal shifting in any way if we kept cutting stuff out.
Until then we plan on beginning the sanding and prepping process in addition to any other little miscellaneous tasks I can think of to preoccupy myself until it shows up and we can dive back into the rust. Any reccomedations are much appreciated... 
As it sits now, both doglegs, rockers, and outer parts of the floor are all out, but can't really install anything till more metal shows up...  |
|
| Back to top |
|
|
volksaddict
Samba Member
Joined: August 19, 2003
Posts: 1724
|
| Posted: Sat Feb 15, 2014 7:55 pm Post subject: |
|
|
Well now you're speakin my language  |
|
| Back to top |
|
|
RJGiddings
Samba Member
Joined: January 20, 2014
Posts: 6
Location: Seattle
|
| Posted: Mon Mar 10, 2014 8:42 am Post subject: |
|
|
Any updates?
I'm curious to see the latest ! |
|
| Back to top |
|
|
Squilly
Samba Member
Joined: March 01, 2011
Posts: 158
Location: Steamboat Springs, CO
|
| Posted: Mon Mar 10, 2014 5:05 pm Post subject: |
|
|
| Up until now it's just been collecting the remaining metal that we needed. Big order from Klassicfab just showed up last week so we should be able to get started with that again this weekend. Other than that it has just been some sanding and preping here and there. |
|
| Back to top |
|
|
Squilly
Samba Member
Joined: March 01, 2011
Posts: 158
Location: Steamboat Springs, CO
|
| Posted: Tue Mar 18, 2014 8:26 pm Post subject: |
|
|
Small progress update: Klassicfab 8'' high corners are installed. Engine bay was more difficult than we first thought. We had a hard time finding good metal to weld to, but eventually worked it out.
Klassicfab corners fit decently well, but we had some difficulty getting the drivers side to stretch to the factory seam. Thinking it may have been a bad cut of got torqued during shipping.
Looking forward to getting the new floors in as well when the cross-members show up later this week. Hopefully we can get a little more work done before we take the 76 Westy to Zion National Park for spring break!
|
|
| Back to top |
|
|
cru62
Samba Member

Joined: December 31, 2002
Posts: 4117
Location: Margaritaville.....24/7
|
| Posted: Tue Mar 18, 2014 10:24 pm Post subject: |
|
|
| mr white wrote: |
| Buy some cleco fastners. |
I'm trying to figure out if there is some new configuration of clecos that I am not aware of. AFAIK clecos are used to hold two panels together that lap over one another. Since these are butt-welded the usual suspects would not work. I am aware of the edge clamp clecos as well. But they would not work in this situation either. I have used magnets for this type of repair with much success. Is there yet another type? Perhaps you can snap a pic or post a link. Thanks.
_________________
"My biggest worry is that when I die, my wife will sell all my parts for what I told her I paid for them"-Jon
Jokes about German sausage are the wurst.
Stop dead photo links! Post your photos to The Samba Gallery! |
|
| Back to top |
|
|
Squilly
Samba Member
Joined: March 01, 2011
Posts: 158
Location: Steamboat Springs, CO
|
| Posted: Wed Apr 23, 2014 6:47 pm Post subject: |
|
|
Finally I've got enough material to post an update! I've just been doing some light work when I can after school; wire wheeling the frame rails, disassembling for front floor removal, as well as removing the rear floors.
Since we are replacing all the cross-sections underneath the cargo floors I opted to not go the tedious spot weld drilling route and instead did the "go for it" cutting wheel route. New sections should start being welded in this Saturday. And of course while all of this is coming out I'll be refinishing the frame with a nice cleaning and a Por-15 treatment.
As far as the front floor goes, I have almost every part out except the steering wheel and column, and the heater tube. I'll be going about the steering wheel tomorrow, but was wondering:
What should be disconnected to get the steering box out? I know which bolts need to come out, but not sure if the disconnection of the linkage is as straight forward.
Should the shifter come out too? I know part of it has to, but can you leave parts in similar to the parking brake?
What is the best way to go about removing the heater tube? I saw some other threads about the process, and need to look into it further...
I got kinda bored of cleaning out stuff in the front and disassembling and cutting, and decided to try and patch the swiss cheese holes in the rear shelf. I started grinding it and it just got worse and worse, as expected. So now I'm in the process of locating a donor one. I've seen a few out of parts busses on here, but having trouble actually getting one. I'm also wondering if they changed the width of the "rails" or raised areas of this section in the later years, or if they're all basically the same.
If you have one of these sections or know of one that would work for me please let me know! It's not really a priority, but something I'll need to find eventually.
More metal to be replaced... What is the best way to go about removing this section of tubing and all the other linkage and cable housings?
Lots of custom patch work here too! But nothing that will be too difficult to make. Need to get some of these pillars too...
Bus is now back at my garage until we can get it structually strong enough to move, not that it was really strong enough to move in the first place but whatever.
It is finally getting warm enough out to work just about every day, so I'm hoping it will start moving a little bit faster. Keep an eye out for another update coming this weekend, preferably with more good metal!
|
|
| Back to top |
|
|
lumber-baron
Samba Member

Joined: May 01, 2010
Posts: 394
Location: Golden, CO
|
| Posted: Tue Oct 21, 2014 11:06 am Post subject: |
|
|
I haven't seen this on the road yet, what's taking you guys so long?  |
|
| Back to top |
|
|
asesapie
Samba Member

Joined: March 07, 2005
Posts: 756
Location: Spokane, WA
|
| Posted: Tue Oct 21, 2014 2:49 pm Post subject: |
|
|
| Any update on the bus? |
|
| Back to top |
|
|
Stocknazi
Samba Member

Joined: June 18, 2004
Posts: 5150
|
| Posted: Tue Oct 21, 2014 5:56 pm Post subject: |
|
|
There are different rear luggage shelf stampings btw early and late.
_________________
WANTED:
58 Westfalia cabinet knobs (3 needed), roof rack, and (7) privy tent poles (silver painted).
"When the people are afraid of the government, that's tyranny. But when the government is afraid of the people, that's liberty."
"Resistance to tyrants is obedience to God."
Thomas Jefferson |
|
| Back to top |
|
|
j.pickens
Samba Member
Joined: December 03, 2002
Posts: 9789
Location: Exit 7, New Jersey
|
| Posted: Tue Oct 21, 2014 11:44 pm Post subject: |
|
|
I'd take a good look at your main frame rails before attaching anything to them. They look compromised in the photos.
_________________
Founder and Chairman Emeritus, ECMSAS
BBX BBXII and BBXXI Long Distance Award Winner
| BeaterBarndoor wrote: |
i wish more people would actually drive their vws rather than just talking about what they have in the garage. |
| Red Fau Veh wrote: |
If you've seen one sunroof swivel seat kombi, you've seen them all!  |
|
|
| Back to top |
|
|
Squilly
Samba Member
Joined: March 01, 2011
Posts: 158
Location: Steamboat Springs, CO
|
| Posted: Fri Nov 07, 2014 12:41 am Post subject: |
|
|
| lumber-baron wrote: |
| I haven't seen this on the road yet, what's taking you guys so long? |
I know we've been taking our sweet time with it! Cranked a lot of work out a while ago though and just never got around to posting it before school started back up again. I'm planning on getting back at it for a week over Thanksgiving break, when we will hopefully put it in a primer just to seal it up while we continue the remaining metal work. Heres what has been done since my last update: Front floor has been installed (Pictures to come later when I can upload them to my computer), doglegs have gone in, inner and outer valence, new long rocker, new pillars, and a new lower nose.
| j.pickens wrote: |
| I'd take a good look at your main frame rails before attaching anything to them. They look compromised in the photos. |
You're right, they did look pretty rough in the photos, but even to my surprise they ended up cleaning up really well with a few passes with the wire wheel, then some additional cleaning followed by a couple coats of POR15 on all sides. I'll probably hit them again once the rest of the bottom metal is put back in. (Still have jackpoints, outriggers, cross members, and some tubing) Following that we measured and remeasured where the old top hats were, marked them, then cut out the old ones. Cleaned up the mounting spots, sealed them, then welded the new pieces in, one at a time, starting in the middle/front to back, double checking that they were all the correct distance apart. Once the easier, middle ones were in we worked the front and back then got them installed. I decided to just try and seal everything I could possibly coat while I had the chance so we hit all the welds with more POR15, and the top hats with some nice weldable primer.
Went on from here to finish up the floor supports with the inner rockers from Wolfsburg West, coated them, then went installed the two-piece outer rocker from Autocraft. It really took some finessing and lots of reaching around the back to slowly tweak/ease it into the proper position. After awhile we got it into a spot that we were really happy with, and I think the result is great. Finally got around to starting the floor then too. They really didn't take too much work other than some cutting to accommodate the rise in the heater tube, and some banging into place and flattening with rubber mallets and feet. Triple-checking that we had them exactly where we wanted each of the floor halves, we put in the first of many welds for the floor. We ended up only putting a few in for now so that it would be solid enough to move around again so that I could take it home and finish drilling the pilot holes for the rest of the welds in the floor, as well as sanding it so we could hopefully spray it before school. Didn't end up getting to spray it then, but I would say that I'm extremely happy with our progress thus far.
In the few days I had left I was able to get pretty far on the sanding, and removal of the rest of the bondo. It was crazy thick around the antenna mount holes and about halfway down the nose(areas I sprayed white and the bare spot), as well as all along the long panel on the passenger side(black). It was weird though because I really couldn't find any significant damage, especially on the the nose.
I think thats about where we're at right now, but we will see in 2 weeks, maybe it'll be completely solid underneath and one color! Who knows? For now though, this is how it is currently looking. Begging to look like a bus again and less of mess of rust! 
|
|
| Back to top |
|
|
|


