| Author |
Message |
DrKamikazi
Samba Member
Joined: March 03, 2013
Posts: 316
Location: Across North America

|
 Posted: Mon Feb 24, 2014 2:23 pm Post subject: 78 Riviera aka soon to be my new home! Posted: Mon Feb 24, 2014 2:23 pm Post subject: 78 Riviera aka soon to be my new home! |
 |
|
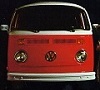
Hey all been here for a lil bit getting help fixing up my 69 bay window, and now Ive got a 78 Riviera that I am fixing up with a custom interior and eventual total restore and will be moving into it and traveling the world(hopefully!!).
figured I would make a thread for her (she doesnt have a name yet) for any help I may need or advice along the way! everyone was so helpful with my old bus I know that everything will go way more smoothly with you guys here in the new(er) one.
the "original" interior
spent this past sunday getting into her and stripping out the interior
the one problem me and my step dad encountered was the driver seat is stuck pretty firmly in place, got it soaked in PB, letting that sit to see if it helps.
gave the interior a nice scrubbing after it was all said and done. now to look into rust repair as it has a little bit of surface rust and to dig into the engine next weekend! |
|
| Back to top |
|
 |
DrKamikazi
Samba Member
Joined: March 03, 2013
Posts: 316
Location: Across North America
|
| Posted: Mon Feb 24, 2014 2:49 pm Post subject: |
|
|
oh and one thing I noticed about the engine when I got it was one of the mounts for the generator was cracked,
decided to go out and take a picture and see if anyone had any good leads on a replacement. been scouring the internet but so far no luck...
also heres the whole engine, gotta do some reading up on it as all my mechanical knowledge was gained from the '69...sooo type 1 engines is pretty much all I know about...should be fun, right  |
|
| Back to top |
|
|
BUSBOSS
Samba Member

Joined: January 21, 2009
Posts: 2161
Location: Northern California
|
| Posted: Mon Feb 24, 2014 3:39 pm Post subject: |
|
|
Good luck! You probably know this from reading here.
1) Replace your fuel lines and fuel vent lines.
2) Get a new engine seal.
_________________
All the redemption I can offer, girl, is beneath this dirty hood
1976 Westfalia
1970 Karmann Ghia Convertible (sold - but not forgotten) |
|
| Back to top |
|
|
mross
Samba Member
Joined: September 11, 2003
Posts: 59
|
| Posted: Mon Feb 24, 2014 3:47 pm Post subject: |
|
|
The alternator mount is just a piece of steel bent in a sort of "U" shape. If you can't find one, you might be able to make one with basic hand tools and a piece of strap steel from the hardware store. If you have a welder and are really careful, you might be able to weld up the one you have after removing it. You're also missing a few pieces of engine tin. There is supposed to be a piece of tin that fits over the alternator, and a sort of circular piece of plastic around the end of the alternator that directs cooling air into the vents. There is also a piece of plastic that snaps into the alternator surround tin to cover the belt tensioner bolt. When you remove the alternator, check the elbow that directs air into the fan shroud. They are frequently cracked, and can cause a cooling air leak.
Other than that, you're only missing the foam engine seal, from what I can see. Whoever owned it before you left the fuel injection, which is great! However, I would replace the fuel lines soon, as they tend to crack over time. If it doesn't quite run right, check for vacuum leaks in the various hoses going into the intake air tube behind the air flow meter. Also check the intake air tube for rips and cracks.
If you have any tips on getting the seat unstuck, I'd be happy to hear them; as I have the same problem on a 79. |
|
| Back to top |
|
|
DrKamikazi
Samba Member
Joined: March 03, 2013
Posts: 316
Location: Across North America
|
| Posted: Mon Feb 24, 2014 5:34 pm Post subject: |
|
|
awesome man thanks for the help! trying to figure out all the differences and what I need to be looking for when I get into the engine.
she seems to run fine, drove her four hours to Oklahoma from Arkansas and she did great. def gunna get into the fuel lines and brakes and everything next weekend.
also sadly an overnight soak in PB did nothing to budge the seat...going to search for new options on that this week as well. |
|
| Back to top |
|
|
nodrenim
Samba Member
Joined: October 06, 2006
Posts: 843
Location: Dobson, North Carolina
|
| Posted: Tue Feb 25, 2014 6:00 am Post subject: |
|
|
| You could try some Naval Jelly on the seat tracks. Also try putting a metal bar on the end of the track that is attached to the seat and tap with a hammer to loosen it up. |
|
| Back to top |
|
|
thewalrus
Big Jack
Joined: March 27, 2006
Posts: 3014
Location: Belchertown, MA
|
| Posted: Tue Feb 25, 2014 6:13 am Post subject: |
|
|
Nice bus!! 
If you want my honest opinion, pull the engine and clean EVERYTHING! You'll be able to get at the fuel tank, fuel filler neck and elbow and vent lines a lot easier too and not to mention those awkward deep parts of the engine that I'm sure are caked in dirt and oil.
Could you post the VIN also? 1978's didn't come with the divider wall behind the passenger seats. Also you have a round fuel filler cap and squareback seats with headrests. If I had to guess I'd say you had a 1974 or 1975 bus. A VIN or M-Code will give us the exact date it was made.
_________________
'73 Transporter 1.7L Dual Carb
| notchboy wrote: |
| You ran over some #Vanlife'ers hopes and dreams? |
| 60vwnewengland wrote: |
| Looking forward to next weekend, weed, krunk juice, hookers, blow, hanging with bums, philly, ...the awards! |
|
|
| Back to top |
|
|
Red Fau Veh
Samba Member

Joined: September 07, 2012
Posts: 3037
Location: Prescott Az.
|
| Posted: Tue Feb 25, 2014 7:56 am Post subject: |
|
|
That is one rare bus! A blue 78? Never heard of them.
_________________
1971 Deluxe Sunroof Bay 1905 stroker, dual idf40's, 74mm Scat forged crank, engle 110 cam. CB 044 heads, AutoCraft rockers, chromoly push rods
1973 Orange transporter stock type 4 with dual 40 Dellortos and Empi single quiet pack
1969 Adventurewagen blue whale Gene Berg 1776 built by Dave Kawell dual 36 DRLA's, Vintage Speed exhaust, Bosch 019 screamer
1961 Swivel Seat camper, L345 grey
| Touch Nicks Thing wrote: |
Swivel Seat panels are for people with no friends  |
|
|
| Back to top |
|
|
Bala
Samba Member

Joined: December 04, 2003
Posts: 2613
Location: Austin, TX
|
| Posted: Tue Feb 25, 2014 8:11 am Post subject: |
|
|
Nice project!
For the seat, have you tried a rubber mallet? Mine was also stuck solid when I got it. Penetrating oil + some serious whacks with a mallet finally broke it loose.
_________________
1976 Westy
1966 Beetle |
|
| Back to top |
|
|
DrKamikazi
Samba Member
Joined: March 03, 2013
Posts: 316
Location: Across North America
|
| Posted: Sun Mar 02, 2014 9:07 am Post subject: |
|
|
Thanks for the info guys! Still waiting to go get the tools to do the rust repair and start the interior, and now this ice storm has prevented the engine work I planned on doing today. As far as pulling the engine the pictures show pretty much where she is to be worked on, how much harder is a type four engine to pull than a type one (still trying to figure out all the differences, but I do have the Bentley and Tom Wilson's rebuild book).
also took these pics of what I think is where the vin should be, looks to be a '78 from what the labels say at least...
|
|
| Back to top |
|
|
DrKamikazi
Samba Member
Joined: March 03, 2013
Posts: 316
Location: Across North America
|
| Posted: Sun Mar 02, 2014 12:37 pm Post subject: |
|
|
| One other thing I had a question on is I need to replace the gaskets on the valve covers, and when I did this in the '69 bus I read on here that using real cork ones like the original was the best option. Is that still the case with the later bays or will any type gasket work? |
|
| Back to top |
|
|
Bala
Samba Member
Joined: December 04, 2003
Posts: 2613
Location: Austin, TX
|
| Posted: Wed Mar 05, 2014 9:51 am Post subject: |
|
|
Yep, stick with quality cork gaskets. I use a very thin swipe of grease on the head side, and Hylomar on the valve cover side.
_________________
1976 Westy
1966 Beetle |
|
| Back to top |
|
|
DrKamikazi
Samba Member
Joined: March 03, 2013
Posts: 316
Location: Across North America
|
| Posted: Sun Mar 16, 2014 12:23 pm Post subject: |
|
|
Ok guys so been getting the rust out and coming up with a plan for the interior and I found this bundle of wires that comes out of the engine compartment and into the back of the bus. It was never connected to anything when I took the interior out and everything seems to run fine in the bus, any ideas on what it goes to?
Im going to be pulling the engine but not till after I get the flooring and panels put into the inside so it will most likely be covered at that point so Id like to know if it is something I need or what... |
|
| Back to top |
|
|
northernbus77
Samba Member

Joined: November 17, 2008
Posts: 196
Location: Yukon
|
| Posted: Sun Mar 16, 2014 12:48 pm Post subject: |
|
|
| DrKamikazi wrote: |
| .... how much harder is a type four engine to pull than a type one .... |
These instructions make it easy.
http://www.ratwell.com/technical/EngineRemoval.html
As for the wire bundle. I've seen better pictures of big foot  |
|
| Back to top |
|
|
DrKamikazi
Samba Member
Joined: March 03, 2013
Posts: 316
Location: Across North America
|
| Posted: Sun Mar 16, 2014 6:32 pm Post subject: |
|
|
| Awesome thanks for the link! And yeah sorry haha, it looked a lot better on my phone. I'll take a new one tomorrow, but essentially it's a length of like ten or twelve wires that comes out of the rear passenger side of the floor and is a couple feet long. It went along the back of the bus and up the drivers side and just ended in a tangled mess under the sink before I tore the interior out. |
|
| Back to top |
|
|
brandt
Samba Member

Joined: April 27, 2004
Posts: 364
Location: S. Utah
|
| Posted: Sun Mar 16, 2014 9:15 pm Post subject: |
|
|
That bulkhead behind the seat is odd for the year. Bummer for you as you are going to live in this and your passenger seat can't spin to face backwards.
Behind your drivers seat backrest may be a sticker with a color on it, likely in German. Let us know. The M-plate on your bus may be interesting, too. It's up under the dash on the drivers side rivited onto the top of the fresh air vent. Hard to see, some use a crayon and take a rubbing. A bunch of numbers that can tell you a lot about your bus.
You have chrome bumpers, too.
|
|
| Back to top |
|
|
dugfresh
Samba Member

Joined: November 04, 2012
Posts: 651
Location: Seattle
|
| Posted: Sun Mar 16, 2014 10:28 pm Post subject: |
|
|
I have a 78 Riviera a well... Same stuck seat.. penetrating oil and lots of pushing with feet (stuart the destroyer) got it unstuck. Just get it started moving and it will get easier.
The fact that its a riviera makes it unique and different from the typical westies. The bulkhead is exactly the same as mine and many others. You'll probably have an early bar seat on the passenger side too.. The mcode will reveal a typical bus with portland delivery.
Welcome to riviera living! So chic 
_________________
78 Riviera
http://flic.kr/s/aHsjDRJPa1 |
|
| Back to top |
|
|
brandt
Samba Member
Joined: April 27, 2004
Posts: 364
Location: S. Utah
|
| Posted: Mon Mar 17, 2014 8:16 am Post subject: |
|
|
| Well, now that I think of it I have a buddy with a blue 78 Riviera and know of another in a junkyard. So Riviera had a deal to get blue busses direct in 78? |
|
| Back to top |
|
|
dugfresh
Samba Member
Joined: November 04, 2012
Posts: 651
Location: Seattle
|
| Posted: Mon Mar 17, 2014 9:17 am Post subject: |
|
|
My understanding.. is that a dealership in Portland couldn't keep westies on the shelf. Selling gangbusters. But in order to get another shipment of westies in, they had to sell all of their stock of every other type of bus. Panels, passengers.. etc... So, they came up with a scheme to get those buses out the door.. convert them All to campers. Some became pop tops, some became tin top campers. Either way they apparently had a good concept, because you see almost as many Rivis on the road in the PNW as you do Westies (ok... slight exageration)
But the result is a lot of odd bus combos out there. They came up with a lot of different interior options. They even would take your existing bus and convert it for you.
_________________
78 Riviera
http://flic.kr/s/aHsjDRJPa1 |
|
| Back to top |
|
|
DrKamikazi
Samba Member
Joined: March 03, 2013
Posts: 316
Location: Across North America
|
| Posted: Fri Mar 21, 2014 11:45 am Post subject: |
|
|
wow thanks for all the info, had no idea about the randomness of Rivieras. It does make sense as Ive been tearing into the interior and stuff. I only have sundays to work on it at the moment so I'll get the info from the mplate and stuff this weekend.
Also ill try the penetrating oil, I already took the back of the seat off thinking that this would make it easier to try to jar loose. Is that how you did yours dugfresh? |
|
| Back to top |
|
|
|


