| Author |
Message |
Tmiller3
Samba Member

Joined: June 12, 2014
Posts: 142
Location: Lone Tree

|
 Posted: Sat Jul 05, 2014 5:24 pm Post subject: Long Day Posted: Sat Jul 05, 2014 5:24 pm Post subject: Long Day |
 |
|
Ok. This is going to be a fairly long post. 
When my friend came over to work on the bus, our first order of business was to get the engine running. You can see the engine running on YouTube at this site:
https://www.youtube.com/watch?v=PvElelCjS7s&feature=youtu.be
The basic problem wasn't the carb but a wiring problem. I switched the two red wires in the ignition and that did the trick when it came down to the idle problem. Nice to have a new fuel pump and a cleaned out carb in the process however. So then came the issue of the fuel tank.
We knew we had to pull the engine in order to get the fuel tank switched out, but it was a bigger problem than I anticipated (as you probably saw from my previous posts). We finally were able to get the last bolt out, and pulled the engine.
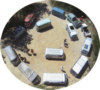
That was a good thing (took a lot of work, but a good thing nevertheless). I took the old fuel tank out (it reeked), and (attempted) to replace it with the tank I had purchased. One of the first things I noticed was that the new tank had the top hole opposite of the original. That did put it a bit closer to the wiring for the fuel gauge, so I didn't see this as a problem. But when we tried to put the 'new' fuel tank in, there was no way in the world it would fit. As you can see from these photos, it's got thing attached to it and a configuration that was NOT going to go with the 62 bus.
I have more pics if you'd like to see them in my gallery. However, after a great deal of cursing, I realized that a replacement tank WASN'T going to happen. However, my father-in-law left a 1/2 tank of gas as a surprise to me in the old tank. Needless to say, my neighbors will probably report me to the EPA considering the smell. It was gross to say the very least.
So now, I actually have a good problem. I have the engine out, and I get to clean from top to bottom the engine compartment as well as the engine itself. Certainly going to take a lot of paper towels and stuff, but it'll look better when I get the engine back in there.
So the moral of the story is that a lot of you were correct in telling me that the original parts were best, and whatever I can do to salvage the workable ones would be a good idea. 
If you'd like to look at some of the photos I've posted, please do so and give me some comments re: how the engine looks and what it needs, etc.... There are a lot of photos to post, so I'll be updating this tomorrow again.
By the way, my dog did not volunteer to help. |
|
| Back to top |
|
 |
Tmiller3
Samba Member
Joined: June 12, 2014
Posts: 142
Location: Lone Tree
|
| Posted: Sat Jul 05, 2014 5:32 pm Post subject: |
|
|
Hey, at least I'm pretty happy with how it cleaned up. Kudos to Tom and Scott for the advice the other day!
|
|
| Back to top |
|
|
scvw
Samba Member

Joined: September 02, 2006
Posts: 3544
Location: South Carolina
|
| Posted: Sat Jul 05, 2014 6:00 pm Post subject: |
|
|
I still think you will be pleasantly surprised with how well you can clean the tank up yourself. The outside of mine looked very much the same as yours. Here is mine and it's still OG paint and just required some light cleaning. It's about to be cleaned again while the motor is out.
_________________
58 Coral Red ragtop(Diana's car)
57 PG/SG standard
63 Ruby Red SC
SOUTHERN INTEGRITY AIRCOOLERS
WTB - Sigla popout glass like in my ad.
http://www.thesamba.com/vw/classifieds/detail.php?id=1667775 |
|
| Back to top |
|
|
zuggbug
Samba Member

Joined: June 17, 2008
Posts: 3479
Location: Anderson SC
|
| Posted: Sat Jul 05, 2014 7:33 pm Post subject: |
|
|
Outstanding work. The bus is looking stelar.
_________________
SOUTHERN INTEGRITY AIRCOOLERS
58 15 window
56 westy |
|
| Back to top |
|
|
wcfvw69 
Samba Purist

Joined: June 10, 2004
Posts: 13389
Location: Arizona
|
| Posted: Sat Jul 05, 2014 7:47 pm Post subject: |
|
|
Boy, that bus cleaned up nicely.
Looking at your pics today, that dent in your drivers side rear could be massaged out by a good paint less dent repairman. I'm not sure if you're familiar with them but you can see them doing un-believable dent repairs on youtube. What's nice about them is they are able to pop the dents w/out doing any damage to the original paint.
Have you looked inside the tank now that you've poured out the horrible, old fuel? Is it rusty or can you clean it your self, clean it up and re-install it?
_________________
Contact me at [email protected]
Follow me on instagram @sparxwerksllc
Decades of VW and VW parts restoration experience.
The Samba member since 2004.
**Now rebuilding throttle bodies for VW's and Porsche's**
**Restored German Bosch distributors for sale or I can restore yours**
**Restored German Pierburg fuel pumps for sale or I can restore yours**
**Restored Porsche fuel pumps or I can restore yours**
**Restored Porsche distributors or I can restore yours** |
|
| Back to top |
|
|
cru62
Samba Member

Joined: December 31, 2002
Posts: 4117
Location: Margaritaville.....24/7
|
| Posted: Sat Jul 05, 2014 8:04 pm Post subject: |
|
|
You asked what to do with the old, stinky gas in your tank. I had some in a tank that had been siting since 1987 'til 2012 when I removed the tank. It was like molasses. I put it in a squirt bottle, like for catsup and used it to start my fire pit in the winter. Since it was so old it was not nearly as volatile as new gas so it started slow. I don't think it would be a good idea to start charcoal for a cookout, however.
x2 on that dent being a job for a dent whisperer. I worked with a guy who had been awarded silver plated tools to be used on new BMWs that arrived on the East Coast with shipping damage. He removed a massive door dent in a buddy's black MB with absolutely no evidence that it had been worked. It was seriously like watching magic close up.
_________________
"My biggest worry is that when I die, my wife will sell all my parts for what I told her I paid for them"-Jon
Jokes about German sausage are the wurst.
Stop dead photo links! Post your photos to The Samba Gallery! |
|
| Back to top |
|
|
Braukuche
Samba Member
Joined: September 03, 2004
Posts: 10999
|
| Posted: Sat Jul 05, 2014 8:20 pm Post subject: |
|
|
Looking super nice. Any shots of the interior cleaned up?
_________________
Go Reds! Smash state!
Retirement is here!
1956 Ghia
1959 SO-23 Westfalia
1960 double cab
1960 Baja Bug
1963 stretched double cab
1962 Golde sunroof Ghia
1963 356 B coupe
1963 Notchback
1967 21 window less rusty now |
|
| Back to top |
|
|
Big Bill
Samba Member
Joined: June 21, 2005
Posts: 1782
Location: Santa Rosa, Ca
|
| Posted: Sun Jul 06, 2014 7:06 am Post subject: |
|
|
What a beautiful bus, and that it was your father-in- laws makes it even better. I was looking at your photos in the Gallery and noticed that yours has a 6 spring pressure plate over the clutch disk. I think a bus should have a 9 spring pressure plate,(I could be mistaken, hopefully some trans./clutch expert will chime in)and since the engine is out anyway you might want to check the clutch plate and the condition of your though out bearing. Easy to check and change now if needed, carry on you are doing a GREAT job.  |
|
| Back to top |
|
|
Tmiller3
Samba Member
Joined: June 12, 2014
Posts: 142
Location: Lone Tree
|
| Posted: Sun Jul 06, 2014 1:50 pm Post subject: |
|
|
I'm not sure about the clutch question, but I'll do a bit of research on it. Haven't heard from anyone about it either. I went to Wal Mart and bought a 5 gallon fuel tank and put the old 'gas' into it, so the old tank is just empty and awaiting me trying to figure out what to do with it. One thing at a time, I guess. Right now, I'll be cleaning up the engine compartment, and it's looking pretty good. I do have another question: I got my muffler from Douglas, and it arrived yesterday (thanks Douglas!). But in trying to put it on, even though it looks EXACTLY like the old one, it still won't quite fit. I'm having a hard time with the bottom two tubes fitting into it. Not to mention, these brackets were so rusted that there wasn't anything left of the bolt but rust. I need to know what these brackets are called, and whether I can restore them or just get a new set.
I'll post the pics of the ends of the muffler too, so you all can see what I'm seeing.
I also took some time this morning to clean up the engine a bit (light cleaning- and I covered all the of key component with plastic). Not bad.
|
|
| Back to top |
|
|
BarryL
Samba Member

Joined: November 01, 2004
Posts: 14258
Location: Casa de Oro, California
|
| Posted: Sun Jul 06, 2014 2:00 pm Post subject: |
|
|
| Tmiller3 wrote: |
| ... I'm having a hard time with the bottom two tubes fitting into it. Not to mention, these brackets were so rusted that there wasn't anything left of the bolt but rust. I need to know what these brackets are called, and whether I can restore them or just get a new set.. |
You need to remove the heaterbox forward end and put in a new gasket there. When you put all the muffler stuff on you would leave the forward heater box nuts loose to align to the muffler, if that is all that is wrong.
Throw all that rotten stuff away. There is a full kit with the whole intall gaskets and clamps available. Someone will link it up. Also get eight brass exhaust nuts that have the 11mm hex for your exhaust studs. |
|
| Back to top |
|
|
wcfvw69
Samba Purist
Joined: June 10, 2004
Posts: 13389
Location: Arizona
|
| Posted: Sun Jul 06, 2014 2:19 pm Post subject: |
|
|
As Barry mentioned, any classic VW shop will have those muffler clamps in stock. It comes in a kit. Wolfsburg West has them as well if you want to order them online.
A couple of thoughts while the engine is out-
* Change the rear main seal on the engine if you haven't already. I had my motor out of the car for 4 years during a restoration. When I put it back in, the rear main started leaking. It probably dried up from lack of lubrication. Man, I was pissed having to pull the motor out again to change it when I should of before I put it in. Check the clutch disk and pressure plate as well while they are off. You'd hate to have to immediately pull the engine again after all the work to install a new rear main seal that cost $5 bucks.
* Change the valve cover gaskets if you haven't already.
* See if your pre-heat tube is clear of carbon on the intake manifold. Often times they are clogged up and air won't go thru them. It's important to make that engine run smooth, especially in cooler climates like Denver.
* You should pull the fan shroud off and make sure no mice built nests on top of the cylinders. You can also make sure there's not a bunch of old grease or oil and dirt, clogging the fins passages that the air needs to go thru to cool them. You can then check the oil cooler as well. Might not be a bad idea to change the two oil cooler seals as well.
_________________
Contact me at [email protected]
Follow me on instagram @sparxwerksllc
Decades of VW and VW parts restoration experience.
The Samba member since 2004.
**Now rebuilding throttle bodies for VW's and Porsche's**
**Restored German Bosch distributors for sale or I can restore yours**
**Restored German Pierburg fuel pumps for sale or I can restore yours**
**Restored Porsche fuel pumps or I can restore yours**
**Restored Porsche distributors or I can restore yours** |
|
| Back to top |
|
|
Braukuche
Samba Member
Joined: September 03, 2004
Posts: 10999
|
| Posted: Sun Jul 06, 2014 2:45 pm Post subject: |
|
|
| wcfvw69 wrote: |
As Barry mentioned, any classic VW shop will have those muffler clamps in stock. It comes in a kit. Wolfsburg West has them as well if you want to order them online.
A couple of thoughts while the engine is out-
* Change the rear main seal on the engine if you haven't already. I had my motor out of the car for 4 years during a restoration. When I put it back in, the rear main started leaking. It probably dried up from lack of lubrication. Man, I was pissed having to pull the motor out again to change it when I should of before I put it in. Check the clutch disk and pressure plate as well while they are off. You'd hate to have to immediately pull the engine again after all the work to install a new rear main seal that cost $5 bucks.
* Change the valve cover gaskets if you haven't already.
* See if your pre-heat tube is clear of carbon on the intake manifold. Often times they are clogged up and air won't go thru them. It's important to make that engine run smooth, especially in cooler climates like Denver.
* You should pull the fan shroud off and make sure no mice built nests on top of the cylinders. You can also make sure there's not a bunch of old grease or oil and dirt, clogging the fins passages that the air needs to go thru to cool them. You can then check the oil cooler as well. Might not be a bad idea to change the two oil cooler seals as well. |
I would take it down to the long block and RR all seals and gaskets for that matter. Easier to do now than later.
_________________
Go Reds! Smash state!
Retirement is here!
1956 Ghia
1959 SO-23 Westfalia
1960 double cab
1960 Baja Bug
1963 stretched double cab
1962 Golde sunroof Ghia
1963 356 B coupe
1963 Notchback
1967 21 window less rusty now |
|
| Back to top |
|
|
GTV
Samba Member
Joined: March 27, 2004
Posts: 2084
Location: Si'ahl
|
| Posted: Sun Jul 06, 2014 3:52 pm Post subject: |
|
|
| BarryL wrote: |
| Also get eight brass exhaust nuts that have the 11mm hex for your exhaust studs. |
IMO, for a stock exhaust it is not necessary. The original nuts have worked for 50 years , they will probably work for 50 more. Besides, every detail needs to be correct on a bus as special as this.
You're doing a great job! Take your time, be methodical.
I've disposed of old fuel at an AutoZone or similar type store.
_________________
EMPI Power Rules! |
|
| Back to top |
|
|
Tmiller3
Samba Member
Joined: June 12, 2014
Posts: 142
Location: Lone Tree
|
| Posted: Sun Jul 06, 2014 5:36 pm Post subject: Engine compartment |
|
|
Thanks to all of you for the advice on the muffler. I didn't want to do any forcing of anything, and I figured something was amiss. I've been cleaning all day long in the engine compartment, and after going through a massive amount of paper towels and mega-sweat, I'm pretty pleased about how it turned out. Massive grease build-up over 20+ years in a farm garage can humble a guy, and I'm going to be sore tomorrow, but the results are nice. Nothing like a little manual labor to make you appreciate what you're trying to accomplish.
I'm going to a VW parts store tomorrow to try to return the old gas tank, though it's pretty dented now and even though I have the receipt, I wouldn't be surprised if they won't take it back. Oh well. Another lesson. I'm also going to give them the door handles and the engine lid hinge to get a small bit of welding done (as per my previous posts). I'll check into the muffler kit then.
I'm going to take a few shots tonight of the heater box(es) and see what y'all think. They're in pretty bad shape as well (rusty). |
|
| Back to top |
|
|
Tmiller3
Samba Member
Joined: June 12, 2014
Posts: 142
Location: Lone Tree
|
| Posted: Sun Jul 06, 2014 5:58 pm Post subject: Heater boxes |
|
|
Here are a few shots of the heater boxes from different angles. Tell me what you think.
Also, after the cleaning, and under all of that grease, was this:
Cool.
And, I got the link fixed to "public" on the YouTube video I posted for the engine test. It works now. I think. |
|
| Back to top |
|
|
wcfvw69
Samba Purist
Joined: June 10, 2004
Posts: 13389
Location: Arizona
|
| Posted: Sun Jul 06, 2014 6:24 pm Post subject: |
|
|
From what I can see of your heater boxes, I think they look fine. You can get some chemical rust remover that will take that surface rust right off. Then you can repaint them w/2000 degree spray paint. I used that paint on my heater boxes and it's held up well.
Those heater boxes need to stay with that engine/bus.
Nice work on the engine compartment clean up. It looks great.
_________________
Contact me at [email protected]
Follow me on instagram @sparxwerksllc
Decades of VW and VW parts restoration experience.
The Samba member since 2004.
**Now rebuilding throttle bodies for VW's and Porsche's**
**Restored German Bosch distributors for sale or I can restore yours**
**Restored German Pierburg fuel pumps for sale or I can restore yours**
**Restored Porsche fuel pumps or I can restore yours**
**Restored Porsche distributors or I can restore yours** |
|
| Back to top |
|
|
Eric&Barb
Samba Member

Joined: September 19, 2004
Posts: 24736
Location: Olympia Wash Rinse & Repeat
|
| Posted: Sun Jul 06, 2014 7:16 pm Post subject: |
|
|
| Braukuche wrote: |
I would take it down to the long block and RR all seals and gaskets for that matter. Easier to do now than later. |
Ditto, and retorque ALL the case and head fasteners in same amount and sequence as if you are building the engine. You will be surprised how all of those get so loose.
_________________
In Stereo, Where Available! |
|
| Back to top |
|
|
Z
Samba Member

Joined: June 15, 2003
Posts: 2517
Location: galveston, tx
|
| Posted: Sun Jul 06, 2014 7:33 pm Post subject: |
|
|
Looking really nice! Try to get the best muffler installation kit you can. Easy enough to change if you can only find the cheap ones...thats all a lot of places carry, but on some the clamps are really flimsy and the sealing rings don't really seal well.
Cleanup pics of your bus are awesome! |
|
| Back to top |
|
|
j.pickens
Samba Member
Joined: December 03, 2002
Posts: 9789
Location: Exit 7, New Jersey
|
| Posted: Sun Jul 06, 2014 11:07 pm Post subject: |
|
|
I would definitely pull the tin and rocker arms and retorque the head nuts. Also check the thermostat.
_________________
Founder and Chairman Emeritus, ECMSAS
BBX BBXII and BBXXI Long Distance Award Winner
| BeaterBarndoor wrote: |
i wish more people would actually drive their vws rather than just talking about what they have in the garage. |
| Red Fau Veh wrote: |
If you've seen one sunroof swivel seat kombi, you've seen them all!  |
|
|
| Back to top |
|
|
Tmiller3
Samba Member
Joined: June 12, 2014
Posts: 142
Location: Lone Tree
|
| Posted: Mon Jul 07, 2014 3:19 pm Post subject: 62 Gas tank issue solved |
|
|
| I am so pleased to announce that I have been able to locate here in Denver a shop that can take care of the original gasoline tank for the bus. I'll have it back in two weeks! Whew. And the shop where I purchased the replacement tank weeks ago took it back. So, overall, a very, very good day. Now I have a question. The original fuel sending unit is just as bad as the original tank itself. However, it physically (on the outside) looks o.k. Can this part be reconditioned somehow? If so, what's the procedure? I'm really psyched that I can use the original tank! |
|
| Back to top |
|
|
|


