| Author |
Message |
Bret2094
Samba Member

Joined: March 22, 2012
Posts: 665
Location: Linden, Texas or College Station Texas

|
 Posted: Sun Dec 07, 2014 11:31 pm Post subject: Posted: Sun Dec 07, 2014 11:31 pm Post subject: |
 |
|
| 57BLITZ wrote: |
| Yer spring plates WILL look twisted . . . untll you unbolt them from the axle tubes. It's very unlikely that they are bent! |
They seemed twisted more than normal, but upon removal, as you said the "twist" came out...for the most part but the bend i speak of did not. For some unknown reason the P/O bent the end that bolts to the tube almost at a 20 degree angle. I straightened it out. Today got cut short by a random call from a friend about a free complete westy (bay window). My 17 year old brother has been looking at getting into vw but has been wanting a Bus. Looks like i get to do some schooling pretty soon. Those pics will wind up here on a separate thread. Anyhow back to what i did accomplish.
Started cleaning the front beam up by soaking it in Gunk. Found the best way is to take a metal putty knife and scrape the surface before and after hitting the area with Gunk. Followed that cycle with a power washer set to high.
The gunk i used was found in our storage shed. Mom said it's been there since they build the storage building (former well house) back in 1988-1990 ish. Maybe this stuff ages good.
Couple improvement pics. Got it good enough that i can now sandblast the rest.
Started pulling the transmission. old style coupler doesnt seem that safe.
Before i pulled the trans, i drained the oil.......found some metal shavings(in the rag shown)
There were tons of pieces of this coiled wire looking thing connected to my magnetic drain plate. looks kinda like a mechanical pencil spring but it's not. Trans piece of some sort?
With the trans removed you can really see how the mount was cut out and moved down a couple inches. Someone said something about using a bus nosecone to accomidate the modern tranny in the split case mount? I would really like to move this mount back up to its original position in case i go back with a split case down the road.
Frame horn where you can see part of the heater cables sticking out
Man those trans mounts were shot!!
Another look at the rear of the frame.
I also removed the shifter, but forgot to take pics. I also got the frame moved outside to be wire brushed to bare metal tomorrow and prepped for paint. Gonna refrain from spring plate diss-assembly till the rust removal on the rest of the chassis is complete. Also would like to mention that there wasnt even a grounding strap connected to the transmission. make me wonder if they ever got this thing running after hacking up everything to make it run. Oh well, something else added to my list. Tomorrow i am going to track down some seals to rebuild my gear box when i go and get my new wire brush and chassis paint. Found a guide that seems to offer the size for the early gearbox seals. Not happy with just making do by packing it with grease. Here's the link...
http://tallerdelbug.blogspot.com/2012/02/type-1-steering-box-rebuild.html
Until Tomorrow Gents
Bret
_________________
1959 baja beetle ragtop( going back to Full body)
1959 beetle
1960 Beetle frame Custom buggy
1962 Karmann Ghia
1967 beetle( august 66, first car)
1967 beetle (parts car)
1977 Westfalia Camper
1972 Plymouth Duster
Just another 22 year old jackass who caught the bug, and lives by the motto " NO fatchicks allowed" , I've got too many cars as is (buses N/A) |
|
| Back to top |
|
 |
57BLITZ
Samba Member

Joined: June 12, 2012
Posts: 2385
Location: DEEK - U.S.A.
|
| Posted: Mon Dec 08, 2014 1:22 am Post subject: |
|
|
| Bret2094 wrote: |
Before i pulled the trans, i drained the oil.......found some metal shavings . . .
There were tons of pieces of this coiled wire looking thing connected to my magnetic drain plate. looks kinda like a mechanical pencil spring but it's not. Trans piece of some sort? |
It's probably from one of the gear oil "lip seals" in the transaxle.
And WOW . . . a free bus . . . the best kind! 
_________________
Jesucristo es mi Señor y Salvador! |
|
| Back to top |
|
|
Bret2094
Samba Member
Joined: March 22, 2012
Posts: 665
Location: Linden, Texas or College Station Texas
|
| Posted: Tue Dec 09, 2014 1:06 am Post subject: |
|
|
| 57BLITZ wrote: |
| Bret2094 wrote: |
Before i pulled the trans, i drained the oil.......found some metal shavings . . .
There were tons of pieces of this coiled wire looking thing connected to my magnetic drain plate. looks kinda like a mechanical pencil spring but it's not. Trans piece of some sort? |
It's probably from one of the gear oil "lip seals" in the transaxle.
And WOW . . . a free bus . . . the best kind! |
That's probably it! didn't even think of a seal spring!
Today got delayed again, but i did track down some POR-15 and my seals for my steering box. Also managed to start brushing doen the underside of my chassis.
Before
Midway
Frame Head bottom
The frame horns need some serious degreasing before i continue. Should have the frame, backing plates,tie rods(with new ends) front beam, and drums all cleaned/wirebrushed and ready for POR by monday. My hope is to have all of my hardware cleaned by then. Next up after that will be welding the pans up to the frame. Don't worry, i will be using a well ventilated area and only weld on weld through primer. the lip for the pan wont be getting the POR treatment. I hear that stuff is toxic when burned.
Oh and almost forgot about something i mentioned before
The shifter assembly
This is ddefenitely getting run through some solvent. don't think i've ever come across a clean one of these...ever..but then again i've only removed 5 others. 27mm impact socket did the trick wonderfully. I used to use a 27mm socket and a breaker bar with a cheater, but screw that. No shame in my harbor freight impact wrench...or the majority of my tools for that matter. This will be my last post till probably saturday. Other fish to fry
Bret
_________________
1959 baja beetle ragtop( going back to Full body)
1959 beetle
1960 Beetle frame Custom buggy
1962 Karmann Ghia
1967 beetle( august 66, first car)
1967 beetle (parts car)
1977 Westfalia Camper
1972 Plymouth Duster
Just another 22 year old jackass who caught the bug, and lives by the motto " NO fatchicks allowed" , I've got too many cars as is (buses N/A) |
|
| Back to top |
|
|
Bret2094
Samba Member
Joined: March 22, 2012
Posts: 665
Location: Linden, Texas or College Station Texas
|
| Posted: Thu Dec 11, 2014 12:12 pm Post subject: |
|
|
Didn't plan on updating anything today, but i was at walmart and picked up some groceries and decided to look for some resto stuff while there. Anyone guess what all of this is for?
Bret
_________________
1959 baja beetle ragtop( going back to Full body)
1959 beetle
1960 Beetle frame Custom buggy
1962 Karmann Ghia
1967 beetle( august 66, first car)
1967 beetle (parts car)
1977 Westfalia Camper
1972 Plymouth Duster
Just another 22 year old jackass who caught the bug, and lives by the motto " NO fatchicks allowed" , I've got too many cars as is (buses N/A) |
|
| Back to top |
|
|
Dauz
Samba Member

Joined: January 05, 2010
Posts: 1790
|
| Posted: Thu Dec 11, 2014 12:28 pm Post subject: |
|
|
| /ˌflamˈboi(y)ənt/ |
|
| Back to top |
|
|
Bret2094
Samba Member
Joined: March 22, 2012
Posts: 665
Location: Linden, Texas or College Station Texas
|
| Posted: Thu Dec 11, 2014 12:38 pm Post subject: |
|
|
| Dauz wrote: |
| /ˌflamˈboi(y)ənt/ |
Hold on...I think he's trying to speak to us.where's my translation book? Lol
Bret
_________________
1959 baja beetle ragtop( going back to Full body)
1959 beetle
1960 Beetle frame Custom buggy
1962 Karmann Ghia
1967 beetle( august 66, first car)
1967 beetle (parts car)
1977 Westfalia Camper
1972 Plymouth Duster
Just another 22 year old jackass who caught the bug, and lives by the motto " NO fatchicks allowed" , I've got too many cars as is (buses N/A) |
|
| Back to top |
|
|
Bret2094
Samba Member
Joined: March 22, 2012
Posts: 665
Location: Linden, Texas or College Station Texas
|
| Posted: Thu Dec 11, 2014 2:59 pm Post subject: |
|
|
All of that stuff is for steering wheel resto. Also Saturday morning i will be picking up this engine for the carb, intake and possibly heads. Does that look like a 010 to yall? I couldn't get the seller to provide a better pic of it but i did get an engine # of 2744174. It's meant for a 59 but i'll be using my original case. might use some other pieces, but for the most part i'll have a spare pump and various other pieces. between the intake and carb i already own, plus this new stuff, I should be able to create my vintage speed dual carb setup, minus linkage. Is there a tutorial i can stash away to use for making a dual carb linkage/ where could i buy one?
Man , it's hard to imagine all ive got done, and I only have had these since late July.
Bret
_________________
1959 baja beetle ragtop( going back to Full body)
1959 beetle
1960 Beetle frame Custom buggy
1962 Karmann Ghia
1967 beetle( august 66, first car)
1967 beetle (parts car)
1977 Westfalia Camper
1972 Plymouth Duster
Just another 22 year old jackass who caught the bug, and lives by the motto " NO fatchicks allowed" , I've got too many cars as is (buses N/A) |
|
| Back to top |
|
|
henry roberts
Samba Member
Joined: February 24, 2003
Posts: 1275
Location: australia
|
| Posted: Sat Dec 13, 2014 1:13 am Post subject: |
|
|
to me the distributor looks like a normal VJU4 BR8 missing it's vacuum can. they are a little taller in the body to allow for the twin plates for the vacuum mech. back in the day some people used to modify them to make them function like a VJ4 BR8 (019) by removing the vacuum can and brazing the two plates together. (the advance weights are the same for both)
I don't think there is a full how to anywhere, but there are good threads in the vintage speed forum, that should point you in the right direction.
edit. this thread is a good start: http://www.thesamba.com/vw/forum/viewtopic.php?t=326666&postdays=0&postorder=asc&start=0
as far as manifolds and linkages your options for a full kit are limited to what ever you can find second hand or a reichert kit. http://www.riechertmotorentechnik.de/
at least 2 members on here sell manifolds (with out linkages, carbs or aircleaners):
bengt h makes manifolds for solex 32 PBI type carbs
and
welt makes manifolds for solex 28 PCI's at a decent price.
there was also another member in the US repro'ing another partial kit but I can't see it advertised anymore... anyone remember who that was?
as far as carbs:
28 PCI's are everywhere, 32 and 34PCI's are out there too, if you can find them. the throttle shafts run across the carb
32 PBI types: WW repro's (quality?), OG Porsche (expensive), French made variations (Peugeot, simca, etc, some more suitable than others looks wise, not sure about functionality) and British made variations (mk1 landrover, not sure if they work well or not). the throttle shafts run along the length of the carb
riechart also does linkage parts and aircleaners.
the WW okrasa linkages might be able to be made to work with PBI type carbs on bengt's manifolds
the WW aircleaners would work for either carb type
http://www.thesamba.com/vw/classifieds/detail.php?id=601970 should work for both solex types.
or of course twin stock air cleaners.
as far as other carbs you are only limited by your imagination and how good you are at setting them up. there were kits sold in australia for vw's that used twin SU's (sidedraft) and twin single throat Zenith's (downdraft), plus of course the EMPI/speedwell kits that ran twin Stromberg's (sidedraft).
I hope this helps.
Last edited by henry roberts on Sat Dec 13, 2014 5:25 pm; edited 2 times in total |
|
| Back to top |
|
|
sportin-wood
Samba Member

Joined: September 12, 2010
Posts: 2008
Location: Texas
|
| Posted: Sat Dec 13, 2014 6:52 am Post subject: |
|
|
Cool thread. This fellow Texan will be following the progress!
Got any pics of the other VWs you acquired in the deal??
_________________
.
Paused 66 project bug
.
"Relax, all right? My old man is a television repairman. He's got this ultimate set of tools. I can fix it." --- Jeff Spicoli |
|
| Back to top |
|
|
Bret2094
Samba Member
Joined: March 22, 2012
Posts: 665
Location: Linden, Texas or College Station Texas
|
| Posted: Sun Dec 14, 2014 10:04 pm Post subject: |
|
|
Thanks Henry! Lol i went and picked up that engine, and boy I am kinda scratching my head now. the engine was locked up, which is fine by me. The perplexing bit is that after removing the tinware, i notices that almost all of the studs were out of the case and that the left side of the engine was trying to come off with the head....and all of the pushrods were missing, but the tubes were there. Not mad, as i got this for parts, but sadning no less. got way more than 75 bucks in parts off it, and i havent even split the case yet Wound up paying 75 bucks, and you are right, the vacuum canister is missing. Might do that mechanical convert you talked about. As far as the carb setup, i will be running dual 28 Pci's , with my own manifolds made from the stock ones, just looking for the right linkage setup. gonna run stock air cleaners as well. Thanks for the info! Gonna put up pics of my steering wheel resto soon. Frame pics tomorrow as well
Bret
_________________
1959 baja beetle ragtop( going back to Full body)
1959 beetle
1960 Beetle frame Custom buggy
1962 Karmann Ghia
1967 beetle( august 66, first car)
1967 beetle (parts car)
1977 Westfalia Camper
1972 Plymouth Duster
Just another 22 year old jackass who caught the bug, and lives by the motto " NO fatchicks allowed" , I've got too many cars as is (buses N/A) |
|
| Back to top |
|
|
Bret2094
Samba Member
Joined: March 22, 2012
Posts: 665
Location: Linden, Texas or College Station Texas
|
| Posted: Sun Dec 14, 2014 10:06 pm Post subject: |
|
|
| sportin-wood wrote: |
Cool thread. This fellow Texan will be following the progress!
Got any pics of the other VWs you acquired in the deal?? |
Yea, of the other 59......look at my classified add... I hate to say it, but i honestly just put a crazy price hoping to fund this project....Attempt to flip is a no go tbh. You can kinda see the ghia in the back, but it's toast as well
Bret
_________________
1959 baja beetle ragtop( going back to Full body)
1959 beetle
1960 Beetle frame Custom buggy
1962 Karmann Ghia
1967 beetle( august 66, first car)
1967 beetle (parts car)
1977 Westfalia Camper
1972 Plymouth Duster
Just another 22 year old jackass who caught the bug, and lives by the motto " NO fatchicks allowed" , I've got too many cars as is (buses N/A) |
|
| Back to top |
|
|
Bret2094
Samba Member
Joined: March 22, 2012
Posts: 665
Location: Linden, Texas or College Station Texas
|
| Posted: Sun Dec 14, 2014 11:29 pm Post subject: |
|
|
For those interested in restoring their steering wheel in the future, here's the order to do things
1. get some 60 grit sandpaper and clean the entire area apart from ribs and intricate parts of the wheel down to a smooth finish
2. treat ribs with 220 grit paper
3. fill in any missing areas with loctite epoxy putty
4. allow putty to dry for suggested time on box, and then sand down excess to match curvature of the wheel.
5. clean with a moist rag
6. apply JB weld to all fine cracked areas. ( i covered the entire steering wheel as my whole wheel was fucked up)
7. allow JB weld to dry overnight
8. sand jb weld smooth as necesary.
9. repeat 6-8 untill steering wheel is completely smooth
10. shoot with primer to check for more cracks only seen under paint
11.after areas are smoothened out, hit with primer again
12. allow to dry and then paint 2-3 layers of Almond Rustoleum paint
13. allow to cure for a day before spraying 2-3 coats of clear coat paint
14 admire your new jewel
assembly removed from car
whole section missing from wheel
side view with crack shown along grip
more cracks
sample of a sanded area
Putty worked into the wheel(excess to be trimmed later)
Same area that was missing before, now after sanding
Seam that was falling apart
Covered in JB weld. I used my fingers, but there's gotta be a less messy way.
Haven't gotten to the paint yet, many more cracks to fix, but now i can actually grip the wheel without it crumbling into little pieces
Enjoy!
Bret
_________________
1959 baja beetle ragtop( going back to Full body)
1959 beetle
1960 Beetle frame Custom buggy
1962 Karmann Ghia
1967 beetle( august 66, first car)
1967 beetle (parts car)
1977 Westfalia Camper
1972 Plymouth Duster
Just another 22 year old jackass who caught the bug, and lives by the motto " NO fatchicks allowed" , I've got too many cars as is (buses N/A)
Last edited by Bret2094 on Mon Dec 15, 2014 5:04 pm; edited 1 time in total |
|
| Back to top |
|
|
Bret2094
Samba Member
Joined: March 22, 2012
Posts: 665
Location: Linden, Texas or College Station Texas
|
| Posted: Mon Dec 15, 2014 4:48 pm Post subject: |
|
|
Major improvement today, got the frame and front beam cleaned and covered in POR-15. I would have taken pics of the cleaning process, but i was afraid i would run out of time before it got dark(supposed to be cold and nasty starting tomorrow afternoon). Wound up forgetting to prep my lip for the pans with tape....so Now i'll have to deal with removing it along where im gonna weld(nightmare). Still a pretty good day
The steps i took to clean the chassis were as follows:
1. wire brush entire surface until all remaining paint and rust scale were gone
2. power washed the surface until visibly clean
3. used an SOS pad to remove any oil residue from surface
4. power washed again
5. dried the surface with shop towels
6. Used 60 grit sandpaper on a 4-1/2 inch orbital sander throughout the chassis to give an extra tooth for the POR to stick to
7. Used 4 foam brushes to apply POR to the surface(2 large for big flat areas and 2 small ones for crevices)
Here's some pics of the finished product
front beam
Only wound up using a fourth of a can. Another coat is in the plan, but I'm not sure when that will happen
Bret
_________________
1959 baja beetle ragtop( going back to Full body)
1959 beetle
1960 Beetle frame Custom buggy
1962 Karmann Ghia
1967 beetle( august 66, first car)
1967 beetle (parts car)
1977 Westfalia Camper
1972 Plymouth Duster
Just another 22 year old jackass who caught the bug, and lives by the motto " NO fatchicks allowed" , I've got too many cars as is (buses N/A) |
|
| Back to top |
|
|
Bret2094
Samba Member
Joined: March 22, 2012
Posts: 665
Location: Linden, Texas or College Station Texas
|
| Posted: Wed Dec 17, 2014 8:21 pm Post subject: |
|
|
Update:
spent the day cleaning my drums and backing plates. I removed my front adjusters easily from the housing, but my rear ones are stuck in good, even after soaking for 3 days in a chem dip. Sprayed em with penetrating oil, but so far no luck. Suggestions? I could use heat, but i'm trying to avoid that currently. Tomorrow's goal is to defunkify my tranny and get the axle tubes cleaned for paint, as well as make the required bearing puller. Pics to come soon
Bret
_________________
1959 baja beetle ragtop( going back to Full body)
1959 beetle
1960 Beetle frame Custom buggy
1962 Karmann Ghia
1967 beetle( august 66, first car)
1967 beetle (parts car)
1977 Westfalia Camper
1972 Plymouth Duster
Just another 22 year old jackass who caught the bug, and lives by the motto " NO fatchicks allowed" , I've got too many cars as is (buses N/A) |
|
| Back to top |
|
|
henry roberts
Samba Member
Joined: February 24, 2003
Posts: 1275
Location: australia
|
|
| Back to top |
|
|
Bret2094
Samba Member
Joined: March 22, 2012
Posts: 665
Location: Linden, Texas or College Station Texas
|
| Posted: Sat Dec 20, 2014 7:26 pm Post subject: |
|
|
hehehe thanks, i've got a month from today to get as much done before the spring semester kicks off. I actually hadn't seen those threads before, but i like the idea of not running a balance tube. Ive got a ton of stuff to order tomorrow. By the time it gets here from WW i'll actually have the time to use it all. Forgot to mention earlier for those who haven't done something this in depth, or start off with so much shit, when you have the chassis down this far, running the powerwasher through the center tube makes life 10000000% easier. Flip the frame upside down and put the rear end up higher than the front. I crammed the washer in the rear hole where the tranny goes in and shot till clear water came out the e brake hole and front access panel.(had to stop and pull clumps of crap out of the holes from time to time) If you have all of the access covers and seals present, you might get lucky and not have any junk in the tube, but mine was full of rat nests , leaves and red clay. Back to it tomorrow, after pulling my bus tranny and engine
oh here's my order list..... plus my heater channels and fuel line, which is toast...yaaay. gonna be glad to finish the lower half of the car up and get back to the body.....eventually
FRONT SEAT RUBBER STOP x2
SHIFT LEVER BOOT
HEATER CABLE SEALS x2
STEERING BOX LOCK PLATE
STEERING COLUMN RUBBER GROMMET,
Transmission mounts rear
STEERING COUPLER LOCK PLATE
NOSE CONE TO CHASSIS SEAL
TRANSMISSION GASKET SET
HEATER CABLE
METAL BRAKE LINE RUBBER GROMMET x3
HEATER CONTROL KNOB, ivory
HEATER KNOB ROLL PIN x2
TORSION ARM SEAL x4
RUBBER BOOT, seals choke (if applicable) accelerator, and clutch cables
INSPECTION COVER SEAL
LOCK PLATE KIT,
AXLE NUT, hex nut, through 1965 Bug, left x2
AXLE NUT, hex nut, through 1965 Bug, right x2
EMERGENCY BRAKE LEVER CLIP x4
CHOKE CABLE
WHEEL BEARING THRUST WASHER x2
STEERING KNUCKLE LOCK PLATE x2
GROUND STRAP, steering column
BRAKE PEDAL STOP PLATEx2
GAS CAP GASKET, fits 70mm gas cap, made of hexane/benzene resistant material
GAS CAP GASKET, cork, fits 80mm cap
SEAL, tank to body, fiber style, fits through 1960
FUEL LINE, metal, 6mm, fuel pump to carburetor
FUEL LINE, metal, 6mm, chassis to fuel pump
Fuel Line Grommet
FUEL LINE TO CHASSIS GROMMET x2
(note some of this is for my 67 ex 70 mm gas tank gasket)
Bret
_________________
1959 baja beetle ragtop( going back to Full body)
1959 beetle
1960 Beetle frame Custom buggy
1962 Karmann Ghia
1967 beetle( august 66, first car)
1967 beetle (parts car)
1977 Westfalia Camper
1972 Plymouth Duster
Just another 22 year old jackass who caught the bug, and lives by the motto " NO fatchicks allowed" , I've got too many cars as is (buses N/A) |
|
| Back to top |
|
|
Bret2094
Samba Member
Joined: March 22, 2012
Posts: 665
Location: Linden, Texas or College Station Texas
|
| Posted: Wed Dec 24, 2014 8:47 pm Post subject: |
|
|
Well it's been cold outside so ive been inside helping out with the holiday junk so for the most part when i've been outside it's been to work on my bus, but i did manage to mock up a better bracing system for heater channel and chassis support replacement.
I spent a couple days hauling scrap off from the house for a couple $$ and came across this old feeder laying out in the woods half buried and decided that it would be recycled at home. The legs were cut up in to appropriate lengths with a metal saw.
Note these are just mocked up, I have yet to drill holes to the angle iron so that they will be secured down, yet reusable. I also have some sections for the doors to be put in at an angle, but forgot to add a pic.
Everything else has been done inside, including carb and fuel pump cleaning. I dissassembled these without a camera in hand, but most get how that looks
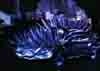
This chem dip stuff in nifty, cleans stuff right up. notice the dual 28 pci's
I went ahead and cleaned the other fuel pump, and saw some slight differences in the pumps. as i got to looking there are some slight differences in the carbs as well
This is the top of the pump that came off the car i have
This is the top of the pump from the donor engine. It had an extra screw on the top of it. What was that for? Both cases are 59's and i was curious if there was a change in pumps mid year . or a PO put whatever on either engine
the bottom of the pumps are even different, the one on the bottom is stamped made in germany, while the other doesnt have a marking..hmmm
My original carb
gotta get a new accelerator pump spring
Started taking the other carb apart, and it's missing the choke spring. Always somethin i guess
Closeup of the hardware removed
Doesn't look like much, but ive spent a ton of time on this stuff. Oh and i just picked up a huge load of free vw stuff. on a block that i got in the load, look what was on a 40 horse
I think i'll be using this hehehe
After xmas is done, imma be onto welding the pans up. gonna need them in so ican do heater channel replacement when my order gets here around the 5th of Jan
Happy holidays!
Bret
_________________
1959 baja beetle ragtop( going back to Full body)
1959 beetle
1960 Beetle frame Custom buggy
1962 Karmann Ghia
1967 beetle( august 66, first car)
1967 beetle (parts car)
1977 Westfalia Camper
1972 Plymouth Duster
Just another 22 year old jackass who caught the bug, and lives by the motto " NO fatchicks allowed" , I've got too many cars as is (buses N/A) |
|
| Back to top |
|
|
Bret2094
Samba Member
Joined: March 22, 2012
Posts: 665
Location: Linden, Texas or College Station Texas
|
| Posted: Sun Dec 28, 2014 8:57 pm Post subject: |
|
|
Well Christmas was a sucess, everybody at the house had a ton of fun, and i would like to point out that my mother was on point with the gifts she got everyone, including myself. ( I really dont deserve such kindness). She bought a clutch alignment tool, snapring pliers, an air chisel,and.....these bad boys
Now i already had an oil pump puller, but i wasnt gonna tell her that, so i modified it to fit 36 horse pumps by shortening the puller on each end with a grinder
If you look at my previous pictures, you will see that the old brake lines were still clinging on for dear life, well not anymore! My new air chisel took em off in seconds without damaging anything. I did the brakes a while back on my 1960 buggy, and swore to never fuck with those cips again. Major Pain.
some random stuff i just took off the chassis. brake lines, bowden tube..etc
afterwards, tonight i cleaned off my pan lip in preparation for tomorrow's welding frenzy, and i covered the bare metal with masking tape to keep surface rust off of everything, just incase i dont get around to it tomorrow
Decided since i was this far, i should try and clean up my shift rod, as well as change out my frozen choke cable......the rod came out, the cable...not so much
Not sure if you can make it out, but most of it snapped at this end
Now....The engine...what a pile of worms. Some of this is self inflicted, while the rest is P/O induced crap, so bear with me. Back this summer i got mad at it and decided to but it in a corner for time out.I started to remove the flywheel, but it started to turn a little on its own...strange..so i put a flywheel lock on it before putting any real pressure down on the gland nut. (someone had tried to remove it before, because it was scarred up)
After further inspection
YAAAAAAAAAAAAY! all the dowels just fell out when i removed the flywheel...looks toast. I bet someone tried to push start this baby after it locked up. Only kinda force i could think of that would do this
Now the crank..
Same....blehhhh. I'm glad i have that spare engine now for parts.
After that little treat, I thought hmm i guess ill just pull the crankshaft pully next...oh boy. Now i had read that using a 3 arm pully is a bad idea because it could warp the pully when removing it, but as a 20 year old jackass, i kinda didnt pay attention to that, as i had pulled many pulleys in the past without a hitch. I guess some lessons have to be self learned
Looks like an accordion now......But wait the fun continues!
I finally decided , after heavy soaking of atf/acetone and kroil that i would just cut around the pistons on the 3&4 side and remove em that way, so i could split the case. This plan worked well, and i split the case in a couple hours, but upon inspection, i really goofed
If you look at the bell housing , you can see where my grinder nicked the housing ( didnt go all the way through, but made me mad at myself none the less) The second mistake is on the pushrod tube inlet, you can see the shiny metal where i hit the edge and broke off the lip a tad. There is still enough good surface for the pushrod tube seal to do its job, but between these two i started kicking myself a bit, but hell the engine is open! I have a ton of patience, but it finally ran out on this part of the project, and i paid the price.
I still have to adress the partial liner in my case, and the 3&4 P&C's still frozen up, but i at least feel better about myself 
I'll Be back to it tomorrow, hopefully with construction instead of destruction. Apparently i'm up to like 7k views, so thanks to whoever you are! Don't get too mad at my recent goofs, i'm only human!
Until tomorrow,
Bret
_________________
1959 baja beetle ragtop( going back to Full body)
1959 beetle
1960 Beetle frame Custom buggy
1962 Karmann Ghia
1967 beetle( august 66, first car)
1967 beetle (parts car)
1977 Westfalia Camper
1972 Plymouth Duster
Just another 22 year old jackass who caught the bug, and lives by the motto " NO fatchicks allowed" , I've got too many cars as is (buses N/A) |
|
| Back to top |
|
|
Fifty-Eight Rag
Samba Member

Joined: September 07, 2011
Posts: 936
Location: St. Louis, MO
|
|
| Back to top |
|
|
Bret2094
Samba Member
Joined: March 22, 2012
Posts: 665
Location: Linden, Texas or College Station Texas
|
| Posted: Mon Dec 29, 2014 7:48 pm Post subject: |
|
|
| Fifty-Eight Rag wrote: |
| caleb0101 wrote: |
| Bret2094 wrote: |
This gecko/lizard was stuck in the passenger front drum brake
Bret |
Looks yummy! I read that mummified lizard tastes like beef.
Great thread, I can't wait to see it done! |
Beef Jerky to be exact  |
It was so crunchy that the dogs wouldnt do more than sniff it a bit. I went to town to buy weld through primer today, but had to wind up ordering a can...it wont be here till thursday, so i moved on to cleaning drums and backing plated some more. More pics to be uploaded tomorrow, when i'm not so damn tired
Cheers!
Bret
_________________
1959 baja beetle ragtop( going back to Full body)
1959 beetle
1960 Beetle frame Custom buggy
1962 Karmann Ghia
1967 beetle( august 66, first car)
1967 beetle (parts car)
1977 Westfalia Camper
1972 Plymouth Duster
Just another 22 year old jackass who caught the bug, and lives by the motto " NO fatchicks allowed" , I've got too many cars as is (buses N/A) |
|
| Back to top |
|
|
|


