| Author |
Message |
TheLadyBug
Samba Member

Joined: August 17, 2014
Posts: 639
Location: Saskatoon, Saskatchewan, Canada

|
 Posted: Mon May 11, 2015 3:01 pm Post subject: Posted: Mon May 11, 2015 3:01 pm Post subject: |
 |
|
My birthday presents came a little early. In the past two weeks or so, I've been able to find some things local or very close to home which helps! This leaves me needing only the engine tin, heater boxes and sleds. I have my late oval stuff but am on the hunt for correct stuff. I have a pile again of things to get powder coated. Seems like a never ending thing. I don't know if I should chance breaking the regulator cap tabs and powder coat it, or just paint it insitu the correct black color.
So I was allowed to go in the garage for a couple hours today and this picture sums up my happiness.
Yes, that's the accelerator cable and choke cable now in their tubes. Also clutch, and e-brake cables! I ended having to ream the choke tube with the fish tape attached to the drill. I figured out that it was a tightened area at the e-brake spot that prevented the choke's sheath to go through. The thin, exposed coil would but no amount of lubrication would let the sheath past. Reaming with overhead door cable on a drill was not enough to clear it.
Also got brake plates on, just need to torque them to spec. Note the DORN and KAMAX markings on the fasteners 
Next on my list is figure out how the races and bearings go on, and install the drums.
Also, I need to powder coat the front/inspection cover parts of the e-brake mechanism. Once I get the gear shift rod and e-brake rod cleaned up and painted, I'll put those in and maybe get the beam installed on the pan. It's so nice that the car is taking up less and less space, as things go back together 
Lastly, our garage cabinets/counter/workspace arrived and my boys got me a cool die cut sign for the wall for Mother's Day.
_________________
Charmaine
-------------
1954 Beetle - because I can
2016 Golf highline - hubbys daily
2016 Golf R - my daily |
|
| Back to top |
|
 |
TheLadyBug
Samba Member
Joined: August 17, 2014
Posts: 639
Location: Saskatoon, Saskatchewan, Canada
|
| Posted: Fri Jun 12, 2015 8:37 pm Post subject: |
|
|
Haven't posted an update in a while cause my little guy turned one... So I had to go back to work! 
Anyway, finally got a chance after reading and reading... To put the bearing races in the drum. Still have to figure out how the grease seal goes on and how to properly install the bearings but I *think* I got it. Any suggestions or tips are welcome! 
I cleaned up the e-brake cover and hardware. I'll do some reading later and see how that goes back together.
If there's one thing I've figured out, is that assembly is taking a long time because it takes me 3 times as long to read about and understand the procedure than it actually takes me to do it. And the time it takes me to actually do it is about 3 times longer than the next person. Oh well! Learning lots.
I have a few chips on my brake plates and drums from assembly. I'll see about touching them up. Disappointing, but I expected it to happen.
_________________
Charmaine
-------------
1954 Beetle - because I can
2016 Golf highline - hubbys daily
2016 Golf R - my daily |
|
| Back to top |
|
|
TheLadyBug
Samba Member
Joined: August 17, 2014
Posts: 639
Location: Saskatoon, Saskatchewan, Canada
|
| Posted: Sat Jun 13, 2015 8:19 pm Post subject: |
|
|
Went through some photos and realized I was missing this piece that's in my hand for the e-brake.  
I've just spent the past 2 hours looking for it. I found it... In a place I had already looked. Oh, they joys of being meticulous and STILL losing stuff.
Then, I look in my brake-parts-box and have only one of these... When I know I had two powder coated. I'm gonna blame small fingers for this part going missing. Where it is... Is beyond me. The little guy is notorious for hiding things as there's a few household things he stole months ago that haven't turned up. Good thing I my transmission is a ways away from being done and won't need them awhile.
Today I torqued the brake plates to the spindles and ran galvanized steel wire through them to keep them from turning.
I found my outboard wheel bearings and will clean them, and hopefully get to packing them and getting the drums on in the next bit. Any recommendations for a solvent to clean them that works best for you?
Also - now that I've noted the speedo cable hole in the driver's side dust cap, I'm wondering HOW exactly the speedo cable works. Can anyone explain it to me? I understand it clips to the dust cap.. but how exactly does it read your speed?
My to do list - clean and install front inner/outer bearings/drums. I got the races in yesterday night.
Assemble pedal cluster and bolt on.
Begin tackling e-brake handle and assembly which means beginning to tackle the ivory painted metal components of the interior.
Also to mention - my hubby just did a bunch of work to our cabby, including new suspension. He noted we needed new brake hoses and had contacted the company they were from to inquire why they looked so worn after only 3 years. The next day, the brake hose failed when I was on the highway and my brakes... Well... They didn't brake. Brake pedal floppy. Luckily I got home safe by downshifting and using the e-brake. I good lesson in being extra cautious when assembling the brake components!
_________________
Charmaine
-------------
1954 Beetle - because I can
2016 Golf highline - hubbys daily
2016 Golf R - my daily |
|
| Back to top |
|
|
trh351
Samba Member
Joined: January 15, 2015
Posts: 30
Location: Wichita
|
| Posted: Sun Jun 14, 2015 8:44 am Post subject: |
|
|
Most standard mechanical speedometers work the same. The have a few moving parts, the speedometer cable, magnet, speed cup, hair spring, pointer, and the one part that doesn't move the dial. The speedometer cable, powered by the most cars transmission output shafts or in the case of your Beetle the front wheel. The cable spins a magnet around at the same speed inside the speed cup. The magnet rotates continually in the same direction. The spinning magnet creates eddy currents in the speed cup. The eddy currents make the speed cup rotate counter-clockwise as well in an attempt to catch up with the magnet. Remember that the magnet and the speed cup are not joined together in any waythere's air in between them. The hair spring tightens, restraining the speed cup so it can turn only a little way. As the speed cup turns, it turns the pointer up the dial, indicating the car's speed.
|
|
| Back to top |
|
|
TheLadyBug
Samba Member
Joined: August 17, 2014
Posts: 639
Location: Saskatoon, Saskatchewan, Canada
|
| Posted: Tue Jun 16, 2015 8:02 pm Post subject: |
|
|
Thank you! That explains it nicely!
So, as with all things, parts come in waves.
Today I picked up another intake manifold as mine was shot. Also got my paws on a '54 carb that just has the 'solex' script and not the 28 PICT, as well as a 54 generator, fan and a round regulator core. Also on their way to me is the cylinder head tin, and some firewall sheet metal from Klassicfab.
My dad has agreed to come help me install the drums as I understand packing the bearings... I would prefer skilled hand to help with the 2 nuts and lock washer so I get the right tension on the bearing.
I've done some inquiring about paint... If, hypothetically speaking of course... I wanted to purchase some L271 ultramaroon single stage paint. Where would I buy it? I know we've had this discussion before but I'm really not wanting to 'paint match'. I want the real paint.
Also. What is the paint code for the early deluxe oval interior metal? The ivory color?
_________________
Charmaine
-------------
1954 Beetle - because I can
2016 Golf highline - hubbys daily
2016 Golf R - my daily |
|
| Back to top |
|
|
nlorntson
Crazy VW Lady

Joined: March 13, 2004
Posts: 3783
Location: Twin Cities, MN
|
| Posted: Wed Jun 17, 2015 7:07 am Post subject: |
|
|
| TheLadyBug wrote: |
| What is the paint code for the early deluxe oval interior metal? The ivory color? |
L75 Light Beige for interior items is my understanding. |
|
| Back to top |
|
|
TheLadyBug
Samba Member
Joined: August 17, 2014
Posts: 639
Location: Saskatoon, Saskatchewan, Canada
|
| Posted: Mon Jun 22, 2015 9:03 pm Post subject: |
|
|
| nlorntson wrote: |
| TheLadyBug wrote: |
| What is the paint code for the early deluxe oval interior metal? The ivory color? |
L75 Light Beige for interior items is my understanding. |
Thanks! Now how to duplicate it with water borne paint  
Got some parts this week. I've got near all the correct early '54 parts to make my engine correct.
This arrived today... And I was surprised the cylinder head tin is so similar to the later years. The details, right? here's a couple comparison pics. Ironically, I got the 1-2 side from a guy named Mike who lives in Illinois. I have the 3-4 side coming from another guy named Mike in a different part of Illinois. Makes you wonder if they aren't actually a matched pair. The back plate is also on its way. Just needing the sleds, heater control boxes and breastplate.
Then these arrived yesterday, to deal with the little bits of swiss cheese that appeared in the lower inner firewall when she was blasted. Gotta love the Klassicfab green. I had wanted the large firewall piece that Klassicfab sells but they don't ship to Canada, and my local shop says they've been having a hard time getting shipments from them. So two small pieces it has to be as that's all my local shop had available. Klassicfab also didn't respond to any of my emails inquiring about shipping to Canada. 
And lastly, my 54 generator and carb. I now have a spare round regulator as well, without the cap. And hopefully this manifold I picked up doesn't fail the leak test like the last one!
Looking for info on the correct tool roll for under the hood, correct jack, and still needing the driver's side vent window frame with pivot arm. I've kinda enjoyed the scour for parts and the ability to say that I've collected pieces from all over the world.
_________________
Charmaine
-------------
1954 Beetle - because I can
2016 Golf highline - hubbys daily
2016 Golf R - my daily |
|
| Back to top |
|
|
Trevor P
Samba Member

Joined: January 21, 2004
Posts: 863
Location: Saskatoon, SK, Canada
|
| Posted: Mon Jun 22, 2015 10:26 pm Post subject: |
|
|
You don't have to worry about using water borne paint on the interior ivory bits. Use single stage U tech. Easy peasy.
_________________
53 Canadian standard oval
56 Wolfsburg PG/SG
57 Oval, 2332 & Berg 5
70 911T
91 Westy |
|
| Back to top |
|
|
TheLadyBug
Samba Member
Joined: August 17, 2014
Posts: 639
Location: Saskatoon, Saskatchewan, Canada
|
| Posted: Tue Jun 23, 2015 8:37 am Post subject: |
|
|
| Trevor P wrote: |
| You don't have to worry about using water borne paint on the interior ivory bits. Use single stage U tech. Easy peasy. |
Haha, thanks Trevor. Hopefully the stuff you used matches I forgot this was an option
_________________
Charmaine
-------------
1954 Beetle - because I can
2016 Golf highline - hubbys daily
2016 Golf R - my daily |
|
| Back to top |
|
|
sunroof
Samba Member

Joined: October 06, 2006
Posts: 1774
Location: Winnipeg
|
| Posted: Tue Jun 23, 2015 11:09 am Post subject: |
|
|
When I installed these parts, the inner ones went in exactly:
The front pieces OTOH had some alignment issues. I cut very carefully and when the contours didn't line up exactly I went back to the original pieces and checked my cut lines. I had done everything right so the problem was with the part. No biggie, I started with the stuff you will never see for just this reason.
Don
_________________
Better and better mistakes! |
|
| Back to top |
|
|
TheLadyBug
Samba Member
Joined: August 17, 2014
Posts: 639
Location: Saskatoon, Saskatchewan, Canada
|
| Posted: Tue Jun 23, 2015 8:28 pm Post subject: |
|
|
Thanks for the photos, Don!
I'm glad I didn't need any metal on the outer firewall. Just the inner. Good to see those pieces fit nicely. Was your outer also from klassic?
Thought I'd share this photo of my parts heading off to the post office appropriate on all levels!
So it turns out that I thought the back plate was the back plate and the front plate was the breast plate. Lol. I now realize the back is the breastplate and the front is the front. so.... I'm thinking the front plate is the same throughout the oval years and I can use the one I have? Back plate is on its way so I have the correct 3 hole one coming.
_________________
Charmaine
-------------
1954 Beetle - because I can
2016 Golf highline - hubbys daily
2016 Golf R - my daily |
|
| Back to top |
|
|
sunroof
Samba Member
Joined: October 06, 2006
Posts: 1774
Location: Winnipeg
|
| Posted: Wed Jun 24, 2015 8:15 am Post subject: |
|
|
| Quote: |
| So it turns out that I thought the back plate was the back plate and the front plate was the breast plate. Lol. I now realize the back is the breastplate and the front is the front. so.... I'm thinking the front plate is the same throughout the oval years and I can use the one I have? Back plate is on its way so I have the correct 3 hole one coming. |
???
I got the parts from Ken King and yes they are Klassic. The heatewr channels are amazing.
Don
_________________
Better and better mistakes! |
|
| Back to top |
|
|
TheLadyBug
Samba Member
Joined: August 17, 2014
Posts: 639
Location: Saskatoon, Saskatchewan, Canada
|
| Posted: Wed Jun 24, 2015 2:00 pm Post subject: |
|
|
| sunroof wrote: |
| Quote: |
| So it turns out that I thought the back plate was the back plate and the front plate was the breast plate. Lol. I now realize the back is the breastplate and the front is the front. so.... I'm thinking the front plate is the same throughout the oval years and I can use the one I have? Back plate is on its way so I have the correct 3 hole one coming. |
???
I got the parts from Ken King and yes they are Klassic. The heatewr channels are amazing.
Don |
Yeah I just didn't know what the 'name' of the tin was. I thought the breastplate was the front. Lol. In any case, I have another back plate coming and my front plate is likely useable as they didn't change much. Good news for me.
I'm not needing any metal for my heater channels, thank goodness.
_________________
Charmaine
-------------
1954 Beetle - because I can
2016 Golf highline - hubbys daily
2016 Golf R - my daily |
|
| Back to top |
|
|
TheLadyBug
Samba Member
Joined: August 17, 2014
Posts: 639
Location: Saskatoon, Saskatchewan, Canada
|
| Posted: Sat Jun 27, 2015 8:12 pm Post subject: |
|
|
Got to put in a full day out in the garage today. My dad came to help so we got lots done! Packed the wheel bearings and got the drums on. The lock plate on the driver's side was extremely worn and didn't withstand being bent one more time as the one tab broke. The passenger side middle tab was already missing. The dust cap is off and I need to replace them. But at least the drums are on!
Got the pedal cluster assembled and the clutch and accelerator cables attached. The push rod is on (still need a cotter pin that's the right size) and got all the brake lines run. My husband had a pipe bender which I criticized as to when we'd ever need it... ate my own words. The master cylinder is out again as I have to paint it but we had to put it in for correct fitment of the lines. We came to the conclusion that the master gets bled on the car and not beforehand.
These bolts on the car were both wrecked. One was snapped and I had to use a visegrip to get the other one out even after we used the acetylene on it. I had bought these aftermarket bolts to make do but after putting them on, I couldn't do it. They're not right with 13mm heads, and the length is too long as they stick out the bottom of the pan 5mm.
But that's ok cause I just texted Trevor and he has these for me
I don't know how people such as myself get through a period correct restoration without someone awesome like Trevor, to answer my painful questions every single week, supply parts on a whim and rebuild the pieces that are over my head. I can't imagine my level of appreciation once I get to engine assembly!  And who has a dad that has experience with VW bugs and can just come spend an afternoon and can help putting stuff back together? I'm pretty lucky. My dad was saying how he enjoyed spending the time with me helping as when the car is done, I'll have these memories working on the car with him And who has a dad that has experience with VW bugs and can just come spend an afternoon and can help putting stuff back together? I'm pretty lucky. My dad was saying how he enjoyed spending the time with me helping as when the car is done, I'll have these memories working on the car with him
And lastly. Wouldn't be a complete day in the garage if we didn't have a hiccup, right? The brake line kit had a 25.5" line to go from the T piece to the passenger side soft line. My original was bent like this and is 29". I'm wondering where I can get a piece of line that's the correct length, and why the piece supplied is 3.5" too short? I'd prefer to run it as pictured as I assume that was stock.
Tomorrow I'm heading out to the body shop to see her blasted and drop off the firewall sections. Excited to see her without that awful paint!
Next on my list:
Cotter pin for pushrod
Contact cement the rubber pedal pads on
Put new lock plates on
Paint master cylinder
Put on remaining brake line once I get longer piece
Organize more hardware to get plated
Figure out plan for interior ivory painted pieces and get that going so I can assemble the e-brake
Clean cylinder head tin I got this week and get another batch of stuff ready for powder coat
Test intake manifold to see if it's good to use, then look to see about getting it ceramic coated
Clean the engine parts that are to be rebuilt - generator, carb, regulator and fuel pump
Get clamp off the coil and refinish the coil and bracket
_________________
Charmaine
-------------
1954 Beetle - because I can
2016 Golf highline - hubbys daily
2016 Golf R - my daily |
|
| Back to top |
|
|
Loren
Samba Member

Joined: January 10, 2004
Posts: 1701
|
| Posted: Sat Jun 27, 2015 9:38 pm Post subject: |
|
|
| Your oval is looking fantastic! Just a quick question, did you put a wheel on the drum to check that the wheel bearings are tight enough? When I install new bearings I put the wheel on and rock it back and forth to check for slop and adjust as necessary and I always check them after I drive the car around the block a few time to make sure they are still tight. Your oval is coming along nicely and I always look forward to your posts. Thanks for taking the time to document your progress. |
|
| Back to top |
|
|
TheLadyBug
Samba Member
Joined: August 17, 2014
Posts: 639
Location: Saskatoon, Saskatchewan, Canada
|
| Posted: Sun Jun 28, 2015 7:30 am Post subject: |
|
|
| Loren wrote: |
| Your oval is looking fantastic! Just a quick question, did you put a wheel on the drum to check that the wheel bearings are tight enough? When I install new bearings I put the wheel on and rock it back and forth to check for slop and adjust as necessary and I always check them after I drive the car around the block a few time to make sure they are still tight. Your oval is coming along nicely and I always look forward to your posts. Thanks for taking the time to document your progress. |
Thanks for checking my thread! Sometimes I feel like I'm just talking out loud to myself when I post but it's a good reference so I have documentation every time I work in the car and stuff gets done!
We didn't put a wheel on, we just used my dads experience that they were the correct tension. We tightened the nuts almost as tight as we could and backed them off maybe 1/16 of a turn until they felt the same. I didn't want to put a wheel on until the wheels are finished. Once they're painted with the rest of the car I'll put them on and check the friction. The brakes rubbed in a couple spots but I'm hoping the shoes will return once the lines are bled and working and brakes are adjusted. I'm guessing a good time will be once I get to drive the pan around the block without the body
_________________
Charmaine
-------------
1954 Beetle - because I can
2016 Golf highline - hubbys daily
2016 Golf R - my daily |
|
| Back to top |
|
|
TheLadyBug
Samba Member
Joined: August 17, 2014
Posts: 639
Location: Saskatoon, Saskatchewan, Canada
|
| Posted: Sun Jun 28, 2015 10:56 pm Post subject: |
|
|
Went and visited Beatrix's body today at the body shop.
Unfortunately the roof has lead in it and will be more work that originally thought.
Glad I got this piece custom made from Virtanen as it didn't survive being blasted. (Rear passenger side under seat at cross member).
I managed to gather all the beige pieces for the interior and set them aside to go to the body shop for paint. They'll be painted single stage with the dull beige as from factory.
I am going to order another brake line piece that's a little longer. The WW piece I have is 720mm and I need 740. Why it's shorter is beyond me as the original is approx 740.
I need the gear shift boot and ebrake boot and it seems that WW is the only place that has the correct ones.
I sorted some hardware to be plated; I'm wondering if I should make a bigger batch to send or if they'll care that I just have a small amount. I like having smaller bags because then I know what's in the bag. I have gotten smarter and began labelling the hardware with the markings so I can more readily find the hardware I need when it comes to putting it back where it belongs.
My son thought it was pretty cool that the car could go on her side
I'm hoping to clean the master cylinder tomorrow and shoot it with paint, and hopefully I can pickup the hardware as promised from Trevor so I can drop off hardware at the platers soon.
_________________
Charmaine
-------------
1954 Beetle - because I can
2016 Golf highline - hubbys daily
2016 Golf R - my daily |
|
| Back to top |
|
|
sunroof
Samba Member
Joined: October 06, 2006
Posts: 1774
Location: Winnipeg
|
| Posted: Mon Jun 29, 2015 10:41 am Post subject: |
|
|
I'm watching and loving every minute of it.
Don from Winnipeg.
_________________
Better and better mistakes! |
|
| Back to top |
|
|
TheLadyBug
Samba Member
Joined: August 17, 2014
Posts: 639
Location: Saskatoon, Saskatchewan, Canada
|
| Posted: Mon Jun 29, 2015 12:32 pm Post subject: |
|
|
| sunroof wrote: |
I'm watching and loving every minute of it.
Don from Winnipeg. |
Haha, thanks Don!
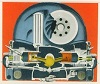
This is what I meant by 3-hole engine tin. I'm hoping my last pieces arrive this week.
I just picked up some hardware from Trevor and dropped off a bag of stuff to be plated. Picked up some assorted cotter pins and a roll of emery cloth per my dad's instruction
Going to see how clean I can get my ivory knobs today, and get some parts ordered from Concept1.
_________________
Charmaine
-------------
1954 Beetle - because I can
2016 Golf highline - hubbys daily
2016 Golf R - my daily |
|
| Back to top |
|
|
splitjunkie
Samba Member
Joined: April 04, 2006
Posts: 4095
|
| Posted: Mon Jun 29, 2015 12:57 pm Post subject: |
|
|
The car is looking great. I will point this out since you are going to such great lengths to get everything right. Most of the fasteners on the body and chassis were not bright zinc or silver cad plated. They would have a black finish. This would most likely be either black oxide or black zinc.
Black oxide doesn't provide much if any corrosion resistance so they would have to be oiled or waxed. Black Zinc provides excellent corrosion resistance. Given the fact that most of the fasteners we see are rusted unless they were painted or stayed greasy or oily, I would think that black oxide was the original finish.
Regardless, I hope your plater is baking them after plating to prevent Hydrogen Embrittlement. Black Oxide is a conversion process and does not have the problem of Hydrogen Embrittlement so does not require baking.
_________________
Chris
You know, a lot of these scratches will buff right out... Jerry Seinfeld |
|
| Back to top |
|
|
|


