| Author |
Message |
mcdonaldneal
Samba Member
Joined: June 13, 2013
Posts: 2644
Location: Gullane, Scotland

|
|
| Back to top |
|
 |
mcdonaldneal
Samba Member
Joined: June 13, 2013
Posts: 2644
Location: Gullane, Scotland
|
 Posted: Mon Apr 20, 2015 12:48 am Post subject: Posted: Mon Apr 20, 2015 12:48 am Post subject: |
 |
|
While I'm away for a few days I've been thinking about how best to install the rubber trunk seal. I'm worried that it's going to be awkward, and worse, that I'll get black weatherstrip adhesive on the paintwork! 
My plan is this...
Get a friend to help.
Use masking tape to screen off the area around the seal channel.
Put a length of string inside the tight flap on the seal that goes over the lip at the inside edge of the channel. This is to make it easier to get the rubber over the lip at the same time as pressing the seal onto the adhesive!
Work in sections.
Start at the most inaccessible bit, the straight edge parallel to the edge of the windscreen.
Apply adhesive to the cleaned rubber and the bottom of the channel, let it dry to tacky then press the two together.
Next, the sections down the sides, making sure that they are stretched to leave the drain hole cutouts at the near corners lined up.
Then glue around the drain holes, as I think they are important to get positioned correctly.
Lastly, the front edge, leaving the join positioned in the middle.
Then remove the string from the rubber flap that goes over the channel lip.
Any other hints or tips from those more experienced would be very welcome!
Hopefully tackle it next week!
_________________
1978 marino yellow Bay Dormobile camper
1969 signal orange Karmann Ghia convertible
1976 martini olive Bay Dormobile camper
Stop dead photo links! Post photos to The Samba Gallery! |
|
| Back to top |
|
|
c21darrel
Samba Member
Joined: January 22, 2009
Posts: 8211
Location: San Dimas
|
| Posted: Mon Apr 20, 2015 12:12 pm Post subject: |
|
|
I'd go the other way... from the bottom
if you have the same seal as i used. Its extra long. Seam at the top by window. Mock it up, lay the seal in to be sure you will have extra and need to cut excess off. Tape off the paint work. Apply cement to each, rubber and metal, a couple feet at a time or whatever you are comfy with. Let set. Start at front latch, and go past the drains on each side. Now your drains will be glued down where thy need to be... Then continue up each side to the turn at the top. There is a screw or "tit" on the corner. Then the last run across the top. Clean any excess and close the hood to hold down. You can place a strip of tape every few inches perpendicular to the seal to hold it down if you work solo. I pull just a little on the seal as its guided into the channel so its tight.
The drains are the important fit, I wouldnt want to pull most of the seal because i was a little off at the drain. Extra hands are nice but you can do it solo too. YMMV. Good luck!
_________________
GhiaBuild
http://www.thesamba.com/vw/forum/viewtopic.php?t=481184
1967 DC build
https://www.thesamba.com/vw/forum/viewtopic.php?t=693583&highlight=67+dc
Stop dead photo links! Post your photos to The Samba Gallery! |
|
| Back to top |
|
|
Paul70Ghia
Samba Member
Joined: September 27, 2014
Posts: 154
Location: Uk
|
| Posted: Mon Apr 20, 2015 12:48 pm Post subject: Seal Fitting |
|
|
| Make sure you wash the glue side of the seal thoroughly to take the mould release agent/talc off - I didn't and have since had to reglue! |
|
| Back to top |
|
|
mcdonaldneal
Samba Member
Joined: June 13, 2013
Posts: 2644
Location: Gullane, Scotland
|
| Posted: Tue Apr 21, 2015 1:43 pm Post subject: |
|
|
Ok. Back home again, and after work, took the chance to have a go at the trunk seal. Part of the reason was that Shona was at home and agreed to give me a hand (for a strict 45mins btw, which is NOT enough time for this job!!  ) )
I had never used the weatherstrip adhesive before, so I didn't know what to expect, but this stuff is a nightmare! Black, sticky, stringy and very tenacious! I had put a rim of masking tape around the channel but putting the glue on was like eating pizza with chopsticks in a dinner suit. 
Following Samba advice, I started in the middle at the front, centring the seam of the strip. Applying adhesive to both surfaces and letting it get tacky, then pushing it into place.
The first drain hole, I put adhesive all around, and had to leave some paper towel in to keep it clear, but it was actually better the second time, when I did not put adhesive in the channel underneath where the cutout in the rubber is.
Then I moved to the top, near the windscreen, so that I could centre the rubber again, and carried on down the sides. It really helped having previously pushed string into the part of the seal that grips the raised lip of the channel, it meant you could gradually remove the string to make sure it all seated properly.
As I came over the top corners, there is a peg that sticks up from the channel. I just made sure I punched a small hole in the right place.
After it was all glued, I shut the trunk lid, to apply pressure to the seal, and lifted the edges of the masking tape. I'll take it off tomorrow. The whole thing was a bit nerve wracking, but got it all done, and no black glue on the paint (that I could see!)
_________________
1978 marino yellow Bay Dormobile camper
1969 signal orange Karmann Ghia convertible
1976 martini olive Bay Dormobile camper
Stop dead photo links! Post photos to The Samba Gallery! |
|
| Back to top |
|
|
c21darrel
Samba Member
Joined: January 22, 2009
Posts: 8211
Location: San Dimas
|
|
| Back to top |
|
|
mcdonaldneal
Samba Member
Joined: June 13, 2013
Posts: 2644
Location: Gullane, Scotland
|
|
| Back to top |
|
|
c21darrel
Samba Member
Joined: January 22, 2009
Posts: 8211
Location: San Dimas
|
|
| Back to top |
|
|
mcdonaldneal
Samba Member
Joined: June 13, 2013
Posts: 2644
Location: Gullane, Scotland
|
| Posted: Wed Apr 22, 2015 6:16 am Post subject: |
|
|
Had a little free time early this morning, so I wanted to adjust the trunk lid hinge, nearest the driver's seat. The lid has been sitting a bit proud when closed, but could be pushed down to the right position. I knew there was an inaccessible nut right up under the windscreen, and I could see one there. With the iPhone I also got a pic of the other end, which is a flathead screw, so I tightened it all up.
It seemed to work, but looking at another photo there is another nut, higher up which sits in a definite adjustment slot. I can't get my head around the spatial orientation, but I thing that one might be for fore/aft adjustment? If so, what is the screw head bolt for?
Anyway, it seems better now. While doing that, I realised that the latch pin was loose, so I tightened it up, but now the trunk is quite stiff to close. I think I need to look up the whole trunk lid adjustment procedure!
Last thing I did was wire up the two door speakers to the radio. I don't like them, but I can't remove them without leaving a hole in the door card, so I might as well use them! I know less than zero about radios and speakers, but I thought that it was bad to wire them all in parallel, so I linked the door speakers in series, and put those two in parallel with the dash speaker. The radio is mono, so only has one speaker 'out'. Hope that's ok, seems to work!
_________________
1978 marino yellow Bay Dormobile camper
1969 signal orange Karmann Ghia convertible
1976 martini olive Bay Dormobile camper
Stop dead photo links! Post photos to The Samba Gallery! |
|
| Back to top |
|
|
mcdonaldneal
Samba Member
Joined: June 13, 2013
Posts: 2644
Location: Gullane, Scotland
|
|
| Back to top |
|
|
mcdonaldneal
Samba Member
Joined: June 13, 2013
Posts: 2644
Location: Gullane, Scotland
|
| Posted: Sun Apr 26, 2015 9:36 am Post subject: |
|
|
Busy with all sorts the last few days, but have got a couple of things done. I soldered up croc clips to power the LM1 wideband meter I got at the beginning of the winter and thought I would try it out today.
You could easily argue that it is a waste of time using wideband with stock carbs (well, H30/31) and motor, but I figure that I know the jets have been changed in my carb, things get old and you can't guarantee that the stock set up is actually right this far down the line, and it sounds as though tuning by ear (or rpm) tends to leave things a bit rich if you check with a wideband. Anyhow, no harm in having the carbs tuned as well as they can be!
There's not really a great place to plumb in a port in a stock exhaust, so I had got the tailpipe sniffer adapter, also that means I can use it on the Kombi as well.
I knew this would be prone to very lean readings at idle, as air gets drawn in to the tailpipe, and when I connected it up the AFR reading was 22, virtually fresh air!
If I temporarily blocked off that tailpipe with a rag though, I got a nice stable reading, so my first step was to adjust the mixture at idle. (At higher rpm, it did give a more stable, lower reading). As most people have reported, using conventional tuning for lean best idle was a little rich, AFR about 12. The volume screw did adjust this nicely, but in the opposite direction to what I expected! UNscrewing it (CCW) lowered the reading, ie richer? I thought that the (small) volume screw adjusted the amount of air added at idle?
Anyway, adjusted it to 14.1, and my next step is to rig up power from the cigarette lighter so that I can see what the reading is at lean cruise, looking for 15-16 or so
_________________
1978 marino yellow Bay Dormobile camper
1969 signal orange Karmann Ghia convertible
1976 martini olive Bay Dormobile camper
Stop dead photo links! Post photos to The Samba Gallery! |
|
| Back to top |
|
|
Bleyseng
Samba Member

Joined: July 03, 2005
Posts: 4752
Location: Seattle
|
| Posted: Sun Apr 26, 2015 12:40 pm Post subject: |
|
|
At cruise 13.5 to 1 is better as too lean makes the engine run too hot!
_________________
70 Ghia Black convert-9/69 build date-stock w/133k 1600 SP-barn find now with a rebuilt tranny and engine
77 Westy 2.0L w/Ljet, Camper Special engine-95hp and with LSD!(sold)
76 Porsche 914 2.1L L20c, 120hp Djet (sold)
87 Syncro Westy Titan Red 2.1L 2 knob 100k miles |
|
| Back to top |
|
|
mcdonaldneal
Samba Member
Joined: June 13, 2013
Posts: 2644
Location: Gullane, Scotland
|
| Posted: Sun Apr 26, 2015 1:02 pm Post subject: |
|
|
So, I made up a cable to power the air/fuel gauge from the cigarette lighter, and by running the main cable from the tailpipe through the open rear window I can lay the gauge on the passenger seat and see it while I'm driving.
There are some very quiet , straight roads near home, so I warmed up the car and the AFM seemed to give good consistent readings and I don't think it is drawing in air from outside at operating speed.
I am being guided by the excellent and very detailed thread 'wideband results'
http://www.thesamba.com/vw/forum/viewtopic.php?t=293837
I'm feeling my way a bit, as most of the discussion on the thread is with modified engines and carbs, but the first step seems to be to get the mixture right at idle, and at a light cruise, 50mph or so.
I have 14.1 AFR at idle. At a steady 50mph on the flat I have about 14-14.5. This is a little richer than ideal, so my first step is to reduce the idle jet to 50 from the current 55 and readjust the idle speed and mixture. Sadly I couldn't find the spare jets I had in the garage somewhere, so I'll put it all on hold for now (and maybe order the jet).
The AFR at wide open throttle was 11.5-12 which again, is a bit richer than ideal, but I shouldn't be looking to adjust that yet, so I'll wait and see.
I don't think I'll get the chance to change anything for a while, as this week we will be getting ready to head down to England for a big VW meet at Stanford Hall, the aim is to get 60 Karmann Ghias together to celebrate 60 years since the first Ghia! Very exciting!
_________________
1978 marino yellow Bay Dormobile camper
1969 signal orange Karmann Ghia convertible
1976 martini olive Bay Dormobile camper
Stop dead photo links! Post photos to The Samba Gallery! |
|
| Back to top |
|
|
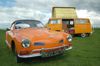
mcdonaldneal
Samba Member
Joined: June 13, 2013
Posts: 2644
Location: Gullane, Scotland
|
| Posted: Tue Apr 28, 2015 2:33 am Post subject: |
|
|
One of the attachment points for the headlining has pulled and almost torn the headlining. I had cut a piece of headlining from a hidden area behind the hinge covers and cleaned it up, and I was ready to glue it on. With hindsight I should have cut a slightly bigger piece, so that I could have the holes line up on the repair patch and the main headliner! I decided to go for the position for the strongest repair rather than perfect cosmesis! 
Anyway, I used a clear flexible adhesive called 'Stormsure' which is used for wetsuit and dry suit repair, and I clamped it in place. After a day to cure it is well attached.
When I do screw it on I will use the VW cup washers that I salvaged from other areas, which have tabs on the backside to give a wider pressure point, compared to the cup washers I can buy at the hardware store. I can't remember why I've got two sizes, I think some came from the rear luggage area carpet, which is no longer screwed down but removable, to let it dry after rain (or washing)!
_________________
1978 marino yellow Bay Dormobile camper
1969 signal orange Karmann Ghia convertible
1976 martini olive Bay Dormobile camper
Stop dead photo links! Post photos to The Samba Gallery! |
|
| Back to top |
|
|
Bleyseng
Samba Member
Joined: July 03, 2005
Posts: 4752
Location: Seattle
|
| Posted: Wed Apr 29, 2015 7:34 am Post subject: |
|
|
Nice fix and I'll have to do that on my 70 as I have the same problem.
_________________
70 Ghia Black convert-9/69 build date-stock w/133k 1600 SP-barn find now with a rebuilt tranny and engine
77 Westy 2.0L w/Ljet, Camper Special engine-95hp and with LSD!(sold)
76 Porsche 914 2.1L L20c, 120hp Djet (sold)
87 Syncro Westy Titan Red 2.1L 2 knob 100k miles |
|
| Back to top |
|
|
mcdonaldneal
Samba Member
Joined: June 13, 2013
Posts: 2644
Location: Gullane, Scotland
|
| Posted: Wed Apr 29, 2015 9:37 am Post subject: |
|
|
Carried on with the tuning job I had started the other day.
The bottom line is that I am aiming for and air/fuel ratio of 16 at a light cruise in 4th at 50mph on the flat, and a rich mixture of about 12 at wide open throttle (as measured accelerating from about 20mph to 50mph in 3rd gear).
Even I know that conventional wisdom is that a lean mixture runs hotter, but there is some evidence on the wideband tuning thread that coming lean at cruise actually runs cooler, and the advice on there is to aim for 16 in the first instance, so im giving that a go! 
Naturally, valves, plugs, timing have been set, and every time I make a change, I readjust the idle speed and mixture to 850rpm and lean best idle (actually an AFR of 14-14.4).
I haven't got around to ordering new jets, but I cannibalised some old carbs that I had lying around and found two of the jet sizes I need for the next steps. Long story short, I ended up putting in smaller idle (down to 50) and main jets (down to 125) and I'm almost where I want to be. Idle AFR is 14.2, light cruise is 15.5 and WOT is 12.2. It maybe that I can put in an even smaller main jet, but I don't have it, so I might order one and look at it after the weekend!
Finished off by reinstalling the 'Save my bug' temp warning dipstick ready for the 7hr drive 'down South' on Friday/Sat.
Pics are of the wideband setup, with a silicone cuff protecting the tailpipe from the securing screw, the cable running in through the rear window, and the gauge on the passenger seat, plugged into the cigarette lighter!
_________________
1978 marino yellow Bay Dormobile camper
1969 signal orange Karmann Ghia convertible
1976 martini olive Bay Dormobile camper
Stop dead photo links! Post photos to The Samba Gallery! |
|
| Back to top |
|
|
mcdonaldneal
Samba Member
Joined: June 13, 2013
Posts: 2644
Location: Gullane, Scotland
|
|
| Back to top |
|
|
mcdonaldneal
Samba Member
Joined: June 13, 2013
Posts: 2644
Location: Gullane, Scotland
|
| Posted: Thu Apr 30, 2015 11:53 am Post subject: |
|
|
In other news...
We're getting ready for the 600+ mile round trip to Leicestershire for the weekend to a big VW show at Stanford Hall.
I spent some time this morning washing and polishing, but with the forecast for showers over the next few days it's probably all in vain!
I did some other little jobs, like replacing screws on the rain guard in the engine bay and at the convertible headliner.
Then I took some time to get together the spares and tools I want to take away. I really want to have the bare minimum, but I know it's handy to be able to sort things that crop up on the journey. I've tried to be minimalist, but there's still a bit of stuff. Some fits behind the folded down vert glass, and some under the rear seat.
A vague list, for those interested...
Fire extinguisher and gloves, behind pass seat
Quart of oil
Jack
Jump leads
Throttle and clutch cable
VW toolkit
Fanbelt
Idiot book
Pared down, but more comprehensive tools
Chocks
Test light
Electrical spares
Tape (duct, electrical, PTFE)
Grease, spigot
Multimeter
Distributor cap (don't know why, but goes with the rotor!)
Rotor, points, condenser
Fuel pump (and correct length rod!)
Coil and voltage regulator (shouldn't be needed, but these are two things that I have replaced recently, so in case of failure of NOS parts!)
Various nuts and bolts and tinware screws.
On the assumption (!) that if you've got it you won't need it, I think I've got a good compromise amount. Stows away pretty neatly anyway!
_________________
1978 marino yellow Bay Dormobile camper
1969 signal orange Karmann Ghia convertible
1976 martini olive Bay Dormobile camper
Stop dead photo links! Post photos to The Samba Gallery! |
|
| Back to top |
|
|
mcdonaldneal
Samba Member
Joined: June 13, 2013
Posts: 2644
Location: Gullane, Scotland
|
|
| Back to top |
|
|
wcfvw69 
Samba Purist

Joined: June 10, 2004
Posts: 13389
Location: Arizona
|
| Posted: Fri May 01, 2015 7:45 pm Post subject: |
|
|
I like you minimalistic parts spares. I think you have a good compromise of parts you're carrying for your trip. I'd also carry a spare belt, fuel pump and clutch/accelerator cables.
I look forward to seeing your pictures from the show. I hope your trip is un-eventful (mechanical wise) and the weather holds up for you!
_________________
Contact me at [email protected]
Follow me on instagram @sparxwerksllc
Decades of VW and VW parts restoration experience.
The Samba member since 2004.
**Now rebuilding throttle bodies for VW's and Porsche's**
**Restored German Bosch distributors for sale or I can restore yours**
**Restored German Pierburg fuel pumps for sale or I can restore yours**
**Restored Porsche fuel pumps or I can restore yours**
**Restored Porsche distributors or I can restore yours** |
|
| Back to top |
|
|
|


