| Author |
Message |
karl h
Samba Member

Joined: October 10, 2005
Posts: 578
Location: austria

|
|
| Back to top |
|
 |
Corney13
Samba Member
Joined: July 06, 2014
Posts: 265
Location: Castaic, California
|
 Posted: Wed Jan 14, 2015 11:27 pm Post subject: Posted: Wed Jan 14, 2015 11:27 pm Post subject: |
 |
|
| karl h wrote: |
| nice work. i did the ragtop the same on my oval and the grey 67. whatever you do drill/file the rear adjusting holes into the roof of the car, dont weld behind them |
Thanks for the tip! I ended up cutting 1.5 inches around the opening on all sides but the back, which is 1 inch. It puts the seam in front of the adjusting holes. How did you address the supports? I have some ideas, but would love to hear what you did. |
|
| Back to top |
|
|
karl h
Samba Member
Joined: October 10, 2005
Posts: 578
Location: austria
|
|
| Back to top |
|
|
Corney13
Samba Member
Joined: July 06, 2014
Posts: 265
Location: Castaic, California
|
| Posted: Mon May 18, 2015 11:13 am Post subject: |
|
|
Been a little while from my last post. I have not had as much time to work on the car as I hoped, but all things considered, I think I have got a lot done. The rag top is in and The drivers side A pillar is welded in (More on this in a second). Unfortunately my cell phone completely died and all pictures of the process were lost. 
For the rap top, I cut a hole in my existing roof that was the exact size and location of the hole. I then spot welded the roof in from the bottom and then used the TIG to weld up the front. I used a little filler just to smooth things out, but any filler used is paper thin, as I ground down any welds and used a hammer and dolly to get things as straight as possible.
I knew there was some Bondo around the base of A pillars, but I am not sure I was ready for how bad it was. I bought patch panels from WW and have already completed the drivers side (Again, pictures lost.) I was sure to fit the door a few times in the process, to make sure the hinges would line up.
Here are some shots of the passenger side which I am about to start on. (The driver's side was about the same)
I chipped some Bondo out of the base. Got a preview of how bad it was...
Then I knocked out a big chunk from the inside.
Thick!!
Looks pretty ugly!
Then I started to pile away the Bondo from the other side in the fender well..
**Interesting note, I have recently began to discover yet another color my car was painted. White! I actually this may have been the original color, or the car got a front clip including the dash at one point. I thought my car was originally Gulf blue, as that paint color is under and around almost everything, but I have found this white under the VIN tag, the the door hinges and of course under the below Bondo. I have no history on the car, so I may never know!
Here is the new metal, ready to go...
Here is the base of the driver's side that I already fixed. I have to grind down the welds a bit, but this section will be under seam sealer, so I am not too concerned.
|
|
| Back to top |
|
|
grandpa pete
Samba Member

Joined: July 06, 2008
Posts: 6426
Location: St. Petersburg, FL
|
| Posted: Mon May 18, 2015 3:19 pm Post subject: |
|
|
Greetings From St. Petersburg Florida ; I knew I would stumble onto your build thread one of these days.....
Whats that old phrase ??.............One mans junk is another mans treasure !!
Here are the seat covers from the dune buggy installed in my 63 beetle ; Appropriately known as " Purple Car "
Thankyou for helping with my Toy !! 
_________________
63 two fold rag
66 sedan delivery Type 6
http://www.thesamba.com/vw/forum/viewtopic.php?t=569619&highlight=sedan+delivery |
|
| Back to top |
|
|
Corney13
Samba Member
Joined: July 06, 2014
Posts: 265
Location: Castaic, California
|
| Posted: Mon May 18, 2015 3:39 pm Post subject: |
|
|
| grandpa pete wrote: |
Greetings From St. Petersburg Florida ; I knew I would stumble onto your build thread one of these days.....
Whats that old phrase ??.............One mans junk is another mans treasure !!
Here are the seat covers from the dune buggy installed in my 63 beetle ; Appropriately known as " Purple Car "
Thankyou for helping with my Toy !!
|
They look great!! When I bought the seats, I told the guy that it was a shame that I was not going purple, because the seat covers were pretty much new. I am glad they were put to good use!  |
|
| Back to top |
|
|
vwnut1
Samba Member

Joined: May 16, 2012
Posts: 495
Location: So Cal
|
| Posted: Mon May 18, 2015 9:35 pm Post subject: |
|
|
Welds are looking great. Must feel good to remove that nasty body filler from your project.
_________________
1957 VW Oval Resto Mod |
|
| Back to top |
|
|
Corney13
Samba Member
Joined: July 06, 2014
Posts: 265
Location: Castaic, California
|
| Posted: Tue May 19, 2015 8:43 am Post subject: |
|
|
| vwnut1 wrote: |
| Welds are looking great. Must feel good to remove that nasty body filler from your project. |
Thanks! I am getting better as I go, but welding on 50+ years old sheet metal is a challenge! I do everything in my power not to blow holes in it. |
|
| Back to top |
|
|
Corney13
Samba Member
Joined: July 06, 2014
Posts: 265
Location: Castaic, California
|
| Posted: Wed May 27, 2015 11:38 am Post subject: |
|
|
I started to cut out the rusted out A pillar on the passenger side. Much like the driver side, the ducting fitting is pretty much rusted away. I will fabricate a new piece. Fortunately, the rest of the heater channel looks pretty solid. I will patch where needed, but I don't feel new heater channels are needed.
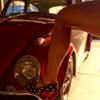
In other news, I found this sweet horn button on *-bay! (The one on left) It is apparently Empi GTV style, but fits a stock wheel. I love it!
|
|
| Back to top |
|
|
Corney13
Samba Member
Joined: July 06, 2014
Posts: 265
Location: Castaic, California
|
| Posted: Mon Jun 08, 2015 2:24 pm Post subject: |
|
|
As you might be able to tell, I jump around a lot on this project. I do eventually finish things, but I base what I am doing on any given day on how much time I have.
So on Sunday, besides going to Pomona, I decided to cut the vents out of a '71 donor lid a bought a few weeks back for $25. I am going to create my own convertible lid by grafting them in. (The longer I have this welder, the more I fabrication decide to attempt!) I got as far as cutting out and roughly mocking up where they go on my lid. I got the measurements from a post here on the site.
|
|
| Back to top |
|
|
Corney13
Samba Member
Joined: July 06, 2014
Posts: 265
Location: Castaic, California
|
| Posted: Wed Jun 10, 2015 1:38 pm Post subject: |
|
|
Last night I decided to clean up my speedometer. One thing I noticed was that my speedo was dated 1965, so it is not original to the car. But at this point, almost nothing is original to the car, so I guess it doesn't really matter.
The glass was dirty inside, so I carefully opened it up. I saw a post on how to disassemble and refurbish the speedo, so I figured while I was in there, I would slide back the pin on the gears and roll the miles back to zero. I need to replace the warning light gels, as mine have basically turned to dust. I see WW sells them for $4.50, but charges an additional $8 to ship. Has anyone tried to use colored tabs from hanging file folders? Seems to me that they would do the trick.
|
|
| Back to top |
|
|
Krmnnghia
Samba Member
Joined: March 28, 2005
Posts: 797
Location: Michigan, Land of salty roads!
|
| Posted: Wed Jun 10, 2015 1:46 pm Post subject: |
|
|
How are these mounted? This is exactly how I want my fogs. Detailed pics? |
|
| Back to top |
|
|
Corney13
Samba Member
Joined: July 06, 2014
Posts: 265
Location: Castaic, California
|
| Posted: Wed Jun 10, 2015 5:23 pm Post subject: |
|
|
| Krmnnghia wrote: |
How are these mounted? This is exactly how I want my fogs. Detailed pics? |
I can take some additional pics, but I used the existing bumper bolts on the bumper (The bolts that hold the bumper to the bracket) and put the bolt through the pivoting bracket on the lights. I have not run them on the car yet, but I may need to shim the lights in order for them to point straight. (Due to the curve of the bumper) |
|
| Back to top |
|
|
rcroane 
Samba Member
Joined: January 03, 2013
Posts: 2000
Location: Springfield, Virginia
|
| Posted: Wed Jun 10, 2015 6:02 pm Post subject: |
|
|
Corney13,
I picked up these gel samples when I repaired my speedo lights. Obviously, I have WAY more than I can ever use.
I'm happy to share.....let me know what colors and I'll send you a few (PM me with your address). You can go traditional red and green, or get a little creative because there is just about any color you could want.
If others are interested, just let me know.
_________________
'65 Sunroof Bug |
|
| Back to top |
|
|
MotoMike
Samba Member
Joined: June 13, 2013
Posts: 120
Location: Durango, CO
|
| Posted: Thu Jun 11, 2015 1:04 pm Post subject: |
|
|
Looking good!
I just met Corney a couple of weeks ago, had a spot of trouble with my 65 and I was loading on a trailer in the local supermarket parking lot when he drove up and offered his assistance.
Keep it up , it's going to be sweet when it's done! |
|
| Back to top |
|
|
rrcade
Samba Member
Joined: May 29, 2010
Posts: 735
Location: WI 1962 Bug 2276
|
| Posted: Wed Jun 17, 2015 8:49 pm Post subject: |
|
|
| I have to ask, did you loosen the brake shoes before you tried getting the rear drums off? |
|
| Back to top |
|
|
grandpa pete
Samba Member
Joined: July 06, 2008
Posts: 6426
Location: St. Petersburg, FL
|
| Posted: Thu Jun 18, 2015 8:03 am Post subject: |
|
|
You are about where I was when I started getting frustrated "This will never get done " 
I sat down and made a list of all the individual projects !
It did two things ;
IT kept me on track
and
It gave me a scence of accomplishment every time I checked something off the list 
Note ; the red seat covers that came off my " Purple Car " are headed for Ontario Canada to someone who wanted that " used " look  ...without the rips and holes ...without the rips and holes
_________________
63 two fold rag
66 sedan delivery Type 6
http://www.thesamba.com/vw/forum/viewtopic.php?t=569619&highlight=sedan+delivery
Last edited by grandpa pete on Thu Jun 18, 2015 12:47 pm; edited 1 time in total |
|
| Back to top |
|
|
Corney13
Samba Member
Joined: July 06, 2014
Posts: 265
Location: Castaic, California
|
| Posted: Thu Jun 18, 2015 9:33 am Post subject: |
|
|
| rrcade wrote: |
| I have to ask, did you loosen the brake shoes before you tried getting the rear drums off? |
Yes I did, the drum was stuck on the spline. If you look at one of the pictures, with the puller, you will see how the drum actually bowed out when I tried to pull it off. When I finally cut part of the drum off, it was still stuck. I put the puller back on what was remaining of the drum and took an air chisel and cracked the remaining part of the drum that was on the spline and if finally broke free. |
|
| Back to top |
|
|
Corney13
Samba Member
Joined: July 06, 2014
Posts: 265
Location: Castaic, California
|
| Posted: Thu Jun 18, 2015 9:54 am Post subject: |
|
|
| grandpa pete wrote: |
You are about where I was when I started getting frustrated "This will never get done "
I sat down and made a list of all the individual projects !
It did two things ;
IT kept me on track
and
It gave me a scence of accomplishment every time I checked something off the list
Note ; the red seat covers that came off my " Purple Car " are headed for Calgary Canada to someone who wanted that " used " look ...without the rips and holes |
I hear you on that! I have not given up on this project, I already have a lot of time and money invested and genuinely want to get it done. Unfortunately keep getting pulled off it to work on house projects or whatever else is on my wife's honey-do list.
Making a list of projects to finish is a great idea. I will do that. I think that the big item on my list, which is to finish the body work is what gets discouraging. I still need to weld up the passenger side A-pillar. The driver's side was not fun, so I keep avoiding it. But I can't finish body work until that is done. I also keep adding things to the list before others are finished (like the deck lid vents). I appreciate the encouragement and the suggestions. I will try to get this build back on track! |
|
| Back to top |
|
|
grandpa pete
Samba Member
Joined: July 06, 2008
Posts: 6426
Location: St. Petersburg, FL
|
|
| Back to top |
|
|
|


