| Author |
Message |
insyncro
Banned

Joined: March 07, 2002
Posts: 15086
Location: New York

|
 Posted: Thu Jan 15, 2015 1:02 pm Post subject: Posted: Thu Jan 15, 2015 1:02 pm Post subject: |
 |
|
Plan to find more rust.
It starts inside and works it's way outward.
As MG commented..."structural" is the key word.
Don't be afraid to put a flat, wide hammer bit on an air hammer and give strong sections a few good whacks for 10 seconds at a time.
You will see plenty of rust come flaking off, both inside and outside the rails.
Measure the wall thickness in crucial areas.
If thin...the entire section must be cut back and reinforced. |
|
| Back to top |
|
 |
DAV!D
Samba Member
Joined: September 10, 2013
Posts: 979
Location: EL CAMINO
|
| Posted: Thu Jan 15, 2015 2:59 pm Post subject: |
|
|
| insyncro wrote: |
Plan to find more rust.
It starts inside and works it's way outward.
As MG commented..."structural" is the key word.
Don't be afraid to put a flat, wide hammer bit on an air hammer and give strong sections a few good whacks for 10 seconds at a time.
You will see plenty of rust come flaking off, both inside and outside the rails.
Measure the wall thickness in crucial areas.
If thin...the entire section must be cut back and reinforced. |
Not knowing got the better of me so I picked up my little mini pick axe hammer and went to town..
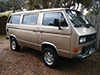
This is the outer frame rail on the passenger's side..I couldn't get the hammer in between the front diff and frame enough to test, but I think this shows enough..
A bit of hammering on the rear cross-member and some new holes showed their ugly head. If you look closely you can see some holes closer to the transaxle support..
Another view of the outer driver side rear cross-member with some lighting in the wheel well to better show the damage.
I think it's safe to say...
Added bonus is after cleaning away some of the undercoating, the outer frame rail on the drivers side up front is showing signs of rust through in the same spot as the passenger's side where the big hole is in the above picture.
I guess it's a learned skill of knowing when to say when, with this kind of stuff, but I think I've come to that point on this body. I'm sure if I wanted to spend hours and hours, I could fab up a new rear cross-member and replace the front frame rails, but it's not going to happen.. 
I will now go forward with the body swap. That was my first thought after coming back home from my road trip and giving the van a once over. I think that was the best decision from the start and I've finally convinced myself to not try and save this one.
_________________
86 Syncro Build - Ecotec Motor Swap - Pop Top Conversion - Camper Build & Syncro Conversion
Last edited by DAV!D on Thu Jan 15, 2015 3:25 pm; edited 2 times in total |
|
| Back to top |
|
|
insyncro
Banned
Joined: March 07, 2002
Posts: 15086
Location: New York
|
| Posted: Thu Jan 15, 2015 3:04 pm Post subject: |
|
|
| BTDT |
|
| Back to top |
|
|
MarkWard
Samba Member

Joined: February 09, 2005
Posts: 17110
Location: Retired South Florida
|
| Posted: Thu Jan 15, 2015 4:49 pm Post subject: |
|
|
Dave you give up too easily. mark
_________________
☮️ |
|
| Back to top |
|
|
DAV!D
Samba Member
Joined: September 10, 2013
Posts: 979
Location: EL CAMINO
|
| Posted: Thu Jan 15, 2015 5:12 pm Post subject: |
|
|
| rsxsr wrote: |
Dave you give up too easily. mark
|
It's a time & money thing.. I'm working off savings and I have a limited timeframe before I need to get back to making money. If I keep following the rust hole, I will burn though my budget for this van in both time and money.
Meanwhile, if I go with the body swap, I'm starting with a Van which is mechanically sound. This means I don't have to fix it before I even get started. I can just focus on swapping the motor/trans and fuel system then move on to the front end.
This is actually the cheaper and least time consuming route at this point because I have about 90% of the parts required to finish it. Meanwhile if I rebuilt the Syncro body, I'm spending a lot more money in body panels, brake lines and so forth. The emergency brakes are non existent, the rear brake components all need replaced, ect..ect..
All that stuff just keeps adding up and next thing you know it's $2k or more.. meanwhile if I use the 2wd body all that stuff is in good shape and I already have bought new wheel bearings, tie rods, ball joints and so forth..
I just can't keep pouring money into those kinds of repairs, as I still have to build out my camper interior and everything which goes with that.
The other issue, is I'm using a borrowed garage so my time is limited.
_________________
86 Syncro Build - Ecotec Motor Swap - Pop Top Conversion - Camper Build & Syncro Conversion |
|
| Back to top |
|
|
newfisher
Samba Member
Joined: January 05, 2012
Posts: 1764
Location: The wet spot--Oregon
|
| Posted: Thu Jan 15, 2015 7:26 pm Post subject: |
|
|
Swap it!
I run a body shop and for all the haters....YES HE COULD SAVE THIS SYNCRO AND RESTORE IT. but as he has mentioned in 4 pages, he has limited time and funds. Let him move along and get back to his original post. For those who want to comment below this regarding how it can be fixed or it should be saved....fly down and help him do it. Put the key board down and stop interweb building.
Off my soap box. OP please continue with the engine and syncro swap  |
|
| Back to top |
|
|
SyncroChrick
Samba Member
Joined: January 10, 2005
Posts: 1010
Location: San Francisco, CA
|
| Posted: Fri Jan 16, 2015 12:57 am Post subject: |
|
|
| DAV!D wrote: |
This is the outer frame rail on the passenger's side..I couldn't get the hammer in between the front diff and frame enough to test, but I think this shows enough..
|
dude, this is exactly what I was mentioned in my earlier posting
yep, now I think we can all agree it's time to move on. |
|
| Back to top |
|
|
DAV!D
Samba Member
Joined: September 10, 2013
Posts: 979
Location: EL CAMINO
|
| Posted: Fri Jan 16, 2015 6:34 am Post subject: |
|
|
| SyncroChrick wrote: |
| DAV!D wrote: |
This is the outer frame rail on the passenger's side..I couldn't get the hammer in between the front diff and frame enough to test, but I think this shows enough..
|
dude, this is exactly what I was mentioned in my earlier posting
yep, now I think we can all agree it's time to move on. |
Yea I know.. I knew there was rust on the outer frame rail in that section but I pushed on it quite a bit and it all seemed pretty solid. I kind of figured maybe there was a second steel tube framing used inside from the factory to add more strength.
However soon as I hit it one good time with the hammer it just started crumbling away.. Guess that's the lesson to be learned here, always check frame rust on these vas with a body hammer of some sort.
_________________
86 Syncro Build - Ecotec Motor Swap - Pop Top Conversion - Camper Build & Syncro Conversion |
|
| Back to top |
|
|
DAV!D
Samba Member
Joined: September 10, 2013
Posts: 979
Location: EL CAMINO
|
| Posted: Fri Jan 16, 2015 6:41 am Post subject: |
|
|
| newfisher wrote: |
Swap it!
I run a body shop and for all the haters....YES HE COULD SAVE THIS SYNCRO AND RESTORE IT. but as he has mentioned in 4 pages, he has limited time and funds. Let him move along and get back to his original post. For those who want to comment below this regarding how it can be fixed or it should be saved....fly down and help him do it. Put the key board down and stop interweb building.
Off my soap box. OP please continue with the engine and syncro swap |
It's all good.
I was very much on the fence as to if I really wanted to body swap or try to fix it. Just for the sake of doing it, I think it would be interesting to fix is, however I have to be realistic and try to keep my time frame and budget in check.
The benifit of the body swap, is I can always stop half way on the 4wd conversion, by just doing the rear half of the swap if I need to. Then use the Van again while I'm tearing apart all the front end components from the Syncro body.
_________________
86 Syncro Build - Ecotec Motor Swap - Pop Top Conversion - Camper Build & Syncro Conversion
Last edited by DAV!D on Fri Jan 16, 2015 6:44 am; edited 1 time in total |
|
| Back to top |
|
|
SyncroGhia
Samba Member

Joined: August 21, 2009
Posts: 2458
Location: Highnam, UK
|
| Posted: Fri Jan 16, 2015 6:41 am Post subject: |
|
|
| DAV!D wrote: |
| insyncro wrote: |
Plan to find more rust.
It starts inside and works it's way outward.
As MG commented..."structural" is the key word.
Don't be afraid to put a flat, wide hammer bit on an air hammer and give strong sections a few good whacks for 10 seconds at a time.
You will see plenty of rust come flaking off, both inside and outside the rails.
Measure the wall thickness in crucial areas.
If thin...the entire section must be cut back and reinforced. |
Not knowing got the better of me so I picked up my little mini pick axe hammer and went to town..
This is the outer frame rail on the passenger's side..I couldn't get the hammer in between the front diff and frame enough to test, but I think this shows enough..
A bit of hammering on the rear cross-member and some new holes showed their ugly head. If you look closely you can see some holes closer to the transaxle support..
Another view of the outer driver side rear cross-member with some lighting in the wheel well to better show the damage.
I think it's safe to say...
Added bonus is after cleaning away some of the undercoating, the outer frame rail on the drivers side up front is showing signs of rust through in the same spot as the passenger's side where the big hole is in the above picture.
I guess it's a learned skill of knowing when to say when, with this kind of stuff, but I think I've come to that point on this body. I'm sure if I wanted to spend hours and hours, I could fab up a new rear cross-member and replace the front frame rails, but it's not going to happen..
I will now go forward with the body swap. That was my first thought after coming back home from my road trip and giving the van a once over. I think that was the best decision from the start and I've finally convinced myself to not try and save this one. |
The section above where the front subframe bolts on is now becoming a common issue on T3s, especially Syncros. I need to attack this area on Limey at some point.
The rear cross members which sit between the rear suspension mounting points where they meet up to the main front to rear chassis is my turning point. Replacing these properly means stripping so much metal away that you end up starting almost from scratch and then you start to wonder, is it straight? Is it strong enough? How bad is the rest that I haven't cut into? etc etc etc
MG
_________________
T3 Syncro 16 S6 Westfalia Limey SOLD
T3 Syncro 6x6 SOLD
T3 RS6 Bluestar
T3 Tristar Syncro 16 SOLD
T3 Tristar Syncro RHD SOLD |
|
| Back to top |
|
|
DAV!D
Samba Member
Joined: September 10, 2013
Posts: 979
Location: EL CAMINO
|
| Posted: Fri Jan 16, 2015 6:57 am Post subject: |
|
|
| SyncroGhia wrote: |
| DAV!D wrote: |
| insyncro wrote: |
Plan to find more rust.
It starts inside and works it's way outward.
As MG commented..."structural" is the key word.
Don't be afraid to put a flat, wide hammer bit on an air hammer and give strong sections a few good whacks for 10 seconds at a time.
You will see plenty of rust come flaking off, both inside and outside the rails.
Measure the wall thickness in crucial areas.
If thin...the entire section must be cut back and reinforced. |
Not knowing got the better of me so I picked up my little mini pick axe hammer and went to town..
This is the outer frame rail on the passenger's side..I couldn't get the hammer in between the front diff and frame enough to test, but I think this shows enough..
A bit of hammering on the rear cross-member and some new holes showed their ugly head. If you look closely you can see some holes closer to the transaxle support..
Another view of the outer driver side rear cross-member with some lighting in the wheel well to better show the damage.
I think it's safe to say...
Added bonus is after cleaning away some of the undercoating, the outer frame rail on the drivers side up front is showing signs of rust through in the same spot as the passenger's side where the big hole is in the above picture.
I guess it's a learned skill of knowing when to say when, with this kind of stuff, but I think I've come to that point on this body. I'm sure if I wanted to spend hours and hours, I could fab up a new rear cross-member and replace the front frame rails, but it's not going to happen..
I will now go forward with the body swap. That was my first thought after coming back home from my road trip and giving the van a once over. I think that was the best decision from the start and I've finally convinced myself to not try and save this one. |
The section above where the front subframe bolts on is now becoming a common issue on T3s, especially Syncros. I need to attack this area on Limey at some point.
The rear cross members which sit between the rear suspension mounting points where they meet up to the main front to rear chassis is my turning point. Replacing these properly means stripping so much metal away that you end up starting almost from scratch and then you start to wonder, is it straight? Is it strong enough? How bad is the rest that I haven't cut into? etc etc etc
MG |
Yep, I think when it gets to this point, there will always be more and more rust to be found. there is a guy on YouTube whom I follow as he has a lot of good vids on this stuff.. "dIYAutoSchool"
https://m.youtube.com/channel/UCH7RpXjPcKNSw5Shb4WCIGA
He's a old school hot rodder type, but he does video series as he rebuilds various cars. He has a series on a old mustang which he ended up tearing the entire car apart chasing the rust.
That's what my Syncro started reminding me of, because it's kind of wasting your time to fix one area, if you don't strip it all down and rebuild everything. It's one thing if it's a few body panels, but once the rust is bad in these unibody style van frames you have to get it all or it will just continue to rust apart. One panel leads to another and another..
_________________
86 Syncro Build - Ecotec Motor Swap - Pop Top Conversion - Camper Build & Syncro Conversion |
|
| Back to top |
|
|
MarkWard
Samba Member
Joined: February 09, 2005
Posts: 17110
Location: Retired South Florida
|
| Posted: Fri Jan 16, 2015 8:00 am Post subject: |
|
|
David, I won't prod you to save the syncro anymore. You are undertaking two major projects. There is certainly overlap in the two projects. I am afraid you will find that there is a lot more time involved in these projects than you are anticipating. You may find you are without the vanagon for more time than you anticipate. Unless you have done a few of these types of conversions prior and then I take back my comments. Good luck. Mark
_________________
☮️ |
|
| Back to top |
|
|
insyncro
Banned
Joined: March 07, 2002
Posts: 15086
Location: New York
|
| Posted: Fri Jan 16, 2015 9:00 am Post subject: |
|
|
Link
|
|
| Back to top |
|
|
DAV!D
Samba Member
Joined: September 10, 2013
Posts: 979
Location: EL CAMINO
|
| Posted: Fri Jan 16, 2015 9:34 am Post subject: |
|
|
| rsxsr wrote: |
| David, I won't prod you to save the syncro anymore. You are undertaking two major projects. There is certainly overlap in the two projects. I am afraid you will find that there is a lot more time involved in these projects than you are anticipating. You may find you are without the vanagon for more time than you anticipate. Unless you have done a few of these types of conversions prior and then I take back my comments. Good luck. Mark |
That's why my initial plan was to go in 3 stages with a few steps in each stage. I decided to do it this way, to keep my main van usable as much as possible.
Stage 1 is 3 steps.
1) Mock up the engine swap in the Synco body and make sure I get it all running. (This is the step I'm on now)
2) Remove the engine/tans and all the components for the rear half of the swap, including gear shifter, water pipes and so forth. Make my plates for the syncro trans mounting points and fuel tank and so on. At this point I will also cut out the gas tank filler from the Syncro body and move it to the 2wd body. (I'm sorting out some of this now, like prepping the fuel tank with new seals & lines)
3) Once everything is prepped and ready to go, I'll drop the wbx engine, prep the 2wd van body & do the rear half of the swap. ( I'm giving myself a week for this step where the 2wd will be out of commission.)
At this point the van will be drive-able once again and I may end up leaving it at this part of the conversion for a while. I expect to be at this point by Jan 31st.
Beyond this is the second half of the syncro conversion is actually stage 3 in my plan. Once I finish up stage 1 and have the van usable, I will go to stage 2 which is the camper build.
The reason I will likely put the 2nd half of the Syncro swap on hold is because I live a very different life style than most people. I gave up my job & house 2 years ago to live as a vandweller and travel around the country.
I obviously still need money, so I usually pick up a contract job for the better half of the summer each year. Last year I went to Denver and worked there, the year before I was in New England. I then come back to FL during the winter and visit family/friends and build my vanagons.
With that in mind, I'm expecting to only get the 2nd stage of this conversion finished before I need to hit the road for the summer. Meaning I'll finish the rear half of the swap and the camper conversion prior to putting the rest on hold as I'm planning to leave FL again sometime in March.
_________________
86 Syncro Build - Ecotec Motor Swap - Pop Top Conversion - Camper Build & Syncro Conversion |
|
| Back to top |
|
|
DAV!D
Samba Member
Joined: September 10, 2013
Posts: 979
Location: EL CAMINO
|
| Posted: Fri Jan 16, 2015 9:39 am Post subject: |
|
|
Limitations only serve the purpose of limiting what you can do.
_________________
86 Syncro Build - Ecotec Motor Swap - Pop Top Conversion - Camper Build & Syncro Conversion |
|
| Back to top |
|
|
dobryan
Samba Member

Joined: March 24, 2006
Posts: 16501
Location: Brookeville, MD
|
|
| Back to top |
|
|
Signalocity
Samba Member
Joined: February 13, 2012
Posts: 573
|
| Posted: Fri Jan 16, 2015 10:10 am Post subject: |
|
|
| I don't think anyone can really fault you for parting out that Syncro, and the value of a patched together Sycnro or converted Westy wouldn't be too far off in my opinion. Whatever works out to be your path of least resistance, I say go for it! |
|
| Back to top |
|
|
DAV!D
Samba Member
Joined: September 10, 2013
Posts: 979
Location: EL CAMINO
|
| Posted: Sat Jan 17, 2015 5:50 pm Post subject: |
|
|
Getting back to some progress, I've kind of just piddled around as I waited for a few key components..
I resealed my fuel tank and replaced the sending unit as the fuel gauge never worked on the syncro.
I also decided to make use of the battery cables which came with my Ecotec wiring harness..
I made a new cable for the alternator to the starter, then one from the starter to my ecotec harness relay box and finally mounted it all in the synco body in a temp fashion. The reason I've opted to do this, is I've decided to move my battery into the engine compartment as I'll now have room to do so and I can then have extra storage inside the van's stock battery box.
Last but not least, almost all my goodies have arrived..
I now have my fuel pressure regulator, stainless fuel lines with 6AN fittings, my permanent cooling hose set up and a couple of little odds and ins.
I'm however missing one mission critical piece. I need an adapter which allows me to fit the 6AN fuel line fitting to the GM fuel rail. It's ordered but has yet to show up. I'm heading to the junk yard for a few things tomorrow, but if it doesn't show up by Monday I'm just going to rig up a temp solution because I want this motor started by Monday to stay on my time schedule..
_________________
86 Syncro Build - Ecotec Motor Swap - Pop Top Conversion - Camper Build & Syncro Conversion |
|
| Back to top |
|
|
MarkWard
Samba Member
Joined: February 09, 2005
Posts: 17110
Location: Retired South Florida
|
| Posted: Sun Jan 18, 2015 7:08 am Post subject: |
|
|
Check Summit racing for the adapter. For the southeast if it is in their Ga. warehouse, you can have it next day usually living in Florida. If you order today, it goes out tomorrow and you have it Tuesday.
_________________
☮️ |
|
| Back to top |
|
|
DAV!D
Samba Member
Joined: September 10, 2013
Posts: 979
Location: EL CAMINO
|
| Posted: Sun Jan 18, 2015 9:26 am Post subject: |
|
|
| rsxsr wrote: |
| Check Summit racing for the adapter. For the southeast if it is in their Ga. warehouse, you can have it next day usually living in Florida. If you order today, it goes out tomorrow and you have it Tuesday. |
Ok, good tip, Jegs shipped the last order from Ohio, so it was about 4 days for some reason.
_________________
86 Syncro Build - Ecotec Motor Swap - Pop Top Conversion - Camper Build & Syncro Conversion |
|
| Back to top |
|
|
|


