| Author |
Message |
BotanyBandit
Samba Member

Joined: February 13, 2013
Posts: 224
Location: Kansas City

|
 Posted: Wed Nov 23, 2016 3:00 pm Post subject: 65 Resurrection Posted: Wed Nov 23, 2016 3:00 pm Post subject: 65 Resurrection |
 |
|
Alright, so it has been a while since i posted on the forums last. People seem to like looking at progress pictures (myself included) so i decided it was time to share mine!
I purchased a 65 bug to restore a couple years ago and have been feeding it my soul and paychecks ever since! I implore anyone considering turning a baja bug back original, to find a better body... trust me on this one. You will kick yourself for it !
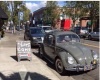
Here is the craigslist add photo. Notice the lack of hood, decklid, fenders, lights... etc.. (read: time & $,$$$)

back at home.

I didnt really get the idea to take pictures until i was very deep into the project, maybe thats a good thing as I had no knowledge of welding or body work before i started this project and i made many many mistakes, but quickly learned. I built a pair of door braces for replacing the heater channels, and a wooden rolling cart for all of the fun to ensue!
I started by rebuilding and working on the chassis.

replaced the old beam with a CB beam

cleaned the tunnel, mice had a party at some point.


basically went through every mechanical component on the car, New brakes (cyl's, metal and rubber lines, shoes, master cyl, rebuilt pedal assembly, did most of this twice because i never put fluid in them the first time and they quickly rusted out again) New powder coated smoothie wheels and rubber, welded new jack stands on and patched the floor pan under the battery, new seat tracks, new fuel line, all new cables, welded new heat flap tubes, replaced shift rod bushing, new steering box, sandblasted and POR'd the entire thing, basically everything i could! Then the real fun started...
A LITTLE OVER A YEAR LATER....
after meeting several of the local VW guys via craigslist and the mokan vw club, swap meets, and the eureka AR show, i tracked down most of the body parts and began the body work.

After cleaning all of the body parts and sanding them down to bare metal and working out the high spots with body hammers. I painted them with SPI epoxy.


Then started the rigorous task of body fillers, sanding/blocking/shaping


Rinse and repeat with the body! After i welded in the heater channels, new front apron, rear apron, replaced the shock tower mounts and bumper bracket mounts, fixed the messed up geometry of the car and checked parts for fitment issues. I took the body down to bare metal and prepped it for some epoxy primer.


lots of orange peel as this was my first time attempting to paint, it took several days to do the inside and out but luckily the primer is forgiving and i learned quickly. Started shaping the body and hiding all of the welds that i made along the way, and there were a lot of them. I had the rear end of the car from just under the back seat, shipped in from a california desert on a grey hound bus and grafted that onto the rear. The front was purchased as new replacement metal (much thinner, not impressed) and grafted from about mid wheel well and forward. The heater channels were completely removed and replaced. Shock towers and bumper bracket mounts, same story. I didnt want any rust left on this car!


shaved the headliner tabs in the process i really like the standard look, but i think i was drunk when i took the picture...


At this point I am getting ready to finish the hood and a few spots before i get a final coat of primer so that i can shoot color. It has been a long time coming but i wanted to share what i have done so far. Maybe this will help someone out there to know that they're not alone. When i started this project i knew nothing about cars, the hardest thing i had ever done to a car was replace a water pump... Your project WILL get done. Dont give up, just keep plugging away!
more to come.
Last edited by BotanyBandit on Thu Dec 01, 2016 1:49 pm; edited 1 time in total |
|
| Back to top |
|
 |
67ctbug
Samba Member

Joined: January 24, 2016
Posts: 3622
Location: CT
|
| Posted: Wed Nov 23, 2016 4:28 pm Post subject: Re: Progress on my 65 restoration |
|
|
Looking good! What type of welder are you using?
_________________
'67 Beetle L41
'74 Westfalia
'69 Plymouth "Adam-12"
'63 Ragtop
'73 914
'72 Dodge Wrecker
Go Cubs!
World Series Champions 2016
| KentPS wrote: |
...or the PO envied the terrorists' bus in "Back to the Future".  |
| mukluk wrote: |
| He's fine, just waiting for the dragon in winklepickers to move out of his lane. |
|
|
| Back to top |
|
|
BotanyBandit
Samba Member
Joined: February 13, 2013
Posts: 224
Location: Kansas City
|
| Posted: Wed Nov 23, 2016 5:11 pm Post subject: Re: Progress on my 65 restoration |
|
|
| I used a Lincoln 140 HD mig welder. Used gas not flux wire. I was surprised how well I could graft new steel parts once I got the hang of it, but it took a while. |
|
| Back to top |
|
|
flyboy161
Samba Member

Joined: December 26, 2009
Posts: 2091
Location: Perry, GA
|
|
| Back to top |
|
|
Projectp
Samba Member

Joined: September 18, 2016
Posts: 41
Location: Abington, MA
|
| Posted: Wed Nov 23, 2016 5:21 pm Post subject: Re: Progress on my 65 restoration |
|
|
| That is some really nice progress, looks great. Your an animal for starting with a baja!! |
|
| Back to top |
|
|
67ctbug
Samba Member
Joined: January 24, 2016
Posts: 3622
Location: CT
|
| Posted: Wed Nov 23, 2016 5:32 pm Post subject: Re: Progress on my 65 restoration |
|
|
I here Lincoln is really good! I'm looking at Eastwood welders.
_________________
'67 Beetle L41
'74 Westfalia
'69 Plymouth "Adam-12"
'63 Ragtop
'73 914
'72 Dodge Wrecker
Go Cubs!
World Series Champions 2016
| KentPS wrote: |
| ...or the PO envied the terrorists' bus in "Back to the Future". |
| mukluk wrote: |
| He's fine, just waiting for the dragon in winklepickers to move out of his lane. |
|
|
| Back to top |
|
|
Busstom
Samba Member

Joined: November 23, 2014
Posts: 3850
Location: San Jose, CA
|
| Posted: Wed Nov 23, 2016 11:41 pm Post subject: Re: Progress on my 65 restoration |
|
|
Dude, that's not just a restoration, it's a damn resurrection!
Kudos to you for bringin' that thing back from the turd that it was...you should get an award for that! Not many peeps takin' on that kinda project to save one, good for you, keep up the great work.
Gonna follow this one, can't wait to see more pics 
_________________
My name's Steve and it's pronounced "Bust 'em" (cuz people think I'm Tom) 😏 |
|
| Back to top |
|
|
BotanyBandit
Samba Member
Joined: February 13, 2013
Posts: 224
Location: Kansas City
|
| Posted: Thu Dec 01, 2016 12:04 pm Post subject: Re: Progress on my 65 restoration |
|
|
Last night I put some more work in. Before leaving town for thanksgiving I prepped a door for primer, by the time I got back home, the rust had already set in.
I had to sand it with 80 grit on a DA sander then clean with wax and grease remover. Then polish and put grit down with the 80 grit one last time and tack before painting
The bottom corner was rotten so i had previously cut out the rot and welded in a patch to the best of my ability.
The heat from the welder unfortunately caused a little warpage, so i placed a block on the backside and pinged
down the high spot so that i could use fiberglass filler to patch the area.
A tad cold outside for painting so i had to use a couple space heaters to get the garage up to around 65-70
Preheating the primer
I think i messed up the ratio.... looks a little off
I had to fix that!!!
Now ready for primer !
First coat on, pings and dents stand out much better now!
While the first coat tacks up I decided i wanted to cover some of the welds and body work done on the front end.
I wasn't planning on priming this yet, so I had a lot of polyester filler dust to clean up.
Microfiber cloths are your friend... But tack cloths are your best friend.
Scuffed up and ready to be cleaned and tack clothed before primed.
It was getting late so i didnt get pictures of everything finished, but today I found my old heater channel parts and wanted to share what they looked like.
The box these were stored in is very fitting...
|
|
| Back to top |
|
|
BotanyBandit
Samba Member
Joined: February 13, 2013
Posts: 224
Location: Kansas City
|
| Posted: Thu Dec 01, 2016 2:00 pm Post subject: Re: Progress on my 65 restoration |
|
|
After the heater channels were replace, I had to dress the welds. I used a dremel tool. The metal shavings that came off of that thing were painful. Almost like fiberglass. I started using a magnet to keep them contained.
|
|
| Back to top |
|
|
BotanyBandit
Samba Member
Joined: February 13, 2013
Posts: 224
Location: Kansas City
|
| Posted: Wed Dec 07, 2016 1:13 pm Post subject: Re: Progress on my 65 restoration |
|
|
More progress on the primer and body work. I had to do a little make shift welding. I didn't want to track down another radio block off so i fixed the one i had.
My radio delete plate had a hole that needed deleted. My approach was overkill but all i had was a hammer so I treated this problem as if it were a nail. I plan on using a retro-sound radio anyways. A just in case item.
Cut a piece of steel to weld up the hole from the back side. I dimpled the edges of the patch down on the top side so that the body work will work...
Glued that sucker up real quick, problem solved, just need to drill a hole for the trim clip and a thin coat of filler on the front to cover scratches. At least I will have a color matching block off if i ever need one.
removed the trim clips from the glove box door and sanded the old primer off for some epoxy
Started the body work on the door that was primed last week. Epoxy cured out enough to sand.
Used 150 grit to block out and scuff up for body work
After blocking the high and low spots show up much more clearly.
Dealing with the high spots... Easy... Just make them low spots and fill
I have been using kitty hair on large areas that i would like a little more durability and depth out of than i trust the traditional fillers with. I have been using evercoat/rage.
Letting that cure while i work on the hood...
I found a hood but it is far from ideal. Ill have to do some hammer work after the primer cures out, I already had to weld up the handle area as it was pulled through. Once the metal is in a acceptable shape i can Use fillers. Not sure what filler would be best used on this, I was thinking of using only fiberglass from the mid point up to the nose to prevent cracks and chipping later on.
After priming this I really wish that i had a better hood, but I don't have the time or money to hunt for one so i am going to do my best and make it work with as little filler as i possibly can.
Also fixed a problem spot on one of the fenders. I had an area of rust out that i had to cut out and patch. I truely hate body filler. My very nature is opposed to the idea of body filler, but without it, my poor car would look like sack of potatoes. Using original fenders, hood, decklid, doors... having to replace heater channels, the front and rear clips, fender nuts, misc rust patches... Without a lot of money in a professional body man, there's just no avoiding it. It makes me feel a little better knowing how much filler is in some of your trailer queens... but not much better.
More to come soon ! |
|
| Back to top |
|
|
BotanyBandit
Samba Member
Joined: February 13, 2013
Posts: 224
Location: Kansas City
|
| Posted: Wed Dec 07, 2016 9:46 pm Post subject: Re: Progress on my 65 restoration |
|
|
Worked over the fender patch and radio delete
If you're too clean, you're doing it wrong. It's part of the fun!
|
|
| Back to top |
|
|
panicman
Samba Member
Joined: December 18, 2011
Posts: 2290
Location: Canby, OR
|
| Posted: Wed Dec 07, 2016 11:50 pm Post subject: Re: Progress on my 65 restoration |
|
|
Aye, here's to a hard fought cold eve dealing with a 50 year old relic. Great thread!
_________________
Plate of shrimp |
|
| Back to top |
|
|
BotanyBandit
Samba Member
Joined: February 13, 2013
Posts: 224
Location: Kansas City
|
| Posted: Mon Dec 12, 2016 5:40 pm Post subject: Re: Progress on my 65 restoration |
|
|
She bought me goodies for no reason, take notes ladies...
More supplies for the body, I'll be finished with body work soon and onto the engine build. |
|
| Back to top |
|
|
BotanyBandit
Samba Member
Joined: February 13, 2013
Posts: 224
Location: Kansas City
|
| Posted: Mon Dec 12, 2016 6:14 pm Post subject: Re: Progress on my 65 restoration |
|
|
I took a day or two off from the blocking... It is long dirty and tedious work. After I did the initial patch on the lower corner and top I found some waves that were minor but seemed to run the length of the door near the bottom. I decided I needed to do a skim coat and block it all out at once for best results. Instead of fighting each area one at a time.
Used guide coat to help me see where I need to focus first
Trying to get this body work done so that I can start having some fun while I wait for warmer weather. Painting is going to be impossible when it's this cold. A few more hours on this panel atleast...
Trying to decide what I want to do for a cam and rocker assembly. |
|
| Back to top |
|
|
Eric&Barb
Samba Member

Joined: September 19, 2004
Posts: 24759
Location: Olympia Wash Rinse & Repeat
|
| Posted: Mon Dec 12, 2016 6:45 pm Post subject: Re: Progress on my 65 restoration |
|
|
Get a shrinking disc to take down any high spots without all the filler fuss. Pop out low spots to make them high spots to get them gone with the shrinking disc also.
You can use a piece of copper to cover a hole on one side, like in the radio block off plate, and fill in only the hole with weld.
_________________
In Stereo, Where Available! |
|
| Back to top |
|
|
BotanyBandit
Samba Member
Joined: February 13, 2013
Posts: 224
Location: Kansas City
|
| Posted: Mon Dec 12, 2016 7:15 pm Post subject: Re: Progress on my 65 restoration |
|
|
| Haha, now you tell me... I'm 95% done with the body work, this door just fought me a little, I hope when it is blocked out that the remaining filler is minimal. Thanks for the tips, I'll check out those shrinking disks for this nightmare hood that is up next! |
|
| Back to top |
|
|
Eric&Barb
Samba Member
Joined: September 19, 2004
Posts: 24759
Location: Olympia Wash Rinse & Repeat
|
| Posted: Mon Dec 12, 2016 8:28 pm Post subject: Re: Progress on my 65 restoration |
|
|
Need to finish up our project. Has not been easy peasy, and would have done some things different now. As always, hindsight is 20/20...
http://www.thesamba.com/vw/forum/viewtopic.php?t=462164&highlight=wounded+westie
Also do check youtube.com for videos about how to do body work with little to no body filler. Hood is not a real great place for filler due to how much it is flexed each time you open/close it.
_________________
In Stereo, Where Available! |
|
| Back to top |
|
|
BotanyBandit
Samba Member
Joined: February 13, 2013
Posts: 224
Location: Kansas City
|
| Posted: Mon Dec 12, 2016 9:03 pm Post subject: Re: Progress on my 65 restoration |
|
|
Now that is impressive! I can't imagine grafting a roof together and not messing some measurement's up!
I couldn't find my brass when I was looking to weld that block off plate up, guess I'll know where it is when I reskin my heater boxes. It came in handy when fixing the fender bolt holes! |
|
| Back to top |
|
|
Eric&Barb
Samba Member
Joined: September 19, 2004
Posts: 24759
Location: Olympia Wash Rinse & Repeat
|
| Posted: Mon Dec 12, 2016 10:18 pm Post subject: Re: Progress on my 65 restoration |
|
|
You can also just cut a piece of copper pipe lengthwise to get a chunk of copper plate to weld against.
_________________
In Stereo, Where Available! |
|
| Back to top |
|
|
BotanyBandit
Samba Member
Joined: February 13, 2013
Posts: 224
Location: Kansas City
|
| Posted: Tue Dec 13, 2016 7:10 pm Post subject: Re: Progress on my 65 restoration |
|
|
Waiting for the garage to warm up after work I decided to kill some time by making an adjustable push rod and get some practice in modifying an old set of lifters with the Bob hoover groove. I think I found the dremel tip that works best for me. I'll have a shot at the rocker arms and adjuster later.
|
|
| Back to top |
|
|
|


