| Author |
Message |
iaccy
Samba Member

Joined: September 24, 2007
Posts: 1378
Location: CT

|
 Posted: Sun Sep 14, 2008 8:08 pm Post subject: My first dub: '67 project beetle Posted: Sun Sep 14, 2008 8:08 pm Post subject: My first dub: '67 project beetle |
 |
|
I figured I'd post up my '67 beetle I picked up 4 months ago, since I haven't had time recently. It was originally a S. Carolina car that went to RI and then made its way to CT. I found it on Craigslist. It's got a 1600 dp out of a '72 super beetle, adjustable front beam, and a generic empi shifter. When I was looking at it I knew it was hit b/c of the bondo on the passenger side, but that's always repairable. While working on it found many other signs that it must have gotten hit pretty hard, browse the pics 
When I bought the car I got 4 brand new fenders, battery tray and luggage compartment sheetmetal, fender beading, an extra motor (not sure of year or size), handbooks, a brand set of pistons and jugs, 2 boxes of new bushings, gaskets, headlights and a s#%t load of other parts I don't feel like listing.
Let me here your suggestions and comments. If you see something or want to share something that would help me out, let me know 
Before I get yelled at I know the dash knobs aren't original
-yes the fuel filter is still in the engine compartment and yes it will be moved.
-I know the seats aren't correct for this year
Morning of the day I picked it up.
Made it home safe and sound.
Some of the parts I got with the deal. 
Hole #1
Hole #2
Hole #3
New piece to fix hole #3
A$$ end.
Cleaned with hub caps on, looks a little better.
Hole #4 under the drivers side heater tube
Patch piece I made.
I'm not the best welder, but it gets the job done
Hole #5 on passenger side under heater tube
Andddd fixed.
Hole #6 in the front of the drivers side fender well.
Fixed.
Passenger side floor welded in.
Luggage compartment cut and primed.
Now time to explain why I think the car took it up the butt really hard from another car at one time. Like I said There's a bunch of bondo on the passenger side. The drum on the passenger side is different from the drivers side. The passenger side has the studs coming from the drum brake with separate lug nuts, while the drivers side has stud lug nuts with a threaded drum. Which is the correct one for a '67??
And then over the weekend I actually thought to myself, why is there blue paint coming through the red on my rear apron?? So I looked around inside and saw this  An absolutely horrible attempt to weld in the donor apron. But I have to say it's lined up pretty damn straight. An absolutely horrible attempt to weld in the donor apron. But I have to say it's lined up pretty damn straight.
I'm going to pick up some Masterseries sealer/primer and chassis black paint this week. So hopefully the updates will keep coming.
Last edited by iaccy on Wed Feb 11, 2009 5:48 pm; edited 2 times in total |
|
| Back to top |
|
 |
jmw1982
Samba Member
Joined: May 19, 2008
Posts: 298
Location: Weymouth, MA
|
| Posted: Sun Sep 21, 2008 9:44 am Post subject: |
|
|
looks like your doing a great job. the rust really kills them up here, im from boston and just bought a 60 with very similar rust issues, your welding certainly beats mine. i cant help you with your lugnut question but keeps the pictures coming!
_________________
________________________________________
'60 Beetle Indigo Blue |
|
| Back to top |
|
|
iaccy
Samba Member
Joined: September 24, 2007
Posts: 1378
Location: CT
|
| Posted: Mon Sep 22, 2008 12:32 pm Post subject: |
|
|
I went to buy some Masterseries Primer/sealer, and Chassis black. I was eager to start using it b/c I've heard nothing but positive feedback about the product.
Friday afternoon I stripped the old paint down to bare metal and fixed some cracks on both wheel wells. I gave both sides a coat of the primer and it went on incredibly easy and left no brush marks.
Sunday I got more stripping done on the luggage compartment, and all the way down to the heater tubes near the channels. Getting the paint clean is the most time consuming and annoying part, but it's well worth it when you get the paint on. I did get the rest of the seam putty off the bottom of the luggage compartment after I took the picture and got a little more clean than what's pictured.
My goal for the end of the week/next weekend is to get the inside of floors stripped and primed. I'll keep things updated. |
|
| Back to top |
|
|
420GOAT
Samba Member

Joined: March 31, 2006
Posts: 3343
Location: Wilmington, CA on a nice quiet street but still in the 'hood
|
| Posted: Mon Sep 22, 2008 12:41 pm Post subject: |
|
|
hook that shit up!!
_________________
once you realize im not impressed we will get along just fine |
|
| Back to top |
|
|
'64cal lookdub
1200 Deluxe

Joined: May 29, 2004
Posts: 1714
Location: TX
|
| Posted: Mon Sep 22, 2008 12:41 pm Post subject: |
|
|
| Looks great! How do you like that stuff? I'm thinking about trying it myself. |
|
| Back to top |
|
|
iaccy
Samba Member
Joined: September 24, 2007
Posts: 1378
Location: CT
|
| Posted: Mon Sep 22, 2008 12:47 pm Post subject: |
|
|
| '64cal lookdub wrote: |
| Looks great! How do you like that stuff? I'm thinking about trying it myself. |
THanks!! So far so good. It goes on really smooth and covers well. When I bought it the guy told me to separate the quart into smaller glass jars to store b/c I'd never use the whole can at once. This keeps the paint fresh and you can just use the jars you need.
http://www.masterseriesct.com/home.html
I found it's cheaper than POR-15 and works just as good if not better. At his shop he had a rim that was half painted with the primer/sealer from 6 years ago, and the other half was left untreated. He's left it outside everyday for 6 years and still looks brand new. |
|
| Back to top |
|
|
mustard_madman
Samba Member

Joined: September 04, 2006
Posts: 695
Location: fargo
|
| Posted: Mon Sep 22, 2008 2:42 pm Post subject: |
|
|
Looks good man. And it doesn't matter if the welds are not picture perfect. As long as everything is sealed up, cleaned and rust prevention is complete. Plus, it all gets covered, and you know you did your best. Keep it up!
_________________
Don't delete my posts. |
|
| Back to top |
|
|
floridaguy
Samba Member

Joined: December 11, 2003
Posts: 623
Location: Florida
|
| Posted: Mon Sep 22, 2008 5:05 pm Post subject: |
|
|
| Looks like you are doing a good job, keep the updates coming. |
|
| Back to top |
|
|
Krmnnghia
Samba Member
Joined: March 28, 2005
Posts: 797
Location: Michigan, Land of salty roads!
|
| Posted: Tue Sep 23, 2008 10:34 am Post subject: |
|
|
| Loving it! Looks great so far! |
|
| Back to top |
|
|
BigHerc
Samba Member
Joined: November 26, 2006
Posts: 809
Location: sierra madre, CA
|
|
| Back to top |
|
|
iaccy
Samba Member
Joined: September 24, 2007
Posts: 1378
Location: CT
|
| Posted: Mon Sep 29, 2008 4:34 pm Post subject: |
|
|
Got more done this weekend!! WOoot!!!
This is the absolute best grinder attachment they sell!! It took all the old paint and sh*t off the floor in 2 seconds! Go buy one.
When I took the pedal cluster off of the drivers side I found this weird plate bolted through the floor
I took it off and found this hacked hole. I'm pretty sure the plate was just behind the brake pedal. Can I just patch it or does this thing actually serve a purpose?
Finished it up and looks awesome!! Love how it's coming out.
I started cleaning up the underside of the front end and noticed this. I'm no pro but are these weld in adjusters? They look awfully similar to pictures in the gallery.
|
|
| Back to top |
|
|
Krmnnghia
Samba Member
Joined: March 28, 2005
Posts: 797
Location: Michigan, Land of salty roads!
|
| Posted: Mon Sep 29, 2008 5:05 pm Post subject: |
|
|
Yes those are adjusters. Drop that shit!  |
|
| Back to top |
|
|
arod
Samba Member
Joined: March 07, 2004
Posts: 7322
Location: Pembroke Pines, FL
|
| Posted: Mon Sep 29, 2008 6:04 pm Post subject: |
|
|
[quote="iaccy"]Got more done this weekend!! WOoot!!!
When I took the pedal cluster off of the drivers side I found this weird plate bolted through the floor
I took it off and found this hacked hole. I'm pretty sure the plate was just behind the brake pedal. Can I just patch it or does this thing actually serve a purpose?
you need that bolt and plate there. that is for the pedal assembly. the floorpan is suppossed to have a threaded tab there for that bolt to bolt through, not a hacked up hole. there is something about a '67 bug that just gets me. nice work so far. |
|
| Back to top |
|
|
iaccy
Samba Member
Joined: September 24, 2007
Posts: 1378
Location: CT
|
| Posted: Mon Sep 29, 2008 6:14 pm Post subject: |
|
|
| arod wrote: |
| you need that bolt and plate there. that is for the pedal assembly. the floorpan is suppossed to have a threaded tab there for that bolt to bolt through, not a hacked up hole. there is something about a '67 bug that just gets me. nice work so far. |
Ok, but what does it do? I'll clean up the hole and put it back together, but I'm just curious as to what it's for. |
|
| Back to top |
|
|
dirtydeedss
Samba Member

Joined: November 19, 2005
Posts: 613
Location: Aldergrove BC Canada
|
| Posted: Mon Sep 29, 2008 6:59 pm Post subject: |
|
|
| prevents the pedals from falling to the floor, its a stop. |
|
| Back to top |
|
|
iaccy
Samba Member
Joined: September 24, 2007
Posts: 1378
Location: CT
|
|
| Back to top |
|
|
iaccy
Samba Member
Joined: September 24, 2007
Posts: 1378
Location: CT
|
| Posted: Tue Nov 11, 2008 3:34 pm Post subject: |
|
|
It's been a while since I've posted progress on my car, so here's a few more for you guys.
"This sucks" Stripping the floor 
Stripped and painted with rust primer/sealer
Looks mint
Welding the jack support on
Some misc stuff primed/sealed
Teaser pic before the fenders got primed
Primed with 3 coats
Before
After
Another fender well hole 
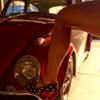
The mirror that came with the car was pretty junky and pitted, so I decided to give it a custom job, haha
Last edited by iaccy on Tue Nov 11, 2008 5:24 pm; edited 1 time in total |
|
| Back to top |
|
|
jmw1982
Samba Member
Joined: May 19, 2008
Posts: 298
Location: Weymouth, MA
|
| Posted: Tue Nov 11, 2008 4:31 pm Post subject: |
|
|
looks like your making great progress
_________________
________________________________________
'60 Beetle Indigo Blue |
|
| Back to top |
|
|
neonrick
Samba Member

Joined: February 03, 2006
Posts: 579
Location: Tampa, Florida
|
| Posted: Tue Nov 11, 2008 7:36 pm Post subject: |
|
|
| Hell yeah!!! Keep it going!! |
|
| Back to top |
|
|
iaccy
Samba Member
Joined: September 24, 2007
Posts: 1378
Location: CT
|
| Posted: Sun Dec 28, 2008 6:32 pm Post subject: |
|
|
I have some more boring chassis paint and other updates.
It was a beautiful day so I decided to roll her out and do some welding.
These dents/cracks were covered in bondo, which we all love
Lines up nice and straight... haha figures, nothing about this car goes smoothly
Much better, but I still have some smoothing out to do where the hood molding goes.
Masterseries Chassis Black...very glossy
(Sorry for the blurriness, it was dark and my camera sucks)
mmmmm nice
|
|
| Back to top |
|
|
|


