| Author |
Message |
jrehm
Samba Member

Joined: March 13, 2008
Posts: 53
Location: on the road permanently

|
 Posted: Sun Mar 07, 2010 6:56 pm Post subject: Early Bay - replace your cot with a bed - How To + pics! FAQ Posted: Sun Mar 07, 2010 6:56 pm Post subject: Early Bay - replace your cot with a bed - How To + pics! FAQ |
 |
|
I just couldn't imagine comfortably sleeping on the cot that was originally installed in the pop top of my 1971 Westfalia. I'm sure I did it as a kid with no complaints, but lets just say that my sleeping requirements have evolved over the years.
I decided to take out the cot and replace it with a custom padded sleeping platform. The goal was something that would give me the full pop top area for sleeping, but not take up any additional room in the bus. It would re-purpose the old sunroof area for storage of the platform.
Click the photos to link to bigger versions (and click those)
bigger
It wasn't too hard, but there were a few minor details that couldn't be overlooked. First, the profile of the old sunroof area is arched, which meant that I wouldn't be able to just buy something and slide it in - I'd have to fabricate it myself. So, I made a glue-lam.
It's got about 2" of dense padding, so it's actually pretty comfortable. It could be better, but... at least it's not a cot. It's upholstered in vinyl and just tacked along the edges with staples. I trimmed the outer edge (facing forward) with some nylon and attached it with screws and finish washers. This hides the staples, and more importantly, gives me a handle to grab when sliding it out.
Finally, I decided I needed a hatch. No need to slide the thing back and forth every time we wanted to go up and down. Just pop up and down through the hatch. Aluminum bar stock provides the support and trims the hole pretty well.
Is it sturdy? You can jump up and down on it. It's solid as a rock.
The best part is that my son can crawl up top, close the hatch, and we all have our privacy.
Unfortunately, I didn't take photos of the assembly process, so a description will hopefully suffice. It's not hard, but takes some time - and can be kicked out as a moderate weekend project.
bigger
1. Get the stuff. you'll need:
-1/8" or 3 mm plywood. I used cheapy Luaun from a big-box hardware store. 3 4'x8' sheets.
-2"x4"x8' - two of them. these are used for the form.
-Wood glue. One gallon jug. When else are you going to buy this much glue?
-wood screws - 2" - maybe 40 of them.
-2" aluminum bar stock. 2 of them, 4' sections. you don't need this if you don't want a hatch.
- jigsaw, and/or circular saw. Drill.
-trim, staples, and upholstery stuff. you decide what you want.
2. Cut the sheets for the platform layers - I made 6 layers. I think I cut them to 39" x 48". Leave some slop and you will trim it to fit later. Alternate the grain pattern for each sheet so your glue lam will be stronger.
3. Make the forms. Cut your 2"x4"s to about 40" length (slop okay.) You'll need 4 of them. Draw an arc with 1" of curvature across the length of the 2x4. Cut it using a jigsaw or circular saw. I used a circular saw and it turned out fine - a little slop is okay here too (the plywood can only bend so much) - you're going to screw the plywood into these to make the arched platform shape while it's drying.
4. Lay out your forms so you can put your plywood on top and bend it over the arch. Pretend you're making an airplane wing. Get your glue and a paintbrush and start evenly covering the plywood and stack them up. It's messy. Maybe put down some plastic or Saran over your forms so you don't glue the plywood to the forms.
5. Once everything is stacked up, start screwing the plywood down into the forms. The screws will hold the entire thing in place and force it around the arch while it's drying. Sure, you'll have some holes in your platform, but they're small and easily covered with wood putty. I can't see mine. The top section that you're probably standing on will be covered in padding and upholstery.
6. Clean up as much glue as possible - you've made a huge gooey mess on your garage floor. Don't worry about a little slipping and sliding between each plywood layer - you cut them with some slop and will trim to fit later.
7. Let it dry overnight. Come back the next day and take out all the screws. and remove from the forms. Admire your work. Jump up and down on it and convince yourself it's as strong as hell.
8. Now, go to your bus and measure your sunroof *exactly* before trimming to the final size. mine is 39"x48", but don't take my word for it. Use a jigsaw to trim and then sand the edges smooth. Test fit and make sure it slides all the way in and comes out just right. Trim again if needed. You might have to shape the ends a bit to get around the pop-top tie-down brackets in the front.
9. Add the hatch if you want it. Cut how you like. I made mine 18"x18" and it's just over the sink for climbing in and out easily. See the photos for how the aluminum bar stock supports the hatch - it's not adding strength to the platform.
10. Upholstery and padding is up to you. Adding the hatch will make the upholstery job a little more difficult. Otherwise, it's just cover and staple. Sanding and staining or painting the bottom side beforehand is up to you.
11. I highly recommend some sort of handle to make pulling it out a easy. I used a nylon strap.
12. I made another padded section (1" foam, covered in vinyl) for the rest of the roof. It's basically a large thin pillow and is easy to sew.
13. Install. Lay down and enjoy! Roomy, isn't it?
We're currently using this thing every single day on our epic road trip to South America. See it in use here: www.BodesWell.com
There are a few things I may have done differently, so consider this:
1. It's too strong. It's also a little heavy - not bad - but it could be lighter. I would probably make it only 4 layers next time, since my son is the primary user. I might also consider making it only 2 layers and reinforcing with fiberglass for the lightest possible sturdy platform. Obviously more work, but might be worth the effort.
2. I wanted to put some sort of hinge on the hatch. I couldn't think of anything I liked, so just left it free floating and it rests on the aluminum bars for support. This works really well, but there might be a more elegant solution.
Cheers and enjoy.
Jason
_________________
Driving around the the world in a '71 Westy. Ten years and 45 countries so far.
follow our misadventures: www.bodeswell.com or @bodes.well
-------------------------------------------------------
Last edited by jrehm on Sun Mar 07, 2010 7:19 pm; edited 1 time in total |
|
| Back to top |
|
 |
calebmelvin
Samba Member

Joined: July 19, 2006
Posts: 3140
Location: Seattle, WA
|
|
| Back to top |
|
|
skid
Samba Member

Joined: January 16, 2009
Posts: 1329
Location: Vancouver, BC
|
| Posted: Sun Mar 07, 2010 7:53 pm Post subject: |
|
|
Pretty rad!
_________________
'71 Westfalia |
|
| Back to top |
|
|
JT's Westy
Samba Member
Joined: February 25, 2010
Posts: 65
Location: San Francisco
|
| Posted: Mon Mar 08, 2010 8:50 pm Post subject: Thanks |
|
|
| I was thinking about something like this when I was remodeling the interior of my '71 Westy last summer. I'm going to do this. |
|
| Back to top |
|
|
jrehm
Samba Member
Joined: March 13, 2008
Posts: 53
Location: on the road permanently
|
| Posted: Wed Mar 10, 2010 2:43 pm Post subject: |
|
|
the link to the bigger photos was broken - now fixed!
_________________
Driving around the the world in a '71 Westy. Ten years and 45 countries so far.
follow our misadventures: www.bodeswell.com or @bodes.well
------------------------------------------------------- |
|
| Back to top |
|
|
notchboy
Samba Member

Joined: April 27, 2002
Posts: 22463
Location: Escondido CA
|
|
| Back to top |
|
|
dirigible
Samba Member

Joined: September 28, 2009
Posts: 208
Location: Sudbury, ON Canada
|
| Posted: Tue Jul 27, 2010 11:26 am Post subject: |
|
|
Thread alive! <whoooosh!>
It's hard to tell in your photos--is the cushion on the slide-out section that covers the hole flush with the part of the cushion that stays permanently on the roof? If so, how did you do this? Does the part that covers the hole rest on the lip around the hole, or do you raise it to rest on the roof after pulling it out?
Thanks!
_________________
'71 Campmobile. |
|
| Back to top |
|
|
jrehm
Samba Member
Joined: March 13, 2008
Posts: 53
Location: on the road permanently
|
| Posted: Thu Jul 29, 2010 8:45 am Post subject: |
|
|
It's flush.
The cushion that covers the roof is thin - about 1" foam padding. It's really all you can put there anyway, since the top always has to close down on it.
The padding on the sliding part is closer to 2" - this is the most I could add and still have it fit in the slot. I slide it out and rest it on the sunroof lip - not the roof itself - and the cushions align perfectly.
_________________
Driving around the the world in a '71 Westy. Ten years and 45 countries so far.
follow our misadventures: www.bodeswell.com or @bodes.well
------------------------------------------------------- |
|
| Back to top |
|
|
TheLoren
Samba Member

Joined: February 21, 2010
Posts: 100
Location: Rancho Cordova
|
| Posted: Thu Jul 29, 2010 9:23 am Post subject: |
|
|
I"m curious to see what it looks like all put away and the pop top down. could you post a picture of that?
And do you find that you end up on the sides of the bed due to the arch?
_________________
1970 westy |
|
| Back to top |
|
|
aliennetwork
Samba Member

Joined: May 27, 2009
Posts: 458
Location: Aiken, SC
|
|
| Back to top |
|
|
jrehm
Samba Member
Joined: March 13, 2008
Posts: 53
Location: on the road permanently
|
| Posted: Sat Feb 12, 2011 8:02 am Post subject: |
|
|
| TheLoren wrote: |
I"m curious to see what it looks like all put away and the pop top down. could you post a picture of that?
And do you find that you end up on the sides of the bed due to the arch? |
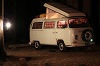
Sorry for the long delay... but here is a pic of the top down. Not much to see. In the front, I just drop the top down on the cushion. the blue thing in the photo is my son's sleeping bag, so there is actually a little bit more room for towels, etc (storage everywhere!). In the back, it's just like the second photo in the first post, but with the top down - it slides in the slot and it out of the way.
As far as the slight arch goes, I slept on it last night and have no complaints 
bigger photo
_________________
Driving around the the world in a '71 Westy. Ten years and 45 countries so far.
follow our misadventures: www.bodeswell.com or @bodes.well
------------------------------------------------------- |
|
| Back to top |
|
|
RocketSurgeon
Samba Member
Joined: May 26, 2005
Posts: 442
Location: Roseville, CA
|
| Posted: Sat Nov 10, 2012 11:13 pm Post subject: |
|
|
I have admired this idea since I first saw it. I knew I had to make one for myself. So far I have only finished the main platform, but the other cushion will be easy to make. I think I went a little different with the amount of arch and I'm not planning on adding a hatch ( it's only going to be used a few times a year). Also I only went 4 ply. I'm a fat guy (230) plus my kid (30) and even with both of us up there this thing does not budge! It's rock solid! Can't wait to get some use out of it in the spring. I Took plenty of build pics if any one is interested. Thanks again for the inspiration Jason!
Any one else tackle this project?
_________________
69 Westy |
|
| Back to top |
|
|
Squarebob
Samba Member

Joined: January 23, 2005
Posts: 34
Location: Edmonton Alberta Canada
|
| Posted: Fri Nov 16, 2012 2:40 pm Post subject: |
|
|
Awesome idea, thanks Jason for sharing it. -- it's definitely on my project list for this winter. With some mustard-vinyl it could even look like original equipment. 
Thanks also RocketSurgeon for posting yours and bumping this thread back to the top where I spotted it. I'm interested in your build pics, I'll PM my email address.
_________________
'56 Beetle |
|
| Back to top |
|
|
RocketSurgeon
Samba Member
Joined: May 26, 2005
Posts: 442
Location: Roseville, CA
|
| Posted: Fri Nov 16, 2012 9:04 pm Post subject: |
|
|
Message sent
_________________
69 Westy |
|
| Back to top |
|
|
RocketSurgeon
Samba Member
Joined: May 26, 2005
Posts: 442
Location: Roseville, CA
|
| Posted: Sun Nov 18, 2012 6:29 pm Post subject: |
|
|
Anyone local(Sacramento-San Francisco) want the frame I used to make the glue-lam?
I feel bad just tossing it.
_________________
69 Westy |
|
| Back to top |
|
|
Klaussinator
Samba Member

Joined: June 17, 2008
Posts: 1111
Location: Virginia
|
| Posted: Sun Nov 18, 2012 6:59 pm Post subject: |
|
|
Looks to me like you're all ready to go into production . . . taken any orders yet?!?
-Klauss
_________________
I have taken a vow of poverty. To annoy me, send money!
____________________________________________
the Klaussinator - `73 hardtop Bay custom-built camper |
|
| Back to top |
|
|
RocketSurgeon
Samba Member
Joined: May 26, 2005
Posts: 442
Location: Roseville, CA
|
| Posted: Sun Nov 18, 2012 10:19 pm Post subject: |
|
|
| Klaussinator wrote: |
Looks to me like you're all ready to go into production . . . taken any orders yet?!?
-Klauss |
Haha!
Coming spring 2013!!! 
_________________
69 Westy |
|
| Back to top |
|
|
jrehm
Samba Member
Joined: March 13, 2008
Posts: 53
Location: on the road permanently
|
| Posted: Mon Nov 19, 2012 8:40 am Post subject: |
|
|
| RocketSurgeon wrote: |
| Can't wait to get some use out of it in the spring.? |
Nice work! Glad to hear it worked out so well! Next time, I'm going 3 layers!
_________________
Driving around the the world in a '71 Westy. Ten years and 45 countries so far.
follow our misadventures: www.bodeswell.com or @bodes.well
------------------------------------------------------- |
|
| Back to top |
|
|
pioneer1
Samba Member
Joined: February 11, 2008
Posts: 2069
Location: Ontario Canada
|
| Posted: Tue Nov 20, 2012 9:20 am Post subject: |
|
|
[quote="jrehm I slide it out and rest it on the sunroof lip - not the roof itself - and the cushions align perfectly.[/quote]
I've been looking at these pictures trying to figure out where this "sunroof lip" is on my Canadian '73 Westy-alas no lip! back to the continental kit plan I guess.
_________________
"Always waiting for tomorrow ruined everything"
'85 Porsche 911 Targa
'76 Westfalia project |
|
| Back to top |
|
|
jrehm
Samba Member
Joined: March 13, 2008
Posts: 53
Location: on the road permanently
|
| Posted: Tue Nov 20, 2012 9:28 am Post subject: |
|
|
If memory serves me correctly, '72 was the last year that Westfalia conversions were based on the sunroof model kombi. Starting in '73, they used a normal bus and cut off the top and installed a full bed as standard. So, you shouldn't need to do this conversion - you should already have a double bed up there!
_________________
Driving around the the world in a '71 Westy. Ten years and 45 countries so far.
follow our misadventures: www.bodeswell.com or @bodes.well
------------------------------------------------------- |
|
| Back to top |
|
|
|


