| Author |
Message |
?Waldo?
Samba Member

Joined: February 22, 2006
Posts: 9752
Location: Where?

|
 Posted: Sun Sep 23, 2012 10:17 pm Post subject: Posted: Sun Sep 23, 2012 10:17 pm Post subject: |
 |
|
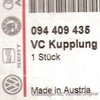
| What is that oil filler cap from? |
|
| Back to top |
|
 |
hans j
Samba Member
Joined: May 06, 2006
Posts: 2714
Location: Salt Lake City UT
|
| Posted: Sun Sep 23, 2012 10:21 pm Post subject: |
|
|
| Andrew A. Libby wrote: |
| What is that oil filler cap from? |
From a box in the trailer at work... But it appears to be aircooled, either Beetle T1 or Porsche. It seems to rattle though while cranking so I need to address that. But it is well over 1/2" shorter than the modern caps. I think they also made them with OEL stamped on them?
_________________
1986 Canadian Syncro Westy TDI - 1989 Syncro Single Cab - 2001 Audi S4 - 1981 VW Caddy ABA - 1980 VW Caddy EV - 1973 VW T-181 |
|
| Back to top |
|
|
mechano
Samba Member
Joined: July 12, 2010
Posts: 6
Location: Ankara / Turkey
|
| Posted: Mon Sep 24, 2012 2:12 am Post subject: |
|
|
Hi,
That post in Brick-Yard forum belongs to me 
I converted that van to 5cyl TDI for a friend of mine.
In my own T3 syncro I converted it from wbx to TDI (AFN code)
I use the signal from the ECU directly to the input pin of the SAK 215, bypassing the capacitor and the resistors, which is way simpler than the conversion I made to the LT bus.
I also have a post about it here, post #32:
http://forums.tdiclub.com/showthread.php?t=269288&page=3
I kind of shocked that you shared my post here, I was just looking at your conversion, great job you are doing by the way!
| hans j wrote: |
And last but certainly not least, modifications to the tach for the ECU signal
This one is mine:
After TONS of searching and not finding anything, somehow I came upon this post: http://www.brick-yard.co.uk/forum/lt-24-petrol-eng...tml#527970 mind=blown...
Now when I opened up the 1988 tach that was laying around, I noticed it was a bit different. Same basic layout, but the capacitor he had originally as a 0.047, I have as a 0.22. So I'm leaving it for now, at least until the engine runs and I can check it out against what the computer reads in VDCS. I did happen to buy a 0.47 capacitor that exactly like what is stock in my tach, but I'll see if I need it.
So that's it for now. I just keep on picking at the wiring until I hear back from Kerma in Tooele about deleting my IMMO3 issue. I do have a cable on the way from China that I might be able to use to pull the .bin file off the ECU, but I'm not holding my breath it's going to work.
I also still have to install the modified airbox, intake pipe, intercooler and charge piping. But it is SOOOO close! |
|
|
| Back to top |
|
|
hans j
Samba Member
Joined: May 06, 2006
Posts: 2714
Location: Salt Lake City UT
|
| Posted: Mon Sep 24, 2012 7:48 am Post subject: |
|
|
| mechano wrote: |
Hi,
That post in Brick-Yard forum belongs to me
I converted that van to 5cyl TDI for a friend of mine.
In my own T3 syncro I converted it from wbx to TDI (AFN code)
I use the signal from the ECU directly to the input pin of the SAK 215, bypassing the capacitor and the resistors, which is way simpler than the conversion I made to the LT bus.
I also have a post about it here, post #32:
http://forums.tdiclub.com/showthread.php?t=269288&page=3
I kind of shocked that you shared my post here, I was just looking at your conversion, great job you are doing by the way!
|
Yup I saw that post the other day too! On my tach, there were even two open pins on that circuit that were easy to solder to. So far it operates when cranking but I have to get it running (ECU IMMO) first before I can check how accurate it is. I was probably more shocked I never found the information here! However many TDI swaps there are out there and all anyone had to say was sometimes a Dakota Digital converter works, sometimes it doesn't.
Thanks again for sharing that information!!
_________________
1986 Canadian Syncro Westy TDI - 1989 Syncro Single Cab - 2001 Audi S4 - 1981 VW Caddy ABA - 1980 VW Caddy EV - 1973 VW T-181 |
|
| Back to top |
|
|
Escorial Syncro
Samba Member
Joined: May 02, 2004
Posts: 437
Location: Manitou Springs, CO
|
| Posted: Mon Sep 24, 2012 7:53 am Post subject: |
|
|
Hey Hans,
This is great fun, thanks for posting. I'm doing this same Eurospec/ALH conversion into a syncro, and I'm picking up all sorts or great ideas from your work. I too opted to build my own engine carrier, so your carrier solutions are of particular interest. Yours is similar to what I envisioned, but I hope you won't mind me "borrowing" some of your ideas! 
Regarding the engine sticking up through the rear deck, I ended up building a jig that bolts the transmission in perfect position as it sits with the WBXer, so it will be interesting if mine sticks up similar to yours.
On the starter hitting the diff lock bracket, does your '86 have the shorter diff lock carrier bracket? The later deeper bracket can be cut instead of the starter I think.
Oh, and I like the solution for the acc. pedal. That looks great too.
Can't wait for your report after the first drive. BTW, I probably missed it, but what gearing are you using?
Keep up the good work, Joel
_________________
Joel Lane
1985 Vanagon converted to syncro, ALH TDI, Reimo Primus top with Westy interior
2002 Toyota Tundra 4x4
1974 Honda CL360 Scrambler (for sale!) |
|
| Back to top |
|
|
hans j
Samba Member
Joined: May 06, 2006
Posts: 2714
Location: Salt Lake City UT
|
| Posted: Mon Sep 24, 2012 6:26 pm Post subject: |
|
|
Still no first drive, but when I get the ECU IMMO fixed, I should be able to just go out and drive it right away to break it in!
Take all the ideas you want! If you need more specific information or pictures just let me know and I'll get them for you.
I don't know what diff lock bracket I have. It looks like all the others I have seen so the standard one?
If you want to measure your trans jig, I can compare it to mine to see how close it is. Again, I'm more concerned with ground clearance than building a cover to fit it.
_________________
1986 Canadian Syncro Westy TDI - 1989 Syncro Single Cab - 2001 Audi S4 - 1981 VW Caddy ABA - 1980 VW Caddy EV - 1973 VW T-181 |
|
| Back to top |
|
|
Crankey
Samba Member

Joined: July 11, 2004
Posts: 2656
|
| Posted: Sat Oct 20, 2012 10:59 pm Post subject: |
|
|
that is a sweet bead rolling tool. I was thinking about a similar tool for small aluminum tube just last night. great idea welding the parts onto a vice grip, I think I'll steal it  |
|
| Back to top |
|
|
hans j
Samba Member
Joined: May 06, 2006
Posts: 2714
Location: Salt Lake City UT
|
| Posted: Sat Oct 20, 2012 11:13 pm Post subject: |
|
|
| Crankey wrote: |
| that is a sweet bead rolling tool. I was thinking about a similar tool for small aluminum tube just last night. great idea welding the parts onto a vice grip, I think I'll steal it |
Also seen here and here and all over the internet when searched. All sorts of forms of them. The next ones I build will be out of small bolt cutters, my hands got sore after all the stuff I had to make.
_________________
1986 Canadian Syncro Westy TDI - 1989 Syncro Single Cab - 2001 Audi S4 - 1981 VW Caddy ABA - 1980 VW Caddy EV - 1973 VW T-181 |
|
| Back to top |
|
|
hans j
Samba Member
Joined: May 06, 2006
Posts: 2714
Location: Salt Lake City UT
|
| Posted: Tue Jan 29, 2013 11:37 am Post subject: |
|
|
Well not much news lately due to finally being able to drive the diesel Ive been taking a much needed break from working on it to enjoy it and drive it around.
I still have some items to finish up in the ALH conversion but it's been running great. Best MPG so far is 27 on a 200 mile trip with mixed roads (freeway and snowpacked dirt). Power is amazing and exactly what I need
Trip to the spiral jetty in Northern Utah
http://en.wikipedia.org/wiki/Spiral_Jetty
Miles of nothing...
I had an issue with my rebuilt propshaft, found one of the caps was loose so I got some 1" OD arbor shims to tighten it up. Vibrations went way down after that.
I also bought a TIG welder recently so I'll be able to finish other things I need to do much nicer
Planning on rebuilding my transmission this summer as well, taller 3/4 gearing, oiling plates, decoupler and oil cooler. So I bought this gem from Derek Drew as the icing on the cake.
NOS South African aluminum main bearing housing
Hopefully this will be my first and last rebuild of this transmission!
Also found a decent deal on a 135w solar panel that will fit nicely. Want to have that on, my A/W intercooler setup done, engine cover finally built and a few other things by April.
Am I the only one who feels like this?
_________________
1986 Canadian Syncro Westy TDI - 1989 Syncro Single Cab - 2001 Audi S4 - 1981 VW Caddy ABA - 1980 VW Caddy EV - 1973 VW T-181 |
|
| Back to top |
|
|
syncroserge
Samba Member
Joined: November 26, 2005
Posts: 553
Location: Okotos, Alberta, Canada
|
| Posted: Tue Jan 29, 2013 12:17 pm Post subject: |
|
|
| hans j wrote: |
Am I the only one who feels like this?
|
I laughed so hard I almost choked 
I bought my first syncro westy new in 1989, that one was stolen...turned around and bought a 1991...
That one is nearing 300k miles, ALH TDI, all sorts of mods and recent complete body resto...
With the pile of money outside my window I could be living in our dream house...
Instead I live in a raggedy old ugly rental house...
With memories more than worth it keep going, you won't regret it.. |
|
| Back to top |
|
|
hans j
Samba Member
Joined: May 06, 2006
Posts: 2714
Location: Salt Lake City UT
|
| Posted: Sat Jun 22, 2013 9:54 pm Post subject: |
|
|
Oh hey look an update! Wow lots of stuff happened since last post, some not so good (for me, not the van). Did I full kitchen remodel to take my mind off it and keep me busy, the bad part is passed and now back on to building my vanagon!
So I actually haven't built much new stuff, but what I have done have made it much more pleasant to drive First off my spare tire cover, 10hp added for sure. Once again dusted off the die cutter and used a product called EasyWeed. It's an iron on material that can be cut in sticker machines. Awesome. So I've had this design for a while and just added a westy into it
I also got my on board air situated and all installed. Found a deal on Amazon for a Viair 380C pump and got a 2 gallon tank from the same store. I went to the local Hose and Rubber and picked up more hose and fittings I needed. Oh I also picked up a group 27 battery box for $6 so that went under the passenger side rear seat.
Tank bolts to the front skid plate (where spare normally goes).
It works great but I need to add a switch to it as it bleeds down slowly. I like having the tank so I can run air tools too. I had to cut off front CV bolts once on the trail because I couldn't get them out...
The battery is wired just like the factory has in the Bentley, relayed (to my 109 diesel relay so engine running it's connected, engine off it's disconnected). This actually helps in starting too. I have heavy gauge wire with a 70 amp relay and maxi fuse (plus another 100 amp fuse near the alternator) in the system. I can totally tell the difference cranking with the battery in. It will get a marine cranking deep cycle someday when the used battery I have totally goes dead.
I finally got my air filter housing built! Did I mention I bought a TIG welder earlier? Well I did and learned how to TIG aluminum.
It's 8" diameter, 1/8" thick aluminum pipe with a removable cover and 3" outlets on either end.
At work I changed the air filters on a 2010 Audi S6 and really liked the air filter shape, so I decided to use it for mine. It's essentially a paper cone filter so it's easy to replace, and since they used it on a new Audi as well as the new 2.5 turbo diesel Toyota Hilux, I should be able to get a replacement anywhere in the world. Also I figure it will be enough filtering for my engine compared to what the OEM application is. At any rate, I took it apart and measured it just for fun, 1100 square inches for you math types...
Fits nicely in the hole behind the tail light too. I used some 3" metal wound hose I found locally, it barely fit down the d-pillar! That part sucked. I thought it would be easy but hindsight says go to Autozone and buy the Spectre universal plastic hose, your experience will be better than mine..
I also finally did my steering rack bushings.
Didn't really want these to break on the trail in Moab, you should probably check yours too...
_________________
1986 Canadian Syncro Westy TDI - 1989 Syncro Single Cab - 2001 Audi S4 - 1981 VW Caddy ABA - 1980 VW Caddy EV - 1973 VW T-181 |
|
| Back to top |
|
|
hans j
Samba Member
Joined: May 06, 2006
Posts: 2714
Location: Salt Lake City UT
|
| Posted: Sat Jun 22, 2013 9:56 pm Post subject: |
|
|
Ok so the engine cover I was putting off for a while. I was really intimidated by it for some reason. Turns out my fears were unfounded and it was so easy I should have done it months ago... It helps to work at a shop with a box pan brake I found a piece of 1/16" or so aluminum, cut it with air shears to the size I wanted and started folding.
I made sure everything was going to fit and then transferred the measurements over to the new lid.
I had been driving around with several layers of cardboard on top of it to try to dampen the sound...
I made the cover 3" tall because I knew 3" foam was available, somewhere... Turns out it's harder to find than I thought, but finally in the camping section at Smiths Marketplace I found both the 3" and 1" I needed! I could have just cut out the stock foam but it kind of makes me sick to do that (even though I know I'll never use it, but it's in such good shape!!).
I put a piano hinge in the rear and window latches (for house windows) in front. Ran foam door seal stuff around the edge to seal it and it's great! I can access pretty much the entire engine without pulling the whole lid off.
Then another trip to Home Depot for silver bubble insulation to cover it and I'll call it done!
Ok so it's not done until it gets a fabric cover, but I have slept on it and I was pleased. And it was quiet! Well for a diesel...
Oh then Syncro Solstice happened:
http://www.thesamba.com/vw/forum/viewtopic.php?p=6670522#6670522
What plans are running in my head currently? Machining adapters for a CV drive line, custom external reservoir suspension (possibly with dual rate springs), sewing a cover for the rear foam cushion and I thought there was something else... Probably but after a couple beers writing this, I don't really care... Unrelated I am going to order my new range and fridge soon too! That's just as fun as building syncro stuff right?! Oh I did pick up another spare BFG today! Going with two full spares, because I can 
_________________
1986 Canadian Syncro Westy TDI - 1989 Syncro Single Cab - 2001 Audi S4 - 1981 VW Caddy ABA - 1980 VW Caddy EV - 1973 VW T-181 |
|
| Back to top |
|
|
hans j
Samba Member
Joined: May 06, 2006
Posts: 2714
Location: Salt Lake City UT
|
| Posted: Sat Jun 22, 2013 9:59 pm Post subject: |
|
|
And watch this:
Link
Can that be my life yet?
_________________
1986 Canadian Syncro Westy TDI - 1989 Syncro Single Cab - 2001 Audi S4 - 1981 VW Caddy ABA - 1980 VW Caddy EV - 1973 VW T-181 |
|
| Back to top |
|
|
syncrodoka
Samba Member

Joined: December 27, 2005
Posts: 12005
Location: Santa Cruz, CA
|
| Posted: Sat Jun 22, 2013 11:24 pm Post subject: |
|
|
I pulled a air tank out of a range rover with air ride at the junk yard. I have been meaning to install it but have been looking for a good location without welding it to a frame rail that can cause ground clearance issues. That location would solve all my issues, I will be borrowing the idea.
I just need to find the correct York compressor to finish the OBA build.
I yearn for that to be my life too. I love watching that video every time it comes up.
| hans j wrote: |
And watch this:
Link
Can that be my life yet? |
|
|
| Back to top |
|
|
kryptkat
Samba Member
Joined: November 08, 2008
Posts: 236
|
| Posted: Sun Jun 23, 2013 12:57 am Post subject: |
|
|
| Great post Hans, hope the TDI is still running like a top. Are you and your rig ready for the West Coast? Hopefully we'll get to do some excursions while you're out here. |
|
| Back to top |
|
|
TheBlueTurtle
Samba Member

Joined: July 03, 2007
Posts: 353
|
| Posted: Fri Jun 28, 2013 7:15 am Post subject: |
|
|
What are you wheel/ tire sizes ? Are those stock 14" steelies?
_________________
84 Westfalia (Goldie)
GoWesty 2.2 |
|
| Back to top |
|
|
hans j
Samba Member
Joined: May 06, 2006
Posts: 2714
Location: Salt Lake City UT
|
| Posted: Fri Jun 28, 2013 7:39 am Post subject: |
|
|
| TheBlueTurtle wrote: |
| What are you wheel/ tire sizes ? Are those stock 14" steelies? |
Stock early Eurovan wheels. 15x6 ET44 plus 15mm spacers on each corner makes them ET29 (plus longer studs). 55 pounds each with BFG AT 215/75-15.
_________________
1986 Canadian Syncro Westy TDI - 1989 Syncro Single Cab - 2001 Audi S4 - 1981 VW Caddy ABA - 1980 VW Caddy EV - 1973 VW T-181 |
|
| Back to top |
|
|
cookrw
Samba Member
Joined: June 09, 2009
Posts: 873
Location: Augusta, KY
|
| Posted: Thu Aug 15, 2013 7:10 pm Post subject: |
|
|
This is awesome. I wish I had as much get up and go as you!
_________________
'71 Super 'Vert
'84 Vanagon GL (w/ Sunroof!)
'96 Jeep Cherokee |
|
| Back to top |
|
|
hans j
Samba Member
Joined: May 06, 2006
Posts: 2714
Location: Salt Lake City UT
|
| Posted: Tue Nov 12, 2013 10:56 pm Post subject: |
|
|
Huh... Guess I need to update this more frequently so I don't spend three hours telling you all what's new... So here's what's new!
During Syncro Solstice, I realized I wanted different suspension. I looked into all the options, costs and benefits and decided to keep it with my theme of build it myself. Also some talk of swaybar disconnects came up (search the archives) and that's on my list. But I needed some information.
First thing, check articulation:
Close up of sway bar disconnected:
Results were actually sort of good! It's slightly better than a stock XJ Jeep! And one inch was gained by disconnecting the sway bar. I also took all sorts of shock measurements which are written on a small piece of paper and probably lost by now. Note to self, take photos of stuff you write down. Anyway, turns out the front can lift about 17 inches off the ground with the sway bar connected. Once I get my hands on a lathe I will be making rattle proof disconnects
Next up was to corner weigh:
Results were as expected, it's a heavy pig, but reasonably balanced! Weighed with me in it, 1/3 tank of diesel, lots of extra weight added to simulate full load. I also weighed all the individual pieces of suspension to calculate unsprung weight. Seems I don't have photos but pretty much each corner weighs in around 120 pounds and the rear weight is halved (when talking unsprung weight) due to it being a semi-trailing arm design. All of this will come in handy later...
Quick off road time waster before hockey to check out some dirt roads and measure shock temperatures
Dual spare tires!
Pretty much mirrored what works on the other side. I was thinking about making brackets to bolt on that would be different so I could add a ski rack or something, but now I will be cutting apart a bent steel wheel and just welding a bike or ski rack to that and bolt it on to the tire rack!
Then I went and hung out with the local 4x4 guys... That was interesting...
(text and photos taken directly from here in case you missed it : http://www.thesamba.com/vw/forum/viewtopic.php?p=6767250#6767250)
"Back to syncro abilities! I went out with one of the local 4x4 clubs to a training day and drove with them as well. The trail was Mineral Basin Road in American Fork canyon Utah. Google and youtube it for thousands of hits. You will specifically find Rock Garden hits and videos (where these photos were taken). Original thread here:
http://www.rme4x4.com/showthread.php?98665-2013-Summer-Quarterly-Training-Day-Trip-Report
In short, the stock syncro is extremely capable. I'm only sitting at 18.5" height with 215/75-15 BFG deflated to 22psi. TDI gave plenty of power. I scraped more coming down the trail than going up, even an inch more of clearance would have been significant on this trail.
The syncro also requires a different kind of spotting than a regular 4x4, my spotter found this out very quickly when I was taking lines he never would have thought of and passing them easily. He noticed our ability to just drive straight over stuff and not try to place the wheels on top of rocks to get a solid axle to pass.
I did touch stuff quite a bit still. Basketball size rocks will do that for you... Items I will be beefing up after driving this road: Front control arms could use some armor, thinking 11 gauge plate welded to the bottom. Rear skid plate needs to be bent back down and possibly beefed up. My sliders worked great but I want stronger mounting points. Want to bolt a heavy skid plate to the front diff carrier, I skid along that a few times but height will also help. I barely touched the driveline protectors, but they are getting upgraded anyway when I build my CV joint driveline. Both rear mudflaps came off, never had an issue with them, but this trail was particularly rocky so I'll have to be careful next time I go out.
I'll think about doing this trail again when I build my suspension, should be night and day with what I am going to put in."
And then it was time for a vanagon trip!
Mini-dirt-tour-Utah
We had been talking about a big dirt tour of Utah but time never panned out for all of us so a quick over nighter was in order. These are just a few of the photos taken, but the best images are in my memory. Thanks Jeremy, Pam, Bob, Craig and Paige. Super fun trip, let's do it twice a month.


About 100 miles of dirt road and camping at 10,000 feet with an amazing sunset. Found out my diesel REALLY likes the speeds of dirt roads, every time I checked the scangauge it was reading 40mpg average! Seriously love it.
And this showed up,


And then these parts,

make these parts,

out with the old

in with the new!

Installed!

tire clearance with 215/75-15 on ET44 Eurovan wheels with 15mm spacers. Ground down and TIG welded joints. Should be plenty of room for chains!

So about my suspension. I had been looking for quite a while and finally settled on building this. Hindsight would just have me buy the adjustable FOX shocks and zero-lift springs but I HAD to do something different I guess. Plus this will be about $700 cheaper than that option. It's just taking longer to build than I wanted, but that's what you get with small companies.
For now they have 400 rate springs installed since I haven't gotten the rest of the parts for the front machined (external reservoir coilovers also). I'll likely do 600 rate in all but left rear, that will be 650. They will all have coilover style adjustments for adjusting height and corner balancing the suspension. I do it because I can
Now if you go back and look closely you will see the transmission missing...
It's like a little coffin:

Yup, 3/4 slider broke  Two days before SoCal MogFest and a week before a planned camping trip to Zions. While my S4 is fun to drive, it's not that great of a camper! I had to set up my tent! Two days before SoCal MogFest and a week before a planned camping trip to Zions. While my S4 is fun to drive, it's not that great of a camper! I had to set up my tent!
But it worked out, my brand new trans just got done getting everything done but the decoupler (I spend a LOT of money and time on my hobby but that one has to wait for now). And I settled on the 1.14 3rd and .73 4th for my driving style. Thanks again Jon for all your advice, even though I did something different. Plus while the van has been sitting there, I was able to install the rear suspension. Those old spring perches weren't even mine, they were core arms. Mine were much worse! I'm amazed they held together! I knew they were going bad, I though about it every time I drove it. Pretty sure the new ones aren't going to break.
I was also able to fix a factory cruise control stalk and get that installed. A few minutes sorting wires and looking at my wiring diagram and I have cruise control! Really can't wait to use this feature
That's about it for tonight, I'll add more when I get my trans and can drive it again!
_________________
1986 Canadian Syncro Westy TDI - 1989 Syncro Single Cab - 2001 Audi S4 - 1981 VW Caddy ABA - 1980 VW Caddy EV - 1973 VW T-181 |
|
| Back to top |
|
|
tam_shops
Samba Member

Joined: November 15, 2012
Posts: 1530
Location: Vancouver BC
|
| Posted: Tue Nov 12, 2013 11:37 pm Post subject: |
|
|
Wow, nice work, on everything!
Too cool w/ the sticker and new dash lights! What kind of paper/product did you use to print that sticker? What is weeding a sticker? Cutting? If you cut that w/ a knife, Wow x10! LOL My head light decal (or is it paint?) is worn off and I'd been thinking about using some oil paint to fill in the lines again, but was worried I'd just make a mess of it...
And, thanks for explaining to me why I had 2 bulbs w/ no purpose on my dash. I've been wondering for months now! Things w/ no purpose and holes for no reason drive me crazy in that special kind of way! Wonder why the Canadian Vanagons don't have an O2 sensor?
tam
| hans j wrote: |
And so my car, being Canadian, didn't have the O2 sensor bulb? Oh well. All the tracks are there, so I just poked a needle through and put in a new 12v LED (with the polarity correct!). See small circle near bottom!
The circle on the right is to complete the circuit for the track. I guess I could have put any voltage bulb I wanted there and then installed the correct resistor for it... But I didn't feel like it. Plus Radioshack had 12v ones, but only in red. So my glow plug light is red instead of orange. I'm already over it since it's done. I did dribble a little bit of solder into the LED connection, it was a little sporadic in working until then.
Annnndddd I didn't have a diesel cluster to steal the center display out of... So I had to improvise, again.
And what I got was an awesome, VERY small glow light symbol!
Oh how cute...
It's a little more white and thicker than the other symbols, but it SUCKS weeding stickers that small.
Looks good though!
I can make you some if you really, REALLY want one.
|
_________________
1987 Vanagon Westfalia GL Automatic
Making it special:
http://www.thesamba.com/vw/forum/viewtopic.php?t=545885 |
|
| Back to top |
|
|
|


