| Author |
Message |
ncstagger
Samba Member
Joined: June 04, 2010
Posts: 284
Location: Fayetteville, NC

|
 Posted: Fri Mar 22, 2013 6:09 am Post subject: 71 Westy Tintop renovation (Pic heavy) Posted: Fri Mar 22, 2013 6:09 am Post subject: 71 Westy Tintop renovation (Pic heavy) |
 |
|
Figured its about time I get my rebuild thread going for this bus. I bought in back in 2010 and have been really slow working on it until recently. I'll try to get caught up here.
I'm calling this a renovation, not a restoration, out of respect to the folks who do real restoration quality work. I'm an amateur, no experience whatsoever in body work, upholstery, electrical, heavy mechanical stuff like suspension, etc. I do have some experience with engines and VW busses in general as I owned half a dozen or so through the years but that was over 20 years ago.
My wife knows how much I love these vehicles and she found this one on craigslist in Raleigh in May 2010, then talked me into buying it. Really twisted my arm. A young couple owned it and had gutted the camper interior with thoughts of using it as a work truck to operate a pressure washing business. It apparently had a bad oil leak and the guy said he forgot to add oil one day and it blew up.
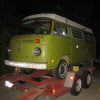
We drove down to see it with my youngest boy along for the ride. Checked it over and found some rust in the front floorboard, passenger side rocker and wheel wells, battery tray, lower rear corners and a couple spots here and there. The roof down just past the gutters looked like it had been redone and painted as did the front nose. New windshield rubber. I guess someone started a restoration and stopped part way. Heres a few photos of how I found it.
Checked out the engine compartment, it was pretty gnarly with oil everywhere. The engine was inside, had a rod poking out the top of the case.
Looked like most of the interior was present just dismantled. The front seats were shredded and most of the paneling was shot. Grease and filth was everywhere but I could see past that and figured there was potential. The icebox/sink unit was there but no water tank. Owner said it was mildewed so he threw it out  . .
We haggled a bit and he ended up accepting $600. Got the title signed over, loaded it up and brought her home.
Got a lot of work to do.
_________________
71 Westy Tintop - 1600 DP 34PICT3/009 - Pastel White
Resto thread here: http://www.thesamba.com/vw/forum/viewtopic.php?t=549162
"Take your most realistic time frame and dollar amount.. then add half of that amount. When you get that total... double it. Only then will you be in the ballpark." - sofaking |
|
| Back to top |
|
 |
ncstagger
Samba Member
Joined: June 04, 2010
Posts: 284
Location: Fayetteville, NC
|
| Posted: Fri Mar 22, 2013 6:41 am Post subject: |
|
|
First order of business was unloading everything, stripping down the interior and evaluating what was there, and what I want to do to it.
Sink unit not too bad, but will need some attention. All the cabinets are present.
Found the cot.
It was so filthy I just grabbed the hose and some simple green, hosed it out, scrubbed it down and rinsed.
So now we have a bunch of clean rust to look at. Some of the rust spots were pretty bad, much worse than I originally thought. A number of holes in the cargo floor and the driver side seat belt anchor is totally gone.
Now I have a pretty good idea of the condition of the interior metal. Its worse than I thought and will require some cutting and welding to repair properly. Need to evaluate the exterior next.
_________________
71 Westy Tintop - 1600 DP 34PICT3/009 - Pastel White
Resto thread here: http://www.thesamba.com/vw/forum/viewtopic.php?t=549162
"Take your most realistic time frame and dollar amount.. then add half of that amount. When you get that total... double it. Only then will you be in the ballpark." - sofaking |
|
| Back to top |
|
|
Sage79
Samba Member
Joined: September 13, 2008
Posts: 433
Location: Holland MI
|
| Posted: Fri Mar 22, 2013 6:48 am Post subject: |
|
|
Looks like it's got pretty good bones, as we say in the building industry. Sure, some work, but what an adventure, especially as a family project. Congrats and enjoy the ride.
_________________
Dirk
'79 Westy 2.0FI
'73 Sportsmobile 1.7dual Solex 003Auto - now my daughter's
'77 delux 2.0FI 090Auto - now my son's |
|
| Back to top |
|
|
ncstagger
Samba Member
Joined: June 04, 2010
Posts: 284
Location: Fayetteville, NC
|
| Posted: Fri Mar 22, 2013 7:30 am Post subject: |
|
|
Thanks. Definitely an adventure.
I certainly got a wake up call as to how the VW scene has changed over the past 20 years. I tried to call my old hometown vw shop but it closed down years ago. Most all of them apparently have. I called up my old junkyard sources. They said they haven't seen an air cooled vw engine in years and they crushed all the old busses they had 10 years ago or more. Well that changed everything. Had to find new suppliers for everything. Online shopping. Prices are somewhere around 5 to 10 times higher now than before and a lot of stuff is NLA. First indication that this was going to be a lot more expensive than I had thought was when I went to replace the vent cap on the roof. Had to search for one, found it on Samba, cost 25 dollars and have to pay to have it shipped. That's the new norm so I had to adjust. Not really a big deal, just an adjustment. I feel very fortunate to have the Samba as a resource.
On to the exterior evaluation. You'll notice the scenery has changed as I moved twice since buying the bus.
Starting with the front, it looks to be in good shape. New window rubber, has been recently painted, no signs of rust or filler. Has a shiny chrome emblem. Not sure if it originally came painted or chrome. Bumper is pretty straight and the overriders are in a box full of parts. I haven't seen an antenna in this location before.
That's the good and here's the bad...the passenger side is the worst with major rust on the rear lower panel and rocker plus a hole on the dogleg.
The slider is fine, door works great but the outer rocker is mostly gone.
Also there is a weird strip of texture about three inches in width along the bottom of the body in places. You can see it on the door. Not sure what that is but it will have to be sanded off. Almost looks like tape.
Now the driver side. Not too bad except for the lower rear.
And the rear...both corners have filler and rust, not good.
Definitely a lot of body work to be done and I have no skills in that area and no tools or welder. The top and front have been repainted at some point, appears to be very close to the original pastel white color but the rest of the body has some kind of flat white primer or something on it, may be rattle can or even rolled on so I think trying to get the original paint back is not an option. Body work and new paint will be a huge expense.
_________________
71 Westy Tintop - 1600 DP 34PICT3/009 - Pastel White
Resto thread here: http://www.thesamba.com/vw/forum/viewtopic.php?t=549162
"Take your most realistic time frame and dollar amount.. then add half of that amount. When you get that total... double it. Only then will you be in the ballpark." - sofaking |
|
| Back to top |
|
|
ncstagger
Samba Member
Joined: June 04, 2010
Posts: 284
Location: Fayetteville, NC
|
| Posted: Fri Mar 22, 2013 8:10 am Post subject: |
|
|
So after evaluating the condition of the bus and taking into account prices and part availability I decided on a plan. What we want is a bus that we can use. We want to go camping and traveling in it as a family. I may even want to use it as a daily driver. With all the rust I dont feel its the best candidate for a full restoration. What I will do is patch up the interior metal as best I can and stop the rust as much as possible. I'll rebuild the interior as close to original as I can, within reason. Actually the whole thing will be as close to original as possible. I'll look for a longblock and do the engine work myself, refurbish the engine compartment and electrical systems and sand and prime the exterior rust spots temporarily. I'll do the brakes and get proper tires. The exterior body work and paint will be left to a professional. At that time I'll also have him or her address the larger holes in the interior metal that are too big for epoxy and weld in a seat belt anchor for the driver.
Started the interior by grinding all the rust smooth and applying two coats of Masterseries silver. Chose that over the POR-15 after researching both. I really like how it went on, very pleased with the results. Hopefully this will at least stop the rust from proceeding. Then I used JB Welds Steel Epoxy product to fill the smaller holes in the metal. Be interesting to see how the epoxy holds up. Its hard as a rock right now. Once all that dried, went back with more Masterseries and top coated with Rustoleum white.
After dealing with the rust I cleaned and painted all the interior metal that will show with L90D pastel white from Wolfsburg West. Also pulled out the old fiberglass insulation and installed the silver bubble wrap stuff from Home Depot on the ceiling and walls.
_________________
71 Westy Tintop - 1600 DP 34PICT3/009 - Pastel White
Resto thread here: http://www.thesamba.com/vw/forum/viewtopic.php?t=549162
"Take your most realistic time frame and dollar amount.. then add half of that amount. When you get that total... double it. Only then will you be in the ballpark." - sofaking |
|
| Back to top |
|
|
secretsubmariner
Champagne Wrangler

Joined: January 08, 2011
Posts: 3104
Location: Tulsa, OK
|
|
| Back to top |
|
|
ncstagger
Samba Member
Joined: June 04, 2010
Posts: 284
Location: Fayetteville, NC
|
| Posted: Fri Mar 22, 2013 8:43 am Post subject: |
|
|
Got a set of seat stand mats from WW and installed them. A bit akward to get these to fit but once I finally got them on they fit great. Used contact cement on the sides, no adhesive at all on the top.
The front mats cleaned up nicely.
Now to address the front seats. The driver seat was the worst. Too far gone to even think about sitting on.
Stripped the old cover and padding off down to the frame. Found this odd framework item inside the padding. Not sure if this is original or not. It was embedded inside the coconut husk material.
Found two broken springs and had them welded. Painted the frame black.
Bought a set of covers from WW along with the original style "horsehair" pads, some burlap and some sisel felt type padding. I also got the hog ring kit. I was pretty worried about trying to recover these myself but it really wasn't as bad as I thought it would be. WW included a DVD that helped. I'm
really happy with how it turned out.
Here's a shot of the original cover next to the new one from Wolfsburg West. Almost an exact match. Beige basketweave.
_________________
71 Westy Tintop - 1600 DP 34PICT3/009 - Pastel White
Resto thread here: http://www.thesamba.com/vw/forum/viewtopic.php?t=549162
"Take your most realistic time frame and dollar amount.. then add half of that amount. When you get that total... double it. Only then will you be in the ballpark." - sofaking
Last edited by ncstagger on Fri Mar 22, 2013 9:38 am; edited 1 time in total |
|
| Back to top |
|
|
Skoolieman
Samba Member

Joined: January 31, 2011
Posts: 573
Location: Chattanooga TN
|
| Posted: Fri Mar 22, 2013 9:18 am Post subject: |
|
|
Those seats came out really nice. All in all this looks like a nice candidate to get cleaned up. I couldnt tell from the pics, though. Did you fix the seat belt mount. I understand being on a budget, but a seat belt would be a necessity in my book in a bus.
Also, I noticed you bought color matching paint from WW. If that is expensive, over in the paint and body forum they have all the factory colors matched up to Krylon colors. The almond gloss was a perfect match for my 69 westy.
Keep up the progress!
_________________
'69 Westfalia Camper~Cassidy
1600dp with H30/31 carb 009 distributor and alternator conversion |
|
| Back to top |
|
|
ncstagger
Samba Member
Joined: June 04, 2010
Posts: 284
Location: Fayetteville, NC
|
| Posted: Fri Mar 22, 2013 9:47 am Post subject: |
|
|
| Skoolieman wrote: |
Those seats came out really nice. All in all this looks like a nice candidate to get cleaned up. I couldnt tell from the pics, though. Did you fix the seat belt mount. I understand being on a budget, but a seat belt would be a necessity in my book in a bus.
Also, I noticed you bought color matching paint from WW. If that is expensive, over in the paint and body forum they have all the factory colors matched up to Krylon colors. The almond gloss was a perfect match for my 69 westy.
Keep up the progress! |
Thanks. The seat belt mount will be repaired prior to the bus being put back on the road. There are a few spots, that one included, that were too much to deal with without a welder. I'll have them taken care of along with the exterior body work. I did find a seat belt mount patch panel at Bus Depot and plan to try it out.
The WW paint is kind of expensive. I did try that thread you mentioned but did not see where anyone had a good match for the pastel white. I asked a couple times but no response. A lot of the other colors did have matches. Since then I found (thanks to someone who posted somewhere on Samba, can't remember where or who) that Rustoleum's Biscuit color appliance paint is also a near identical match for pastel white. I plan to have the exterior painted professionally with "real paint."
_________________
71 Westy Tintop - 1600 DP 34PICT3/009 - Pastel White
Resto thread here: http://www.thesamba.com/vw/forum/viewtopic.php?t=549162
"Take your most realistic time frame and dollar amount.. then add half of that amount. When you get that total... double it. Only then will you be in the ballpark." - sofaking |
|
| Back to top |
|
|
ncstagger
Samba Member
Joined: June 04, 2010
Posts: 284
Location: Fayetteville, NC
|
| Posted: Fri Mar 22, 2013 10:57 am Post subject: |
|
|
Since I need to be able to drive the bus somewhere to get the body work and misc welding done, the next step was to look at getting an engine in there.
I stripped the old one down. With a hole in the case, its not an option but its possible that some of the parts can be reused. There is a set of heads, a crankshaft/flywheel, camshaft, 4 cylinders, 3 pistons and 3 rods, oil cooler, DP intake, 34 pict-3 carb, fuel pump, two heater boxes, a stock beetle type exhaust, crank pulley, 30A generator, clutch/plate, t.o. bearing, starter, 30A voltage reg, doghouse shroud and fan, complete set of tin and a crapload of misc bolts, nuts, etc.
After cleaning everything up and giving it some thought I decided to look for a used longblock. Goal is to try and reuse some of the external engine items and electrical components. Carb will need a rebuild and I'll scrap the beetle exhaust for a new stock style bus setup. This will allow me to get the thing running for a somewhat reasonable outlay and I can work on getting a new engine built they way I want it that's ready to go in a year or two.
First thing I did was buy the Bentley. I've always rolled with Muir's Idiot Book but the Service Manual is really a necessary item. I have both of them nearly memorized at this point.
I found a supposedly good used longblock with 50K on it from a fellow Samba member. I hope to get another 10K or so out of it. Enough to have the bus mobile while the renovations are completed and to take a few family outings over the next year or so. It isn't easy finding a used VW engine around here. They just aren't available like they used to be. Anyways, this is a 71 AE bus engine, supposedly well-maintaned with good compression all around. I had it shipped in, replaced the front seal, no end play, so far so good.
Here it is under construction, I've added the gen stand, pulley, valve covers, fuel pump and clutch/plate at this point. Its sitting on the heater boxes but they aren't on yet.
The engine mounts on the moustache bar were shot so I replaced those.
Unfortunately, it was right after this point that our camera died so there are no more pics of the engine assembly. I wish I had been able to document that with photos but it didn't happen. The engine has now been completed. I ordered a new camera last week, it should be here soon and I'll post pics of the completed engine when it gets here.
Things that got done were cleaning and painting all the engine tin and shroud gloss black, cleaning and hi-temp painting the heater boxes, new plugs, breather tube tip, oil filler gasket, new points, condenser and cap in the 009 from the first engine, cleaned up the generator and installed new brushes, installed a new stock style bus muffler/exhaust, had the 34 pict-3 rebuilt, had to buy another intake as the old one's heat riser was blocked and I finally gave up on trying to get it unclogged after a couple months, of course all new gaskets, hoses and belt.
_________________
71 Westy Tintop - 1600 DP 34PICT3/009 - Pastel White
Resto thread here: http://www.thesamba.com/vw/forum/viewtopic.php?t=549162
"Take your most realistic time frame and dollar amount.. then add half of that amount. When you get that total... double it. Only then will you be in the ballpark." - sofaking |
|
| Back to top |
|
|
superman73
Samba Member

Joined: December 21, 2006
Posts: 2032
Location: Crystal Springs, Mississippi
|
|
| Back to top |
|
|
ncstagger
Samba Member
Joined: June 04, 2010
Posts: 284
Location: Fayetteville, NC
|
| Posted: Fri Mar 22, 2013 11:29 am Post subject: |
|
|
| superman73 wrote: |
| nice job! im about to start working on my 1970 deluxe bus again. ive been collecting parts and just got the title issue worked out. keep up the good work! |
Thanks. I had a 70 poptop years ago. Still miss that one it was my favorite (so far  ). ).
_________________
71 Westy Tintop - 1600 DP 34PICT3/009 - Pastel White
Resto thread here: http://www.thesamba.com/vw/forum/viewtopic.php?t=549162
"Take your most realistic time frame and dollar amount.. then add half of that amount. When you get that total... double it. Only then will you be in the ballpark." - sofaking |
|
| Back to top |
|
|
ncstagger
Samba Member
Joined: June 04, 2010
Posts: 284
Location: Fayetteville, NC
|
| Posted: Fri Mar 22, 2013 11:44 am Post subject: |
|
|
While getting the engine ready I decided to tackle the engine compartment. It was pretty rank:
On the driver's side there is some kind of something there that I don't think is original. Can anyone identify it? I'm thinking its some kind of cruise control flow meter type thingamajigger. They were popular back in the 80's. I'm not sure what it is but I removed it.
Again, no pics of the finished product yet but then engine compartment is done and the engine is installed. I'll post pics after the new camera gets here.
What was done was everything degreased, cleaned, firewall painted grey, compartment painted pastel white, new rubber seals installed, removed fuel lines and screen, flushed gas tank, installed new screen and mounted new fuel line with filter over the tranny, installed new trans ground strap, engine ground strap, new firewall grommets, cleaned up starter, new starter bushing, new battery cable and ground strap, went through wiring, removed non-stock wires, soldered new connectors where needed, installed new side markers, greased all cables, new heater cable connectors, probably some other stuff I've forgotten.
_________________
71 Westy Tintop - 1600 DP 34PICT3/009 - Pastel White
Resto thread here: http://www.thesamba.com/vw/forum/viewtopic.php?t=549162
"Take your most realistic time frame and dollar amount.. then add half of that amount. When you get that total... double it. Only then will you be in the ballpark." - sofaking |
|
| Back to top |
|
|
ncstagger
Samba Member
Joined: June 04, 2010
Posts: 284
Location: Fayetteville, NC
|
| Posted: Fri Mar 22, 2013 11:59 am Post subject: |
|
|
There's no way to remember all the little things done during a project like this. Also no way to thank all the people who have helped. I really could not have gotten this far without the kindness of Samba members over the last couple years.
There are folks like busdaddy, desertbusman, sgkent and countless others who have either replied directly to one of my pleas for help or have helped someone else and I have come by later and reaped the benefit of their posts. I dont know if these people realize how helpful and invaluable their input here really is. I am very grateful for all of their generosity and kindness (and even occasional snarkiness) as they share their experience and knowledge. Also, don't forget there is a donate button to help a bit with the expense of running this website. I know whatever I can give it certainly does not come close to matching what I have received.
I'll update more when I can post pics to show the current status but right now the engine is in and running. Yes, it's ALIVE!
First try it would not start. Found that the OG fuel pump was shot. Replaced it yesterday and after a spoonful of gas in the carb to prime, it fired right up and purred like a kitten. But why not, right!? Dwell is 43 and idle is a bit low at 750 so I'll work on fine tuning it this afternoon and check the advance timing. The 009 will have to do until the newly rebuilt DVDA arrives next week  . Also need to install an accelerator pedal rebuild kit to get rid of the slop in the current one. If I can get the engine tuned just right I'll try and take it around the yard and see how close I got the shift plate adjustment. . Also need to install an accelerator pedal rebuild kit to get rid of the slop in the current one. If I can get the engine tuned just right I'll try and take it around the yard and see how close I got the shift plate adjustment.
Also found a source for baltic birch in Raleigh, Capital City Lumber. They have the 5 x 5 sheets of 1/8" for 25 dollars each. I picked up 4 of them and can now start working on the ceiling and wall panels. The adventure continues.
_________________
71 Westy Tintop - 1600 DP 34PICT3/009 - Pastel White
Resto thread here: http://www.thesamba.com/vw/forum/viewtopic.php?t=549162
"Take your most realistic time frame and dollar amount.. then add half of that amount. When you get that total... double it. Only then will you be in the ballpark." - sofaking |
|
| Back to top |
|
|
superman73
Samba Member
Joined: December 21, 2006
Posts: 2032
Location: Crystal Springs, Mississippi
|
| Posted: Fri Mar 22, 2013 1:25 pm Post subject: |
|
|
that birch should look really good inside. mine is a tin top also and it had a side closet when i got it and the camper side windows, so im thinking weekender. i have changed to slider windows and sold the closet and bought a middle and rear seat. im inspired to get back on mine after reading your thread. thanks!!!
_________________
Chuck
Jesus Saves
70 deluxe bus
74 ghia 1776 dual carb
67 manx clone
various other parts cars.
http://www.thesamba.com/vw/forum/viewtopic.php?t=228364&highlight=superman73sb+bellsouth |
|
| Back to top |
|
|
superman73
Samba Member
Joined: December 21, 2006
Posts: 2032
Location: Crystal Springs, Mississippi
|
|
| Back to top |
|
|
gands
Samba Member
Joined: August 31, 2009
Posts: 79
Location: Arkansas
|
| Posted: Fri Mar 22, 2013 1:40 pm Post subject: |
|
|
| Love your bus! And the way you are doing it (another one saved) I have done paint and body work for close to thirty years, it will cost 15k and beyond for a any classic including a bus to be brought back from the dead (paint and body only) when people ask why I don't paint my bus I tell them it's built for my enjoyment. |
|
| Back to top |
|
|
ncstagger
Samba Member
Joined: June 04, 2010
Posts: 284
Location: Fayetteville, NC
|
| Posted: Fri Mar 22, 2013 3:53 pm Post subject: |
|
|
dont know why this thread is still only on the first page. maybe i should have put only a couple of pics in each post ? sure does load slowly.
anyway, the new camera has arrived so i'll give it a try in a bit.
the bus made her maiden trip today....one lap around the backyard! only took 2 years, 9 months and 22 days! Got the new gas pedal kit in but still need to fine tune the engine. dwell is good at 44 but having a hard time keeping the idle high enough. i think i'll make sure the timing is just right before i worry with the idle again.
_________________
71 Westy Tintop - 1600 DP 34PICT3/009 - Pastel White
Resto thread here: http://www.thesamba.com/vw/forum/viewtopic.php?t=549162
"Take your most realistic time frame and dollar amount.. then add half of that amount. When you get that total... double it. Only then will you be in the ballpark." - sofaking |
|
| Back to top |
|
|
ncstagger
Samba Member
Joined: June 04, 2010
Posts: 284
Location: Fayetteville, NC
|
| Posted: Mon Apr 15, 2013 10:05 pm Post subject: |
|
|
Finally got the engine running really well. My timing was way off, once I got that right everything else fell right into place. Added a degree pulley also. Started another thread about the timing/fuel pump/009 issues so I wont restate it all here. If you're interested its here: http://www.thesamba.com/vw/forum/viewtopic.php?t=549372
_________________
71 Westy Tintop - 1600 DP 34PICT3/009 - Pastel White
Resto thread here: http://www.thesamba.com/vw/forum/viewtopic.php?t=549162
"Take your most realistic time frame and dollar amount.. then add half of that amount. When you get that total... double it. Only then will you be in the ballpark." - sofaking |
|
| Back to top |
|
|
ncstagger
Samba Member
Joined: June 04, 2010
Posts: 284
Location: Fayetteville, NC
|
| Posted: Mon Apr 15, 2013 10:20 pm Post subject: |
|
|
My new camera turned out to be a real lemon so I tried again and got one that takes pretty decent pics at last.
Couple shots of the newly installed engine and engine compartment.
[/img]
_________________
71 Westy Tintop - 1600 DP 34PICT3/009 - Pastel White
Resto thread here: http://www.thesamba.com/vw/forum/viewtopic.php?t=549162
"Take your most realistic time frame and dollar amount.. then add half of that amount. When you get that total... double it. Only then will you be in the ballpark." - sofaking |
|
| Back to top |
|
|
|


