| Author |
Message |
Jeff's Old Volks Home
Samba Member
Joined: December 19, 2011
Posts: 819
Location: Chester Basin, Nova Scotia

|
 Posted: Sun Feb 16, 2014 7:49 am Post subject: Ulitmate Van build thread... Posted: Sun Feb 16, 2014 7:49 am Post subject: Ulitmate Van build thread... |
 |
|
By popular demand, I've been asked to document the build of my own personal van, so here goes.
A little background, I own a VW shop on the East coast of Canada, we're fully equipped, well staffed and plenty passionate. Ive built dozens of vans for customers, and built a few for myself, but this one needs to be a keeper. My loving wife is getting tired of changing campers twice a year, so with her permission I got the green light to built 'my dream van'...
In my opinion the ultimate VW utility van has got to be the Weekender, it has to be Syncro and it needs more than stock power.
So into my bone yard to hunt for the a cadaver that I can build on, we have from 5 to 20 parts vans at anytime, so the picking was easy. I bought for parts a few years previously a 1990 Vanagon Weekender that has been sitting for not less than 10 years after a body job that the previous owner commissioned went terribly wrong when the body shop owner tragically died in a fishing accident. So i was asked if I'd make an offer on a stripped and completely disassembled van for parts. It done come with a clean title! and after $800 exchanged hands and a $300 tow bill the van came home. To sit, and sit and sit. I wouldn't let anyone sell anything from it, and I could have sold the interior many times.
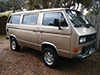
This is how she looked at the start of the project:
So you might be saying: it's a 2wd and stock weak water boxer, what's up with that? I thought you had a plan?
Stand by... |
|
| Back to top |
|
 |
dobryan
Samba Member

Joined: March 24, 2006
Posts: 16503
Location: Brookeville, MD
|
|
| Back to top |
|
|
Jeff's Old Volks Home
Samba Member
Joined: December 19, 2011
Posts: 819
Location: Chester Basin, Nova Scotia
|
| Posted: Sun Feb 16, 2014 8:00 am Post subject: |
|
|
So the next thing for me to do was to sort out the body issues. It wasn't rusty at all... it has lot's of body dings, a bit a rear seam rust where the rear window had been out for a few years, but very solid. So the filling and sanding an blocking began, the plan all along was to convert to syncro so I had to add the fuel filler panel too.
So the work went well, and she's ready for some colour. I'm not big on messing with the factory paint so the colour she was born with suits me fine, Bordeaux pearl was selected and I sent to a body shop up the street to be sprayed. It turned out ok, not to my standard but i think I can cut and buff it to shine a bit.
|
|
| Back to top |
|
|
Syncrozilla
Samba Member
Joined: September 11, 2004
Posts: 772
Location: Santa Barbara
|
| Posted: Sun Feb 16, 2014 8:07 am Post subject: |
|
|
That's the way I like to start also. If your going to "build" a car then there is no sense in starting of the the $$ nice stuff.
_________________
Please do not message me on TheSamba. Use my email, [email protected] |
|
| Back to top |
|
|
insyncro
Banned

Joined: March 07, 2002
Posts: 15086
Location: New York
|
| Posted: Sun Feb 16, 2014 8:10 am Post subject: |
|
|
Take it all the way down and build it back up...that's how I do it too.
Sweet. |
|
| Back to top |
|
|
Jeff's Old Volks Home
Samba Member
Joined: December 19, 2011
Posts: 819
Location: Chester Basin, Nova Scotia
|
| Posted: Sun Feb 16, 2014 8:24 am Post subject: |
|
|
Relax the fun stuff is yet to come... So back out to the bone yard to scrounge up enough bits to hopefully make a syncro conversion. This is a bit of an issue, I sell this stuff usually as fast as it comes in, so it might take a while to find it all. But this is one of the fairly complete vans I have:
I did manage to get the entire front suspension, front diff, speedo cable and speedo head, subframe from her. as well as the previously cut out fuel filler panel and bezel.
This is the first big chunk:
We do have a nice place to sandblast and I had a student here with the local high school and I worked him like a rented mule, he learned a lot about sand blasting, it was a new sensation for him, he asked me when he knew he was done, I told him-"when you can hear yourself blink, you're getting close"
I decided to paint these instead of powder coating, not because I'm cheap but...no wait it is because I'm cheap. I used a very good quality Wurth high solid paint through out. It looks like Ronald McDonald chose the colour scheme though:
Both of the uprights have been rebuilt:
More to come...
Jeff |
|
| Back to top |
|
|
Jeff's Old Volks Home
Samba Member
Joined: December 19, 2011
Posts: 819
Location: Chester Basin, Nova Scotia
|
| Posted: Sun Feb 16, 2014 8:27 am Post subject: |
|
|
I did make up new radius rods to replace the missing threads...
Jeff |
|
| Back to top |
|
|
insyncro
Banned
Joined: March 07, 2002
Posts: 15086
Location: New York
|
| Posted: Sun Feb 16, 2014 8:38 am Post subject: |
|
|
Nice, late model cast lower arms...dont see too many of those around as donors.
I would like to see the radius rod work if you get a chance.
Looks great. |
|
| Back to top |
|
|
Jeff's Old Volks Home
Samba Member
Joined: December 19, 2011
Posts: 819
Location: Chester Basin, Nova Scotia
|
| Posted: Sun Feb 16, 2014 8:38 am Post subject: |
|
|
Once I cut the steering rack cross member from my cadaver Syncro I needed to fit it to my Weekender.
This is the 2wd with the original rack installed:
This is the Syncro cross member held in place waiting for some welding. It takes a fair amount of grinding to make it fit, so If you're doing this for your self, be patient, there's lots of metal, make it fit perfectly. This is an important step.
I'm a GoWesty wholesale partner, so it made sense for me to source what I needed from them, like Old Man Emu shocks and their progressive rate lift springs. I even found a reman rack in my stock room to use:
Jeff |
|
| Back to top |
|
|
DAV!D
Samba Member
Joined: September 10, 2013
Posts: 979
Location: EL CAMINO
|
| Posted: Sun Feb 16, 2014 8:51 am Post subject: |
|
|
Looks like it will be a nice build. Ronald McDonald would certainly be proud of that front suspension. Perhaps you should name the van Happy Wheels.. 
_________________
86 Syncro Build - Ecotec Motor Swap - Pop Top Conversion - Camper Build & Syncro Conversion |
|
| Back to top |
|
|
Zeitgeist 13
Samba Member

Joined: March 05, 2009
Posts: 12115
Location: Port Manteau
|
| Posted: Sun Feb 16, 2014 8:56 am Post subject: |
|
|
When did that design of LCA show up?
_________________
Casey--
'89 Bluestar ALH w/12mm Waldo pump, PP764 and GT2052
'01 Weekender --> full camper
y u rune klassik? |
|
| Back to top |
|
|
jimeg
Samba Member

Joined: May 14, 2007
Posts: 510
Location: PNW
|
|
| Back to top |
|
|
Jeff's Old Volks Home
Samba Member
Joined: December 19, 2011
Posts: 819
Location: Chester Basin, Nova Scotia
|
| Posted: Sun Feb 16, 2014 9:00 am Post subject: |
|
|
If I had to do it all over again, and I likely will... I'd take way more photos. I can see lot's of holes in my documenting that now I'd think would be pertinent.
I used the ubiquitous G60 288mm rotor big brake kit, It works great, fits with the wheels I'm eventually planning to run and and I keep lots of them in stock. No brainer.
The lift springs a bit tricky to install, I never use a spring compressor for Syncro springs. I use the van, a floor jack a chain and a ratchet strap. I've installed as many as probably any one who's reading this, maybe more. This is safe and quick.
With the van on my hoist, I put the floor jack under the lower control arm, chain the van to the bottom of the floor jack, take a strain on the arm so the spring is tensioned enough to take the nut from the top of the shock. Release the jack. pull out the spring, install the much longer spring, aim the shock stem up, slid a ratchet strap around the shaft of the shock and tighten the strap until the threads are pointing to the hole in the upper spring perch. Jack up the floor jack, this is where the chain is important, it'll only allow the van to raise until the chain gets tight. keep jacking until you can start a nut on the shock top, tighten it up. Remove the strap, lower the jack and remove the chain. easy peasy.
I used 2 more bolts in the front of the subframe than VW used.
As my dear old Dad would say about Horse Power "a lot is good, more is better, and too much is just right!"
Jeff |
|
| Back to top |
|
|
Jeff's Old Volks Home
Samba Member
Joined: December 19, 2011
Posts: 819
Location: Chester Basin, Nova Scotia
|
| Posted: Sun Feb 16, 2014 9:02 am Post subject: |
|
|
| Zeitgeist 13 wrote: |
| When did that design of LCA show up? |
My 1987 doesn't have it but my cadaver was a 1991, it has the cast ones, I think around 1989???
Jeff |
|
| Back to top |
|
|
jimeg
Samba Member
Joined: May 14, 2007
Posts: 510
Location: PNW
|
|
| Back to top |
|
|
insyncro
Banned
Joined: March 07, 2002
Posts: 15086
Location: New York
|
| Posted: Sun Feb 16, 2014 9:23 am Post subject: |
|
|
| Jeff's Old Volks Home wrote: |
| Zeitgeist 13 wrote: |
| When did that design of LCA show up? |
My 1987 doesn't have it but my cadaver was a 1991, it has the cast ones, I think around 1989???
Jeff |
A few of the USDM 89 Syncro had the cast lower arms, all 90 & 91s had them.
The ability to lift to the max like the stamped steel ones is counter productive, my opinion, but the ride of the cast arms, especially at the stock height is far superior on pavement. |
|
| Back to top |
|
|
Jeff's Old Volks Home
Samba Member
Joined: December 19, 2011
Posts: 819
Location: Chester Basin, Nova Scotia
|
| Posted: Sun Feb 16, 2014 9:28 am Post subject: |
|
|
| jimeg wrote: |
| which axles/cv's did you use? |
I use Empi. I pack them well, paint the shafts to make them pretty. I'm not a hardcore off roader, they'll last me a long time. As a matter of fact, I've sold and installed hundreds of them, and I can count on my right hand how many I've had a problem with.
DISCLAIMER: Due to an injury involving a winch cable I have not nearly as many digits to count with as many of you...  Total count 6 1/2... Total count 6 1/2...
Jeff |
|
| Back to top |
|
|
Jeff's Old Volks Home
Samba Member
Joined: December 19, 2011
Posts: 819
Location: Chester Basin, Nova Scotia
|
| Posted: Sun Feb 16, 2014 9:38 am Post subject: |
|
|
The rear was a lot easier. New drum brakes, same OME shocks and lift springs. I did find it necessary to add a 16mm spacer on top of the spring seat, and lengthen the bump stop, not shown in the picture. I also moved my shock mount up by 19mm. I found the shocks a little short, I spent too much on them to wreck them.
This is a shot of the front completed, less sway bar.
Rear end:
This is a shot of the first time on the ground, she sits up quite proud.
|
|
| Back to top |
|
|
Jeff's Old Volks Home
Samba Member
Joined: December 19, 2011
Posts: 819
Location: Chester Basin, Nova Scotia
|
| Posted: Sun Feb 16, 2014 9:40 am Post subject: |
|
|
| DAV!D wrote: |
| Looks like it will be a nice build. Ronald McDonald would certainly be proud of that front suspension. Perhaps you should name the van Happy Wheels.. |
That's funny! We were just thinking of a name to call her... ideas?
Jeff |
|
| Back to top |
|
|
Jeff's Old Volks Home
Samba Member
Joined: December 19, 2011
Posts: 819
Location: Chester Basin, Nova Scotia
|
| Posted: Sun Feb 16, 2014 9:52 am Post subject: |
|
|
The next part that everyone seems to be the most afraid of is mounting the gas tank. Well, get over it. Remove all the padding and everything under the back seat. Re-route your rear heater lines if you're using one. I make up 2 blocks from 1X3 steel, I drill a hole bigger than the 8mm bolt and weld a nut inside the box steel. Lucky for me there's always at least one Syncro here at any given time so measuring to get the hole in the right place is easy. Te left side is important because the fuel outlet is in the middle of the strap, the right side not so much.
Peek-a-boo...
|
|
| Back to top |
|
|
|


