| Author |
Message |
danfromsyr
Samba Member

Joined: March 01, 2004
Posts: 15144
Location: Syracuse, NY

|
 Posted: Tue Jan 29, 2013 8:37 am Post subject: Posted: Tue Jan 29, 2013 8:37 am Post subject: |
 |
|
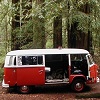
here's a pic of my brother's custom interior
made with 3/4" oak plywood, includes the furnace, microwave and a custom cut-down Magic chef propane oven we use to make lasagna and apple crisp (among other tasty items) while camping and road tripping.
just to show you're only limited by imagination. the staggered furnace and micro cabinets make the step up to the top much easier for those w/short legs.
and yes this is a vanagon, not a bay sorry.
_________________
| Abscate wrote: |
| These are the reasons we have words like wanker |
|
|
| Back to top |
|
 |
webwalker 
Samba Member

Joined: January 26, 2006
Posts: 2803
Location: Mount Laurel, NJ
|
| Posted: Tue Jan 29, 2013 9:54 am Post subject: |
|
|
| germanBay wrote: |
| TRN9 wrote: |
What do you have in your vents? 2nd pic? |
That's a racing grill. I attached it, because the metal sheet behind the vent didn't look good. I don't have any cooling problems with it so far.
|
How DID you attach this grill? I've always thought this was a great mod, inexpensive and clever.
_________________
"Consistent maintenance with quality products is the cheapest warranty you'll ever need."
1977 CE1 Transporter Deluxe, Subaru EJ22, Skills Cooling, Steedle HD 091 w/ GuardT .82 4th
Click to view image |
|
| Back to top |
|
|
airkooledchris
Samba Member
Joined: January 25, 2005
Posts: 2713
|
| Posted: Tue Jan 29, 2013 10:18 am Post subject: |
|
|
if you look really closely at the edges of the top and bottom cross piece, you can see it's attached at either side by some sort of wire or ziptie that's been painted/matched to the body.
just a guess. |
|
| Back to top |
|
|
Stuartzickefoose
Samba Post Whore

Joined: February 07, 2008
Posts: 10350
Location: SoCal for now...
|
| Posted: Tue Jan 29, 2013 11:56 am Post subject: |
|
|
| airkooledchris wrote: |
if you look really closely at the edges of the top and bottom cross piece, you can see it's attached at either side by some sort of wire or ziptie that's been painted/matched to the body.
just a guess. |
yep, i noticed em soon as i looked. almost clear. all four corners or so.
_________________
Stuart Zickefoose
2011 Jetta Sportwagen TDi 6 speed manual
206-841-7324
[email protected] |
|
| Back to top |
|
|
hill
Samba Member
Joined: September 24, 2011
Posts: 442
Location: PNW
|
| Posted: Tue Jan 29, 2013 2:19 pm Post subject: |
|
|
Catgut, or small green tie-wraps painted to match.
Looks good and solves potential problems with debri or even birds.
_________________
'78 Biegephalia |
|
| Back to top |
|
|
Resto-raider
Samba Member

Joined: June 07, 2011
Posts: 131
Location: Netherlands, Europe
|
| Posted: Fri Feb 01, 2013 4:25 pm Post subject: |
|
|
I'm currently completing my new interior. New headlining, window rubbers, panels, floor, upholstery, seat stand rubbers, etc.
_________________
- Baywindow microbus- aug '68 - 1641cc twinport (AS)
- Mk1 Golf (rabbit) - june 1977 |
|
| Back to top |
|
|
75bus4/me
Samba Member

Joined: November 10, 2011
Posts: 414
Location: Arizona
|
| Posted: Fri Feb 01, 2013 11:28 pm Post subject: |
|
|
Here is mine.
_________________
1975 Bay Window {Big Red} |
|
| Back to top |
|
|
junichi
Samba Member
Joined: September 12, 2005
Posts: 749
Location: brentwood bay, bc
|
| Posted: Tue May 14, 2013 9:01 pm Post subject: mine |
|
|
I wouldn't call it the coolest but here's what I've done to mine.
before (original 1978 interior):
after (1974-75 style, custom built):
jump seat:
jump seat storage:
I still need to add a low profile head banger cabinet, re-laminate the table, and redo the fabric.
A lot of people say the 78-79 interior is the best, but I found I didn't use the sink and that the large amount of storage was making me store too much junk. And if I camp, I don't tend to put things away into the cupboards. I now have just enough storage for the stuff that needs to be in there all the time (stove, plates, cutlery, awning, wash basin) and I will bring along a cooler and water jug. I am happy to have 2 more seats at the dining table, and no longer is one person sitting table-less at the front swivel. I can set up one more guest at the table (total 5) on a folding stool. Not to mention, the lighter wood feels much brighter and more modern, but not too modern. So far, I consider it an improvement. |
|
| Back to top |
|
|
Paintedbus
Samba Member

Joined: September 14, 2003
Posts: 679
Location: salem, ma
|
| Posted: Tue May 14, 2013 9:44 pm Post subject: |
|
|
While its not all color coordinated yet, i think my interior is pretty cool. I have had several buses over the years and have noted what i like best about each.
The front upper cabinet is also a speaker box now (my doing) and from what i can tell, came out of mexico at some point. I got it from a friend in PA. I wired in a ring of seriously bright LED lights in place of the done light. The 4x6 speakers face forward right behind the front seats. I have never seen another one like it. 
the seats are out of an 87 vanagon and were a must after driving my ex-87 westy. No way I'd go back to the baywindow style seat. These are about to be dyed dark brown to match my champagne edition dashboard and components. I have a lot of experience dyeing fabrics, so I think I can pull this off.
In my ex- 71 westy, I removed the jump seat and moved the icebox over to the drivers side. In this bus, i did that as well, but also gutted the icebox in favor of storage. I retained the sink, but use removable used-water and freshwater jugs instead of stock setup. Thats easier to use imo.
The vintage Thermos cooler is where I store all my parts, spare generator, VR, point/ condensers, coils, rotors, wires, cables etc. Works good as an ottoman with the passenger seat turned around. I actually dont have a swivel, but after bending the leading edge of the track slightly, I can just run the seat backwards on the tracks. With a little practice, I can flip it around in 15 seconds.
In the rear, I have the full width 74 westy bed and table (with extension). Lots of storage under there, but I might make it a full slide or drawer. Its too hard to get into while travelling. I find the mattress marginally comfortable and despite my labors at upholstering it (we have a pretty excellent sewing machine) I think I will take this material off in favor of a solid colored vinyl (think early bay westy) and use this striped material for new curtains.
The next change will be the removal of the 74-75 table in favor of the later westy table on the movable arm. It will have mounts on the corner of the sink cabinet (i removed the icebox insert in favor of storage) and near the door. I should be picking that up in about a week on my way through Asheville, NC.
I used the super-hard-to-find late hardtop westy headbanger cabinet, but mounted it flush with the side cabinet and extended it clear to the back hatch, permitting all my bedding to get stored up there, even in the fall.
I frequently road trip this bus and will be on the road again next week, travelling nearly 3000 miles over the next month. To me a cool bus is one that suit my needs perfectly, and this bus is slowly getting there. I have lots of ambitions including a pop top or high-top graft, but thats in the future sometime. A bigger sound system might be soon too though!
_________________
Champagne Edition Roadtrip monster "Juakali"
~"Paintedbus" Ken~
The Mobile Muralist
WWW.PAINTEDBUSART.COM
Last edited by Paintedbus on Tue May 14, 2013 10:45 pm; edited 2 times in total |
|
| Back to top |
|
|
ablakely
Samba Member

Joined: February 01, 2013
Posts: 95
Location: Memphis, TN
|
| Posted: Tue May 14, 2013 10:34 pm Post subject: |
|
|
| chrisd1891 wrote: |
I love this thread! I'm all about having a completely personal bus - it's nice to build it from an empty tin can into something that works for you.
Here is mine...these are very very old pictures...it has since changed a bit. We re-covered the seats, and added some nice curtains. As well as adding more wooden trim bits and pieces.
And the exterior, with our $50 rustoleum paint job.
|
I'm really digging this one. Cozy for camping and such and still gives me enough room to haul around like a set of drums or whatever. Though I'm not sure I would cover the ceiling in it. :p
_________________
My '71 Bus |
|
| Back to top |
|
|
westcoastmarek
Samba Member

Joined: September 13, 2011
Posts: 333
Location: Brentwood Bay, BC
|
| Posted: Tue May 14, 2013 11:18 pm Post subject: Re: mine |
|
|
| junichi wrote: |
I wouldn't call it the coolest but here's what I've done to mine.
before (original 1978 interior):
after (1974-75 style, custom built):
jump seat:
[URL=http://s676.photobucket.com/user/junichij/media/photo1_zps38de1bf6.jpg.html]
[/URL]
jump seat storage:
I still need to add a low profile head banger cabinet, re-laminate the table, and redo the fabric.
A lot of people say the 78-79 interior is the best, but I found I didn't use the sink and that the large amount of storage was making me store too much junk. And if I camp, I don't tend to put things away into the cupboards. I now have just enough storage for the stuff that needs to be in there all the time (stove, plates, cutlery, awning, wash basin) and I will bring along a cooler and water jug. I am happy to have 2 more seats at the dining table, and no longer is one person sitting table-less at the front swivel. I can set up one more guest at the table (total 5) on a folding stool. Not to mention, the lighter wood feels much brighter and more modern, but not too modern. So far, I consider it an improvement. |
looking nice Juni
_________________
1979 Westy Auto
----------------------------------------------
sold...
1979 VW bus, 2L FI, now with a rivi top
1971 7 pass. deluxe
1974 Beetle |
|
| Back to top |
|
|
Stuartzickefoose
Samba Post Whore
Joined: February 07, 2008
Posts: 10350
Location: SoCal for now...
|
| Posted: Wed May 15, 2013 7:16 am Post subject: |
|
|
| ablakely wrote: |
| chrisd1891 wrote: |
I love this thread! I'm all about having a completely personal bus - it's nice to build it from an empty tin can into something that works for you.
Here is mine...these are very very old pictures...it has since changed a bit. We re-covered the seats, and added some nice curtains. As well as adding more wooden trim bits and pieces.
And the exterior, with our $50 rustoleum paint job.
|
I'm really digging this one. Cozy for camping and such and still gives me enough room to haul around like a set of drums or whatever. Though I'm not sure I would cover the ceiling in it. :p |
gotta be a fairly quiet ride though....
_________________
Stuart Zickefoose
2011 Jetta Sportwagen TDi 6 speed manual
206-841-7324
[email protected] |
|
| Back to top |
|
|
ablakely
Samba Member
Joined: February 01, 2013
Posts: 95
Location: Memphis, TN
|
| Posted: Wed May 15, 2013 10:19 am Post subject: |
|
|
| Stuartzickefoose wrote: |
| gotta be a fairly quiet ride though.... |
Yeah, that carpet seems like a pretty good sound proofing system. 
_________________
My '71 Bus |
|
| Back to top |
|
|
famousdrums
Samba Member
Joined: March 22, 2012
Posts: 7
Location: Southeast Texas
|
| Posted: Wed May 15, 2013 10:36 am Post subject: |
|
|
heres mine ive been working on and still messing with...
|
|
| Back to top |
|
|
williamM
Samba Member
Joined: August 07, 2008
Posts: 4333
Location: southwest Arizona
|
| Posted: Thu May 16, 2013 3:39 pm Post subject: Bogged down |
|
|
Here is the vision, but making it a reality is a lot of work.[img][/img][img][/img]
_________________
some days I get up and just sit and think. Some days I just sit.
opinion untempered by fact is ignorance.
Don't step in any! |
|
| Back to top |
|
|
blue72beetle
Samba Member

Joined: April 23, 2008
Posts: 846
Location: Fort Wayne, IN
|
| Posted: Thu Oct 02, 2014 5:37 pm Post subject: |
|
|
Thread resurrection.
Here's my interior. Mostly stock except for the back end. I created my own rear hatch tent, and built a larger shelf in place of a rear seat.
_________________
-Andy-
-1970 Ghia-
-1971 Bus 1776 Microsquirt EFI- |
|
| Back to top |
|
|
rob.e
Samba Member

Joined: August 07, 2013
Posts: 46
Location: Oxford, UK
|
| Posted: Fri Oct 03, 2014 8:03 am Post subject: |
|
|
Mines work in progress, but i'm getting there..
Here's the "before" shot. This was taken May 2013 whilst the bus was still in the USA.
May 2013 - Interior by lotus-gt, on Flickr
Lots of work done since then.. interior shot as it looks now:
cab mats and new shifter by lotus-gt, on Flickr
new cab mats - seat base by lotus-gt, on Flickr
new cab mats by lotus-gt, on Flickr
gene berg shifter by lotus-gt, on Flickr
new door cards, escutcheon and crank by lotus-gt, on Flickr
The R&R bed is now re-made full width for more sleeping space:
Full width by lotus-gt, on Flickr
New full width rear by lotus-gt, on Flickr
New cushions:
Lovely cushion by lotus-gt, on Flickr
240v hookup usb chargers and fire extinguisher fitted by lotus-gt, on Flickr
New headlining, black walnut:
Walnut headlining cab area by lotus-gt, on Flickr
... and in the rear too:
Walnut headlining rear by lotus-gt, on Flickr
Its not finished yet, we still have the main berlin deluxe unit and the overhead cupboard to re-make in the walnut but I'm very happy with how its turning out so far. |
|
| Back to top |
|
|
Convoy
Samba Member

Joined: March 17, 2011
Posts: 312
Location: San Clemente
|
| Posted: Fri Oct 03, 2014 8:47 am Post subject: |
|
|
Rob,
Great job on the interior! |
|
| Back to top |
|
|
ChrisFred
Samba Member

Joined: June 11, 2014
Posts: 322
Location: Boulder, CO
|
| Posted: Sat Oct 04, 2014 9:31 am Post subject: |
|
|
| *Heavy Breathing* |
|
| Back to top |
|
|
1967250s
Samba Member
Joined: May 02, 2007
Posts: 2137
|
| Posted: Sat Oct 04, 2014 10:12 am Post subject: |
|
|
| RobE, are those mats available? For a bench seat? They are Neat! |
|
| Back to top |
|
|
|


