| Author |
Message |
bald_dude43
Samba Member

Joined: May 15, 2014
Posts: 107
Location: Ewa Beach Hawaii

|
 Posted: Wed Jan 28, 2015 2:12 am Post subject: Forever Sharp Steering Wheel Posted: Wed Jan 28, 2015 2:12 am Post subject: Forever Sharp Steering Wheel |
 |
|
Is it the weekend yet?! 
Has anyone ever put one of these on their Thing? It says it fits 73 Beattle/Ghia. Im thinking of putting one on my 73.
http://m.ebay.com/itm/311262207892 |
|
| Back to top |
|
 |
GI Joe
Samba Member
Joined: April 28, 2005
Posts: 2012
Location: Athens, TN
|
|
| Back to top |
|
|
germanbilly
Samba Member

Joined: October 18, 2013
Posts: 378
Location: Victorville
|
| Posted: Wed Jan 28, 2015 10:55 am Post subject: |
|
|
I just used there will it fit chart and it says it will not fit the 1973 Thing. It sure does look nice.
GB |
|
| Back to top |
|
|
tallman206
Samba Member

Joined: January 06, 2006
Posts: 316
Location: St.Petersburg Florida USA
|
| Posted: Wed Jan 28, 2015 7:56 pm Post subject: |
|
|
My custom Santos Mahogany segmented wood wheel. The base wheel was a black plastic covered 914 wheel, but I reduced the diameter so I could get my large legs underneath its diameter. I custom designed and fabricated the mating hub from parts found in car show boneyards.
_________________
Jerry Henning
Southern Classic Works
St.Petersburg, Florida
1973 VW Type 181 with 616/33-6 powerplant
1962 356B-T6 Cabriolet Rustbucket |
|
| Back to top |
|
|
bald_dude43
Samba Member
Joined: May 15, 2014
Posts: 107
Location: Ewa Beach Hawaii
|
| Posted: Wed Jan 28, 2015 11:44 pm Post subject: |
|
|
Joe - I know right!? When I saw Tallman's custom wood wheel I have been looking for something as nice as his ever since.
Billy - I know the compatibility chart you are referring to, I saw the same one as well, but on their website they list adapters you can use so I called them. They said I would need the "E08" adapter which fits all VWs 60-73. Apparently the adapter comes with "fittings" to install it on the 73 shaft. They said that if it doesn't fit mine for some reason (PO installing a non-stock shaft, etc.) that I could send them photos and measurements and they would hook me up with the correct adapter.
I should get it next week. once I get it mounted I will let ya'll know with pictures.
It's like it's Christmas all over again.  |
|
| Back to top |
|
|
germanbilly
Samba Member
Joined: October 18, 2013
Posts: 378
Location: Victorville
|
| Posted: Thu Jan 29, 2015 11:33 am Post subject: |
|
|
Will wait to see it installed. I have a 73 that I'm restoring and would like to put that wheel in it.
GB |
|
| Back to top |
|
|
bald_dude43
Samba Member
Joined: May 15, 2014
Posts: 107
Location: Ewa Beach Hawaii
|
| Posted: Fri Jan 30, 2015 1:05 am Post subject: |
|
|
| Billy, I'll take copious notes and pictures when I install it. They have one with the same design but in stainless. |
|
| Back to top |
|
|
rrankin
Samba Member
Joined: November 10, 2004
Posts: 287
Location: Austin Texas
|
| Posted: Fri Jan 30, 2015 10:08 am Post subject: |
|
|
| tallman206 wrote: |
My custom Santos Mahogany segmented wood wheel. The base wheel was a black plastic covered 914 wheel, but I reduced the diameter so I could get my large legs underneath its diameter. I custom designed and fabricated the mating hub from parts found in car show boneyards.
|
Love this!!! I've been wondering if a 914 steering wheel would fit on my 74...
_________________
'74 Thing [Fritz]
Austin, TX |
|
| Back to top |
|
|
tallman206
Samba Member
Joined: January 06, 2006
Posts: 316
Location: St.Petersburg Florida USA
|
| Posted: Fri Jan 30, 2015 2:22 pm Post subject: |
|
|
The 914 wheel will not fit directly. I removed the Porsche hub from the 914 wheel, and then made a replacement hub from a junkyard Thing/Beetle steering wheel. I cut off the collapsible hub portion of the VW wheel, and welded it to a steel ring that I fabricated and then bolted to the 914 wheel. The advantage of this is that the VW hub works with the existing steering column turn signal mechanism and horn electrical interface. And I carefully cut up the old VW black plastic back cover, and trimmed it to beautifully cover the collapsible cage. You need some length in a hub so that the steering wheel does not hit the Thing wiper motor.
_________________
Jerry Henning
Southern Classic Works
St.Petersburg, Florida
1973 VW Type 181 with 616/33-6 powerplant
1962 356B-T6 Cabriolet Rustbucket |
|
| Back to top |
|
|
bald_dude43
Samba Member
Joined: May 15, 2014
Posts: 107
Location: Ewa Beach Hawaii
|
| Posted: Tue Feb 10, 2015 2:37 am Post subject: |
|
|
Got it installed - start to finish - 2 hours - had to rewire the horn from where a PO had installed a dash button and I also had to modify how the new horn button was wired - but its in and works! I'll post more photos with the steps and modification tomorrow.
|
|
| Back to top |
|
|
Jzsquared
Samba Member

Joined: August 16, 2014
Posts: 218
Location: West of Chicago, IL
|
| Posted: Tue Feb 10, 2015 6:21 am Post subject: |
|
|
| Wow looks great, please do posts picks of the install I have a horn button also that I'd like to change |
|
| Back to top |
|
|
bald_dude43
Samba Member
Joined: May 15, 2014
Posts: 107
Location: Ewa Beach Hawaii
|
| Posted: Wed Feb 11, 2015 1:37 am Post subject: |
|
|
Ok ya'll I finally have had a chance to document all the steps I had to take to install my new steering wheel. Start to finish it took about 2 1/2 hours (I figure in a perfect scenario it probably would take less than an hour)
So here we go - this is what I started with, a standard 73 stock wheel
Pop off the face plate (mine has been broken since the PO) by popping each corner with a flat tip then twisting the piece 90 degrees to release it from the steering wheel frame.
As you can see the PO disconnected the horn wiring
and moved it to the left front dash panel
This location sucked because I would instinctively slam the middle of the steering wheel which resulted in silence
Turn your wheels all the way until they stop, place a breaker bar with at least a 4 inch extension and a 27mm socket (make sure you have your key in and do not try and break the nuts torque against the steering lock or you will regret it) hold the wheel and then loosen the retaining nut
hopefully your wheel pops off as easily as mine did. If not try some PB and tap gently around each quadrant until the wheel pops free from the shaft
right now is a good time to inspect and clean your contact tabs, as you can see from the previous photo I am missing a few critical pieces which allow the cancellation of the turn signals. I really have no desire to replace them right now as I have gotten used to being the cancellation mechanism. And if I forget I become "that old guy" who drives for miles with his flasher on - LOL
OK so since the PO had rerouted the wires for the horn I had to do some trouble shooting as you can see there is no continuity from the tabs to ground
I disconnected the two gray connectors behind the switch housing
Then remove the four screws that held the turn signal and horn assembly and gently pulled until it cleared the housing.
check this area to make sure your shaft and retaining ring are secure
I ended up having to rewire the horn back to the original configuration, once I did that I checked the continuity from the tab connection and the pin (4th from the right) Good to go.
I then reattached the wire connectors and rechecked continuity from the shaft to ground
Now comes the interesting part. I removed the horn ring from my old wheel
Place the ring on the adapter with the tab on the right side (the blue tape was to identify the top of the adapter)
Here is where I had to make a minor modification to their design. (and grab a fresh beer) If you look at the horn button you see two tabs. Their horn button is a normally open switch so when you push the button, it simply completes the circuit. Stay with me here. The horn is wired with a hot wire in the front of the trunk, then it's ground wire runs thru the sidewall behind the dash thru the steering column connectors, thru the ring which makes contact to the tabs. In order to complete the ground the connection has to get from the tabs thru the horn button to the steering column housing to go to ground. The adapter has no way to connect a wire from the horn button to the adapter.
What I had to do is take one of the wire pieces they sent me and cut off one clip and replace it with a flat open end connector
I then slipped this thru one of the pre drilled holes so that when I attached the horn ring one of the retaining screws would hold the connector in place against the adapter housing
I connected the other wire they include by clipping one end and splicing it to the existing wire on the horn ring
I then attached the horn ring to the back of the adapter making sure that one of the screws was tight and over the flat connector I had to add.
the wires go thru the holes and out towards the horn button
I put the adapter back on the shaft and installed the retaining nut. Since I didn't have the spec torques handy I used the German Torque method "good'n tight"
Now ran the wires thru the steering wheel and attached them to the horn button
Install the 5 screws thru the horn button, thru the steering wheel, and into the adapter ... and WAHLA! Done!
I apologize for the lengthy post and I hope I was clear enough. If anyone wants to install one of these and they have an issue, I would be happy to try and explain it better. I also wrote Forever Sharp and suggested that they make some type of accommodation for attaching the wire from the horn button to the adapter. It could be a simple threaded hole on the inside that a connector could be attached to. Good Luck |
|
| Back to top |
|
|
Jzsquared
Samba Member
Joined: August 16, 2014
Posts: 218
Location: West of Chicago, IL
|
| Posted: Wed Feb 11, 2015 11:40 am Post subject: |
|
|
| Great write up. Thanks this will help me a lot |
|
| Back to top |
|
|
germanbilly
Samba Member
Joined: October 18, 2013
Posts: 378
Location: Victorville
|
| Posted: Wed Feb 11, 2015 1:44 pm Post subject: |
|
|
Great how to. I think I'm going to get a wheel like that for my 73.
GB |
|
| Back to top |
|
|
cml039
Samba Member
Joined: September 22, 2010
Posts: 50
Location: Denver
|
| Posted: Sat Feb 14, 2015 9:40 am Post subject: |
|
|
Thanks for the how-to. Is there any difference in clearances to the stalks or wiper motor?
For those interested, Foreversharp has a 10% off sale this weekend. |
|
| Back to top |
|
|
germanbilly
Samba Member
Joined: October 18, 2013
Posts: 378
Location: Victorville
|
| Posted: Sat Feb 14, 2015 11:24 am Post subject: |
|
|
The Forever wheel is 2 3/4 inch from the stalk and is 13 1/2 inch in dia
The stock wheel is 2 1/2 inch from the stalk and is 15 1/2 in in dia. I received mine yesterday and installed it in 3/4 of an hour. My horn was working before so there were no mods. Looks very nice.
GB |
|
| Back to top |
|
|
bald_dude43
Samba Member
Joined: May 15, 2014
Posts: 107
Location: Ewa Beach Hawaii
|
| Posted: Sat Feb 14, 2015 7:27 pm Post subject: |
|
|
Ohhhhh Billy ... now you're going to have to post a picture.
glad you didn't have to make any mods. My biggest issue now is just getting used to a smaller wheel. |
|
| Back to top |
|
|
germanbilly
Samba Member
Joined: October 18, 2013
Posts: 378
Location: Victorville
|
| Posted: Sun Feb 15, 2015 10:50 am Post subject: |
|
|
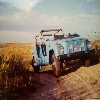
Here is a picture of the wheel in my 73. It is just on the shaft for now as I'm waiting for it to go to body and paint. This month I hope.
GB
|
|
| Back to top |
|
|
bald_dude43
Samba Member
Joined: May 15, 2014
Posts: 107
Location: Ewa Beach Hawaii
|
| Posted: Mon Feb 16, 2015 1:30 am Post subject: |
|
|
| You went with the black, good choice! Man that looks sharp. Whats the paint scheme going to be? |
|
| Back to top |
|
|
germanbilly
Samba Member
Joined: October 18, 2013
Posts: 378
Location: Victorville
|
| Posted: Mon Feb 16, 2015 10:43 am Post subject: |
|
|
Blizzard White with a black The Thing strip down the bottom. Very simple and orginal. When I bought the car last year from a Women up in the mountains here it had been her daughters while she was going to college. When she finished she parked it out in back of her house and it set there for 8 years. There is no rust in the car anywere. She asked me if I could keep it White and for the $800.00 she sold it to me for I say YES. Had all new brakes with drums, new generator new stearing damper, 4 new tires installed. I have everything to put it back together from the Thing Shop. Just waiting to get it preped and painted. Bumpers and rims and roll bar have been powder coated and new windshield. Gas heater works perfect.
GB |
|
| Back to top |
|
|
|


