| Author |
Message |
GI Joe
Samba Member
Joined: April 28, 2005
Posts: 2012
Location: Athens, TN

|
|
| Back to top |
|
 |
KAmes
Samba Member

Joined: February 16, 2014
Posts: 877
Location: Illinois
|
 Posted: Sat May 23, 2015 4:22 pm Post subject: Posted: Sat May 23, 2015 4:22 pm Post subject: |
 |
|
| 63ziggy wrote: |
| looking real nice |
Thanks! I've realized I'm getting into the fun part now, putting it back together, nothing is very hard and the results are satisfying. I spent the winter accumulating parts while my neighbor picked away at the finish & paint work here and there in his spare time. He's really good at what he does and worth the wait. Now that I have the car back in my garage I'm opening boxes, It's like Christmas.
Last edited by KAmes on Sat May 23, 2015 4:57 pm; edited 2 times in total |
|
| Back to top |
|
|
KAmes
Samba Member
Joined: February 16, 2014
Posts: 877
Location: Illinois
|
| Posted: Sat May 23, 2015 4:46 pm Post subject: |
|
|
| GI Joe wrote: |
That Francis harness looks awesome! Very nice setup...
Seems to fit quite well in that slot too.... |
I spent a whole evening, longer than I should have, holding the fuse box this way and that trying to figure the best place to put it. Too high and it starts to interfere with the switches, too low and the dash panel doesn't hinge open correctly. I think I've got the sweet spot now, And I'm past the puzzle of how to mount it, I'll post another pic when it's fully secured.
My brother is a muscle car guy, he's used the Ron Francis kits before and really likes them, and I figured I'm starting from scratch with the split bus column and turn signal switch also. I spent some time this morning sitting with the turn signal switch and my ohm meter figuring out how it works and how to apply it to what I'm doing. I'm actually really digging this part. |
|
| Back to top |
|
|
KAmes
Samba Member
Joined: February 16, 2014
Posts: 877
Location: Illinois
|
| Posted: Mon May 25, 2015 3:44 pm Post subject: |
|
|
Here's the fuse box mounted in the final position.
I wrapped the exposed wires with self fusing rubber tape. I like how it turned out, and the stuff is tough. Look at that paint run! There was bound to be one somewhere. The cover for the brake hoses is at the powdercoater.
Heres the other end in the engine bay. Yes my afternoon was tedious.
My future!
|
|
| Back to top |
|
|
KAmes
Samba Member
Joined: February 16, 2014
Posts: 877
Location: Illinois
|
| Posted: Sat May 30, 2015 6:03 am Post subject: |
|
|
I rewelded the heater exhaust pipe at the correct angle and installed. The exhaust gasket and clamp was difficult to get right, but it's on. There are gaps around the wheel well grommet, no doubt due to the new pipe being a slightly different diameter. I'll probably seal it with silicone from inside the wheel well.
Installed a new wolfsburg west gas tank, put gas in it and test fired the heater. It seems to work really well, thanks Marty! I left it overnight before installing the vent hoses. The garage really stunk of gas the next morning, so if you smell gas, check your vent hoses. The metal vent lines under the car were rusted out, I replaced the one by the master cylinder with a piece of brake line, it currently terminates in the right wheel well like original. I'll put the rest on if I need to, I may just leave it like it is.
|
|
| Back to top |
|
|
Solomon Grundy
Samba Member

Joined: December 26, 2004
Posts: 747
Location: Silicon Valley
|
|
| Back to top |
|
|
KAmes
Samba Member
Joined: February 16, 2014
Posts: 877
Location: Illinois
|
| Posted: Wed Jun 10, 2015 7:09 am Post subject: |
|
|
I've been working on the wiring for the last week. With the Ron Francis fuse panel, beetle switches and thing mechanicals it's pretty much make it up as I go. I don't mind though, because now I understand how everything works and why. One thing I did was wire the tail lights for two bulb separate turn signal, but I also wired for one bulb trailer lights straight out of the turn signal switch, no converter needed. Another challenge was converting the positive voltage separate left/right dash turn indicators provided by the fuse panel to the single light negative voltage needed. I used diodes to isolate left/right and an extra relay to trigger the negative signal. It makes the turn signals click really loud. I'm using a wiper switch with a fresh air knob on it to represent my heater switch.
Made possible with aspirin.
|
|
| Back to top |
|
|
KAmes
Samba Member
Joined: February 16, 2014
Posts: 877
Location: Illinois
|
| Posted: Wed Jun 10, 2015 7:22 am Post subject: |
|
|
I installed a TTS stainless dual exhaust, it has a nice mellow sound without being too quiet. Removing the obnoxious Empi tri-mil clone also allows room for my Thing Shop receiver hitch and tube bumper. The bumper comes with a wide tab welded on for the hitch, it all bolted together easy peasy.
|
|
| Back to top |
|
|
GK.Thing
Samba Member
Joined: March 07, 2014
Posts: 32
Location: alabama
|
| Posted: Wed Jun 10, 2015 3:36 pm Post subject: |
|
|
DUDE !!!! That is awesome . I have to say I am a fan of what your doing.
Its kubellicious
Keep Up the great work |
|
| Back to top |
|
|
HUGO bOSS
Samba Member
Joined: April 27, 2008
Posts: 2602
Location: Madeira Island - Portugal
|
|
| Back to top |
|
|
KAmes
Samba Member
Joined: February 16, 2014
Posts: 877
Location: Illinois
|
| Posted: Wed Jun 10, 2015 4:07 pm Post subject: |
|
|
| GK.Thing wrote: |
| Its kubellicious |
 |
|
| Back to top |
|
|
KAmes
Samba Member
Joined: February 16, 2014
Posts: 877
Location: Illinois
|
| Posted: Thu Jun 18, 2015 9:55 am Post subject: |
|
|
New drive axles.
Installed.
Another coat of paint on the floor.
Stuck my ratty old seat back in to test the steering wheel position, it seems pretty good. I might remove an inch or so off the rear of the seat frame part of the seat track, to allow it to slide back a bit farther. I ordered new upholstery from the thing shop yesterday.
Floor mats. I'll probably order replacements for those footpads, they're in bad shape where the screws go. Still thinking about a center console.
|
|
| Back to top |
|
|
KAmes
Samba Member
Joined: February 16, 2014
Posts: 877
Location: Illinois
|
| Posted: Sat Jun 20, 2015 7:57 am Post subject: |
|
|
Got the right front fender on and the Thing Shop bumper.
Thing Shop skid plate, integrates with the bumper.
I've been experimenting with how to fold the top. If I just push it back like a regular convertible top it pinches the fabric and bunches up the window on the roll bar. If I pull it completely loose off the back of the car like the Thing Shop video, the antenna is in the way and when by myself I can't seem to avoid dragging it all over the ground. My favorite method is to leave it attached at the rear of the car, take loose the sides, fold the frame back, then pull the resulting loop of top that goes from the frame header to the rear of the car up on top of the roll bar, then fold it three times. It doesn't crease the window and I keep it off the ground. The vertical strap in the picture is holding the antenna down to keep the garage door from hitting it.
|
|
| Back to top |
|
|
mondshine
Samba Member

Joined: October 27, 2006
Posts: 2770
Location: The World's Motor Capital
|
| Posted: Tue Jun 23, 2015 6:17 am Post subject: |
|
|
To fold the top, you could use the Thing Shop method:
Link
or do it per the owners manual:
Good luck, Mondshine |
|
| Back to top |
|
|
KAmes
Samba Member
Joined: February 16, 2014
Posts: 877
Location: Illinois
|
| Posted: Tue Jun 23, 2015 7:13 am Post subject: |
|
|
| I had not seen the owners manual. The owners manual method is interesting to me, that's similar to what I was doing but not the same. That method would not require pulling the top "inside out" off the header like I was doing. I'll try it, thanks for posting it. |
|
| Back to top |
|
|
mondshine
Samba Member
Joined: October 27, 2006
Posts: 2770
Location: The World's Motor Capital
|
|
| Back to top |
|
|
KAmes
Samba Member
Joined: February 16, 2014
Posts: 877
Location: Illinois
|
| Posted: Tue Jun 23, 2015 7:47 am Post subject: |
|
|
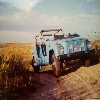
Mondshine, thanks for the link. Well, it's out of the garage and moving under it's own power. I put new shocks on it the other day. It badly needs new tie rods, I'll order those today. Still messing with the carbs trying to get it right, the donut gasket on the left j tube is popping pretty loud, needs wheels and tires, and I don't have a reverse light yet. It got me to work though!
|
|
| Back to top |
|
|
mondshine
Samba Member
Joined: October 27, 2006
Posts: 2770
Location: The World's Motor Capital
|
| Posted: Tue Jun 23, 2015 10:52 am Post subject: |
|
|
Keep going!
I want to see that car in Dayton a month from now!
Good luck, Mondshine |
|
| Back to top |
|
|
GI Joe
Samba Member
Joined: April 28, 2005
Posts: 2012
Location: Athens, TN
|
|
| Back to top |
|
|
KAmes
Samba Member
Joined: February 16, 2014
Posts: 877
Location: Illinois
|
| Posted: Tue Jun 23, 2015 2:54 pm Post subject: |
|
|
| GI Joe wrote: |
Looking good!! I've run Bobtail a few times, slinging the propane!! 
Thing looks Great!
Black, tan, or chrome wheels would look Great! (Of course, chrome won't work with the Mil theme...) |
I keep finding myself looking at the BRMs because of the black. The other idea in the running is powdercoat the stock wheels black and put the hubcaps back on, but actually they're not in great shape, dinged around the edges etc. So BRMs are winning at the moment. I'm third generation in the propane business, my grandfather started in 1947? I think, that was fuel oil, propane came in 1956. Dad still works in the office, he turned 77 yesterday. |
|
| Back to top |
|
|
|


