| Author |
Message |
randywebb
Samba Member

Joined: February 15, 2005
Posts: 3815
Location: Greater Metropolitan Nimrod, Orygun

|
 Posted: Tue Apr 09, 2013 6:12 pm Post subject: Rear Washer - Panel & Access to Reservoir Posted: Tue Apr 09, 2013 6:12 pm Post subject: Rear Washer - Panel & Access to Reservoir |
 |
|
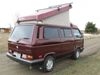
Looking for info on how to remove the panel on the rear RH side of the interior, so I can see what is up with the rear washer reservoir & pump.
Can't find anything in the freakin' Bentley or by searching here...
The snaps at the rear seem to be holding the trim panel in, but have no Phillips or Allen head fixture for removal...
_________________
1986 2.1L Westy 2wd Auto Trans. |
|
| Back to top |
|
 |
randywebb
Samba Member
Joined: February 15, 2005
Posts: 3815
Location: Greater Metropolitan Nimrod, Orygun
|
| Posted: Tue Apr 09, 2013 7:19 pm Post subject: |
|
|
example of one of the snaps on the upper trim panel (which seems to hold in the lower panel)
_________________
1986 2.1L Westy 2wd Auto Trans. |
|
| Back to top |
|
|
SCM
Samba Member
Joined: January 26, 2011
Posts: 3118
Location: Bozeman MT
|
| Posted: Tue Apr 09, 2013 7:45 pm Post subject: |
|
|
Oooh, just a gues on my part but do you suppose that those snaps are rivetted through the panel right into the sheet metal? That would suck.
If you can remove the rest of the panel then slide some sort of fork type tool under the snap and pry a little bit...
Really though, I have not idea and am interested to follow what you learn here.
_________________
'91 Westfalia GL Automatic (GTA "Turbo" Rebuild w/Peloquin) and 2.3L GoWesty Engine |
|
| Back to top |
|
|
madspaniard
Samba Member

Joined: August 18, 2008
Posts: 3795
Location: Alameda, CA
|
| Posted: Tue Apr 09, 2013 7:49 pm Post subject: |
|
|
Yes, riveted. You need to drill them out.
_________________
1991 Westy auto w/ Peloquin TBD
"The only difference between me and a madman is that I'm not mad - Salvador Dali |
|
| Back to top |
|
|
randywebb
Samba Member
Joined: February 15, 2005
Posts: 3815
Location: Greater Metropolitan Nimrod, Orygun
|
| Posted: Tue Apr 09, 2013 8:04 pm Post subject: |
|
|
Once again, I am amazed at VW engineering!
Where do you buy replacements that can be screwed in?
_________________
1986 2.1L Westy 2wd Auto Trans. |
|
| Back to top |
|
|
ragnarhairybreeks
Samba Member

Joined: October 26, 2009
Posts: 1890
Location: Sidney B.C. Canada
|
| Posted: Tue Apr 09, 2013 8:32 pm Post subject: |
|
|
find a sheet metal screw with a head low enough in profile so that the snaps will still work. What I mean is that you can easily find screws to fit and secure the snap, but the head might interfere with the mating of the other snap.
This is what I found when I re-did the interior panels on my old van. I did manage to find screws that worked. But another caution - try the screws out with snaps, but not installed in van, That way if you find a screw that works you haven't irreversibly enlarged the hole in the van sheet metal.
Have I made this sufficiently obscure?

good luck
alistair
_________________
'86 7 passenger syncro, converted to westy pop top, project still in progress
'82 westy, diesel converted to gas in '94, now gone...
https://shufti.blog/
Old address still works...
http://shufti.wordpress.com |
|
| Back to top |
|
|
randywebb
Samba Member
Joined: February 15, 2005
Posts: 3815
Location: Greater Metropolitan Nimrod, Orygun
|
| Posted: Tue Apr 09, 2013 8:34 pm Post subject: |
|
|
yes you have!
what get me, is that VW used screw on snaps for the frackin' curtains...
_________________
1986 2.1L Westy 2wd Auto Trans. |
|
| Back to top |
|
|
tam_shops
Samba Member

Joined: November 15, 2012
Posts: 1530
Location: Vancouver BC
|
| Posted: Tue Apr 09, 2013 10:11 pm Post subject: |
|
|
That's b/c they wanted to sell you more curtains. They don't want your kids messing w/ the washer fluid and then suing them for not securing it! LOL
tam
| randywebb wrote: |
yes you have!
what get me, is that VW used screw on snaps for the frackin' curtains... |
_________________
1987 Vanagon Westfalia GL Automatic
Making it special:
http://www.thesamba.com/vw/forum/viewtopic.php?t=545885 |
|
| Back to top |
|
|
PDXWesty
Samba Member

Joined: April 11, 2006
Posts: 6247
Location: Portland OR
|
| Posted: Tue Apr 09, 2013 10:51 pm Post subject: |
|
|
It's not "VW" engineering at all. It was done by Westfalia Works. The snaps did not come from VW but were put on as part of the camper conversion outside the factory as well as the curtain screws. Blame the camper folks.
BTW, I thought the rivets were just on the panel. I thought I've taken mine off without having to drill them out but I could be wrong.
I've also put in lots of snaps with screws. You just need small sheet metal pan head screws. They work just fine.
_________________
89 Westy 2.1 Auto |
|
| Back to top |
|
|
gl98115
Samba Member
Joined: April 22, 2011
Posts: 263
Location: Seattle, WA
|
| Posted: Wed Apr 10, 2013 10:31 am Post subject: |
|
|
I just stripped my Westy interior and had to drilled a bunch of rivets to get various parts off. You can either use sheet metal screws or just replace the rivets.
_________________
'87 faux-Syncro Westy w/ 2.3l GoWesty WBX |
|
| Back to top |
|
|
MsTaboo
Samba Member

Joined: June 02, 2006
Posts: 4096
Location: East Kootenay, British Columbia
|
| Posted: Wed Apr 10, 2013 11:54 am Post subject: |
|
|
I recently pulled that panel to check for corrosion and leaks. The rivets are easy to drill out. Use a drill that is slightly larger than the hole in the middle and carefully drill until the head separates. Do not drill clear through the supporting sheet metal!
After you have pulled the panel and done whatever work you need to do, be sure to clean the hole and touch up any chipped paint.
Note that some of the holes extend through to the outside of the rear hatch. You will need to add some sealant to the hole before reinstalling the rivets (or screws) to prevent water from seeping into the van.
_________________
Currently:
'90 Syncro Westy 3 knob w/Zetec
The information age has morphed into the age of disinformation and willful ignorance. Agnotology!
Help the fight against Truth Decay.
Defend democracy, support Ukraine. |
|
| Back to top |
|
|
Paulbeard
Samba Member
Joined: July 10, 2015
Posts: 2604
Location: Seattle
|
| Posted: Sun Jul 12, 2015 6:18 pm Post subject: Aargh. The snaps have to be drilled out? |
|
|
As I feared, you gotta break stuff to fix other stuff. The rear washer worked when I tried it today  so maybe this isn't a big deal. I can hear the pump but no spray most of the time. I wanted to get at it to see if it was lined with 28 years of scum like the front one was. The nastiest sludge ever to roll down my arm
and a good way to kill a pump. so maybe this isn't a big deal. I can hear the pump but no spray most of the time. I wanted to get at it to see if it was lined with 28 years of scum like the front one was. The nastiest sludge ever to roll down my arm
and a good way to kill a pump.
Had a lot of things electrical not working at first as the PO had made a hash of installing the auxiliary battery. Lots of stuff was being starved of voltage (mostly accessories like the radio, lighter/phone charger). But I don't think this is my problem.
Edit: turns out the breaking that needed doing was the panels when the plastic snap rivets held broke out of the wood/plastic material before it came out of the metal. They don't age well, sadly
Might be fabricating some replacement panels out of something more durable.
_________________
Currently -> Frida: 87 Tizian Red (mostly) Vanagon GL Westfalia w/ 2.0L ABA conversion
Formerly -> Steward of a 73 Super Beetle (Beater) and 67 Beetle 1300 (Little Max) both names by POs
dhaavers |
|
| Back to top |
|
|
GreenMachineVW
Samba Member
Joined: August 08, 2008
Posts: 645
|
| Posted: Sun Aug 09, 2015 1:18 pm Post subject: |
|
|
| I'm retrofitting a rear washer into my 1983 Vanagon. I can not find the route for the wiring and tube to the washer bottle after it enters the vehicle through the rubber grommet in the rear. It looks like it should descend the cavity that is just behind the rear side glass and in front of the engine vents, but I cannot find any access on mine. I did have to drill the hole for the grommet on the inside (not the hatch). Could I be missing some holes because there was no rear washer from the factory? |
|
| Back to top |
|
|
|

