| Author |
Message |
smitty1976bus
Samba Member

Joined: January 21, 2013
Posts: 369
Location: Cape Cod

|
 Posted: Sat Jun 18, 2016 12:23 pm Post subject: My 1978 Big Sage Green Giant Westy Build! Lots of Pictures! Posted: Sat Jun 18, 2016 12:23 pm Post subject: My 1978 Big Sage Green Giant Westy Build! Lots of Pictures! |
 |
|
Hi all!  Ive had my 1978 VW Westy for a little over a year, and you fine folks here at the Samba have really helped me out. Thought Id make a project page about my Green Giant and show the restoration process. First a little about me, friends call me Smitty, I live on Cape Cod in Massachusetts, and do accounting to pay for all the VW parts. Ive never had any formal mechanic training, so some of my work might be a little
. Sub par. Haha. Ive owned a few antique cars though, and they all needed tons of work, so I was forced to learn how to fix them if I wanted to drive them. Bought a 66 Ford Fairlane when I was 15, this needed motor swaps and body work (the body work I did was not good at all haha). Then had a 65 GTO, which was short lived, I was in over my head, this thing was too rusty, had to sell it before I spent too much $$$. Then I had an 85 Trans Am, then a 97 Mustang Cobra, both just needed basic mechanical work. So I do know a little bit about engines and body work, and am learning more every day. Plus, with this thing called the internet, there is literally nothing you cant learn. Its like being in the Matrix and just downloading information straight to your brain. Any ways, even with all the cars Ive had, ever since I was a little kid Ive wanted a VW Bus. Ideally, a split window 23 window bus, but theyre all great! Ive had my 1978 VW Westy for a little over a year, and you fine folks here at the Samba have really helped me out. Thought Id make a project page about my Green Giant and show the restoration process. First a little about me, friends call me Smitty, I live on Cape Cod in Massachusetts, and do accounting to pay for all the VW parts. Ive never had any formal mechanic training, so some of my work might be a little
. Sub par. Haha. Ive owned a few antique cars though, and they all needed tons of work, so I was forced to learn how to fix them if I wanted to drive them. Bought a 66 Ford Fairlane when I was 15, this needed motor swaps and body work (the body work I did was not good at all haha). Then had a 65 GTO, which was short lived, I was in over my head, this thing was too rusty, had to sell it before I spent too much $$$. Then I had an 85 Trans Am, then a 97 Mustang Cobra, both just needed basic mechanical work. So I do know a little bit about engines and body work, and am learning more every day. Plus, with this thing called the internet, there is literally nothing you cant learn. Its like being in the Matrix and just downloading information straight to your brain. Any ways, even with all the cars Ive had, ever since I was a little kid Ive wanted a VW Bus. Ideally, a split window 23 window bus, but theyre all great!
The first bus I bought was 1976 Westy, and unfortunately, she was in a lot worse shape than I had originally thought. When I first looked at it in New Hampshire, up in a couple feet of snow, it looked ok. But once I towed it back to my place, it was more rust than Bus. I stripped what I could and then scrapped it. 
The one cool thing about the 76 bus was that it was air conditioned. I had no idea VW put A/C in some of these buses. Unfortunately, the condenser was totally rusted, completely useless, and the compressor was missing. Still cool though.
Now I needed to find a bus. Luckily bus owners are some of the friendliest people youll ever meet, and when I was at a local cruise night, I struck up a conversation with an owner of a beautifully restored Westy. He gave me the phone number of a man looking to sell a Bus. It was an amazing score. Thank you guy with the Green Westy at the Gillette Stadium Car Cruise, if youre on here, I wish I grabbed your phone number! Thank You! And GO PATRIOTS! 
I called the dude selling the Bus, and set a date to go up and see the VW. This guy lived on a mountain up in New Hampshire
No lie, a mountain.  It was crazy driving up it, no idea how he towed all his cars up there. Heres what the bus looked like up there: It was crazy driving up it, no idea how he towed all his cars up there. Heres what the bus looked like up there:
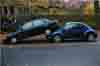
Not bad at all. The owner and I did some talking and I ended up buying it!  On the condition he tow it down to my place in South East Massachusetts. No way am I towing a bus off a mountain. Ha. He agreed. Awesome guy. And a couple weeks later I had my bus: On the condition he tow it down to my place in South East Massachusetts. No way am I towing a bus off a mountain. Ha. He agreed. Awesome guy. And a couple weeks later I had my bus:
First thing I did was power wash the entire bus, and watched all that rust fly off, haha. It did make a dramatic difference though, she looked so much better with all the tree sap and dirt off. Now its time to work on the engine!
The 78 I just purchased had no engine, the seller kept it for a dune buggy project, along with all of the 2.0Ls EFI parts. However, I did keep the 1.8L engine from the 1976 Bus, but it needed a total rebuild. Plus, the fuel injection components were stolen out of the bus before I bought it, so it would need to be carbureted.
Luckily, right before I spent any serious money on the engine rebuild, I received a phone call from the guy who sold me the 78 bus. Hes willing to sell me the 2.0L with all the EFI components from the bus!  Too good of a deal to pass up; I drove up the next day and bought it off him. He even had the heads rebuilt, so it was all ready to go. The engine was just a little dirty, so I spruced it up some: Too good of a deal to pass up; I drove up the next day and bought it off him. He even had the heads rebuilt, so it was all ready to go. The engine was just a little dirty, so I spruced it up some:
^^^Here it is all dirty^^^
^^^So fresh and so clean^^^
Now I had to get the engine bay ready for the engine. I cleaned it all up and painted it Sage Green. I pulled all the fuel lines and fuel tank, to clean them thoroughly and/or replace if necessary.
^^^The fuel pump looked nasty, but still fired up, so shell stay^^^
^^^Same with the fuel tank, she was dirty on the outside, but no rust, so shes was scrubbed clean and given a fresh coat of paint.
^^^Here she is all cleaned up and re-installed back into the bus. All the fuel lines were scrapped though, in place for new ones, along with a new filter and pressure regulator.
Installing the engine was far more difficult than actually pulling it out.  I had to jack up the bus pretty high, just to roll the engine under the rear section. Then the transmission mount had to be loosened up, so I could angle of the transmission input shaft just right, so the clutch splines could fit into it. I had to jack up the bus pretty high, just to roll the engine under the rear section. Then the transmission mount had to be loosened up, so I could angle of the transmission input shaft just right, so the clutch splines could fit into it.
^^^The engine bay ready for the engine^^^
^^^I used an ATV/Motorcycle jack to slide and hoist the engine into place. It worked perfectly
^^^In she goes!!^^^
I lined up the input shaft and clutch the best I could, but she just didnt want to slide all the way in
I turned the crank, just to make sure the spine was actually in correctly:
Once I knew it was in, I just tightened up to engine to transmission bolts, to mate the two entirely:
I periodically compressed the clutch pedal just to make sure nothing was binding up. Really didnt want to pull it all apart again. But it was all good!
^^^Shes in! ^^^
Heres a video of it all happening:
Link
And the forum thread of me struggling to get it in, all in detail:
http://www.thesamba.com/vw/forum/viewtopic.php?p=7900331&highlight=#7900331
Getting the engine to actually start and run was a new challenge all in its self. It was a total pain in the a$$. This is where my lack of mechanical knowledge showed, but since Im fresh out of college, and student loans are insane  , I had to do all the wrench turning myself. But even if I did have money to have someone else do all the work, I wouldnt. Half the fun is doing all the work yourseld. I have a nice long forum dedicated to getting this 2.0L started, and thank you to all you Samba peeps out there for helping me out: , I had to do all the wrench turning myself. But even if I did have money to have someone else do all the work, I wouldnt. Half the fun is doing all the work yourseld. I have a nice long forum dedicated to getting this 2.0L started, and thank you to all you Samba peeps out there for helping me out:
http://www.thesamba.com/vw/forum/viewtopic.php?t=649039&postdays=0&postorder=asc&start=0
I guess the short storey on why the engine wouldnt start is:
a) The double relay I had was trash
So I made one with 4 relays, with the help of this amazing forum thread
http://www.thesamba.com/vw/forum/viewtopic.php?t=334340
This did the trick, but was totally unreliable, so I spent some $$ and just purchased a used one.
b) I had no idea what wire went where. This part took a bit to figure out, and the Green Bently book really didnt help me at all, so I had to look at picture of other bus engines. I made this picture too, to help anyone else down the road
c) My vacuum lines sucked. Unfortunately I wasnt smart enough to keep my old ones, thought I could just buy new ones. Oh, how wrong I was. Heres what I started with
So much air was getting through these hoses. I ended up wrapping them with some type of rubber tape, and it fixed the issue nicely:
D) And finally, the biggest issue I had was the gaskets found on the intake tubes connecting to the cylinder heads, were total y toasted. There was a huge vacuum leak at this location. I used new gaskets when I installed the intake tubes, but I must not have scrapped away all of the old gaskets. I just ended up cutting new gaskets from basic paper gasket materials found at a local parts store.
^^^It did the trick!
After all of that, she finally runs, and runs nice. I timed it, and got her idling well. Ill have to have a professional time it, just to get it perfect.
Link
^^^^This is as good as I could get it^^^^
That was about a week or two ago, and Ive started on the body work now, so Ill post some updates of that when I can. The more I dive into it, the more rust I find, its crazy!
Thanks for looking everyone!
Smitty |
|
| Back to top |
|
 |
notchboy
Samba Member

Joined: April 27, 2002
Posts: 22461
Location: Escondido CA
|
|
| Back to top |
|
|
smitty1976bus
Samba Member
Joined: January 21, 2013
Posts: 369
Location: Cape Cod
|
| Posted: Sun Jun 19, 2016 8:09 pm Post subject: Re: My 1978 Big Sage Green Giant Westy Build! Lots of Picutres! |
|
|
This weekend I started work on the drivers side rocker panels. I'd like to point out that I am very new to welding, and am not that great at it, so please be kind. Also, the welder I'm using is an old Lincoln Electric MIG welder, which I bought for $25 about 5 years off some guy I work with, ha.
Anyways, I tried to remove what was left of the old rusted rockers, but the just did not want to come out. The spot welds were near impossible to find, so I just saws all'd, grinded, and chiseled them out.
^^^ What I started with^^^
^^^ How I removed most of the rockers^^^
It was a pain getting them all out; had to do it in the dirt, on a really hot day. Nothing a few brewski's cant help with though!
The jack points were both pretty rusted too, they def needed attention. The front one was salvageable:
Before
After
The rear jack point needed to be cut out and replaced though:
With the jack points all welded up, it was time to put on the inner rocker. I really couldn't figure out a good way to do this, and couldn't find any how-to's online, so I just fit it the best I could, then welded. Here's what happened:
I purchased the rockers from BusDepot, and they're a great product, just wasn't sure why the area where the rocker meets the top hat, there was just a void. So I welded on some steel to seal it up. Not sure if that's what the middle rocker was for or not, but did it anyways.
Next I did the middle rocker:
With all that done up and primed, I moved onto the outer rockers. This was the biggest pain, and were my poor welding skills, and poor welder, came into light. Here's where I'm at right now:
Now, while I did get most of my sheet metal from Bus Depot, I did get some freebies from a guy I met at a car show, about a year ago. He had a 1971 bus and had a bunch of spare parts; I told him about my, then, 1976 bus. He gave me all the spare parts! It was amazing, he wouldn't even let me give him any money. I did buy him a burger, but still, I couldn't believe it. Anyways, one piece in this box of parts was a rear wheel arch patch. I assumed it would fit my 78', but it doesn't seem to very well:
I'm not sure if it truly is different, or it's just the way I mocked it up. There's a huge gap going on! I dont think I'll be able to fix this up, I'll have to grind it off and put a new patch on. Oh well.
So this is where I'm at, I'll have to finish it up tomorrow, and clean it up a bit.
Thanks for looking!
Smitty |
|
| Back to top |
|
|
secretsubmariner
Champagne Wrangler

Joined: January 08, 2011
Posts: 3104
Location: Tulsa, OK
|
| Posted: Sun Jun 19, 2016 9:49 pm Post subject: Re: My 1978 Big Sage Green Giant Westy Build! Lots of Picutres! |
|
|
Amazing work!
It looks like the rear quarter rocker is a different profile entirely from the middle rocker... Are you sure they're both for your year of bay window?
Anyway, super nicely done, sir.
_________________
-Tony
ᏣᎳᎩᎯ ᎠᏰᎵ
1978 Champagne Edition Bus FI
1970 Auto Fastback FI |
|
| Back to top |
|
|
lolight70
Samba Member
Joined: August 22, 2013
Posts: 160
Location: West Australia
|
| Posted: Mon Jun 20, 2016 3:04 am Post subject: Re: My 1978 Big Sage Green Giant Westy Build! Lots of Picutres! |
|
|
Good build so far
There is a Haynes book called:"Volkswagen bay transporter
Restoration manual "
It shows how to replace inner/outer rockers,basically the whole lower body
section of a bus.
its an English book with lots of colour pix
Well worth getting |
|
| Back to top |
|
|
Tcash
Samba Member

Joined: July 20, 2011
Posts: 12844
Location: San Jose, California, USA
|
| Posted: Mon Jun 20, 2016 12:10 pm Post subject: Re: My 1978 Big Sage Green Giant Westy Build! Lots of Picutres! |
|
|
| Rust Repair |
|
| Back to top |
|
|
smitty1976bus
Samba Member
Joined: January 21, 2013
Posts: 369
Location: Cape Cod
|
| Posted: Wed Jun 22, 2016 8:03 pm Post subject: Re: My 1978 Big Sage Green Giant Westy Build! Lots of Picutres! |
|
|
secretsubmariner wrote:
| Quote: |
| It looks like the rear quarter rocker is a different profile entirely from the middle rocker... Are you sure they're both for your year of bay window? |
That is the only piece I did not buy myself, so I'm not 100% sure of what year bus it goes to. But it doesn't look like it goes to a 78', ha. Believe the guy who gave it to me had a 71' bus, so that would make sense. All the other pieces I purchased off of Bus Depot, and are 100% for my year bus.
lolight70 wrote:
| Quote: |
There is a Haynes book called:"Volkswagen bay transporter
Restoration manual " |
How do I not have this book?? I thought I picked up every VW manual there was for my year, but I guess I missed this one. Just ordered it off of amazon. Great tip, thanks man!
I had some time to work on the body after work today, and takled the little gap issue I was having. Before I cut off the wrong rear quarter piece, I tried to fix it a bit. So I welded on some steel to line it up a little bit better:
Actually seems to be ok, definitely better than it was. I'll have to go back and clean it up of course, but if it looks good after that and tons of bondo, I should be ok.
Super!
-Smitty |
|
| Back to top |
|
|
smitty1976bus
Samba Member
Joined: January 21, 2013
Posts: 369
Location: Cape Cod
|
| Posted: Sun Jun 26, 2016 8:18 pm Post subject: Re: My 1978 Big Sage Green Giant Westy Build! Lots of Pictures! |
|
|
Did some more body work this weekend, and after touching up the welds just a bit more, and filling in the gaps with more steel, it was onto the bondo.
That's just about as good as I could get it. I then sanded away the paint to make room for bondo:
The paint on this bus is insane. There's about 7-8 layers on there! After sanding an area, it looks like one of those jawbreaker candies! All those different colors for each layer your sand away. And to make it even worse, the top layer is the thick latex house paint type. It sucks to sand off. It clogs up the sand paper so quick. I think I might need to go rent a sand blaster or something...
Bondo time!
The bondo filled into the cracks and the large seams, left by the welding, nicely. They shouldn't be visible any longer. I just have a lot of sanding, and more bondo-ing, ahead of me. Getting there though!
Oh, here's my sweet set up I have going on. Just a simple tent garage thing behind my house. Nothing crazy.
-Smitty |
|
| Back to top |
|
|
smitty1976bus
Samba Member
Joined: January 21, 2013
Posts: 369
Location: Cape Cod
|
| Posted: Wed Jul 06, 2016 7:48 pm Post subject: Re: My 1978 Big Sage Green Giant Westy Build! Lots of Pictures! |
|
|
Began the paint removal on the drivers side panal, and after talking with some body shop guys, I decided to try out chemical strippers. I went with aircraft remover, and it worked great! Here's the process:
It's a slow process, but it seems like every time I wipe on a layer of remover, it strips away 1 layer of paint. So, with about 7 layers of paint, it takes some time to remove it all. But, it's cheaper than eating through a bunch of sandpaper.
At the same time, I worked on the drivers side door. I removed it and then stripped the paint away.
My plan is to prime the entire bus, and get it ready for a professional painter to spray on the green. But, I want to paint all the door jams, and inside peices, so it's just a little easier for the painter, and cheaper for me.
I also found out that the nose of my bus is not the original nose. A new one was welded on some time ago, luckily it looks like who ever did the job did a good one. But, the new nose was a different color, so the door jams and A pillar is a different color, so it'll need to be painted green.
Along with all the jams:
I'm not to happy with the paint match. I purchased some rattle cans from PaintScratch.com, but it seems to be a more mustard yellow than sage green. I've contacted AutomotiveTouchUp.com to see if they still make Sage Green, since I didn't see it on their website. I know they match the green perfectly. Anyone know anyone else who makes old VW Paint colors?
I also primed my front door with a rattle can, with some basic duplicolor primer:
Seems to be a lot of tiger stripping though, any suggestions on what might fix this?
It's slow going when it comes to body work!
-Smitty |
|
| Back to top |
|
|
THall
Samba Member

Joined: August 25, 2010
Posts: 324
Location: Verona, WI

|
| Posted: Thu Jul 07, 2016 6:19 am Post subject: Re: My 1978 Big Sage Green Giant Westy Build! Lots of Pictures! |
|
|
| smitty1976bus wrote: |
| Anyone know anyone else who makes old VW Paint colors? |
These folks have done a good job with L63H Sage Green for my bus.
http://www.apstowerpaint.com/
_________________
'78 Westy - 2.0 FI |
|
| Back to top |
|
|
smitty1976bus
Samba Member
Joined: January 21, 2013
Posts: 369
Location: Cape Cod
|
| Posted: Thu Jul 07, 2016 8:05 pm Post subject: Re: My 1978 Big Sage Green Giant Westy Build! Lots of Pictures! |
|
|
THall Wrote:
I'll give them a try, thanks for the tip! I also went to a local body shop today and asked them if they'd be able to match the color at all. They showed me some swatches, and one green came pretty close:
This will be my last case scenario; hell, I'm not even sure who I'm going to have do the final spray anyways.
Also received this sweet book in the mail today:
So many good things in there, definitely going to help out down the line. Thanks for the tip lolight70
I started repairs on the sliding door today. My new plan is to fix everything thats keeping the bus from being road legal. I want to get it registered and start driving it around! I'll do repairs while I drive. Hopefully it gets there before summer is over.
The sliding door on the bus now is trash, totally rusted:
Luckily I saved the door from the 76' bus I had before this one. The door is in much better condition:
I began stripping the paint, but I cannot seem to remove the damn handle from the door. I removed all the bolts, but the thing won't come off.
I cant find any removal examples in my Haynes book or online anywhere. i feel like its an obvious removal process, and I'm just missing something. Any know how to remove the handle?
-Smitty |
|
| Back to top |
|
|
Tcash
Samba Member
Joined: July 20, 2011
Posts: 12844
Location: San Jose, California, USA
|
|
| Back to top |
|
|
smitty1976bus
Samba Member
Joined: January 21, 2013
Posts: 369
Location: Cape Cod
|
| Posted: Tue Jul 19, 2016 7:45 pm Post subject: Re: My 1978 Big Sage Green Giant Westy Build! Lots of Pictures! |
|
|
I finally stripped all the paint off of the drivers side body panel:
Once the bare metal was visible, it was clear there was a lot of dings and dents; nothing too bad thankfully. Some bondo was spread over the damaged area, and smoothed out the best it could be. After that dried, some primer was sprayed on.
One major issue I've come across is all of the small scratches, in the bondo and metal, left after I sanded everything down. I start with 80-100 grit, to remove the paint and shape the bondo; then move up to 150 grit, then to 220-250 grit. Once it's smooth, on goes the primer, I first use the DupliColor Primer Filler:
I find it fills in all of the swirl and sanding scratchs nicely. But this is as far as I've gotten with priming everyhting. I still need to sand the primer filler, then shoot a nice smooth primer sealer. So hopefully I do that correctly.
Any way, here's the side panels sprayed with primer filler:
I did the same with the sliding door:
That I'm happy with, it was in pretty rough shape under all that paint, but I managed to get it nice and smooth.
I also began work on the passenger side rear quarter. I totally forgot to take a 'before' picture of it, but it was in really rough shape, pretty much more rust than metal. It was cut off and a new one welded on:
Then filled in and smoothed out:
While working in the area, I saw there was a lot of patching done with fiberglass sheets, down near the bottom of the fender and wheel wells... Every section I move onto there's a new surprise, haha. Well, at least I'm about 1/3 the way done with the body work. Almost there!
-Smitty |
|
| Back to top |
|
|
Thrasher22
Samba Member

Joined: October 05, 2010
Posts: 858
Location: Calgary, Canada
|
| Posted: Wed Jul 20, 2016 9:19 am Post subject: Re: My 1978 Big Sage Green Giant Westy Build! Lots of Pictures! |
|
|
That's a big project! Starting to look good though.
I had a couple spray cans of sage green mixed up last week at my local body shop for painting my engine bay. They put the color ratio's on the can in case I needed more, I'll post a photo when I get home if that helps...
If you're painting the outside of the bus, I would spray can it though, you'll need a TON of cans and have worse quality paint. Do some research on turbine HVLP guns if you don't have a compressor. That's what I used and it was okay.
_________________
1975 Westfalia - http://www.thesamba.com/vw/forum/viewtopic.php?t=516701 |
|
| Back to top |
|
|
smitty1976bus
Samba Member
Joined: January 21, 2013
Posts: 369
Location: Cape Cod
|
| Posted: Sun Jul 24, 2016 7:08 pm Post subject: Re: My 1978 Big Sage Green Giant Westy Build! Lots of Pictures! |
|
|
Thrasher22 Wrote:
| Quote: |
| I had a couple spray cans of sage green mixed up last week at my local body shop for painting my engine bay. They put the color ratio's on the can in case I needed more, I'll post a photo when I get home if that helps... |
That could really help me out man, if you still have it. I did get in contact with Automotive Touchup, and they said they could make me a batch of Sage Green, but it is rather pricey.
Thrasher22 Wrote:
| Quote: |
| If you're painting the outside of the bus, I would spray can it though, you'll need a TON of cans and have worse quality paint. Do some research on turbine HVLP guns if you don't have a compressor. That's what I used and it was okay. |
I planned on just using spray cans for the primer layer. I do have a small compressor, but it does power the HVLP guns for short periods of time. I don't have any spray gun at the moment, but I may go buy one, since I am using a ton of primer rattle cans.
When I actually shoot the base coat (If I decide to spray myself) I'm going to go out and rent a big, proper, air compressor. I have a local place that rents them for about $100 a day, which is pretty good. I'll just have to invest in a decent gun, the last HVLP gun i had was purchased from Harbor Freight for like $30, and it sucked. Haha
This weekend I started work on the passanger side rockers. They were pretty bad, not as bad as the drivers side, but still bad. Here's the lovely rust:
Yep, pretty bad. I have all the new metal, just have to rip out all the bad. Started with the jack points. Here's the fronts:
The old jack point vs. the new one:
The rest of the metal was really rotted as well, any welding to it would blow it apart. New metal would be needed.
Much better! The rear jack point was actually in better shape, but still needed replacing. I'll have to post pictures later, I have to get them developed at the 1 hour photo hut. Haha, jk. Wonder if those places even exist any more. lol. But, I will post pics later. Have a good week everyone!
-Smitty |
|
| Back to top |
|
|
smitty1976bus
Samba Member
Joined: January 21, 2013
Posts: 369
Location: Cape Cod
|
| Posted: Sun Jul 31, 2016 7:46 pm Post subject: Re: My 1978 Big Sage Green Giant Westy Build! Lots of Pictures! |
|
|
Started the work on the rear jack point; was way to rotted to save, so just cut it all out:
Then the new one went in:
Just about everything in this area was rotted beyond saving. I had to cut most of it out. I did leave the inner rocker, my plan is to just add good metal to the little bits left to the rocker. After my experience with the drivers side inner rocker panel, and having it suck so much (finding all the spot welds, and prying it away from all those top hat braces), I didn't want to go through that again. Anyways, I cut most of the rockers away:
All the remaining metal was cleaned up and prepped for the middle rocker panel to be installed:
The top half of the middle rocker was going to tough to reach with a welder, so I used some epoxy and JB weld to bond the two.
After the epoxy cured, the two pieces were welded together. I did have to cut the middle rocker into a couple parts, due to the old rockers (the one still on the bus) has a smooth curve to it, and the new rocker has ridged angles; so the two wouldn't sit flush. I had to cut the new pieces and bend it until it had the right shape, then in it went:
Next was the outer rocker panel. I used the same basic method, epoxy on top, just to give a clean flush look; that and some spot welds:
And the bottom welded to the middle rocker:
Now, the inner rocker was next. Since I didn't have a new one, and the fact I kept most of the old one on the bus, I had to cut a new one form sheet metal. I don't have any training in metal work, and have never practiced this amazing artform, so I tried the best I could. I didn't take a picture of my creation before installing, but here it is on the bus:
It's not the prettiest thing in the world, but it'll do... I guess. Next I wanted to seal it all up, just so no moisture gets inside the rockers:
After that was done, I cleaned up the rest of the undercarriage, in the area, then prepped it for some primer. Once the primer was sprayed, then dry, I sprayed on some undercoating.
Thankfully that portion of the rockers and undercarriage is done with, because it was horrible to do. I was in the sand, in 85 degree heat with a million percent humidity, under a bus working in an area no taller than a foot. My arms and clothes are covers in burns from welding, haha. Oh well, it's done. I'll look back it and laugh one day.
There's still a ton of things to do in that area of the bus before I can get back to paint stripping and priming. The floors are a mess:
The fun never ends; till next week end!
-Smitty |
|
| Back to top |
|
|
smitty1976bus
Samba Member
Joined: January 21, 2013
Posts: 369
Location: Cape Cod
|
| Posted: Sat Aug 06, 2016 11:08 am Post subject: Re: My 1978 Big Sage Green Giant Westy Build! Lots of Pictures! |
|
|
Jumped back into stripping paint. Onto the passenger side panels:
Love it when the paint bubbles up, ha. Here it is down to the metal, or mostly metal:
Still have plenty to repair
Stipped the paint off the drivers side rear quarters and rear lower panel as well. There is a ton of body work that needs to be done. There's also evidence of prior body work being done. This bus could have been in a few accidents in its life:
As you can see, lots of bondo, lots of hammered metal , and lots of rust. Goody!
Does anyone know of an easy, well relativly easy, way to remove the paint from inside the cool air inlet ducts?
This part is going to be tricky....
-Smitty |
|
| Back to top |
|
|
smitty1976bus
Samba Member
Joined: January 21, 2013
Posts: 369
Location: Cape Cod
|
| Posted: Sun Aug 21, 2016 7:36 pm Post subject: Re: My 1978 Big Sage Green Giant Westy Build! Lots of Pictures! |
|
|
Finally a weekend when I dont have to work and it's not raining out, ha. Tried to do as much as I could. I started with the cool air inlet ducts, and stripping the paint inside of them. Not sure of the best way to do this, so a lot of chemical stripper was sprayed into duct. Once the paint bubbled up, I tried to brush it away:
What it started off like ^^^
The chemical peeler was working, I just needed something to scrap all the paint away with. I tried just taping a scrapper to a steel rod:
It didn't work all to well. Way too flimsy. I ended up fabbing up a metal scrapper:
It was a crude tool, but it did the trick!
I managed to get most of the paint off the ducts. I then tried to prep for primer the best I could, then sprayed it on:
It wasn't as bad as I thought it was going to be. Guess I should just shoot some Sage Green on and be done with it:
It actually came out pretty good, I was very happy with it. Now I can cover it up and forget about that part of the bus. I don't want to spray any primer or anything else on it, while I'm doing body work on the rest of the bus.
As you can probably tell, I found some Sage Green (L63H) paint. I talked with Automotive Touch Up and they mixed me up a nice batch, and the color is absolutely perfect. This company is awesome, they match the color perfect (as far as I can tell, I am little color blind though, haha) and their prices are very reasonable.
Ok, I also primed up the passenger side rear side panel, but forgot to take a picture of the final product, but here it is all prepped for primer:
While I was doing the body work on the rear of the bus, I removed the engine bay door, and stripped it, bondo'd it up, sanded it, then primed it. And it was in really rough shape.
The drivers side rear quarter was in really really reallyyyy rough shape, as you saw in my last post. I tried to fix it, but it isn't coming out too well. One area was near the fender, it was all rusted away. So I had to cut the rust out, and weld in a new piece. This came out ok:
Then the rear panel, below the engine bay, was totally destroyed, so that needed new metal and a lot of bondo:
But the area around the tail light was a nightmare, one of the previous owners drilled a ton of holes around it (around the entire quarter panel actually), and I couldn't hammer them flat, and couldn't bondo them up. Seems like they must have used one of those hammer out body working tools to fix some dents; but they did a horrible job. So I tried to get it back to its normal shape:
After all that, here's what the quarter looks like:
I was hoping to take my time painting, but it turned out I had some thunderstorms coming my way, so I rushed to paint before I got any rain. I masked and prepped everything, and started spraying; and of course I'm low on primer. Luckily I sprayed mostly everything I needed to, I could go for another coat or two, but I'll have to wait for another day. Here's how it came out:
One thing about primer, it will show you every single imperfection in your body work; and it was showing me a lot. I'm going to have to sand a lot more, and maybe spread some more bondo. I'm thinking the area around the taillights should be good, the actual taillights should hide everything. If it doesn't, I may have to buy a new skin... Don't want to do that.
Another area of the bus down, onto the next one. My lack of automotive body working skills is starting to become frustrating. I may just do all I can, then have a professional look at it and do some work on it. We'll see. I just can't wait to drive it!
-Smitty |
|
| Back to top |
|
|
notchboy
Samba Member
Joined: April 27, 2002
Posts: 22461
Location: Escondido CA
|
|
| Back to top |
|
|
oscarsnapkin
Samba Member
Joined: October 22, 2013
Posts: 558
Location: Bucks County, PA
|
| Posted: Mon Aug 22, 2016 2:48 am Post subject: Re: My 1978 Big Sage Green Giant Westy Build! Lots of Pictures! |
|
|
Man, you're brave. I always like seeing the pictures of rust repair. It makes you realize that all these things are is a bunch of metal panels that fit together like a giant puzzle. Keep up the great work.
_________________
- 1977 CEI Sunroof Bus 2.0L F.I. Hydraulic Lifters
- 1973 Thing
"Its so easy to laugh, its so easy to hate, it takes strength to be gentle and kind." |
|
| Back to top |
|
|
|


