| Author |
Message |
rzep
Samba Member
Joined: August 21, 2016
Posts: 1
Location: Australia

|
 Posted: Mon Aug 22, 2016 3:41 am Post subject: Re: My 1978 Big Sage Green Giant Westy Build! Lots of Pictures! Posted: Mon Aug 22, 2016 3:41 am Post subject: Re: My 1978 Big Sage Green Giant Westy Build! Lots of Pictures! |
 |
|
| You are doing a great jog. Will watch this build with interest. |
|
| Back to top |
|
 |
smitty1976bus
Samba Member

Joined: January 21, 2013
Posts: 369
Location: Cape Cod
|
| Posted: Mon Aug 22, 2016 7:02 pm Post subject: Re: My 1978 Big Sage Green Giant Westy Build! Lots of Pictures! |
|
|
Ended up just priming the passanger rear quarter tonight, just because I didnt have time or paint to do it last night. Was nice and quick:
Only issue was the bugs, haha. They kept landing on the fresh paint:
Have a great week Sambatonians.... Sambaians.... Sambanites... People of Samba!
-Smitty |
|
| Back to top |
|
|
Pinetops
Samba Member

Joined: March 24, 2007
Posts: 2987
|
| Posted: Wed Aug 24, 2016 10:05 am Post subject: Re: My 1978 Big Sage Green Giant Westy Build! Lots of Pictures! |
|
|
Thanks for sharing your work on the bus.
If I'm honest, your welding is a little crude. Strive to rely on filler as little as possible. It's definitely an improvement though. You are brave to take on such a project!
I hope you'll keep updating us with your progress.
_________________
"A rolling bus gathers no rust." |
|
| Back to top |
|
|
thewalrus
Big Jack
Joined: March 27, 2006
Posts: 3014
Location: Belchertown, MA
|
|
| Back to top |
|
|
smitty1976bus
Samba Member
Joined: January 21, 2013
Posts: 369
Location: Cape Cod
|
| Posted: Wed Aug 24, 2016 7:35 pm Post subject: Re: My 1978 Big Sage Green Giant Westy Build! Lots of Pictures! |
|
|
| Quote: |
Pinetops wrote:
If I'm honest, your welding is a little crude |
Crude is being generous. haha. Im very frustrated with the way my welds have come out on this build, I just can't seem to get the welding thing down. This is my first time welding, and have done some practicing, and watched plenty of youtube videos, but am not progressing the way Id hoped. I had a buddy try and teach me, at his place, on his welder; and I seem to do a decent job there, but when I try welding back on the bus, with my welder, it's not quite so decent. It might be my welder
.maybe... It's a Lincoln Electric HandyMIG 10919, and I bought it from a co-worker for $25 (haha, yep). it was in rough shape, I had to clean it up a bit, I bought new nozzles, tips, and cleaned the inside electric connectors. She works, but some times dies, so I pull a Fonz and hit it and it turns back on. And while welding body panels, she seems to either burn right through the metal, or just pool up ontop of the metal.
I may need a new welder, any recommendations on a good/cheap unit? Ive been looking on craigslist and harbor freight, but dont want to waste money on a crappier unit. I'll have to do some research, I'm sure theres a million reviews and forums out there on good welders.
| Quote: |
thewalrus wrote:
That's a 70A Alternator. Nice! |
Yessir! Took me a while to figure out that it was different from like 75% of all the other alternators out there. Quick story: I brought it to AutoZone to test it out, and they said it was dead, so I bought a new one from them. Yep, the new one they shipped me was a little different (Thank God i didnt give them my 70 amp as a core, I would have killed myself later). Anyway, I returned that back to AZ, and had a mechanic buddy test my original, and it came back good. So, long story short, never trust AZ, haha. And, hopefully my original alt works, because I cannot find any rebuilt units out there, or anyone who rebuilds them. (havent looked too hard tho)
| Quote: |
thewalrus wrote:
TransporterFest is coming up in October |
I cant wait! My original goal was to have my bus ready for the show. I guess there's still a super super super slim chance that I will have it ready. I've been working overtime on it!
-Smitty |
|
| Back to top |
|
|
Pinetops
Samba Member
Joined: March 24, 2007
Posts: 2987
|
| Posted: Wed Aug 24, 2016 7:49 pm Post subject: Re: My 1978 Big Sage Green Giant Westy Build! Lots of Pictures! |
|
|
| smitty1976bus wrote: |
| Quote: |
Pinetops wrote:
If I'm honest, your welding is a little crude |
Crude is being generous. haha. |

I really have no room to talk really since I've done very little welding. Maybe it is the welder. If the temp is non consistent then that could be the problem. Either way you're getting it done and for that I commend you.
_________________
"A rolling bus gathers no rust." |
|
| Back to top |
|
|
smitty1976bus
Samba Member
Joined: January 21, 2013
Posts: 369
Location: Cape Cod
|
| Posted: Sun Aug 28, 2016 5:21 pm Post subject: Re: My 1978 Big Sage Green Giant Westy Build! Lots of Pictures! |
|
|

Another nice weekend, unfortunatly I had to work half a day on Saturday. So I had to work into the night if I wanted to meet all my goals. First I started on the rear hatch of the bus:
I did some sanding back when I first purchased the bus, so there wasn't too much to do:
After some light sanding and some bondo, the primer went on:
The only issue I had with the rear hatch was the weather stripping holding in the glass. I really really reallyyyy don't want to remove any glass for this re-paint. I know I should, but I don't know how, and new rubber costs more than I though it would. But, it's pretty dry rotted:
I ended up sanding the rubber down, to get it smooth, then I soaked it with armor-all, just to get some moisture back into it. I'm not done smoothing it down, so I'll post picture of the finished product soon. If the rubber is too far gone, I may not have a choice, and be forced to buy a new one.
I also tackled the passengers side door:
So many layers of paint!
Chemical peeler did quick work of it though, and the primer want on.
I kept bouncing around on the bus, doing too many things at once, but one area I did manage to [almost] finish was the little step in the passenger side door well. It was totally rusted away:
The rusted area was cut away, and new steel welded in. Then I primed it, and spread a nice healthy layer on bondo on top of it all, to make it look smooth (Not yet smoothed out). The underside of it all was grinded smooth and primed as well. Later to be undercoated, along with the rest of the undercarriage.
What I didnt get to was the area by the rear passenger wheel well:
I have a new skin for that:
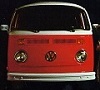
And I wanted to strip the paint off the front of the bus:
I removed all the things that could come off, and really saw how lazy the previous owner (Or who ever did the previous paint job) really was:
They just painted right over the chrome shiny reflector part of the light housing. But I guess I'm not surprised, since they just painted over the bulbs everywhere else:
Haha. I might be cutting corners in some places, but I'm not that bad, ha.
Welp, not a bad weekend, just wish I had more time do more to the bus. It'll be September by the time I work on it again, and my October 'On the Road" goal just seems out of reach. Hopefully Septembers weather is as nice as Augusts' was.
-Smitty |
|
| Back to top |
|
|
smitty1976bus
Samba Member
Joined: January 21, 2013
Posts: 369
Location: Cape Cod
|
| Posted: Mon Aug 29, 2016 8:31 am Post subject: Re: My 1978 Big Sage Green Giant Westy Build! Lots of Pictures! |
|
|
|
|
| Back to top |
|
|
smitty1976bus
Samba Member
Joined: January 21, 2013
Posts: 369
Location: Cape Cod
|
| Posted: Mon Sep 05, 2016 4:09 pm Post subject: Re: My 1978 Big Sage Green Giant Westy Build! Lots of Pictures! |
|
|
A nice long weekend to work on the Bus! Noooope. 
Had a tropical storm barreling down on us here on Cape Cod. So I had Saturday to work on my bus, then had a sunny Sunday for cookouts and beverages, then a day of stormy weather.
Started with painting the inside of the sliding door and rear hatch:
All primed up.
On with the Green!
I sprayed the gloss clear coat on too, but didnt take a picture 
Oh, and of course my air compressor decided to die on me. It was a cheap 10 gallon unit, $125 from Harbor freight, and I've had it for about 8 years, so I was very happy with it. It actually died on me during the week, so I had some time to do some research for a new one. I wanted the new compressor to be able to use a HVLP spray gun, so it needs a decent size tank. And, it needs to be portable, so a big 60 gallon unit was out. It came down to either a 30 gallon Kobalt unit from Lowes for $450'sh, or a 30 gallon Porter Cable unit from Tractor Supply for $380'sh. Some one told me that Porter Cable is made by DeWalt, and theyre damn good, so that's what I went with:
Welp, now with my savings account hit, I'm hoping I don't need to spend too much more on this bus.
After the doors were painted, I finished up on the passenger side door step:
Then started stripping the paint on the front face of the bus:
So many different colors!!!! (I'm not going to fix that big a$$ dent in the front, that's beyond my expertise, and I don't feel like welding on a new skin. Maybe in the future. Besides, the spare tire will hide all them dents!  ) )
Then quickly sprayed a little primer on it:
Before I had to tuck her into the tent for the upcoming rain and wind from Tropical Storm Hermine:
Come Monday morning, the storm wasn't as bad as everyone was saying it was going to be, just windy. But by 3-4 in the afternoon, the rain came and the winds really picked up. With the drought we were having, a lot of branches kept falling. They say it'll be rainy and windy for the next 12-18 hours, so hopefully nothing crazy happens.
-Smitty |
|
| Back to top |
|
|
smitty1976bus
Samba Member
Joined: January 21, 2013
Posts: 369
Location: Cape Cod
|
| Posted: Mon Sep 12, 2016 7:37 am Post subject: Re: My 1978 Big Sage Green Giant Westy Build! Lots of Pictures! |
|
|
On this edition of 'I have no idea what I'm doing': Painting!
First I finished up the back facing portion of the engine bay door:
^^^Started with
^^^^Painted
^^^^Trying to save all the original stickers
I'm still not sure if I want to paint the actual bus myself, or pay someone to do it. Unfortunetly, with my budget, I wont be able to afford a big auto body shop to paint it, I'd have to find someone who does it on the side. And with all the hours of body work I've put into this bus, I dont know if I'd trust anyone to do it, haha. So I thought I'd try painting a small portion of the bus and see how it comes out.
First I bought a spray gun from Lowes:
Then I took the engine bay hatch and rear hatch, and made sure everything was sanded smooth, then went over it all with 600 grit sandpaper:
Then sprayed on another layer of primer, to get a uniform color and texture... Only, it sprayed horribly:
I set the gun up horribly.... So, I read the instruction manual, watched even more YouTube channels, on how to paint a car and set up an HVLP gun. Eventually I dialed the gun in:
This cardboard definitely helped me out.
Then it all got sprayed:
(Didnt take a photo of the rear hatch because I got an eyelash in the paint, and had to wait for it to dry, then sand it out, then paint it again, and I just forgot to snap a photo  ) )
After the primer dried, I just went onto the base coat, no wet sanding in between.
Then right onto the glossy clear coat. This is after it dried over night:
It's pretty shiney I just need to figure out how to remove the orange peel and buff it to a better shine.
Still have no idea what I'm doing, and if I should attempt to spray the rest of the bus or not. I'll wait to see how well the buffing and polishing goes....
In other news, I finished stripping the front of the bus:
And found even more rust:
And found out my new panel I bought, was for a 68-71 bus, not my 78' bus, so I had to return it to BusDepot and am awaiting the correct piece:
All I need is a few more weeks of good weather. Come on Summer, don't run out on me yet!
-Smitty |
|
| Back to top |
|
|
notchboy
Samba Member

Joined: April 27, 2002
Posts: 22460
Location: Escondido CA
|
| Posted: Mon Sep 12, 2016 8:50 am Post subject: Re: My 1978 Big Sage Green Giant Westy Build! Lots of Pictures! |
|
|
Its a real quick curve brother. You took that deck lid from rust to paint - and it presents well in the pics. Guess what? You now know what you are doing 
You may not do it well but you know how and I think it looks way better than it did before. Keep up the good work!
_________________
| t3kg wrote: |
OK, this thread is over. You win. |
Jason "notchboy" Weigel
1964 1500 S
1964 T34 S Convertible
1977 Westfalia Camper pop-top |
|
| Back to top |
|
|
smitty1976bus
Samba Member
Joined: January 21, 2013
Posts: 369
Location: Cape Cod
|
| Posted: Mon Sep 12, 2016 7:36 pm Post subject: Re: My 1978 Big Sage Green Giant Westy Build! Lots of Pictures! |
|
|
Thanks notchboy!
I thought I'd be able to buff out the orange peel with some 1500 and 2000 grit sandpaper, and some Meguires 105 cutting compound:
It made the paint a little better, and mirror like in some small areas, but still no where close to what I'd call acceptable:
I'll have to start over.
But, it's great practice, and at least I know what I have to do, or what not to do.
When I was wet sanding, it burned through the paint, due to the low spots of the orange peel; and I missed painting a small area around the curved part of the hatch; and also missed some areas on the lip of the hatch. All things I have to look for when trying again.
So I'll have to:
Sand off the green paint
Make it smooth again
Prime it all over again
Wet sand to..... 600 grit?
Spray Base Coat
Wet sand to 1500 grit
Spray Clear Coat
Sand to 2000 grit
Buff with Meguires Cutting 105 compound
Buff with Meguires Cutting 205 compound
(A lot of people are telling me to use 3M cutting coumpounds, but the store by me had Meguires, and it costs half as much)
So, that's my plan. It should produce a mirror like finish. Hopefully.
I love venting my frustrations out on this forum, ha.
-Smitty |
|
| Back to top |
|
|
smitty1976bus
Samba Member
Joined: January 21, 2013
Posts: 369
Location: Cape Cod
|
| Posted: Fri Sep 16, 2016 10:22 am Post subject: Re: My 1978 Big Sage Green Giant Westy Build! Lots of Pictures! |
|
|
Alrighty, after failing on my first attempt of painting, I stripped it down to primer, and re-painted. I got some tips from auto body buddies, and watched even more 'how to' videos, so I did some more prep and wet sanding this time around laying down paint. After it was all sprayed, dried, wet sanded, and buffed, I think it came out ok:
Definitely better than my first time, but still a little bit of orange peel. My spray gun still needs some fine tuning. Hopefully every time I paint, it will come out a little bit better.
-Smitty |
|
| Back to top |
|
|
smitty1976bus
Samba Member
Joined: January 21, 2013
Posts: 369
Location: Cape Cod
|
| Posted: Sun Sep 25, 2016 7:30 pm Post subject: Re: My 1978 Big Sage Green Giant Westy Build! Lots of Pictures! |
|
|
Havent had much time to work on the bus lately, but I did squeeze in some time this weekend. And of course it's two steps forwards, one step back..
Started work on the two front doors and the sliding door. I had already done most of the body work, so I just made sure it was all smooth, so sanded it up to 320 grit.
I then sprayed on some primer. i'm using Duplicolors 'ready to spray' paint:
Why I went with the expensive Duplicolor crap----> I originally had a nice gallon of primer and a jug of some reducer, which I bought from AutoZone for like $40. But that must have been sitting on the shelf for years, because it was dried solid when I opened it. After I returned that stuff, I just picked up the quarts of the Duplicolor for $20 each. It's definitely going to cost me more, but I didnt want to wait another week or two to have some new primer shipped in, and all other parts / body shops told me the same
So I sprayed on the primer, and had some issues. I must have waited too long to spray my second coat, because my gun got all gunky. Could be the thicker primer gunking it up as well. I'll have to figure out how to prevent this going forward. But I did manage to lay down some decent paint...
Well, on two out of the 3 doors... The passenger door had some funky residue on it. All the paint dried except for some splotchy areas
Not sure what it is. I cleaned the doors very well before spraying, using some 'wax and tar' remover. The only thing I can think of is the tack cloth I used left some tacky'ness on the door. All I know for sure is that I'll have to sand it down again, then re-spray. This painting is tricky business.
I did do some other body work and paint sripping, some minor things:
Getting there!
-Smitty |
|
| Back to top |
|
|
smitty1976bus
Samba Member
Joined: January 21, 2013
Posts: 369
Location: Cape Cod
|
| Posted: Sun Oct 02, 2016 7:58 pm Post subject: Re: My 1978 Big Sage Green Giant Westy Build! Lots of Pictures! |
|
|
Another rainy weekend in New England, and looks like it will be raining for a while up here.. I finished up priming the two front doors, sliding door, the engine bay hatch (well, re-priming it for the second time), and the side molding things:
I then primed the inside of the two doors, then sprayed them green with a rattle can:
Then clear coated it. Once that was all dry, I flipped the doors back over and began wetsanding, as did so for about a day. I went up to 600 grit on them, and smoothed them out nicely. Next I had to arrange the doors and panels around my 10x20 foot tent garage, so I could paint them all without tripping over myself:
Then it was time to paint!
I took no chances this time around, I had my full painters suit, just wore socks, put plastic liner down everywhere, didn't want any dirt flying around. I even put plastic liners on the roof, just as an extra layer of protection against rain leaking in. And since it's getting cool up here in the North East, I bought a few heat lamps and put them around the tent. Mix those with the shop lamps and it got pretty toasty in there.
I began with spraying the top of the doors:
I did this so I could flip them, so I wouldn't have to spray any part of the door touching the ground:
It seemed like a good idea at the time, but I quickly learned that the over spray would leave little dots of paint all over the unpainted portion of the doors. I had to wetsand those dots smooth before continuing with painting. I then sprayed the rest of everything:
I laid down 3 coats of the base coat, 3 light coats, as I was told by someone to do. After it dried, it dried very smooth, unlike the first time I tried painting a few weeks ago. It was looking good. I then loaded up my spray gun with the clear coat, and sprayed it on. I did 3 heavy coats of the clear:
I let it dry overnight, and let all the paint fumes and mist settle down:
I still haven't mastered the spraying of the clear coat, there was a lot of orange peel left over. I started wetsanding again, starting with 1500 grit and moving up to 2000 grit:
Then I took the Meguires compound and my wool pad and buffed it out:
The final product
But there were some rough spots, I sanded through to the primer around the edge:
Not sure how I'll touch up those.. I'll probably just take some paint, and use a brush to blend it in, luckily it's not too big of an imperfection.
I then did the drivers side door, using the same process:
On the top photo, you can see the huge difference the Meguires compound makes. But it does leave swirl marks in the paint. I'll have to see if there's some polish or some other, less aggressive, compound out the there to remover those swirl marks.
Then I looked at the sliding door. There was a very noticeable imperfection in the paint, at the top. One of my plastic liners came loose in the night, due to the storm, and landed in the wet wetcoat, probably just for a second, but enough to ruin a small section (how ironic that the thing I used to protect my paint, was the thing that hurt it):
I ended up sanding it all down, to make it smooth, and then sprayed it with a rattle can; green then with the wet coat:
I have no idea how this is going to come out. I'm hoping that it will dry and not be noticeable. I'll have to find out tomorrow. That, and finish up on the engine hatch and side panels. It's been a long weekend of nervous and stressful painting. I hate doing something I'm not sure on, when there is so much money on the line. If i drop a can of paint, or screw up on a large panel, that could be hundreds of dollars worth of mistakes. I tried to push that out of my mind while spraying, but I have to admit, it was always in the back of my head. I can't wait till this part is over!
-Smitty |
|
| Back to top |
|
|
Spike0180
Samba Member

Joined: June 06, 2015
Posts: 2269
Location: Detroit, Michigan
|
| Posted: Mon Oct 03, 2016 6:55 am Post subject: Re: My 1978 Big Sage Green Giant Westy Build! Lots of Pictures! |
|
|
Its looking great. Just remember that paint is like bando, too much is enough and enough is too little. The goal is to have as much as possible without making it drip.
It helps to have your doors on a stand so you can spay on a flat surface (kinda too late for that info though, and doesn't help on the rest of the bus).
Another word of advice, don't try buffing on corners/edges. It is nearly impossible not to burn through. Overall, it's looking great. Keep up the good work =)
_________________
Brutis Patches Izabich: 1970 VW Transporter - 1776cc DP
Current State: Projects never truly end...
Location: Grosse Pointe, Michigan
Other cars: 2003 F150, 2003 Jetta GLI vr6-6sp
Sambastic: adj; the quality of being nit picky, elitist, expecting everyone to do things the way they believe is best with no regard to situation, "sambastic" |
|
| Back to top |
|
|
1967250s
Samba Member
Joined: May 02, 2007
Posts: 2137
|
| Posted: Mon Oct 03, 2016 6:01 pm Post subject: Re: My 1978 Big Sage Green Giant Westy Build! Lots of Pictures! |
|
|
Admire your fearlessness. I have many of the same issues, but am balking at cutting. You know the engine hatch is from a 72. Good luck!
_________________
'72 Elm Green Deluxe |
|
| Back to top |
|
|
1967250s
Samba Member
Joined: May 02, 2007
Posts: 2137
|
| Posted: Mon Oct 03, 2016 6:02 pm Post subject: Re: My 1978 Big Sage Green Giant Westy Build! Lots of Pictures! |
|
|
Admire your fearlessness. I have many of the same issues, but am balking at cutting. You know the engine hatch is from a 72. Good luck!
_________________
'72 Elm Green Deluxe |
|
| Back to top |
|
|
smitty1976bus
Samba Member
Joined: January 21, 2013
Posts: 369
Location: Cape Cod
|
| Posted: Sat Oct 08, 2016 9:29 am Post subject: Re: My 1978 Big Sage Green Giant Westy Build! Lots of Pictures! |
|
|
Thanks guys!
I have a new found respect for the people who are good at painting, it's more of an art than a science. I just can't wrap my head around those paint jobs you see at Sema or those cars on all those tv shows; Some of those guys have more skill than professional sports players, ha.
The cutting process is just as tricky, and I'll def keep the rotary buffer away from the edges now. Makes sense too, the paint will be much thinner by the edges, just because of the surface tension of a liquid, or something like that.
Anyway, I managed to fix the imperfections I made:
Then buffed up the rest of the pieces:
I asked around, and every is telling me use 3M cutting and buffing compounds, that it will really take out those swirl marks. But..... the 3 step kit costs around $300, not including the wool or foam pads... That's insane! I'll have to see what it looks like when I'm all done, if it has too many deep swirl marks or not.
Now I'm back to body work  The rust never ends!!!!! The rust never ends!!!!!
And there's so much more too do... At this rate, I might be done by Thanksgiving... or Christmas... maybe Valentines day.... ha.
-Smitty |
|
| Back to top |
|
|
smitty1976bus
Samba Member
Joined: January 21, 2013
Posts: 369
Location: Cape Cod
|
| Posted: Mon Oct 10, 2016 8:08 pm Post subject: Re: My 1978 Big Sage Green Giant Westy Build! Lots of Pictures! |
|
|
I had another free weekend, and rain was on the forcast yet again; remnants of Hurricane Matthew (my thoughts and wishes are with all the family's effected by it down south)... So, painting was out of the question. I decided to tackle the pop top. I took the front half off first, fully expecting the roof of the bus to be totally rusted, but I had a nice pleasant surprise:
The little spot was the only issue. Easily fixable... Hopefully.
The fiberglass top itself was in dirty condition:
First I tried cleaning it with Simple Green (Below), then took some bleach to it (Second picture below). It was clean, but definitely stained.
At this point the rain and wind started, so I had to convince my buddies to get a little wet and help me take the big part off the pop top off. We got it off pretty quickly, about 5 minutes, and put it in my tent garage:
Really really really dirty... The brilliant previous owner of this bus painted the sides and problems areas with white house paint. It looked horrible. But again, I spray some simple green and purple clean on it, scrubbed away with a 3M scuffing pad, and then did the same method with bleach:
I haven't found many threads about pop top restoration, so I looked up some fiberglass repair on the Google. I started sanding with 150 grit sandpaper, then 220 grit. It smoothed everything out pretty good.
I was going to spray on some basic primer, but read that you shouldn't use lacquer based paints on fiberglass, not for a primer anyhow. Not sure if that's true, but I don't want to chance that. I read that you should use Urethane or Epoxy based paints. First thought was to use marine paint, so I ran out to Lowes and bought a quart:
But I also saw this epoxy rattle can for a fraction of the price:
Figured I'd try that before the expensive marine paint. So I tested it on small corner of the pop top:
It covered it pretty nicely. Now I need to decide if I should try this route, at $3 per can, or use the thick marine paint, at $50, and cover up all the scratches and smooth it out a little bit. After this primer, depending how it looks, I'll spray on a nice white lacquer and matte finish clear coat.
If anyone knows of any good threads or web pages with pop top restoration, or what paint to use on fiberglass (reasonably priced), I'd be super pumped if you'd share
-Smitty |
|
| Back to top |
|
|
|


