| Author |
Message |
WildIdea
Samba Member

Joined: September 17, 2016
Posts: 928
Location: Black Hills, South Dakota

|
 Posted: Wed Feb 07, 2018 10:09 pm Post subject: Re: Hell In A Bucket! WildIdea's 1977 Sage Green Westy Posted: Wed Feb 07, 2018 10:09 pm Post subject: Re: Hell In A Bucket! WildIdea's 1977 Sage Green Westy |
 |
|
So many cool current 77 Westfalia threads going up live these days. Makes me feel less crazy not being the only person getting after one.
Time to get the Kitchen Block out of the garage and into an area with better temps, tunes and lighting.
The sink is pretty crusty and needs a cleaning and polish. The mounting seal is aged out and takes some adhesive remover and it come clean too. That's going on in the dining room table.
I think I'll start with the piece thats behind the stove controls. It's hanging by a thread but not cracked, so lets bake it off with the hot iron.
The glue underneath is really dry and thinly coated, sands smooth pretty easy. I get some spray and brushable rubber cement depending on the size of the area and after it flashes, I get it stuck back in place. My whole regiment of clamps jumps in to help.
That's about all I do in a day with this, I get an area prepped and glued then left clamped for the day and pop them off in the morning. Repeat in series on another piece the next day. Only takes anywhere from 20 min to an hour depending on the spot.
Same as the next spot. Remove or pull back, clean, glue, clamp---repeat.
Before I get the clamps on, I get most of the glue that squishes out wipped up so it doesn't quirt all over the outside of the laminate. I don't think the glue would forever bond on the side, but its easier to clean up with acetone before it dries. I really like the painters tape to help hold and protect the surfaces and I go through plenty. On some edges, only about a half inch is sprung and I learned on the eche_bus thread to use toothpicks as wedges to allow you to get some glue in there. As a toothpick is removed the excess glue gets wipped and the painters tape applied to get it held down. A few less sprung areas and it's getting tighter every day.
|
|
| Back to top |
|
 |
WildIdea
Samba Member

Joined: September 17, 2016
Posts: 928
Location: Black Hills, South Dakota

|
 Posted: Thu Feb 08, 2018 10:23 pm Post subject: Re: Hell In A Bucket! WildIdea's 1977 Sage Green Westy Posted: Thu Feb 08, 2018 10:23 pm Post subject: Re: Hell In A Bucket! WildIdea's 1977 Sage Green Westy |
 |
|
Things are going ever so slow and tedious with the Kitchen Block, but it's better than some of the other tasks I've had to address with the bus. Still, lots of glueing and clamping and rolling the beast over a few dozen times.


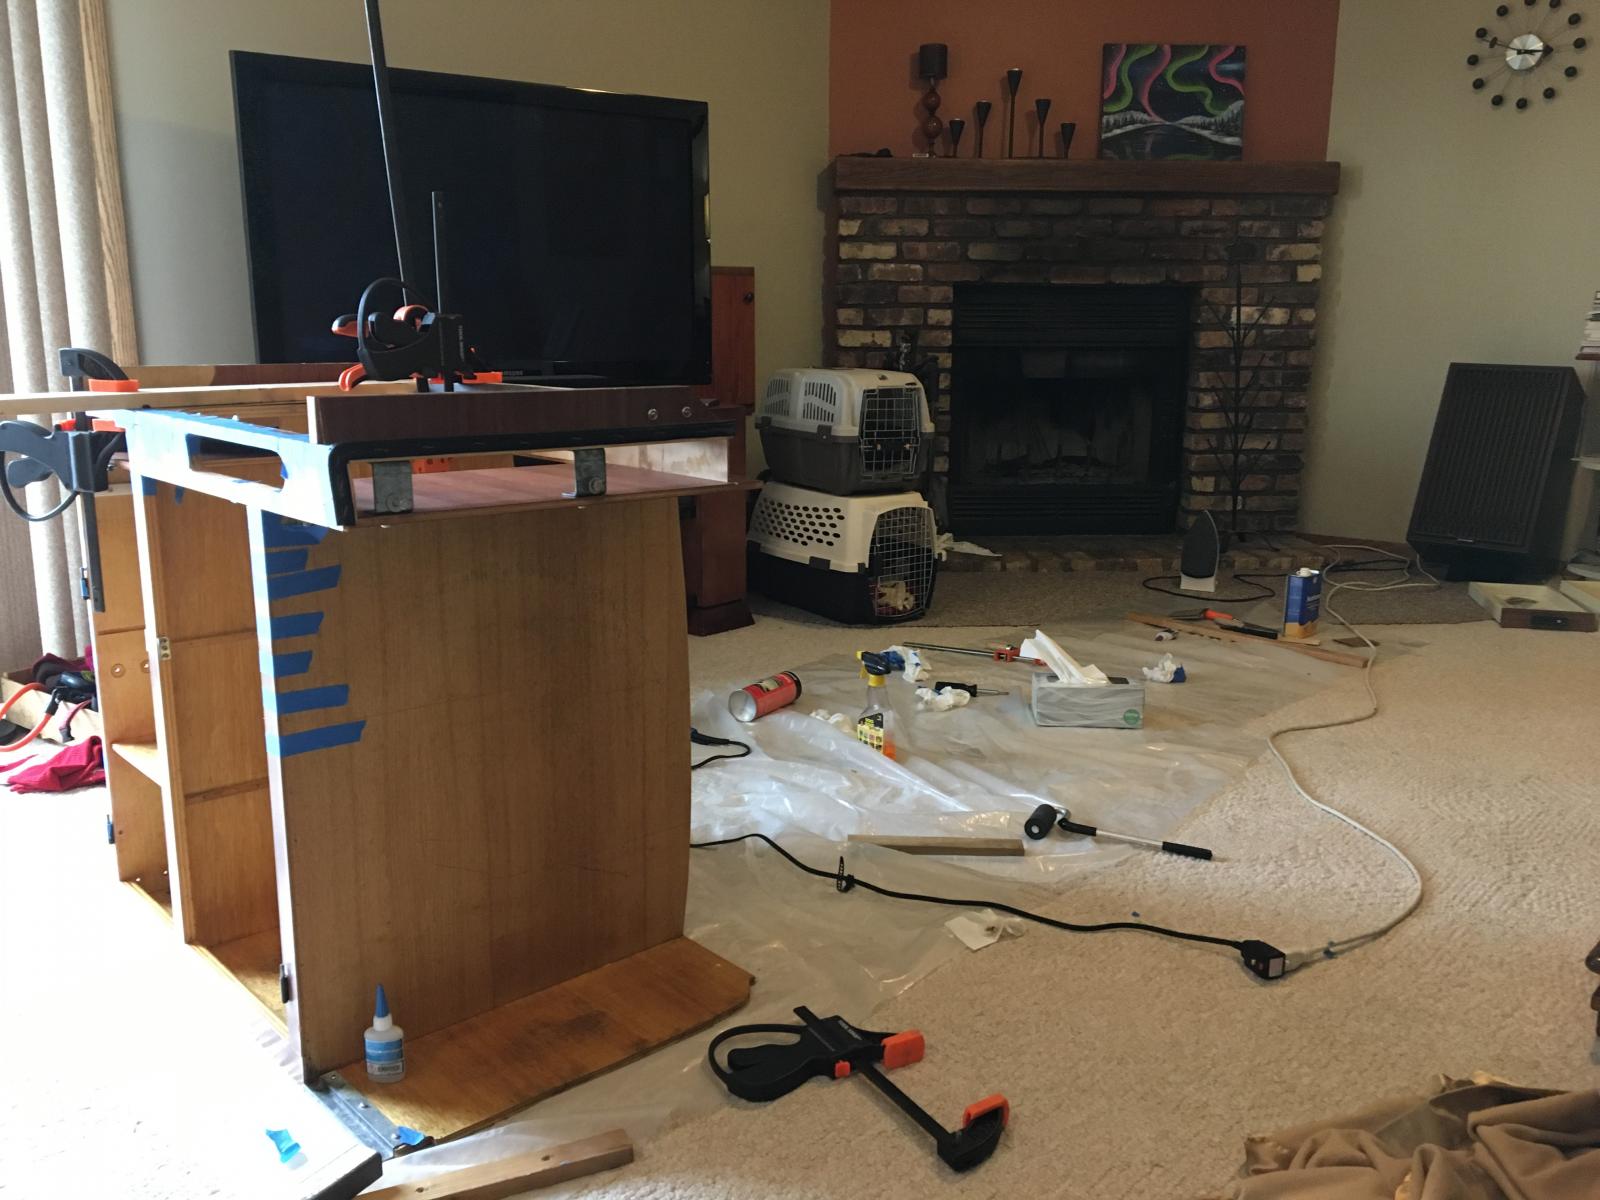
I'm looking at the very top surface of the piece and it has issues. Its delaminating in several places and cracked right down the middle. On top of that, it appears that the two short rails that support the lid are screwed down from below and no clear way to get a wrench on them to remove. I've seen some folks drill through the wood thats covering the screws from below to gain access, but I'm not comfortable drilling holes in this piece. I decide that I will try to make my repairs here with the laminate in place.
The first area to patch up is around the water tank filler neck. It's cracked in several places. I get some glue worked in there the best I can. This is where the spray rubber cement comes in handy. Lift up the laminate and spray some in there and squish the glue down deep into the recesses and lift it back up to "flash", then flake the laminate so it rests in its original state. Clamp and tape it overnight to bond.
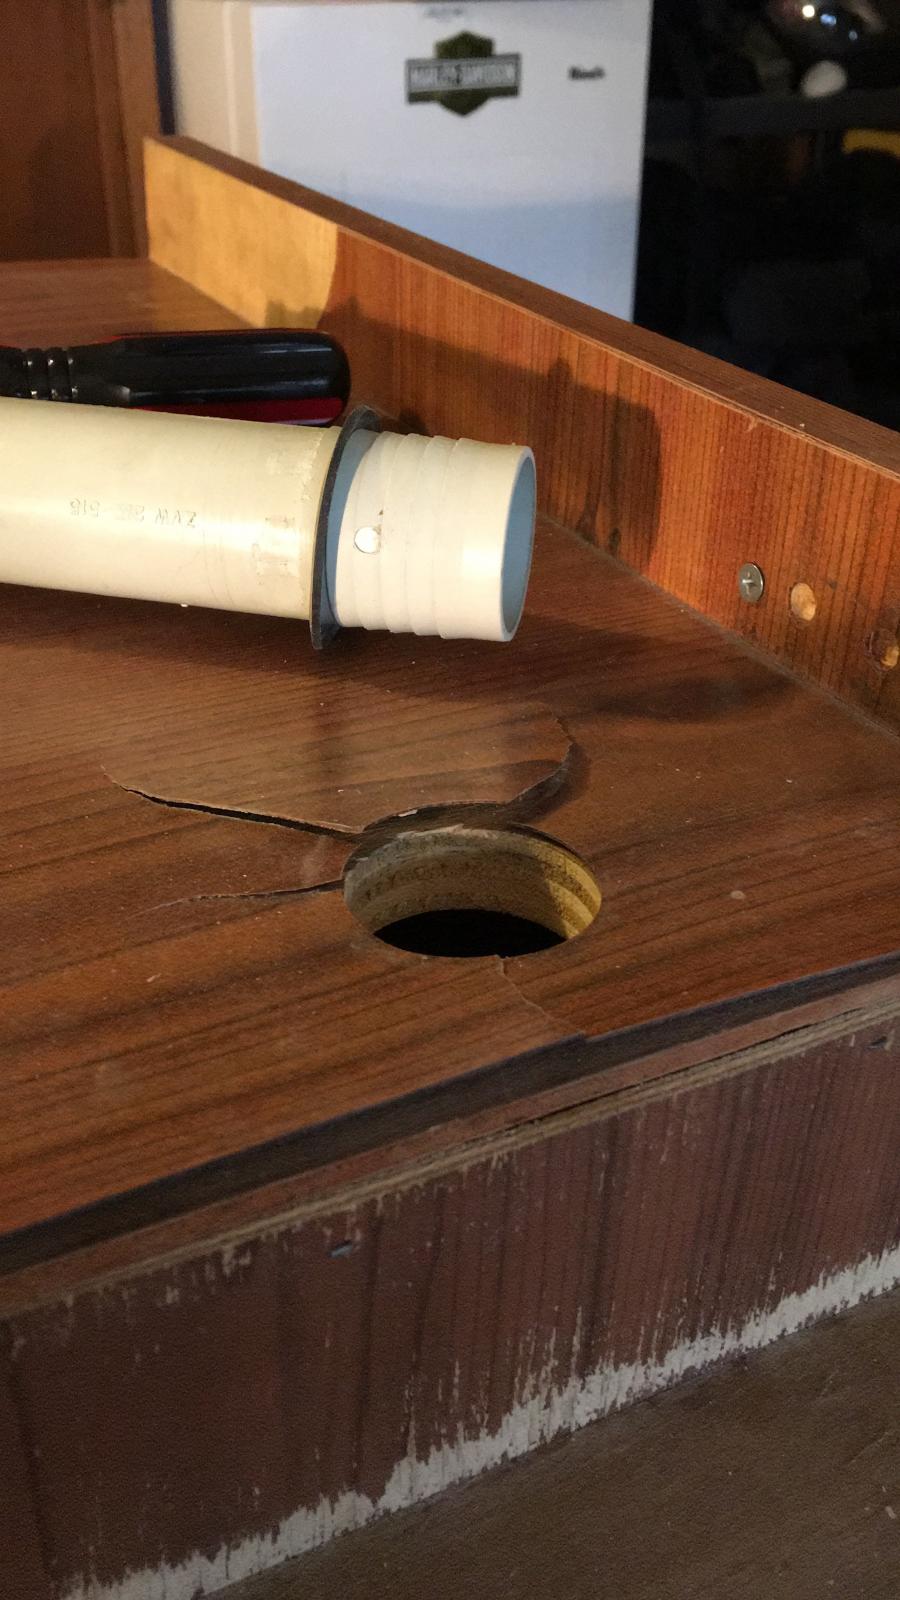


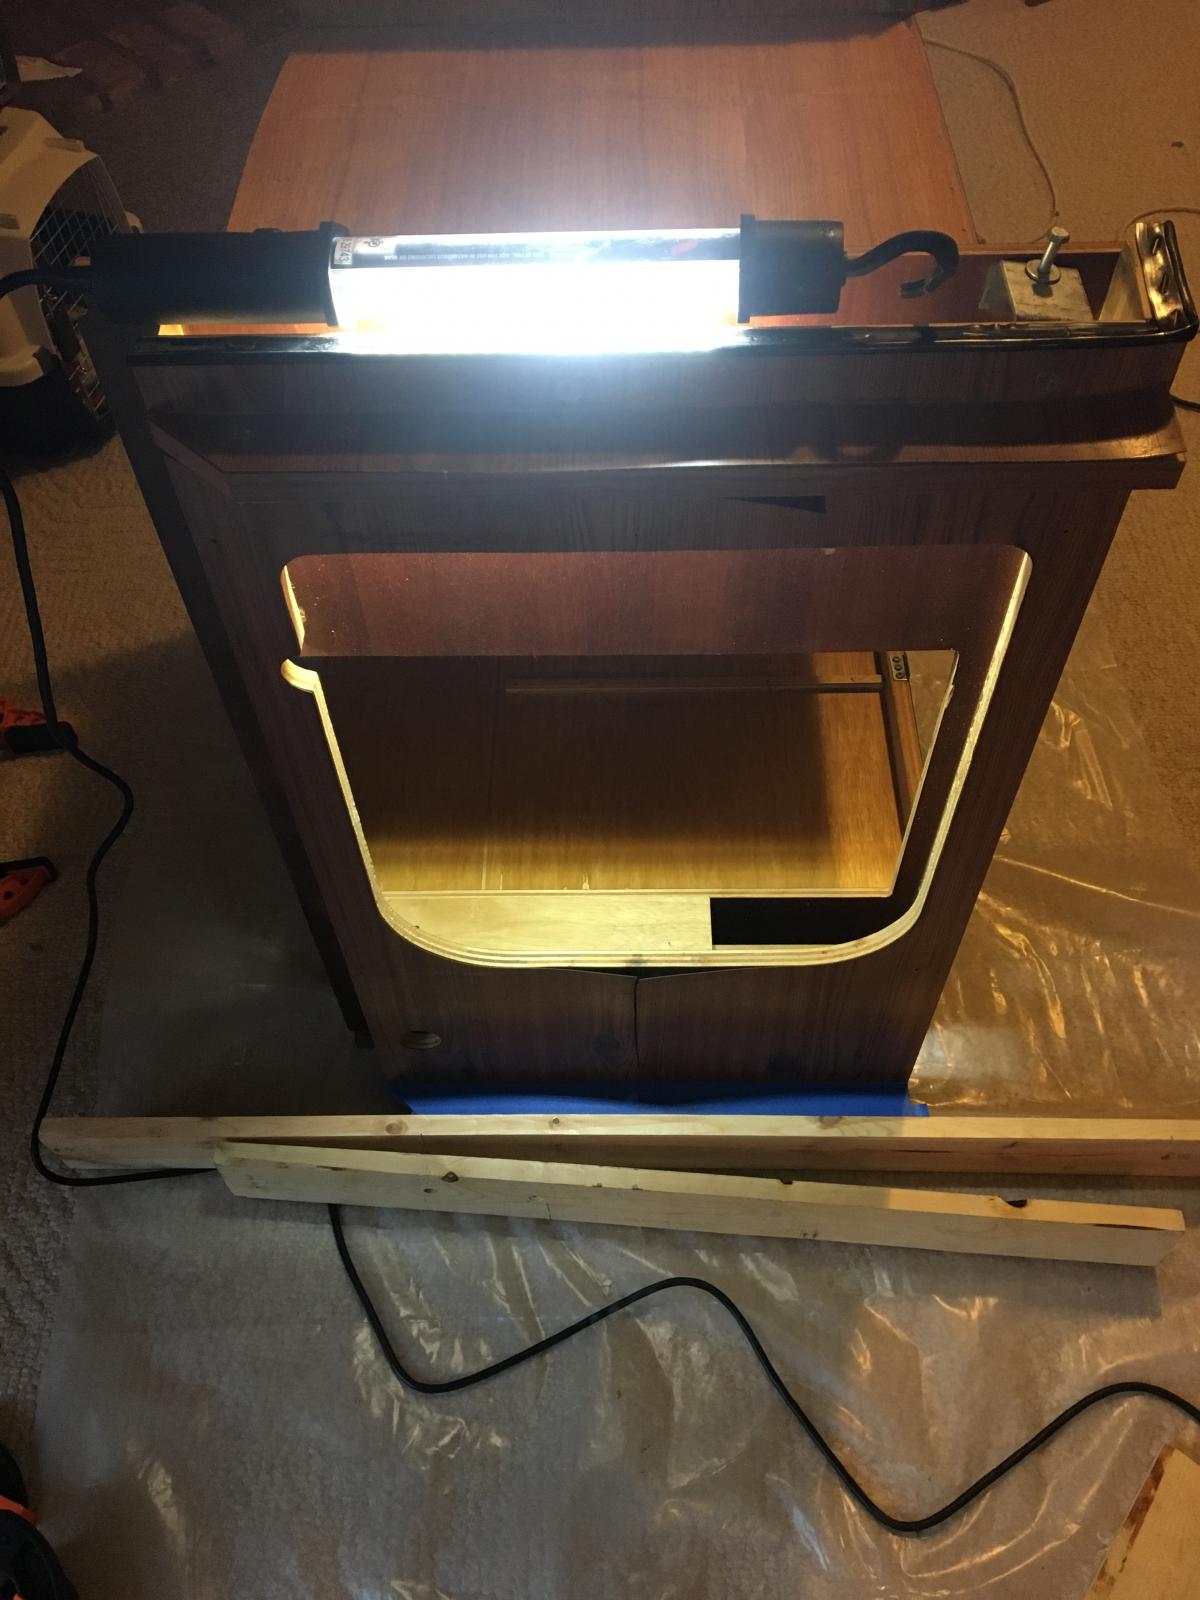
The worst crack is at the very top of the surface that goes from one lid rail to the edge of the sink. My plan is to get one side of the split worked at a time. Then the second night the other side gets glued and clamped. I felt that trying to do both at once would get glue spread out all over and I wouldn't be able to control that.
There was a hairline crack that was left and it was filled slightly with a really thin super glue that ran in the crease and was built up over several nights and it flowed in pretty flush without sanding. It's commercial name is called Paleo Bond and it's used for prepping fossils. One comes so thin it can pass through limestone. There is a generic version sold locally in 8 different viscosities and I have several as its pretty cheap. I'm not using it to bond the laminate to the wood but works great for filling a thin void with something solid. A watercolor paint with a tiny brush to take the glint off and it basically disappeared.
See those reader glasses? thats why I blow up my text, dang birthdays 
With that done, the rest is pretty much down hill, still just investing my time and energy and execute the steps.
Back to the parts box to get after the shifting linkage. Get up underneath is always a blast, but it's not so bad when you break it up with not so terrible tasks. Who doesn't want to shift like butter?
The replacement lineage coupler isn't made very well. Typical. The screw that passes through the shaft never tightens up and keeps slipping on the pressed threads. I get it back off and toss it in the "hopefully it never gets so bad I'll need to run this" box.
I'll clean up and replace my OG one with new plastic ends.
The first time I installed this it took at least an hour getting versed in what tools to use and how, then putting my OG back in took about 10 min. Hey, I'm slow at first but once I learn the system, click right through it.
Last edited by WildIdea on Sun Feb 11, 2018 8:06 am; edited 1 time in total |
|
| Back to top |
|
 |
WildIdea
Samba Member

Joined: September 17, 2016
Posts: 928
Location: Black Hills, South Dakota

|
 Posted: Sat Feb 10, 2018 10:25 am Post subject: Re: Hell In A Bucket! WildIdea's 1977 Sage Green Westy Posted: Sat Feb 10, 2018 10:25 am Post subject: Re: Hell In A Bucket! WildIdea's 1977 Sage Green Westy |
 |
|
Iím getting less and less intimidated by the laminate at this point. You know, if you search online 1977 Westy interiors, there are pages of completed mint examples in existence. Lotís to see as references and use for inspiration. Iím getting more and more excited to have a set of my own and its wind in my sails seeing what you all have done before me.
Itís been said before by others, that there is a ton of glueing and clamping, and I know Iím not showing anything new here, just making a record that I actually performed the steps.
Now Iím not sure what order I had this all going down, Iím doing my best to show the progression. I dared to do a look of the piece with the drawers in for a min.
I has a bit of a warp in this thin panel at the rear. The one with the silk screened printed wood pattern. I ended up wood gluing this back in place to suck in in. The wooden print keeps lifting off every time I get some tape around it. Dang it. I wonder if I should worry about it, it doesnít show being behind the piece between the window, well see.....
The lid rails are both pealing and missing on both sides of each. I have some donor pieces that I use to butt up to the existing strips. My straight cut sheet metal sheers scissor through this laminate nicely.
I repeat this step 4 times. The painters plastic works great fro glue overspray. It takes time to get it on but its worth it. Eliminates the cleanup later.
This thing is a perfect project for working in the mornings with a stiff coffee and hitting another spot late at night alone with a sweet meaningful record spinning. Itís something I really look forward to in the day and its smiling back at me.
On the weekend I fire up the heater and get back under the bus. When Kev and I pulled the Transaxle out we broke off the ground stud from the body. I know this is essential to have back on so I found a metric bolt and got up under there. I pulled the flexible heater tubes and stashed them.
I prepped and clamped the bolt down and welded it on as best I could with the tight space. I considered other places to mount it, but I couldnít find a better one, so I went with what the makers chose.
Weíll see how it holds. The original braided ground strap seems a little brittle and has an even amount of road grime impregnated throughout. I stashed that, I could probably recondition it with an chemical ultrasonic bath and new insulation. Brian tossed me some new supply and I torched it together, so now I have a bomber ground strap. Iíll go with this new one for now.
All in all, enjoying the project. If Iíve been talking to you lately, Iím not listening well, sorry. Iím thinking about the bus. |
|
| Back to top |
|
 |
WildIdea
Samba Member

Joined: September 17, 2016
Posts: 928
Location: Black Hills, South Dakota

|
 Posted: Sun Feb 11, 2018 7:55 am Post subject: Re: Hell In A Bucket! WildIdea's 1977 Sage Green Westy Posted: Sun Feb 11, 2018 7:55 am Post subject: Re: Hell In A Bucket! WildIdea's 1977 Sage Green Westy |
 |
|
There are many times I think I'm through working over a piece and realize I can improve it if I keep looking after it. Just posting these photos shows me places I missed and would like to get after again. This KB just keeps on needing a little more here a little more there. Tons of steps that require dry time and it's been in my life for weeks. All in all, it's a rewarding project.
Once all the loose, sprung laminate is finally all reattached I get the area straightened up and start installing the drawers, doors and the hardware. This is a neat step as its such a high point for the project. The pieces have been sitting around just waiting their tun to go on and now the proper time has come and it feels great.
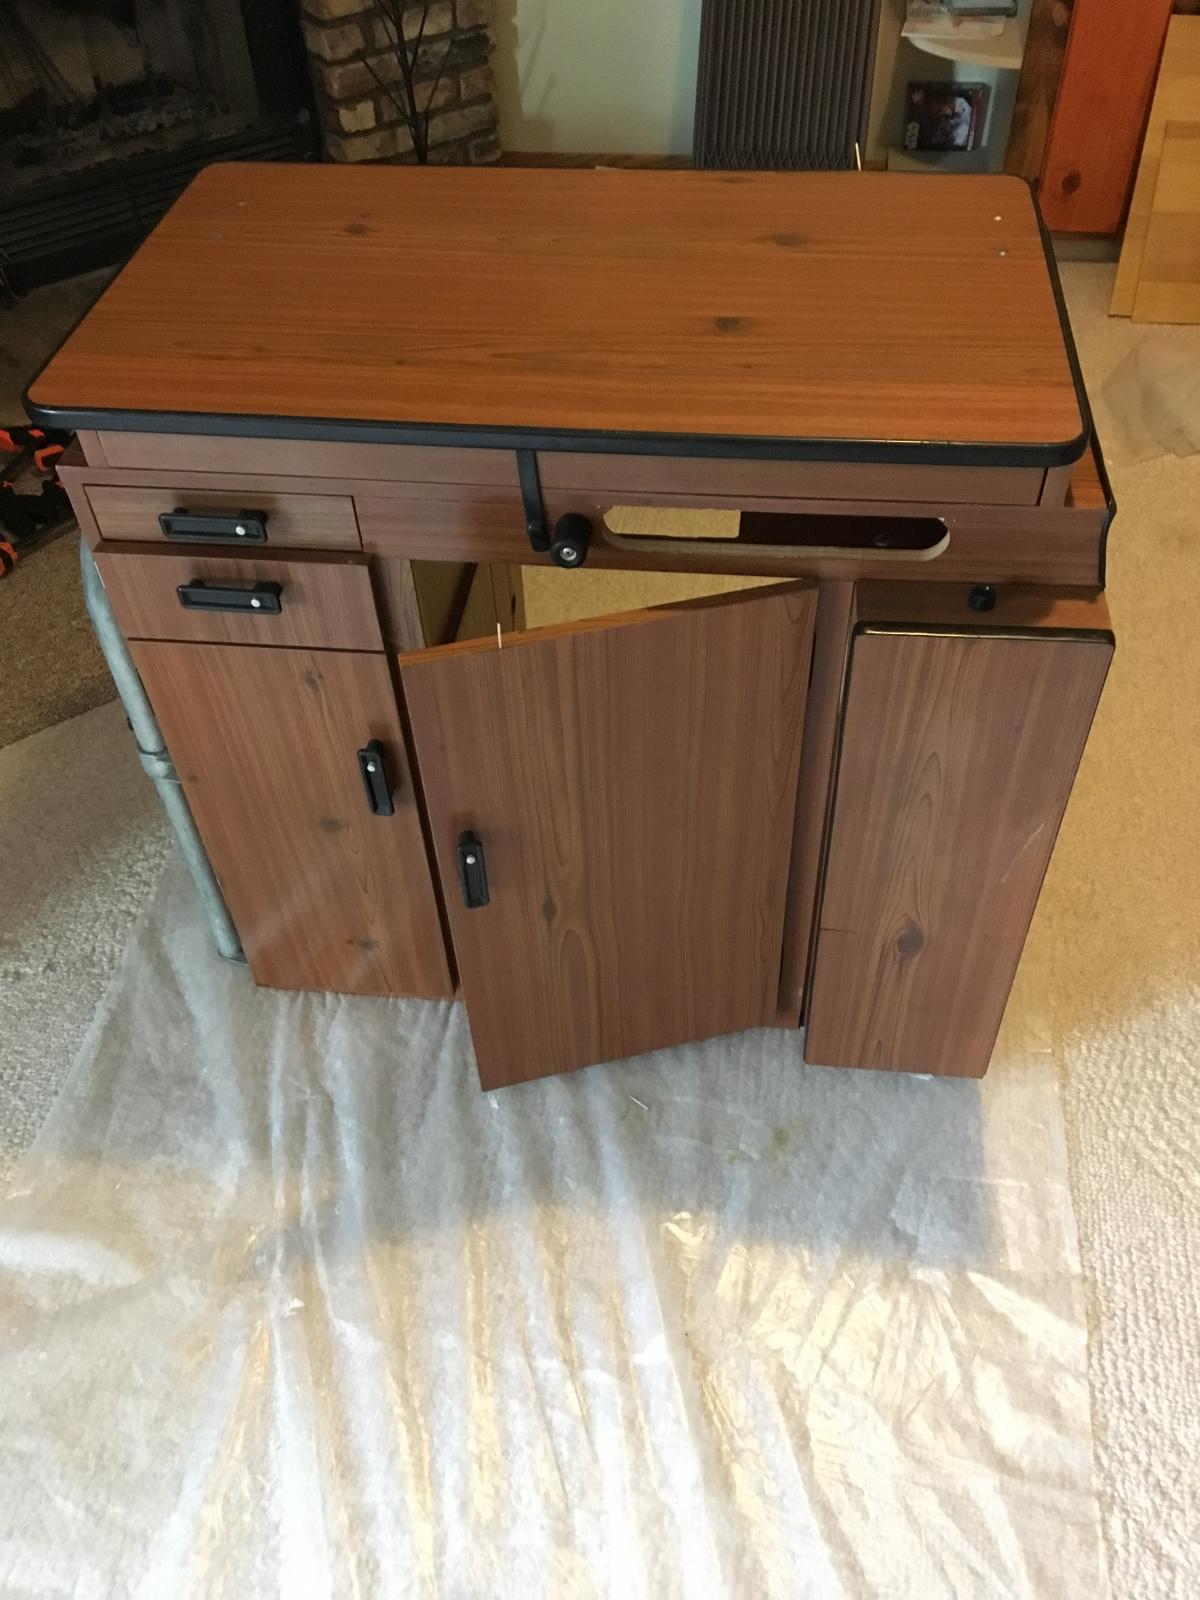
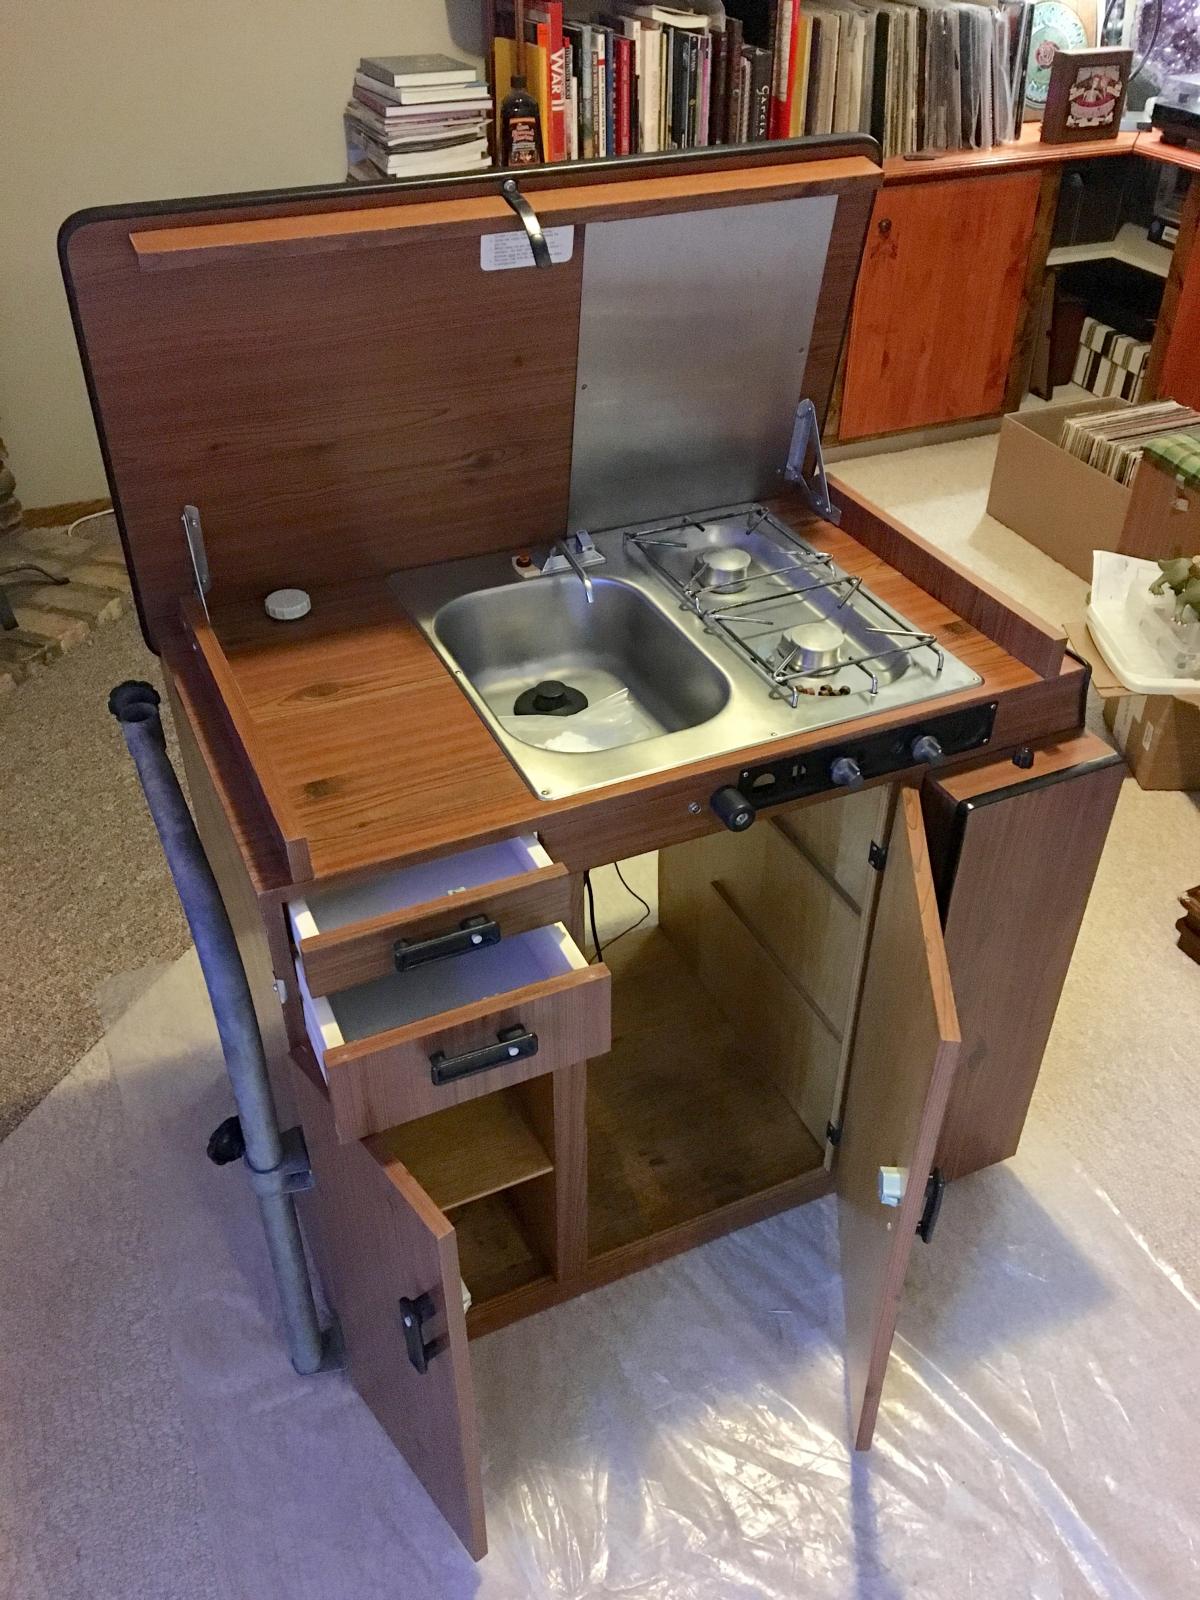
I have to give Kevin credit here. I wouldn't be this far if he hadn't swapped out a few pieces and let me high-grade some proper hardware so it would be complete.
I got my new water pump in a BusDepot order a while back and I'm looking at the last few things that need attention here. With all the cleaning products, glue and paint, there just isn't anything that can reverse the candle dye that has soaked into my water tank. I get all the wax off and bleach the inside out and say a quick prayer poem about accepting flaws and gratitude it won't show and just let that go. The tank gets reinstalled and locked in with the rubber stoppers and filler neck.
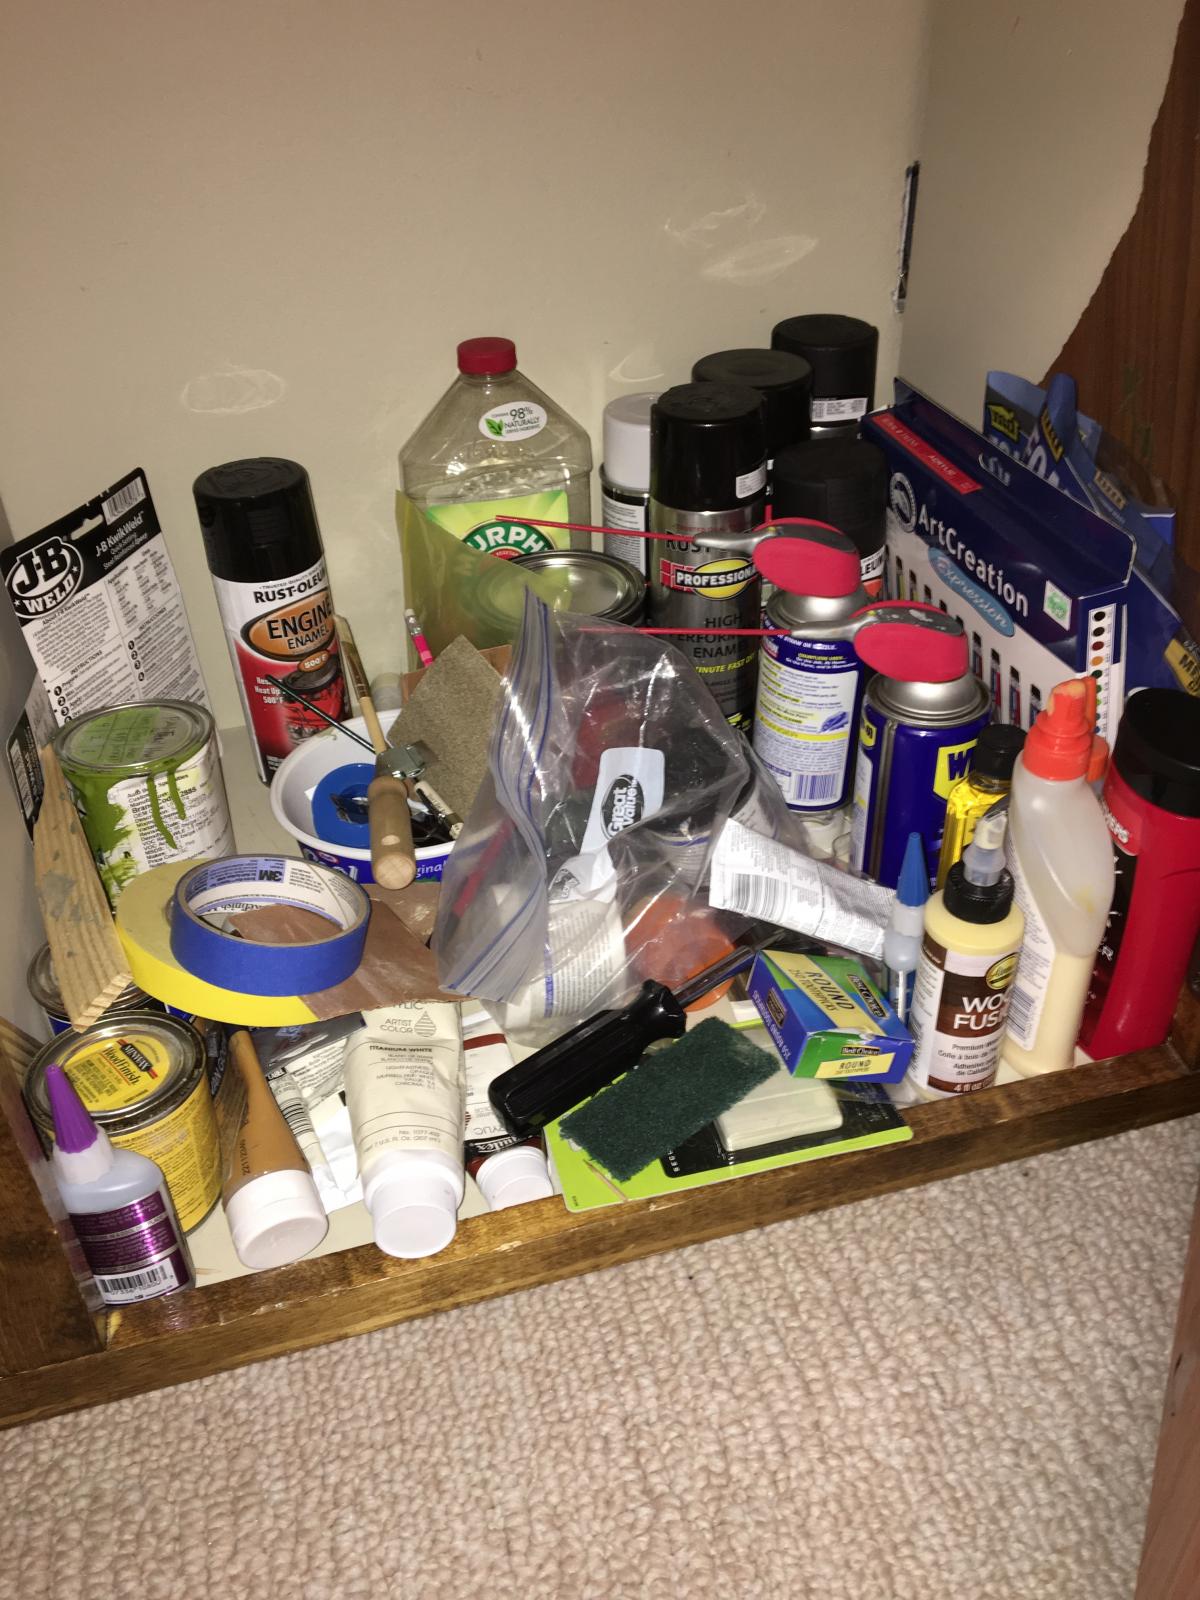
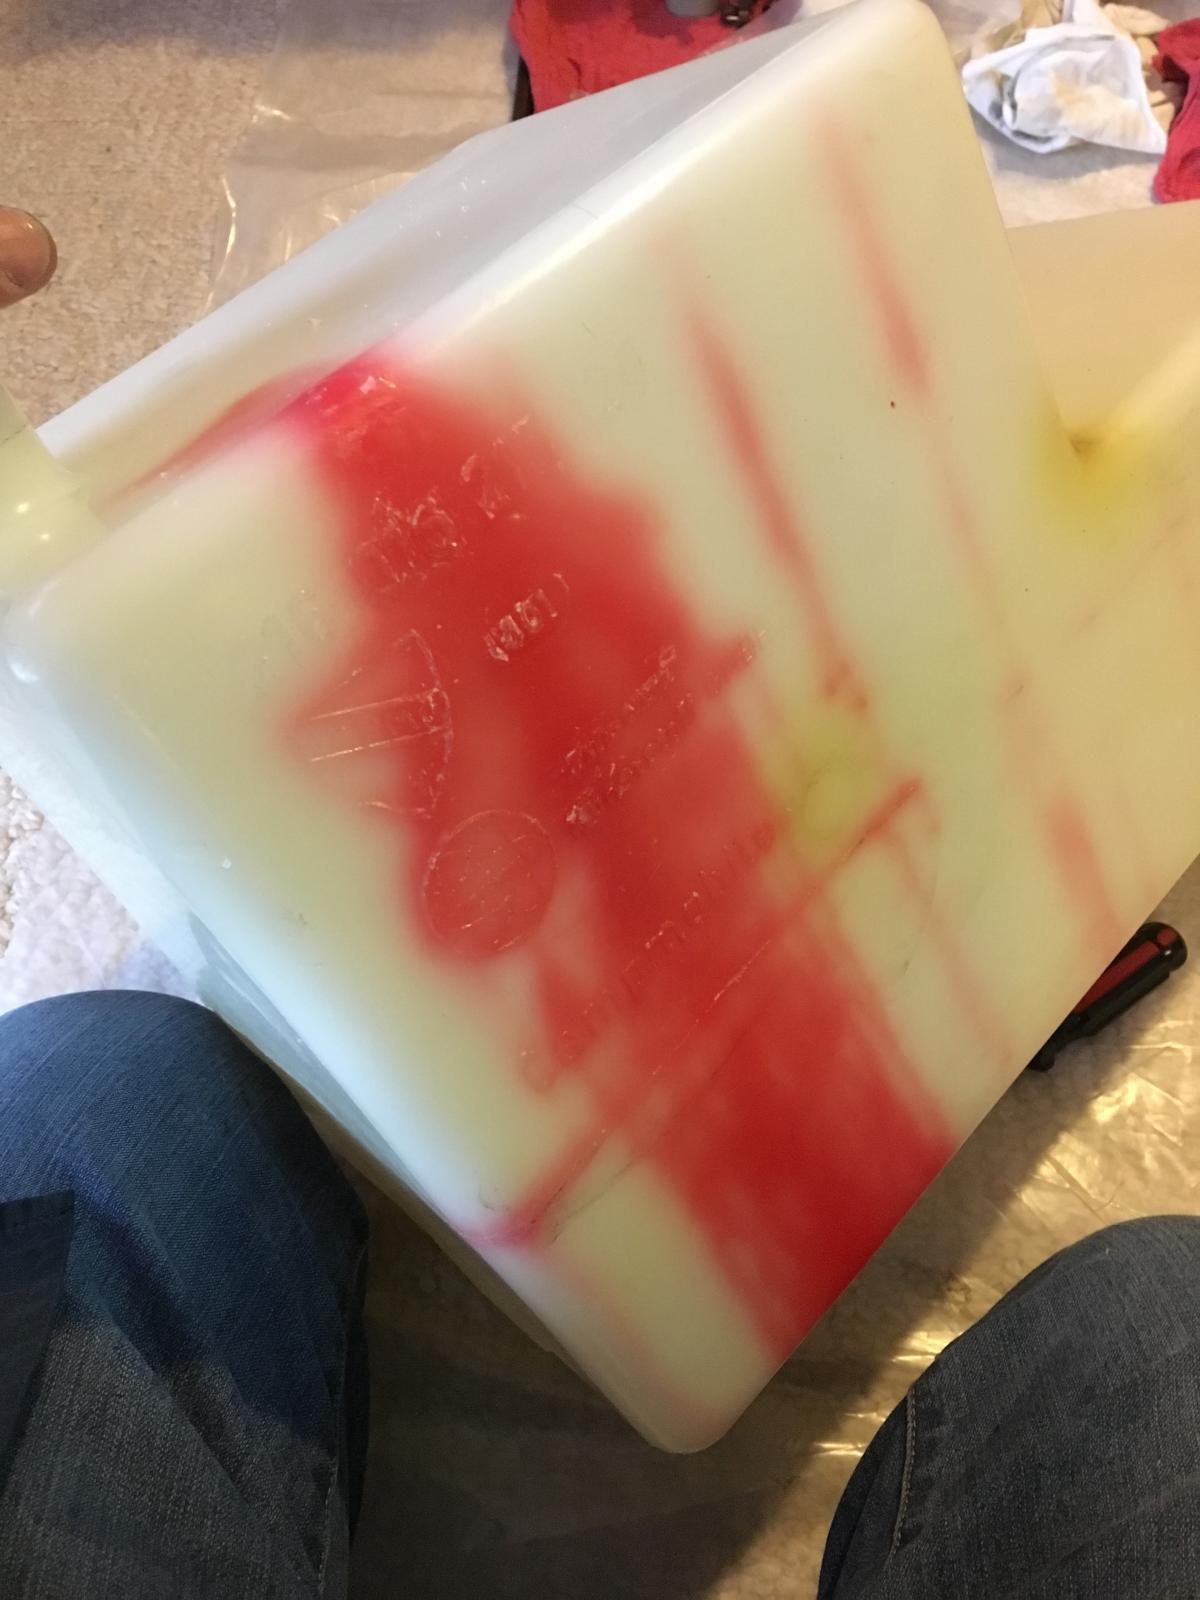

I get the water pump screwed on and the wires all routed and attached. Soldered them. I added an O ring to the outside of the connection, hoping it will add some protection, but I'm not thinking I'll ever put water in this tank. Maybe, but this piece is more of a collectable to me now and I'm pretty protective of it. I can always throw some water jugs in the bus. The thought of the block getting water damage from a leaky tank makes me cringe.
While I'm back there I'm looking at the piece with the decaying wooden print. I know it doesn't show in the bus, but it bugs me its lifting.
I spent the better part of an evening session getting it stabilized and repainted and replacing the masonite backing board with thin finish nails in the old staple holes, in case it ever needs to come off again.
The completion of this has really lifted my spirits. I'm feeling Volksminded. Its not perfect. It has some blemishes. I've reversed 90% of them and fought for the other 10%. They seem to me to work with the believable originality of the bus and I'm ok with them. The shelves get placed and this piece sitting noble and proud in my den getting shown off to anyone who comes over. I like looking at it when I watch my TV. I never would have thought this interior could clean up like this and besides needing to be done to use the bus, I liked doing it. Now it's just another piece sitting there waiting to go in the bus. I think I'll leave it out a while so I can have the room to work the bus and not hurt it climbing all over it.
|
|
| Back to top |
|
 |
SamboSamba22
Samba Member

Joined: August 06, 2015
Posts: 2772
Location: Benton, Arkansas

|
|
| Back to top |
|
 |
WildIdea
Samba Member

Joined: September 17, 2016
Posts: 928
Location: Black Hills, South Dakota

|
 Posted: Mon Feb 12, 2018 9:38 am Post subject: Re: Hell In A Bucket! WildIdea's 1977 Sage Green Westy Posted: Mon Feb 12, 2018 9:38 am Post subject: Re: Hell In A Bucket! WildIdea's 1977 Sage Green Westy |
 |
|
| SamboSamba22 wrote: |
Extensive, detailed, and not glorious work but itís the small details we appreciate when camping and relaxing.
Everything looks great, teaching others through your efforts. Thanks for sharing. I need to do this work in my Westy as well. |
Thanks for checking in SamboSamba22
I'm always interested in talking about buses and being realistic about what goes into having one of these functioning properly. It's one of my most serious pursuits at this time in my life. |
|
| Back to top |
|
 |
WildIdea
Samba Member

Joined: September 17, 2016
Posts: 928
Location: Black Hills, South Dakota

|
 Posted: Mon Feb 12, 2018 10:41 am Post subject: Re: Hell In A Bucket! WildIdea's 1977 Sage Green Westy Posted: Mon Feb 12, 2018 10:41 am Post subject: Re: Hell In A Bucket! WildIdea's 1977 Sage Green Westy |
 |
|
With most of my Berlin Interior worked over, I decide to sign up for Sliding Door 101 in the fall semester.  Mine is acting up and needs some hard pushes and a shoulder check to get it closed. I've just left it open the last year and think I could get it closed a few times without breaking it more, but having it in this semi working order just isn't cool. Mine is acting up and needs some hard pushes and a shoulder check to get it closed. I've just left it open the last year and think I could get it closed a few times without breaking it more, but having it in this semi working order just isn't cool.
I had helped Kev put a slider door back on his bus a while ago so knew how to get mine off. Time to take the plunge here. It took me a bit, but I got the belt line cover off without ruining it. Was dirty in between the seal and needed detailed.
I follow that by getting in the bus and working the snaps off the inner panel. I get some fencing players to scoop them and a knife to work around them evenly without breaking them. I get all but 3 saved. Its pretty neat to pull off that panel and see some factory insulation hanging out looking fresh as the day it was installed.
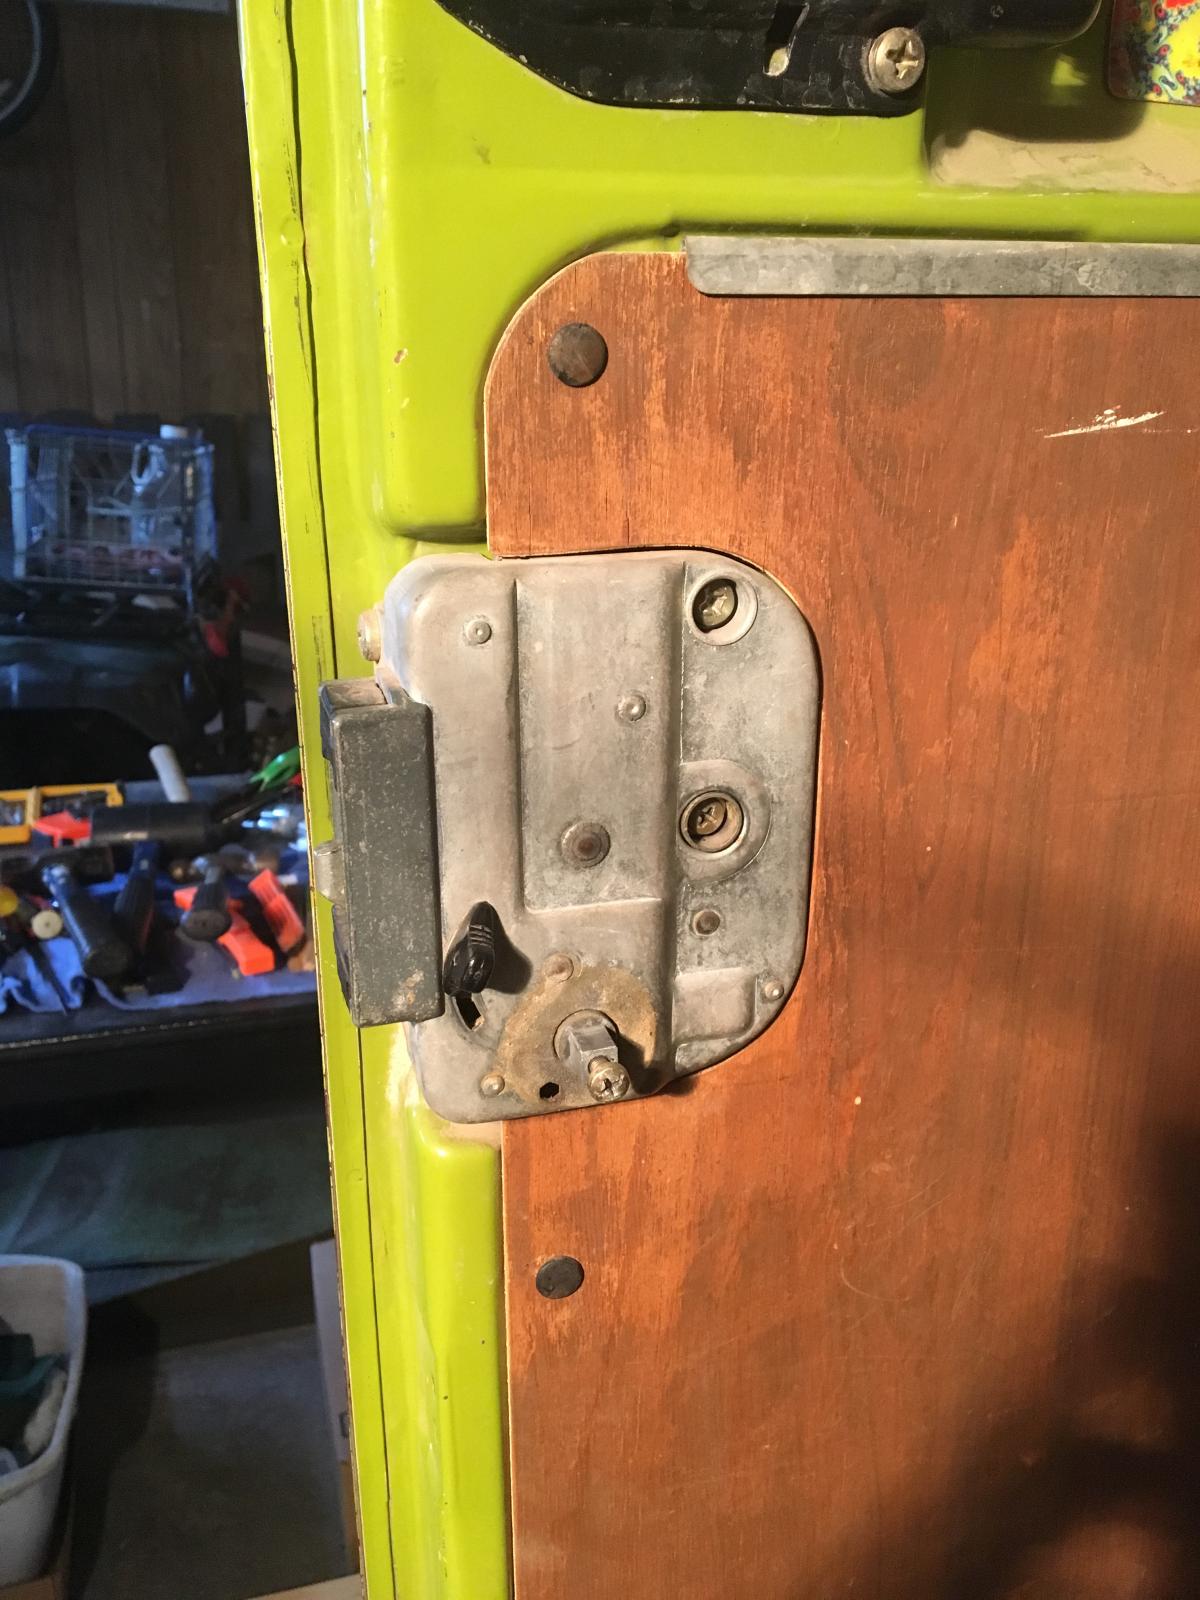
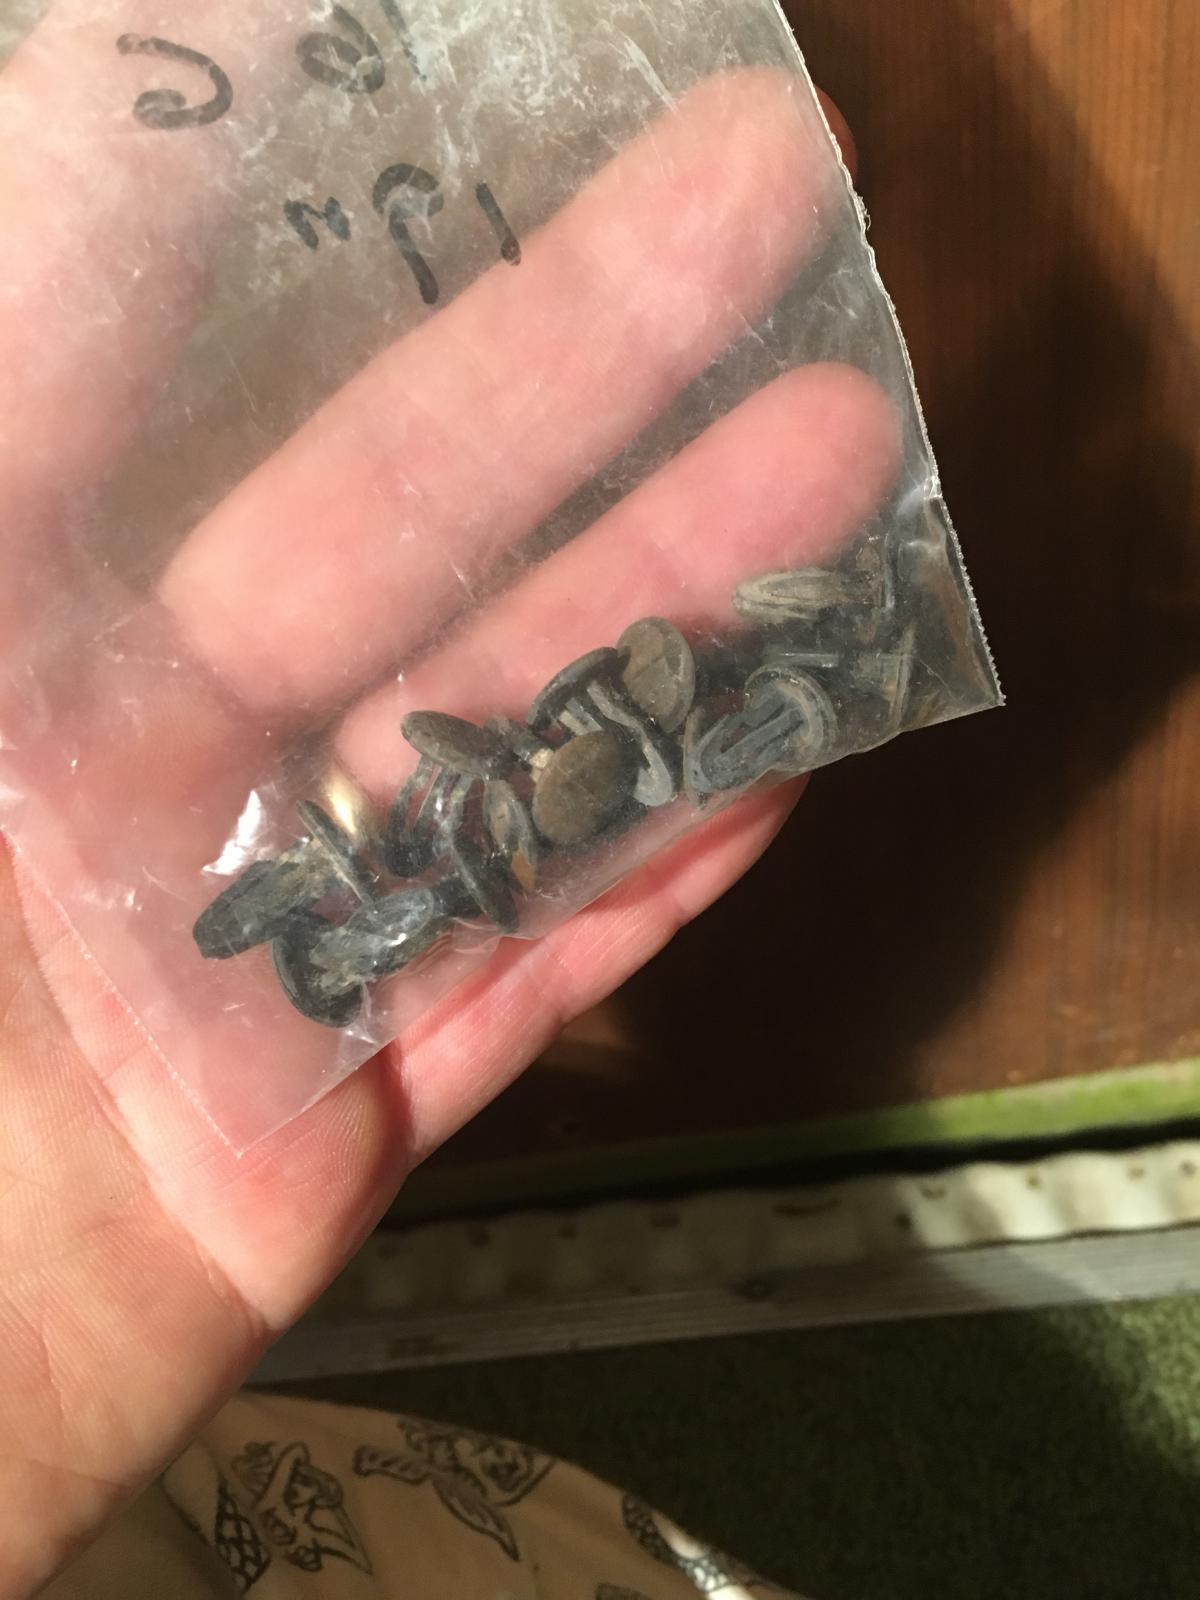
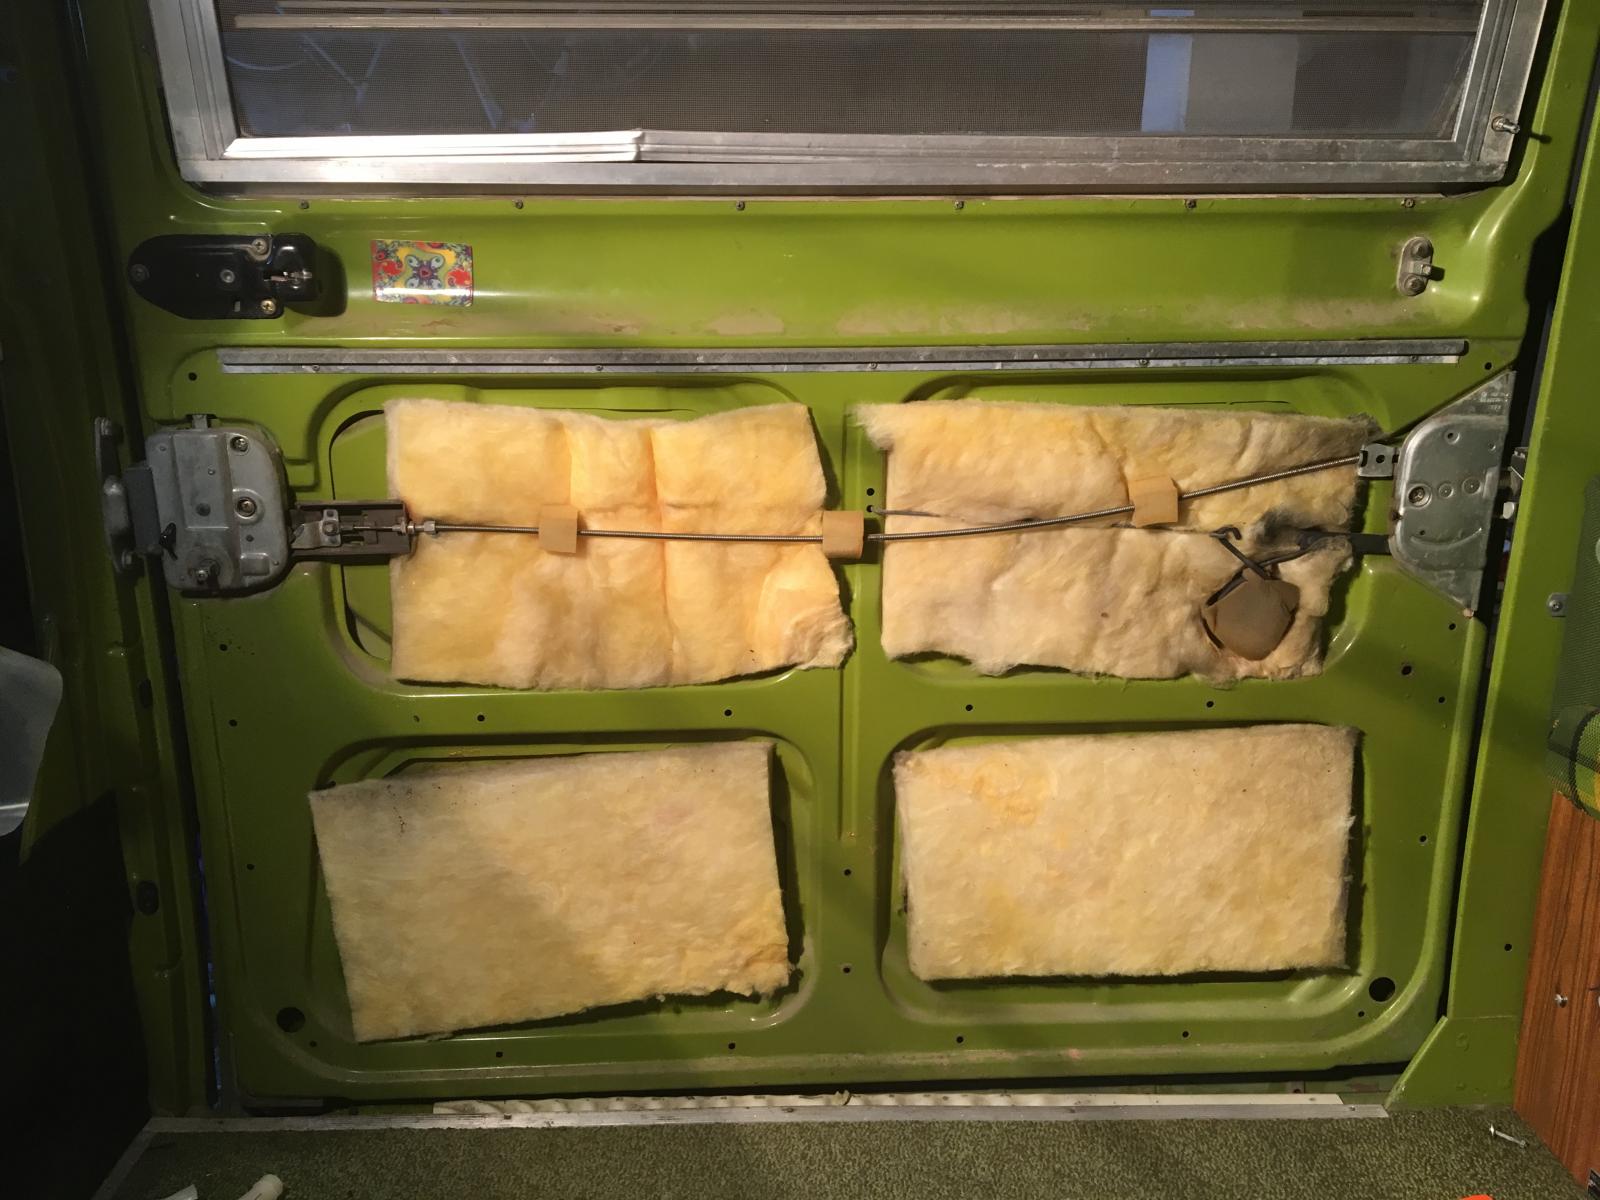
My initial assessment photos show that there seems to be just a thick layer of crust and lacquered grease and oils. I'll start by slowly cleaning each and get familiar with them.
I get the door pulled and set on a table next to the bus. Crazy how that looks missing from the bus.
After that I start by cleaning the bus side of things, jumping on the bottom rail. This thing was packed with debris. I found a penny that was domed from being hit repeatedly by the rear slider wheel. I'm sure that didn't help things being in there. Should have taken a photo of that. I sprayed the gunk with purple power degreaser and scrapped out he rail with a non marring chisel. Pretty simple design. I thought it would be more complicated, it's just the dirt that made it so dark and weird looking and hard to see what was going on. Wiping it clean after that was a cinch.
The body side door latch was quite dirty, but a quick bath and doll up with some oil and grease and it was good to go. The body needed some paint stabilizer and some attention and I put it back on.
Turning my attention to the door itself now. Kevin advised me to not under any circumstances, loosen or remove the bearing wheel mounts. He said it's a bear trying to get them adjusted and they did that at the factory and just leave them. Sound good to me.
In fact, I don't want to change any of the factory adjustments on the door if I can help it and take some pictures of the cable mechanism to make sure I can get it back to the way it was down the road. The door handle mechanism comes off and gets a look see. Its crusty. I have been looking at eche_bus thread to review and it outlines a way to clean the part. I follow it here. Its all pressed together, so taking it apart would likely ruin it. I give it an ultrasonic bath and let dry, then cover it in motor oil and allow that to drain out over a night. Compressed air blows out any remaining drips. All set to go back on.
Before it goes back on I prep the handle passthrough hole to hopefully help paint from pealing and get the lock seal replaced and hand wax the paint around the area.
So far so good. I'm itching to get that new inner panel on and see how this all works, but that'll have to wait. Still more steps to go....... |
|
| Back to top |
|
 |
THall
Samba Member

Joined: August 25, 2010
Posts: 324
Location: Verona, WI

|
|
| Back to top |
|
 |
WildIdea
Samba Member

Joined: September 17, 2016
Posts: 928
Location: Black Hills, South Dakota

|
 Posted: Mon Feb 12, 2018 2:49 pm Post subject: Re: Hell In A Bucket! WildIdea's 1977 Sage Green Westy Posted: Mon Feb 12, 2018 2:49 pm Post subject: Re: Hell In A Bucket! WildIdea's 1977 Sage Green Westy |
 |
|
Thanks, Yes
I have been through the write up. Iím indebted to instructional videos like this and the the folks that have taken the time to produce and share them. My bus is better for it.
This is just a story of my bus. Proof people like myself are reading and applying the knowledge theyíre finding here. |
|
| Back to top |
|
 |
Chochobeef
Samba Member
Joined: May 01, 2013
Posts: 811
Location: Ft. Worth, Texas

|
 Posted: Tue Feb 13, 2018 8:09 am Post subject: Re: Hell In A Bucket! WildIdea's 1977 Sage Green Westy Posted: Tue Feb 13, 2018 8:09 am Post subject: Re: Hell In A Bucket! WildIdea's 1977 Sage Green Westy |
 |
|
I like your journey through it all. Its been a pleasure to read, and almost makes me feel like I know you. Would be cool to help you to, but I don't think thats possible with the distance so I will watch and enjoy.
thumbs up to you and your family |
|
| Back to top |
|
 |
WildIdea
Samba Member

Joined: September 17, 2016
Posts: 928
Location: Black Hills, South Dakota

|
 Posted: Tue Feb 13, 2018 8:27 am Post subject: Re: Hell In A Bucket! WildIdea's 1977 Sage Green Westy Posted: Tue Feb 13, 2018 8:27 am Post subject: Re: Hell In A Bucket! WildIdea's 1977 Sage Green Westy |
 |
|
With day one in the books for the slider and still with a day free in my pocket I just couldn't help but suit up and get back after the door and wrap it up as best I could. With my nylon rail bushing cracked in half I got a few coming this way. It's a piece thats critical to the door closing at the end of the closing throw.
I didn't remove the roller mounts and cleaned them with hot water and compressed air until clear water came out off behind the mount. The roller come off and I figured a little lithium grease wouldn't hurt in there on their return.
The inside closing handle didn't need much but a new coat of paint and a little lube.
Now getting the spring rail mechanism detailed took a little fumbling. I started with getting the nylon bushing off. I couldn't tell what was holding it on and Brian said its a big rivet. I used a counter sink bit to slowly grind off the back of the rivet stopping just shy of the mounting arm.
Brian said he was near me and I went in to meet him in a parking lot and we swapped the piece window to window and with some pleasantries and went our way. My life is pretty basic these days.
On his way home from work he meets me in the same place with the new piece. It's an internally threaded mounting stud. Being these bushings seem to wear and crack it seems to be a solid upgrade. I'm impressed. He said making one of something is easy, it's making 100 perfectly match is another. Well, thanks man!! Back to the garage.
The wheel that rides in the track got pulled, cleaned and oiled. Its all going back together pretty nice. Time to get after that window. My screen was bent from it likely coming lose and catching upon a opening. It's looking to get replaced. The windows gets a few hours of detailing, flipping the door and doing the outside a while. Its not something I feel needs to be removed to clean. I'm betting disturbing the body seal would be unwise.


Everything is looking clean and functional so it starts going back on. I'm still waiting for the bushings, but that's not stopping me from progressing to the wooden panel. Again, it's edge shows the whitish blond of the wood its mounted on, so I sand and stain the edge so it matched the laminate better. My OG clips snap it right on. Pretty nice alignment with the pre drilled holes. Props to whoever made this. I had it downstairs on the floor for months with books laying on it hoping to train it flat. It still wanted to curl, but it was fine once it was installed.
I was missing a few clips, but found some on eBay from a person in England and although a reproduction, they looked real nice and snapped in strong. I put them on the back corner where they won't show as often. I had found a reproduction decal, but it doesn't look like my door mechanism, so that's not going on. Must be for an earlier bus. The psychedelic magnet was right there in the bus when I got it, so I left it there.
This sits a few days into the week and I get this little envelope with three bushings in it. I give one to Kevin and throw my extra in the glove box possibles bag. Brian's internally threaded stud is perfect and in a flash the door goes on.
It takes me another bit to get the slider rail cover installed. The door works flawlessly in every feature. Super nice to have a buttery slider. Really up levels the bus and didn't cost any bug bucks to do this refresh accept the new panel, which is optional. A weekend well invested.
My video of the door operating.
https://youtu.be/D2RJY5F06yo |
|
| Back to top |
|
 |
WildIdea
Samba Member

Joined: September 17, 2016
Posts: 928
Location: Black Hills, South Dakota

|
 Posted: Tue Feb 13, 2018 8:53 am Post subject: Re: Hell In A Bucket! WildIdea's 1977 Sage Green Westy Posted: Tue Feb 13, 2018 8:53 am Post subject: Re: Hell In A Bucket! WildIdea's 1977 Sage Green Westy |
 |
|
| Chochobeef wrote: |
I like your journey through it all. Its been a pleasure to read, and almost makes me feel like I know you. Would be cool to help you to, but I don't think thats possible with the distance so I will watch and enjoy.
thumbs up to you and your family |
Wow, Thanks a ton! Maybe someday we will meet!
It's a lot for me to step out of my privacy comfort zone and let the world into my life. I don't see what it could hurt. Its just bus stuff. I try to look in the background of my photos and edit them and pick up messes behind them and light the shots well. Whipping out my phone to document is now a habit.
These shots are really only a few months old. I opted to work the bus with my time and read here instead of posting it all in real time. Now I'm concentrating on learning the site and sharing it so it's not lost. I like moving it along pretty fast as I think it's a more engaging story not having to wait weeks in between for updates. |
|
| Back to top |
|
 |
riverside66
Samba Member

Joined: June 04, 2008
Posts: 218
Location: Sparta, NC

|
 Posted: Tue Feb 13, 2018 9:20 am Post subject: Re: Hell In A Bucket! WildIdea's 1977 Sage Green Westy Posted: Tue Feb 13, 2018 9:20 am Post subject: Re: Hell In A Bucket! WildIdea's 1977 Sage Green Westy |
 |
|
Well crap! I thought my bus sliding door opened and closed just fine, but after seeing yours and it's oh-so-smooth action, now I'm jealous!
_________________
1977 Standard Beetle -Sold-
1979 Transporter - "Wheatbread" -Sold- |
|
| Back to top |
|
 |
airschooled
Air-Schooled

Joined: April 04, 2012
Posts: 12721
Location: on a bike ride somewhere

|
 Posted: Tue Feb 13, 2018 9:32 am Post subject: Re: Hell In A Bucket! WildIdea's 1977 Sage Green Westy Posted: Tue Feb 13, 2018 9:32 am Post subject: Re: Hell In A Bucket! WildIdea's 1977 Sage Green Westy |
 |
|
Dunno how I missed this thread, but wow! Mind if I send some cabinets your way?????? 
Nice slider work, too! I find those ergonomic improvements to be most excellent.
Robbie
_________________
Learn how your vintage VW works. And why it doesn't!
One-on-one tech help for your Volkswagen:
www.airschooled.com |
|
| Back to top |
|
 |
WildIdea
Samba Member

Joined: September 17, 2016
Posts: 928
Location: Black Hills, South Dakota

|
 Posted: Tue Feb 13, 2018 9:51 am Post subject: Re: Hell In A Bucket! WildIdea's 1977 Sage Green Westy Posted: Tue Feb 13, 2018 9:51 am Post subject: Re: Hell In A Bucket! WildIdea's 1977 Sage Green Westy |
 |
|
| riverside66 wrote: |
| Well crap! I thought my bus sliding door opened and closed just fine, but after seeing yours and it's oh-so-smooth action, now I'm jealous! |
Thanks! I found that most of what was holding it up was dirt. Actually, that's usually pretty much the first step and all it takes to get this stuff working again.
I dig your new motor by the way. |
|
| Back to top |
|
 |
WildIdea
Samba Member

Joined: September 17, 2016
Posts: 928
Location: Black Hills, South Dakota

|
 Posted: Tue Feb 13, 2018 9:55 am Post subject: Re: Hell In A Bucket! WildIdea's 1977 Sage Green Westy Posted: Tue Feb 13, 2018 9:55 am Post subject: Re: Hell In A Bucket! WildIdea's 1977 Sage Green Westy |
 |
|
| asiab3 wrote: |
Dunno how I missed this thread, but wow! Mind if I send some cabinets your way?????? 
Nice slider work, too! I find those ergonomic improvements to be most excellent.
Robbie |
Ha! Probably because you have your head in the details of your motor build. I'm following that for sure.
Your cross country trip was most epic. One of my first reads here. Can't wait to see you do it again. That's gonna happen for me someday, thanks for the inspiration. |
|
| Back to top |
|
 |
WildIdea
Samba Member

Joined: September 17, 2016
Posts: 928
Location: Black Hills, South Dakota

|
 Posted: Wed Feb 14, 2018 8:14 am Post subject: Re: Hell In A Bucket! WildIdea's 1977 Sage Green Westy Posted: Wed Feb 14, 2018 8:14 am Post subject: Re: Hell In A Bucket! WildIdea's 1977 Sage Green Westy |
 |
|
A little catch all update for the morning. Some of this larger projects that take days to complete are happening simultaneously with several other little distracting ones.
One of which was my city water hookup. Again, yellowed, so I prepped and painted. At the time I couldn't seem to find one as a repo so just conditioned mine. Now I think I found one online from a few different overseas companies. I'll keep that in mind.
Kevin came back over and with the help of my Dad, we installed the transaxle. That's my Dads face under there. Getting after it at 70 years old. Me, I'm just holding the light and taking pictures  . My old clutch cable flexible guide tube was impacted with grime and just in horrible shape, so I bought a new one and got it on this day. . My old clutch cable flexible guide tube was impacted with grime and just in horrible shape, so I bought a new one and got it on this day.
Then we took the opportunity with 6 arms to pack and rebuild the CV joints and boots. The boot clamps need a specific crimp tool I don't have so that will have to wait until I locate them.
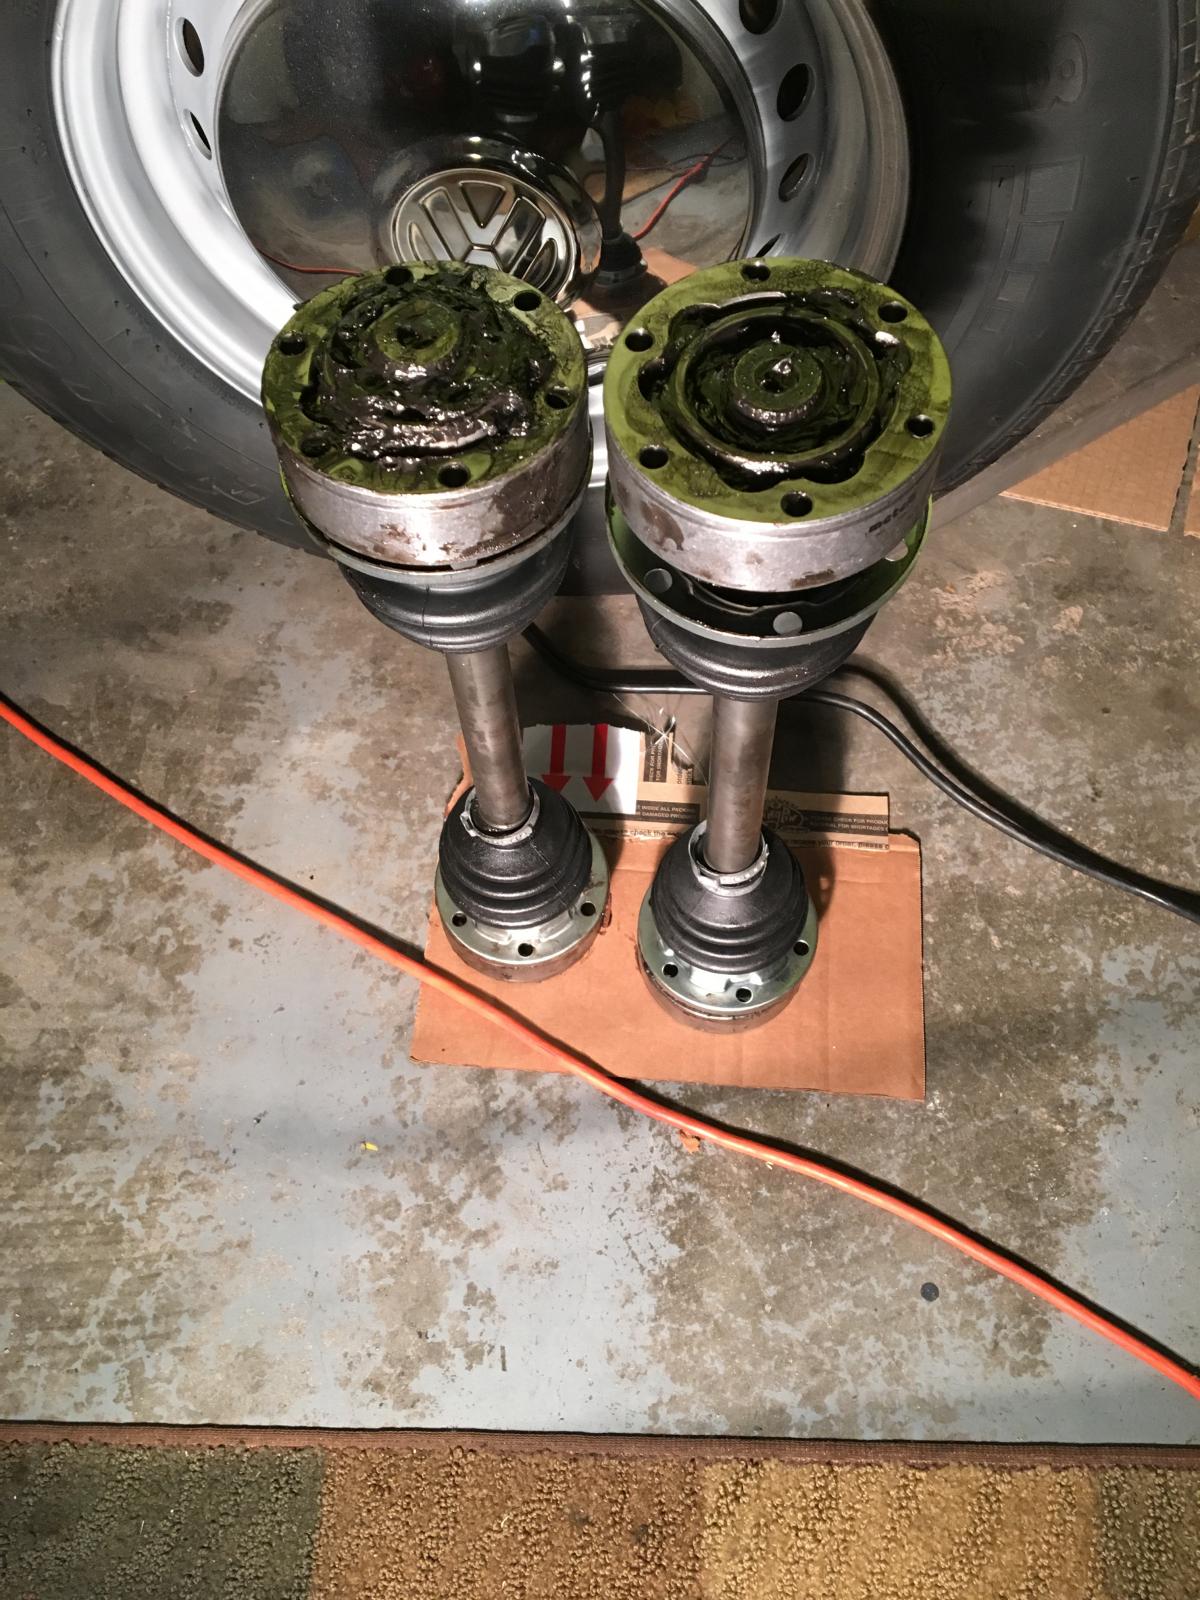
Always something going on under the bus. It's always nice to get some time in there and when I'm done banging my head for a while, get out and do something a little more enjoyable.
One day Cat and I were in Deadwood messing around and we finally had the time to hit this Indian Motorcycle restoration shop. It's a neat place that restores Indians from like 1970 and older. Now I'm into Harleys but these guys have their stuff together and are masterfully working these things over and left me leaving wanting a 1950s Scout  . The styling cues from this period are just amazingly groovy. Fixing any old machine takes a similar mindset and there was a lot of discussion about what were all working on. Anyway, They make a lot of NLA parts onsite and also sell quite a few things in their store. Old Indians have jocky shifts on their tanks and they had a whole assortment of neato replacement Knobs. I picked up this black one with a skull..... . The styling cues from this period are just amazingly groovy. Fixing any old machine takes a similar mindset and there was a lot of discussion about what were all working on. Anyway, They make a lot of NLA parts onsite and also sell quite a few things in their store. Old Indians have jocky shifts on their tanks and they had a whole assortment of neato replacement Knobs. I picked up this black one with a skull.....
I want my bus to be pretty clean and I'm not planning on stickering it up or adding a bunch of fluff. Not my style. I will though cave into a few reversible details that jazz it up a little with a few skull and roses in just the right places.
My tap set tells me what thread pitch the shaft is.


I get the knob over to Brian saying I don't want to distract you to much from the motor, but can you turn this for me? He's on it, and it looks great in the shifter. I pack it with steel wool and it tightens down tight at just the right angle.
Brian treats me with some updates on the engine. Getting some measurements and whatnot. I better get back on the body, this is gonna come together like we planned.
Last edited by WildIdea on Thu Feb 15, 2018 6:52 am; edited 1 time in total |
|
| Back to top |
|
 |
Chochobeef
Samba Member
Joined: May 01, 2013
Posts: 811
Location: Ft. Worth, Texas

|
 Posted: Wed Feb 14, 2018 8:52 am Post subject: Re: Hell In A Bucket! WildIdea's 1977 Sage Green Westy Posted: Wed Feb 14, 2018 8:52 am Post subject: Re: Hell In A Bucket! WildIdea's 1977 Sage Green Westy |
 |
|
| Don't forget to support the trans. You can bend your shift rod with it hanging free. |
|
| Back to top |
|
 |
riverside66
Samba Member

Joined: June 04, 2008
Posts: 218
Location: Sparta, NC

|
 Posted: Wed Feb 14, 2018 11:44 am Post subject: Re: Hell In A Bucket! WildIdea's 1977 Sage Green Westy Posted: Wed Feb 14, 2018 11:44 am Post subject: Re: Hell In A Bucket! WildIdea's 1977 Sage Green Westy |
 |
|
| WildIdea wrote: |
| I dig your new motor by the way. |
Thanks! I might too (if I can devote some time to get it tuned right)
Looks like you're off to a great start on yours! I may have overlooked you saying earlier, but what are your plans for your build?
_________________
1977 Standard Beetle -Sold-
1979 Transporter - "Wheatbread" -Sold- |
|
| Back to top |
|
 |
WildIdea
Samba Member

Joined: September 17, 2016
Posts: 928
Location: Black Hills, South Dakota

|
 Posted: Wed Feb 14, 2018 5:40 pm Post subject: Re: Hell In A Bucket! WildIdea's 1977 Sage Green Westy Posted: Wed Feb 14, 2018 5:40 pm Post subject: Re: Hell In A Bucket! WildIdea's 1977 Sage Green Westy |
 |
|
| riverside66 wrote: |
| WildIdea wrote: |
| I dig your new motor by the way. |
Thanks! I might too (if I can devote some time to get it tuned right)
Looks like you're off to a great start on yours! I may have overlooked you saying earlier, but what are your plans for your build? |
Well, if the bus had a functioning motor when I bought it I would have likely nursed it and just drove it that way for a while, but with it being ceased we had to take the core down and start from scratch. I donít feel obligated to rebuild it the way the factory created it.
Iím not a motor scientist, so Iím deferring to my builder Brian on all the technical quoting but were going for a dependable runner that can breathe a little. Dual carbs and open up the valves and exhaust and drop in a fun cam. Nothing too radical. Getting all the tolerances back with new components will be nice, I hope to get some decent life out it. |
|
| Back to top |
|
 |
|

