| Author |
Message |
T3Yoshi
Samba Member

Joined: November 06, 2016
Posts: 158
Location: Sonoma County

|
 Posted: Sun Jul 01, 2018 8:13 pm Post subject: Yoshi's 1967 Squareback Posted: Sun Jul 01, 2018 8:13 pm Post subject: Yoshi's 1967 Squareback |
 |
|
Well, I've been lurking and chipping away at my 67 Squareback project for a few years now and have finally decided that its time for me to create a thread. I'll gradually add posts until I catch up to where I'm at now.
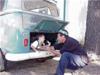
This is how I received the car from the PO. Someone installed a full length ragtop at some point in addition to MANY other interesting things, for better or for worse. It's been an adventure.
One of these "things" was stripping out the lugs on the pass rear wheel. On my way home from the purchase I heard a rattling coming from the rear after hard braking in traffic. I pull over and see that the wheel is kinda wonkey. Well, come to discover that I have a couple of lug bolts rattling around in my hubcap. I got a tow home and ordered replacement hubs and lugs for good measure(the front discs checked out okay).
After fixing the brakes (MC replacement) I drove it like that for a while until I decided to get serious about the project.
The first metalwork on this car and my first welding project was a quarter pan replacement. I used the method where you overlap the replacement panel over the old metal, secure it with sheetmetal screws, cut through the overlapping section and weld as you go.
It's not perfect and I cringe a bit when I see the big fat spot welds that I should have turned up the heat on, but for my first effort it's alright and I learned a lot. Here goes...
...cleaned up the subframe support and jack point and primered them while I was down there.
These are the replacement panels that need to be widened a bit if you want to use the full width. It wasn't that bad with a block of wood, clamps, hammer and dolly. Glad there is even a replacement available.
Flattened out the rear section a bit too...
Cut, remove screws and tack...
Made giant ugly tacks using a low setting because I was afraid of blowing holes in the pan, then grind grind grind...
Located subframe support holes, drilled, primed under nut mount thingies, tacked into place and then primed again. Later on I put a bead across the top edge of those mounts...
Made a battery hold down. The car didn't come with one and I coudn't find a good OG one in the classifieds at the time.
Stripped the pan and did the whole POR-15 prep and paint process. The painted picture was taken today WAYY after the fact(didnt have an after shot for some reason). POR-15 seems to be holding up, except where I accidentally let paint stripper seep through from stripping the underside  , although paint stripper hardly puts a dent in this stuff. I will clean that up and seam seal. , although paint stripper hardly puts a dent in this stuff. I will clean that up and seam seal.
I do not think I will use POR again though. Without an air compressor at the time I think it was a good option, but if I did it again today I'd probably epoxy prime and single stage paint it.
Chemical stripped the bottom and then used an angle grinder for hours and hours and hours, laying on my back  . Glad to be done with that! . Glad to be done with that!
Got a compressor and epoxy primed then Raptorlined the bottom. I was pretty stoked on the Raptorliner and plan on using a colormatched batch in the wheel wells and maybe the cargo area.
Last edited by T3Yoshi on Tue Jul 03, 2018 8:22 am; edited 3 times in total |
|
| Back to top |
|
 |
gt1953
Samba Member
Joined: May 08, 2002
Posts: 13848
Location: White Mountains Arizona
|
| Posted: Mon Jul 02, 2018 6:55 am Post subject: Re: Yoshi's 1967 Squareback |
|
|
Looks like you are on the right track in progress. Just did my right side pan recently.
_________________
Volkswagen: We tune what we drive.
Numbers Matching VW's are getting harder to find. Source out the most Stock vehicle and keep that way. You will be glad you did.
72 type 1
72 Squareback
({59 Euro bug, 62, 63, 67, 68, 69, 73 type ones 68 & 69 type two, 68 Ghia all sold}) |
|
| Back to top |
|
|
notchboy
Samba Member

Joined: April 27, 2002
Posts: 22463
Location: Escondido CA
|
|
| Back to top |
|
|
Bobnotch
Samba Member

Joined: July 06, 2003
Posts: 22431
Location: Kimball, Mi
|
| Posted: Tue Jul 03, 2018 10:16 am Post subject: Re: Yoshi's 1967 Squareback |
|
|
Very nice work.  While the cut, unscrew, and tack method might have been slow going, it turned out great. Your battery bracket turned out good too. While the cut, unscrew, and tack method might have been slow going, it turned out great. Your battery bracket turned out good too. 
I'm not really a fan of POR15, but it works for some people, as they have better luck with it than I do. I just normally epoxy prime and paint it.
You're definitely making progress with it though. Nice job.
Look forward to seeing more.
_________________
Bob 65 Notch S with Sunroof
71 Notch ...aka Krunchy; build pics here;
http://www.thesamba.com/vw/forum/viewtopic.php?t=249390 -been busy working
64 T-34 Ghia...aka Wolfie, under construction... http://www.thesamba.com/vw/forum/viewtopic.php?t=412120
| Tram wrote: |
| "Friends are God's way of apologizing for relatives." |
| Tram wrote: |
| People keep confusing "restored" and "restroyed". |
|
|
| Back to top |
|
|
bkeith85
Samba Member
Joined: December 21, 2013
Posts: 149
Location: United States
|
| Posted: Tue Jul 03, 2018 10:38 am Post subject: Re: Yoshi's 1967 Squareback |
|
|
Wouldn't ya know, as soon as I finish doing this very job some smart guy comes along with a better way to do it. Man, if I had thought of that, things would have gone so much smoother. Mine turned out good, but getting it to fit well with manageable gaps was a real pain in the butt. It didn't help that I started fitting it and cut some of the hole a year ago, then let it sit.
Nice job! It turned out great. Don't worry about the welds, they will be covered up anyway. Just make sure they are strong.
How'd you like the fit of that patch panel? I used the same one and it was so close in some areas and way off in others. I ended up cutting mine in sections to get it to line up right. Now I see why folks go to the trouble to do the full Gerson pans. I bet those are real nice.
_________________
My build thread: https://www.thesamba.com/vw/forum/viewtopic.php?t=614323&highlight= |
|
| Back to top |
|
|
Bobnotch
Samba Member
Joined: July 06, 2003
Posts: 22431
Location: Kimball, Mi
|
| Posted: Tue Jul 03, 2018 11:12 am Post subject: Re: Yoshi's 1967 Squareback |
|
|
| bkeith85 wrote: |
| Now I see why folks go to the trouble to do the full Gerson pans. I bet those are real nice. |
From what I understand they have their own issues.
_________________
Bob 65 Notch S with Sunroof
71 Notch ...aka Krunchy; build pics here;
http://www.thesamba.com/vw/forum/viewtopic.php?t=249390 -been busy working
64 T-34 Ghia...aka Wolfie, under construction... http://www.thesamba.com/vw/forum/viewtopic.php?t=412120
| Tram wrote: |
| "Friends are God's way of apologizing for relatives." |
| Tram wrote: |
| People keep confusing "restored" and "restroyed". |
|
|
| Back to top |
|
|
MonT3
Samba Member
Joined: January 07, 2012
Posts: 1988
Location: South Dakota
|
|
| Back to top |
|
|
ibjack
Samba Member

Joined: February 06, 2002
Posts: 2106
Location: Imperial Beach CA
|
| Posted: Tue Jul 03, 2018 9:11 pm Post subject: Re: Yoshi's 1967 Squareback |
|
|
| Bobnotch wrote: |
| bkeith85 wrote: |
| Now I see why folks go to the trouble to do the full Gerson pans. I bet those are real nice. |
From what I understand they have their own issues. |
Not many issues. They are much thicker than the patch panels are are the best way to go.
_________________
'68 Lotus White T34 automatic sunroof
'64 Manila Yellow T34
'65 Sea Blue Square Panel
the1500club.com
Shop Lacky at the T3/34 Factory, https://www.facebook.com/profile.php?id=100094313902074 |
|
| Back to top |
|
|
T3Yoshi
Samba Member
Joined: November 06, 2016
Posts: 158
Location: Sonoma County
|
| Posted: Fri Aug 03, 2018 12:09 am Post subject: Re: Yoshi's 1967 Squareback |
|
|
Thank you everyone for the feedback! Real cool to hear from you guys.
bkeith85 - I wish I could take credit for figuring out the quarter pan method but I actually read about it somewhere and decided to give it a shot. The replacement quarter pans did need a little bit of work in some spots but I was expecting to have to fuss with these a little bit so I wasn't too disappointed with the fit.
After doing the pan I worked on the front driver fender a bit.
I started with patching this rusted out section.
Made a template out of masking tape
Cut away the bad
Replaced the backside
Then did the frontside
I also straightened out the mangled antenna hole.
The driver side rear hatch hinge had the issue where it gets stuck, doesn't want to close and then bends a scary amount until it finally closes. I saw Nate M's gas strut setup and decided to do the same.
Made cardboard templates that fit in the inside corner of the hatch hinges
Cut some steel plate from the templates, welded nuts and inserted the ball studs.
Bent up the lower ball stud support from some steel plate too.
I used stainless sheetmetal screws to hold this into place. Im going to eventually weld nutserts into the body and use bolts because these screws come loose over time.
Tacked into place for now. All this stuff will get cleaned up and smoothed out.
Opens and closes really well, has the full range of travel and has a nice positive feel when opening. I think I went with the 60# struts per Nate's recommendation. I did this a while back and have to track down my gas strut order form. Nate has a great technical writeup on his build if anyone wants a little more info. |
|
| Back to top |
|
|
oxsign
Samba Member

Joined: February 19, 2006
Posts: 607
Location: Sanford, FL
|
|
| Back to top |
|
|
T3Yoshi
Samba Member
Joined: November 06, 2016
Posts: 158
Location: Sonoma County
|
| Posted: Sun Aug 12, 2018 1:14 am Post subject: Re: Yoshi's 1967 Squareback |
|
|
Thanks oxsign!
This next repair was a real turning point for me in the build. I initially was hoping that I could just replace the front apron, but I soon realized that I should replace the front clip. I was scared to cut off the front end but I reminded myself that I got this car so that I could learn some new skills and also have something that I'm proud of when done. The old front clip had to go!
I did manage to track down a nice NOS front apron before I decided to do the entire clip.
I decided to use the apron that came with the donor clip because it wasn't too banged up, but this was still really useful.
I took a note from Clatter's rear apron job on his build and made up templates to help bodywork the donor apron. I made a large profile gauge out of cardboard and skewers, took measurements at four different locations, then transferred those profiles to poster board.
I took readings at the center and 1/2", 6" and 12" from the edge.
Donor clip from an earlier square. 65 maybe? No indentations on the lower apron, no mickey mouse horn grill, single circuit master cylinder.
I removed the apron inner braces to give myself a little more room to swing a hammer. I spent a ton of time with the hammer and dolly and the profile templates. Even with those braces removed its kinda tough to work in there.
I got as close as I could with hammer and dolly then media blasted, laid down epoxy primer, bodyfiller(Rage Gold), Slick Sand, Hi Build Primer then lastly sealed it off with another layer of epoxy. This was my first time going through the whole process of hammering it out and doing all the bodywork steps up to the sealer coat. Learned a lot! I know its not perfect but for my first go I'm pretty happy.
With the donor clip straightened I go back to the car...
First thing I did was to level out the car side to side. I used a level on the edge of the gas tank opening and placed shims under the jacks until I got a good reading(not shown in the above photo)
I read a lot of front clip replacement threads on here and decided to buy a handy dandy laser level. I found common factory body holes on the original and donor clips, used these as reference points, placed the laser level in the exact same spots on the donor and original and marked my cut lines.
The point of no return... Never been so excited and scared to chop through a piece of metal with an angle grinder.
Cut a little wide knowing that I'd trim to fit just to be safe.
...and repeat the same steps on the donor clip. You can see the blue masking tape is where I marked the laser level location. I measured a certain distance away from a fender mount hole.
Trimmed the extra metal off the edge and it's really close. The passenger side edge of the original clip was a little low from the accident damage and needed a little persuasion to get it to line up perfectly. I used a 6 foot long 2x4 wedged against the torsion arms to pry it upward a bit and did some hammer and dolly work.
Lining up nice now. These clamps are great! I also have some angle iron camped to the gas tank opening frame. That really helped keep things straight. I also did a lot of measuring off of factory holes on both sides and used a level again on the front and back sides of the gas tank opening. Just looking to keep everything level and even on both sides/front to back.
Once I like how everything was looking with the clamps in I put a pretty straight donor hood on to check the fit. I was relieved to see it line up this well.
Then it was time to weld and grind. I went through a ton of those roloc discs!
It's not over yet!
This was a donor clip form an earlier car so I had to change the single circut MC reservoir mount over to dual circut.
It seems overkill but I coudn't figure out a way to make a new slot with the tools that I have. I went back to my original clip and robbed the MC reservoir brace slot from it.
I welded that into place and also moved the hole on the lefthand side over to where it needs to be.
Looks like its going to work.
...enlarged the brake line pass through to dual line size.
Next up was the frunk release cable tube.
This is also a little different on the earlier clip. My original tube was in worse shape so I spliced in the donor tube. I would have used the whole thing but it was just a few inches too short so I had to make this splice.
I found a tube with the perfect inside diameter so that it slips over both tubes.
Slipped right into place and held tight with a little JB weld.
Getting really close now. There were some tabs that needed to be replaced so I made some up from 22 gauge steel I had laying around.
And thats pretty much it on the front clip. I did a bunch of smoothing, probably spent too much time in there with the hi build primer but it just seemed like the thing to do. I want it to look nice after all the time I put into it.
One problem I need to figure out is the frunk release cable. With the new cable tube run being a hybrid between the early donor clip and the original 67 tube, my cable is a couple of inches too short. I ran the frunk release cable through to the hood latch but came up short and couldn't connect it.
Does anyone have any ideas on lengthening the frunk release cable? I'm thinking about somehow carefully removing the cable from the handle/pull knob deal and then crimping in an entire new cable. Needs to be strong as I don't want to get stuck with a locked hood and a broken cable. Thanks for any input. |
|
| Back to top |
|
|
MonT3
Samba Member
Joined: January 07, 2012
Posts: 1988
Location: South Dakota
|
| Posted: Sun Aug 12, 2018 6:32 am Post subject: Re: Yoshi's 1967 Squareback |
|
|
Beautiful work on replacing the front clip! You did a superb job on that as it shows you put in a really detailed thought process put into your plan, all the way down to the fold-over clips and the results - Awesome! great job. I'm sure achieving that milestone on your build felt really good. Congrats and keep it up!
_________________
MonT3
67 Squareback
64 Squareback
63 Squareback
Engine rebuild
Trailer rebuild |
|
| Back to top |
|
|
notchboy
Samba Member
Joined: April 27, 2002
Posts: 22463
Location: Escondido CA
|
|
| Back to top |
|
|
Bobnotch
Samba Member
Joined: July 06, 2003
Posts: 22431
Location: Kimball, Mi
|
| Posted: Sun Aug 12, 2018 11:11 am Post subject: Re: Yoshi's 1967 Squareback |
|
|
Very nice work. I wonder if you could use a different cable, or maybe 1 from a 65, since you say the 67 is too short. Might be worth checking the parts book for lengths.
On Rob's 65 Roadster, we used a Ghia convertible locking handle on it. We relocated the handle lower, since it (the handle) partly wraps under the trunk lip section on a Ghia, we had to do something similar on his type 3. We ended up cutting the tube and the cable (because the end of the unit moved the release handle forward), and used the 2 set screws for locking the cable to the pull portion. Then it was just a matter of resetting the cable at the latch. Basically I'm wondering/asking if you can replace the cable portion at the knob? If so, then you could go with some .040 to .060 stainless steel wire, or 1/16th wire rope (actual cable).
Another option might be to go with a Ghia engine lid release (maybe a Ghia owner can give you a length of it).
Again, very nice work on clipping the front.
_________________
Bob 65 Notch S with Sunroof
71 Notch ...aka Krunchy; build pics here;
http://www.thesamba.com/vw/forum/viewtopic.php?t=249390 -been busy working
64 T-34 Ghia...aka Wolfie, under construction... http://www.thesamba.com/vw/forum/viewtopic.php?t=412120
| Tram wrote: |
| "Friends are God's way of apologizing for relatives." |
| Tram wrote: |
| People keep confusing "restored" and "restroyed". |
|
|
| Back to top |
|
|
Clatter
Samba Member

Joined: September 24, 2003
Posts: 7551
Location: Santa Cruz
|
| Posted: Mon Aug 13, 2018 10:55 pm Post subject: Re: Yoshi's 1967 Squareback |
|
|
Nice work.
Digging it!
_________________
Bus Motor Build
Whats That Noise?!? |
|
| Back to top |
|
|
T3Yoshi
Samba Member
Joined: November 06, 2016
Posts: 158
Location: Sonoma County
|
| Posted: Sat Jan 26, 2019 9:26 am Post subject: Re: Yoshi's 1967 Squareback |
|
|
| Bobnotch wrote: |
Very nice work. I wonder if you could use a different cable, or maybe 1 from a 65, since you say the 67 is too short. Might be worth checking the parts book for lengths.
On Rob's 65 Roadster, we used a Ghia convertible locking handle on it. We relocated the handle lower, since it (the handle) partly wraps under the trunk lip section on a Ghia, we had to do something similar on his type 3. We ended up cutting the tube and the cable (because the end of the unit moved the release handle forward), and used the 2 set screws for locking the cable to the pull portion. Then it was just a matter of resetting the cable at the latch. Basically I'm wondering/asking if you can replace the cable portion at the knob? If so, then you could go with some .040 to .060 stainless steel wire, or 1/16th wire rope (actual cable).
Another option might be to go with a Ghia engine lid release (maybe a Ghia owner can give you a length of it).
Again, very nice work on clipping the front. |
Thank you Bob! I knew someone would have a solution for this.
I played around with the idea of replacing the cable portion at the knob. It looks like it is both brazed and crimped into place. I also noticed there is a very cool mini vw logo stamp on this crimp. Anyways, the local hardware store I went to did not have stainless or standard steel cable in lengths I need for this.
At this point I decided to just replace the frunk release cable entirely. I looked in the parts book and I did see a couple of different lengths for frunk release cables. I checked and ISP sells the 63in long version. Its a little longer than what I need so I can trim to fit. I think that everyone is basically selling the same T3 63in long cable right now.
Thanks for the help and Ill be posting an update in a minute.
|
|
| Back to top |
|
|
T3Yoshi
Samba Member
Joined: November 06, 2016
Posts: 158
Location: Sonoma County
|
| Posted: Sat Jan 26, 2019 11:24 am Post subject: Re: Yoshi's 1967 Squareback |
|
|
Again, thanks for the kind words everyone. I'd be lying if I said that they didn't help me push thought some of these challenges.
Ive done a lot since last time but I'll focus this post on the rear inner and outer apron replacement I've been working on. Ill call it a Trilogy of Aprons.
The rear end was a bit of a mess when I bought it.
I started by uncovering things to see what I had to work with.
With no solid replacements available I decided to see what I could do with what I had.
I wish I had a picture of what that lower lip looked like originally. Basically it was a piece of sheet welded into place,then sliced every inch or so along the bottom and sloppily bent up underneath and behind the apron.
I cut some rectangular bumper mount holes into some sheet and welded into place to replace the wonkey ones.
Then I pulled the curled up lower lip down straight, tacked a 1/4" steel rod behind it and then bent the lip back up. The 1/4" rod helped keep the lip more straight. I trimmed the excess off.
This would have been okay but it really bothered me that the apron didn't look correct.
Next thing I tried was the fiberglass apron.
It worked about as well as you would expect. I spent a lot of time trying to get the upper corners of the fiber apron to lay behind the bottom lip of the rear hatch. This was difficult to do because its just a fiberglass cap over the old upper apron. I added a bunch of fiberglass to reshape the upper corners and upper lip.
I also strengthened the sides so that I could use threaded rivets on the body and countersink bolts into the apron sides.
I figured if Im going to settle for a fiberglass apron, I should make it a removable apron. At least then there would be a slight(very slight) benefit to attaching a giant rust trap to the rear of my car.
From a distance it looked okay but the rust trap factor bugged me a lot. And it kept bugging me, so I went in again and decided to search out a donor.
This brings us to exhibit #3
I checked the classifieds everyday until I finally found one! It was a huge relief to find one in decent shape. I finally felt like I was going to be able to make this car look the way I want it to look.
I carefully extracted it from the surrounding metal with an angle grinder, drill and metal chisel.
This was one of many test fits and was also a difficult point in the process.
It looked right from the outside but during removal of the old apron I noticed that I had another problem.
The inner apron was also fairly crunched.
As much as I wanted to call it good and weld this thing into place, deep down I knew what I had to do.
Another fucking apron!
Lots and lots of tiny strategic cuts made, holes drilled and chisel taps later I successfully separated the inner and outer aprons from each other without too much damage. The seam that connects the front edge of the inner apron to the outer apron mid seam is incredibly difficult to separate without doing too much damage because its a solid seam, not spot welded. Drilling consecutive holes as if it was spot welded did help but you still have the space between the holes that need to be chiseled through.
I finally blew a hole through a valve on my HF sand blaster cleaning these things up.
I wire wheeled and then blasted then epoxy primed in very small sections to make it manageable.
One of the cool things about doing the inner and outer aprons is that I got to follow the procedures in the bentley.
I tried out my new shrinking disc and polisher. I was skeptical but this shrinker actually works pretty well on stretched out raised peaks. I spent a day straightening the outer apron. Its not perfect but it definitely close enough to only need a shallow skim layer of filler.
I stripped and primed the a lot of the body throughout this process btw.
Sheet metal screwed, welded, ground, epoxy primed, epoxy seam sealed, epoxy primed, sealer coated, base coated, clear coated, overkilled?
I am doing a color change to anthracite so I figured why not have it look right if someone removes the oil dip stick tube or bellows rubber.
I was painting in cold weather so I used the medium speed(instead of slow)SPI clear coat activator. Got a little orange peel plus the surface underneath was not super smooth to begin with.
While doing final fitment of the outer apron I got to make sure that the dip stick tube flange laid flat. The old aprons and flange never lined up correctly. It does now.
Dont forget these plug welds on the air splitter.
I set the rear hatch gap of my new donor hatch. I had previously gapped it for the fiberglass apron so it needed to be re done.
Someone else on here showed this method where they loosen the rear hatch hinge bolts, close the hatch, adjust the hatch until the gaps are good with the hatch still closed, throw some tacks on the hatch and its hinges, open the hatch slightly and tighten the hinge bolts.
Then you drill tiny location holes though the sides of the hinges into the hatch sides. Lastly you cut through the tacks and grind them clean. Then you can remove the hatch and not worry as much about lining it up again when you reattach. Those locating holes at least give you a good staring point when you put it back on.
Fixed this little guy. The seller accidentally cut this edge too far. Honest mistake no sweat.
I accidentally drilled through the rear hatch bottom seal flange thingie you see there. No one will ever see it but it bugs me. Ill have to smooth that out. I welded it as much as I could without frying that incredibly fragile seal groove. Probably finish it with a little filler or epoxy.
Final fitment! I previously hung all of the body panels to make sure that I don't have any gap issues that would require me to move the rear apron again.
In place and plug weld holes are drilled.
Not shown but its now welded in place and am in the process of cleaning up the welds.
I guess the moral of this story for me is that I'm not going to be happy until its right. The other aprons would have been okay but they really did bug me. I'm finally happy and thats what matters.
If anyone actually read this entire post you are amazing! |
|
| Back to top |
|
|
old_man
Samba Member
Joined: June 19, 2018
Posts: 1382
Location: Newfoundland
|
| Posted: Sat Jan 26, 2019 11:43 am Post subject: Re: Yoshi's 1967 Squareback |
|
|
| T3Yoshi wrote: |
If anyone actually read this entire post you are amazing! |
I read most of it actually. I learned what a shrinking disc is. |
|
| Back to top |
|
|
Bobnotch
Samba Member
Joined: July 06, 2003
Posts: 22431
Location: Kimball, Mi
|
| Posted: Sat Jan 26, 2019 2:52 pm Post subject: Re: Yoshi's 1967 Squareback |
|
|
I read it, and loved it. Very nice attention to detail, along with pointing out ALL of the pitfalls you ran into. Great pics to make it easier for someone to follow along with as well. And yes, I'm guilty of not taking pics at times when doing something like you've gone thru. But, doing both ends of the car is taking things to the extremes that you don't see very often, so I know what you're going thru, especially with limited tools, and no real compressed air for air tools. I hate to say it, but you really made it look easy, even though I know it wasn't.
Great job, and I look forward to seeing more as you progress onward with it. 
_________________
Bob 65 Notch S with Sunroof
71 Notch ...aka Krunchy; build pics here;
http://www.thesamba.com/vw/forum/viewtopic.php?t=249390 -been busy working
64 T-34 Ghia...aka Wolfie, under construction... http://www.thesamba.com/vw/forum/viewtopic.php?t=412120
| Tram wrote: |
| "Friends are God's way of apologizing for relatives." |
| Tram wrote: |
| People keep confusing "restored" and "restroyed". |
|
|
| Back to top |
|
|
Clatter
Samba Member
Joined: September 24, 2003
Posts: 7551
Location: Santa Cruz
|
| Posted: Sat Jan 26, 2019 8:20 pm Post subject: Re: Yoshi's 1967 Squareback |
|
|
Nice, nice work..!
Way to take it to another level.
Love your detailed write-up, too.
_________________
Bus Motor Build
Whats That Noise?!? |
|
| Back to top |
|
|
|


