| Author |
Message |
vw66bus
Samba Member
Joined: September 20, 2005
Posts: 19

|
 Posted: Sun Aug 19, 2018 8:01 pm Post subject: Type 3 Door Panel Removal - How To Posted: Sun Aug 19, 2018 8:01 pm Post subject: Type 3 Door Panel Removal - How To |
 |
|
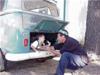
I could not find a post/thread with this info, so here is what I came up with
I only got as far as the top trim panel and upper card.
If you have more info on removing the rear arm rest and lower card, or front "Z" panels, please share.
I used a set of door panel/trim tools from harbor freight.
Here I carefully inserted multiple of the pry sticks in hopes of a tab popping loose. The middle tab did pop.
Here the 3 green zip ties are used as markers to show where the tabs are located. There are 4 total retainer tabs on the black trim piece. The 4th one is equidistant as the others, close to the seat-back. This piece comes off by itself, it is not attached to the upper card.
Here the pinch welt on the door pillar must be pryed away, slightly.
The vinyl from the panel is glued and wrapped around the door pillar.
Once the clips are all popped out, you should be able to jiggle the card while pulling upward and outward on the top. The card must be pulled out such that the ashtray clears its hole. The ashtray has a rubber boot that mounts to the body. In my case 75% of the boot was stuck to the body and the other 25% was stuck to the panel. So I had to unstick it from the panel. The ashtray does NOT just pop out of the panel like it does in beetles.
Here you can see that there are 3 retainer clips across the top of the card and one on the lower edge near tucked behind the edge of the seat. There is possibly a 4th clip on the top tucked behind the seat.
Here is a few pics of the tools and trim and panel.
Last edited by vw66bus on Mon Aug 20, 2018 6:04 am; edited 2 times in total |
|
| Back to top |
|
 |
gt1953
Samba Member
Joined: May 08, 2002
Posts: 13848
Location: White Mountains Arizona
|
| Posted: Sun Aug 19, 2018 9:11 pm Post subject: Re: Type 3 Door Panel Removal - How To |
|
|
Cool, glad you are doing this. The panels are easy to remove/install replace clips if needed.
_________________
Volkswagen: We tune what we drive.
Numbers Matching VW's are getting harder to find. Source out the most Stock vehicle and keep that way. You will be glad you did.
72 type 1
72 Squareback
({59 Euro bug, 62, 63, 67, 68, 69, 73 type ones 68 & 69 type two, 68 Ghia all sold}) |
|
| Back to top |
|
|
Nikon-User
Samba Member

Joined: September 13, 2017
Posts: 33
Location: Switzerland
|
| Posted: Mon Aug 20, 2018 10:32 am Post subject: Re: Type 3 Door Panel Removal - How To |
|
|
To remove the armrest, you would need to remove the lower panel first. The upper panel has some clips behind the armrest... I would say... you did in the the wrong way... But not 100% sure..
And its easier if the back seats are completely out...
The Z-armrest in you car has two metal clips and you "only" need to lift the armrest up...
I did this already 2 times but didn't make any picture. To be honest.. the challenge is to re-install the Z-armrest. Maybe it's easier so install first the Z-armrest and than install the upper panel.. Maybe this was always my mistake why it was so difficult..(yep.. I did it wrong)
Here the photos I made the first time..
2nd. time with new panels and leather Z-armrest
|
|
| Back to top |
|
|
bigfish6025
Samba Member
Joined: August 30, 2019
Posts: 29
|
| Posted: Wed Jun 29, 2022 3:47 pm Post subject: Re: Type 3 Door Panel Removal - How To |
|
|
| Dug up this old thread to ask you, OP, did you reupholster your z arm rest? I have them on my 67 and the vinyl is all cracked on top, the chrome strip is in good shape, Id like to restore those pieces when I replace all my interior paneling. Thx |
|
| Back to top |
|
|
andybla
Samba Member
Joined: March 03, 2014
Posts: 630
Location: BE
|
| Posted: Thu Jun 30, 2022 5:38 am Post subject: Re: Type 3 Door Panel Removal - How To |
|
|
| bigfish6025 wrote: |
| Dug up this old thread to ask you, OP, did you reupholster your z arm rest? I have them on my 67 and the vinyl is all cracked on top, the chrome strip is in good shape, Id like to restore those pieces when I replace all my interior paneling. Thx |
look here
https://www.thesamba.com/vw/forum/viewtopic.php?t=...p;start=60 |
|
| Back to top |
|
|
Ossipon
Samba Member
Joined: May 12, 2021
Posts: 474
Location: KS
|
| Posted: Thu Jun 30, 2022 6:10 am Post subject: Re: Type 3 Door Panel Removal - How To |
|
|
I followed the link that Andy posted. Only difference is I used a "60" vinyl Leather Repair Patch Tape Self-Adhesive Vinyl Sticker for Sofas Couch-Black" that I got online. This had the same pattern as the original surface
The critical thing for my solution is I needed was to use three tools as you do it.
1. Very sharp razor knife. (It has to be thin and sharp)
2. Hand roller similar to what you use for wallpaper or applying sound deadening rolls. (This is to remove the potential air bubbles and help as you stretch apply.)
3. NON-sharp stiff spatula like tool to push in on corner edges. (Non-Sharp is critical as you can puncture if you are not careful)
I will try and find my pictures. I think I lost these when my phone died. The other thing I had to do was build up the holes in the old foam foundation. I used a quick shot of insulation foam and trimmed to smooth the surface.
_________________
Ossipon
VWs in my life:
Air
Type 1 - 59, 62, 63, 71 Super 68 KGhia/ Type 2 - 59 Single Cab / Type 3 - 64 Notch
Water
GTI 83, Jetta 81, 85, 87, 91 TDI, 98 TDI, 09 / New Beetle 99 / SportWagen 05, 13 / Tiguan 18 / T3 92 |
|
| Back to top |
|
|
squaretobehip
Samba Member

Joined: August 23, 2004
Posts: 3695
Location: San Jose, CA
|
| Posted: Thu Jun 30, 2022 10:04 am Post subject: Re: Type 3 Door Panel Removal - How To |
|
|
| bigfish6025 wrote: |
| Dug up this old thread to ask you, OP, did you reupholster your z arm rest? I have them on my 67 and the vinyl is all cracked on top, the chrome strip is in good shape, Id like to restore those pieces when I replace all my interior paneling. Thx |
Someone linked my thread above but your armrests are a little different. The only part to upholster is the upper pad itself. The rest is plastic, hopefully they're not cracked. The upper pad shouldn't be too hard to do, a lot easier than the earlier "Z" armrests. Once you get them off the door panel, the disassembly should be pretty straight forward.
_________________
1963 Notchback - Ruby Red
1963 Squareback - Pearl White
1965 Squareback - Baltic Blue
Follow ISP West on:
Facebook - www.facebook.com/ispwest
Instagram - @ispwest - www.instagram.com/ispwest |
|
| Back to top |
|
|
soupcups 
Samba Member
Joined: May 08, 2014
Posts: 221
Location: Huntington Beach
|
| Posted: Wed Jul 27, 2022 12:50 pm Post subject: Re: Type 3 Door Panel Removal - How To |
|
|
The armrests arent too difficult to restore. Hes right about the foam spray for repairing/replacing any of the foam thats missing. You do have to strip all of the old plastic cover off though, which seems sacrilegious but has to be done if you want a smooth finish. After you sand and shape the new foam get some spray on adhesive and then some new faux leather pebble finish vinyl from Amazon and start recovering. If you want to do it right so no pleats are showing on the corners it can take some time to figure out the best way to make it a clean fold. The one good thing about that vinyl is it stretches. I recovered one for BobNotch in grey that came out pretty close to the same color. Ive also recovered some of the later rear armrests with the chrome trim on them as well. Those are a little bit trickier because of the step down but it can be done. Another great thing about that vinyl is it wont crack like the original vacuumed/heated plastic does. The vinyl brand is called ViVid adhesive backed vinyl. You can get it in a bunch of different colors.
|
|
| Back to top |
|
|
|


