| Author |
Message |
merlinsbus
Samba Member

Joined: August 03, 2011
Posts: 75
Location: Portland, OR

|
 Posted: Sat May 11, 2019 5:02 pm Post subject: Re: Project Dugong - Syncro Bay Bus Posted: Sat May 11, 2019 5:02 pm Post subject: Re: Project Dugong - Syncro Bay Bus |
 |
|
This weekend we dove into the rear suspension, some curious things where discovered such as the torsion bars having a different spline inboard to outboard. First however, we see that some of the sheet metal repair began.
I found that the spots welds on this thicker metal where hard to "spot", so I wire brushed and ran a linishing wheel over it and the stood out nicely.
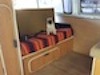
I have rust holes, but it is not so bad. I will be using this old floor metal to replace some parts, but the key slot seat brackets will not be going back in as this bus will become a camper and we don't need water traps.
I cut out the center torsion housing, this is what will allow the Syncro transaxle to fit; however, it will still need to be made wider as a quick test fit of the transaxle revealed. I will be putting my diesel bell housing on the transaxle shortly to get a better idea of fitment.
This is the center torsion housing removed from the bus, what is unfortunate about this part is it is a cast unit making welding a challenge. I may have to get a machinist to make me plugs with these spline cut into them, this a future plan that requires further thought.
Here I cut out the spline section out of my spare spring plate (I only have one spare, need to track another down). This section will be used when I move the torsion bars outboard to make room for the Syncro transaxle.
This shows my guess as to how far the torsion bars will be moved outboard.
Having done some research into driveline angles, I found that installation of the transaxle will dictate placement of the front differential as they are quite critical to vibration. The factory angles VW engineered for the driveline flanges are bizarre and contrary to standard industry practices and I will not be going their route. I will be squeezing in sheet metal work as I order metal from Autocraft and Klassicfab.
_________________
"If I wanted a restored truck the most cost effective way is to buy one already done. My truck is special to me and the journey has enriched my life. VW people understand". -Glideking
"Always remember: others may hate you, but those who hate you don't win unless you hate them and then you destroy yourself" -Richard Nixon |
|
| Back to top |
|
 |
tristessa
Samba Member

Joined: April 07, 2004
Posts: 3992
Location: Portland, OR
|
| Posted: Sat May 11, 2019 5:36 pm Post subject: Re: Project Dugong - Syncro Bay Bus |
|
|
| I've got a Bus torsion section with spring plates, bars and trailing arms sitting in my backyard in SE PDX/Happy Valley near 82nd Ave & Johnson Creek Blvd. You're welcome to whatever parts you need .. just come get 'em. Only catch is that I'm leaving town Wednesday and won't be back until at least the 27th. |
|
| Back to top |
|
|
outcaststudios
Samba Member

Joined: February 09, 2015
Posts: 1732
Location: Maine
|
| Posted: Sat May 11, 2019 8:06 pm Post subject: Re: Project Dugong - Syncro Bay Bus |
|
|
if you ever need information on casting any metal parts let me know, i run a foundry. super cool build.
_________________
'88Doka JX td
'69 westy
(rip)couple bugs
(rip)three type III"s
(rip) '81 vanagon
a bunch of french stuff,and 9 motorcycles.
https://www.thesamba.com/vw/classifieds/detail.php?id=2573791 |
|
| Back to top |
|
|
panel
Samba Member

Joined: December 02, 2001
Posts: 1090
Location: Victoria B.C. Canada
|
| Posted: Sat May 11, 2019 10:51 pm Post subject: Re: Project Dugong - Syncro Bay Bus |
|
|
merlinsbus.......that's exactly how I narrowed my rear of my bus. Cut the torsion housing and moved it in but left the length of the torsion bars and had to extend the splines.
_________________
My '65-Subaru EJ20 Turbo conversion |
|
| Back to top |
|
|
khalimadeath
Samba Member
Joined: June 24, 2014
Posts: 768
Location: Reno, NV
|
| Posted: Sun May 12, 2019 12:03 pm Post subject: Re: Project Dugong - Syncro Bay Bus |
|
|
These 4wd builds are great! Keep up the good work.
_________________
The United States Constitution
(c) 1787. All Rights Reserved
1970 Bus Westfalia
1964 Kombi |
|
| Back to top |
|
|
a1steaksauce
Samba Member
Joined: September 23, 2010
Posts: 612
|
| Posted: Sun May 12, 2019 8:15 pm Post subject: Re: Project Dugong - Syncro Bay Bus |
|
|
Having those torsion housing sections wire EDMed is far more pricey than you think. You can easily make due with donor pieces from spare spring plates. Also the later bays have a slight taper in the splined sections themselves.
Theres quite a few ways to do what youre after as an end result. As others have mentioned its how we lowered guys go about narrowing the rear of a bay. I personally took donor spring plate splined sections, machined down the outer diameter removing the taper, then proceeded to tig weld the two torsion pieces together. Ive personally done 3 sets this way without any issues. Another option Ive seen others do is to add an outer sleeve and then mig weld all three pieces together. But I think that might make installing the torsion housing bushings interesting lol.
Search the lowered thread for other ways. This practice is for sure nothing new and is pretty straight forward.
Oh and before you cut out anymore factory cross bracing you might want to tack some temporary supports in there. My .02 |
|
| Back to top |
|
|
merlinsbus
Samba Member
Joined: August 03, 2011
Posts: 75
Location: Portland, OR
|
| Posted: Tue May 14, 2019 8:18 pm Post subject: Re: Project Dugong - Syncro Bay Bus |
|
|
The splined section from the spring plates is not my concern as these are a forged part, the center torsion housing is what may need a new part machined. The center torsion housing is cast iron, this makes it difficult to weld, particularly under a VW bus. Furthermore, it must be split into to halves as to allow room for the Syncro transaxle and also capped so the splines may bottom and are sealed from outside moisture and dirt.
I am not ignorant to machining costs, but is is something that may have to be faced with a project such as this. The suspension is without doubt the big hurdle with this conversion and parts will simply need to be machined and fabricated.
I figured someone would bring up the lack of bracing, this was a decision I made as mockup of the Syncro transaxle would be impossible with it in the way. The torsion housing tubes did move enough to pinch a sawzall blade, so I will be sure to get a straight edge across it when the final bracing is installed. But yes, no more metal is getting cut out apart from more of the torsion housing tubes.
On the subject of the spring plates, we have two extras now thanks to Tristessa who kindly donated it to my project. He has one cool bus too! These will allow me to make more progress this weekend assuming weather clears.
_________________
"If I wanted a restored truck the most cost effective way is to buy one already done. My truck is special to me and the journey has enriched my life. VW people understand". -Glideking
"Always remember: others may hate you, but those who hate you don't win unless you hate them and then you destroy yourself" -Richard Nixon |
|
| Back to top |
|
|
notchboy
Samba Member

Joined: April 27, 2002
Posts: 22448
Location: Escondido CA
|
| Posted: Wed May 15, 2019 6:56 am Post subject: Re: Project Dugong - Syncro Bay Bus |
|
|
| merlinsbus wrote: |
On the subject of the spring plates, we have two extras now thanks to Tristessa who kindly donated it to my project. He has one cool bus too! These will allow me to make more progress this weekend assuming weather clears. |
Yes he is as well as several other "non" mainstream Samba folks that live around you. See you at the Lucky Lab. 
_________________
| t3kg wrote: |
OK, this thread is over. You win. |
Jason "notchboy" Weigel
1964 1500 S
1964 T34 S Convertible
1977 Westfalia Camper pop-top |
|
| Back to top |
|
|
tristessa
Samba Member
Joined: April 07, 2004
Posts: 3992
Location: Portland, OR
|
| Posted: Wed May 15, 2019 8:38 am Post subject: Re: Project Dugong - Syncro Bay Bus |
|
|
| notchboy wrote: |
| Yes he is as well as several other "non" mainstream Samba folks that live around you. See you at the Lucky Lab. |
I forget -- did you see Engine v2.0 in my Bus before you moved back to SoCal? I know you saw v1.5 at your hootenanny that Ruckman and I came to several years ago when you were still up in SeaTac... |
|
| Back to top |
|
|
notchboy
Samba Member
Joined: April 27, 2002
Posts: 22448
Location: Escondido CA
|
| Posted: Wed May 15, 2019 8:56 am Post subject: Re: Project Dugong - Syncro Bay Bus |
|
|
| tristessa wrote: |
| notchboy wrote: |
| Yes he is as well as several other "non" mainstream Samba folks that live around you. See you at the Lucky Lab. |
I forget -- did you see Engine v2.0 in my Bus before you moved back to SoCal? I know you saw v1.5 at your hootenanny that Ruckman and I came to several years ago when you were still up in SeaTac... |
Last time I saw you brother was at Maupin. I remember looking over your goods then?
_________________
| t3kg wrote: |
OK, this thread is over. You win. |
Jason "notchboy" Weigel
1964 1500 S
1964 T34 S Convertible
1977 Westfalia Camper pop-top |
|
| Back to top |
|
|
KrisBalfe
Samba Member
Joined: December 06, 2004
Posts: 832
Location: SLC
|
| Posted: Wed May 15, 2019 10:37 am Post subject: Re: Project Dugong - Syncro Bay Bus |
|
|
Nice. Getting after it.
Would it be possible to remove a section of the torsion housing and leave the splines intact, and just weld the housing back together? |
|
| Back to top |
|
|
tristessa
Samba Member
Joined: April 07, 2004
Posts: 3992
Location: Portland, OR
|
| Posted: Wed May 15, 2019 11:08 am Post subject: Re: Project Dugong - Syncro Bay Bus |
|
|
| notchboy wrote: |
| tristessa wrote: |
| notchboy wrote: |
| Yes he is as well as several other "non" mainstream Samba folks that live around you. See you at the Lucky Lab. |
I forget -- did you see Engine v2.0 in my Bus before you moved back to SoCal? I know you saw v1.5 at your hootenanny that Ruckman and I came to several years ago when you were still up in SeaTac... |
Last time I saw you brother was at Maupin. I remember looking over your goods then? |
Remembered you at Maupin, didn't remember if you checked out the new drivetrain when we were there or not. Details of those events are sometimes .. hazy. |
|
| Back to top |
|
|
cdennisg
Samba Member

Joined: November 02, 2004
Posts: 20271
Location: Sandpoint, ID
|
| Posted: Wed May 15, 2019 10:20 pm Post subject: Re: Project Dugong - Syncro Bay Bus |
|
|
This is gonna be good. I'm in!
_________________
nothing |
|
| Back to top |
|
|
merlinsbus
Samba Member
Joined: August 03, 2011
Posts: 75
Location: Portland, OR
|
| Posted: Sat May 18, 2019 9:32 am Post subject: Re: Project Dugong - Syncro Bay Bus |
|
|
I transferred the diesel Vanagon bell housing onto my Syncro transaxle yesterday, but before I did that I did a little study on converting it to cable clutch. I'm sure some of you won't agree with the cable idea, but a cable is less likely to fail and the idea behind this vehicle is mechanical simplicity. For now, I'm sticking to it.
The diesel bell housing casting has the land for the clutch arm return spring, all the modification that will be required appears to be a custom bushing.
A sad surprise waited inside my diesel transaxle however, severe corrosion has left this bell housing useless. It is hard to see in the image, but I went at these white salted areas with a scribe and nearly went though the entire wall. Good news is it is still useable for mocking up and fitting! I am now in the search for another one in better condition should anyone have one?
_________________
"If I wanted a restored truck the most cost effective way is to buy one already done. My truck is special to me and the journey has enriched my life. VW people understand". -Glideking
"Always remember: others may hate you, but those who hate you don't win unless you hate them and then you destroy yourself" -Richard Nixon |
|
| Back to top |
|
|
merlinsbus
Samba Member
Joined: August 03, 2011
Posts: 75
Location: Portland, OR
|
| Posted: Mon May 27, 2019 3:11 pm Post subject: Re: Project Dugong - Syncro Bay Bus |
|
|
Memorial day weekend was largely spent on the Vanagon, but we did get some machining and revelations in as well.
First off I cut the center torsion housing in half at a friends machine shop on their horizontal band saw. I attempted to weld on these parts with great success, this is awesome news as it will allow rosette welds and will not require me to have a spline section machined.
Knowing that welding was possible, I went ahead and made a drawing for the new center torsion housing. The new plan is make a sort of plug and press the spline section from the original center torsion housing into it.
Finding the right set up on my Atlas lathe was interesting but I got everything coplanar. This machining took ages as the interrupted cut was pretty harsh even after grinding much of the high spots down before machining, not to mention the old TV-54 has very little torque.
Outer spline section was next, I wanted to reduce the diameter to make installation of the spring plate bushings easier.
Lastly, I had to go back to my friends shop and have him part off the ends of the outer spline section as my chuck is far too small. A chamfer was added to allow better penetration come the welding. Next step is finding material and machining the inner torsion housing, once those are in I can figure out exactly where I want the outer spline section and make the new spring plate extension to spec.
_________________
"If I wanted a restored truck the most cost effective way is to buy one already done. My truck is special to me and the journey has enriched my life. VW people understand". -Glideking
"Always remember: others may hate you, but those who hate you don't win unless you hate them and then you destroy yourself" -Richard Nixon |
|
| Back to top |
|
|
outcaststudios
Samba Member
Joined: February 09, 2015
Posts: 1732
Location: Maine
|
| Posted: Mon May 27, 2019 3:20 pm Post subject: Re: Project Dugong - Syncro Bay Bus |
|
|
thats awesome. you probably already know this but,be sure to not overheat those when welding. long pauses between passes are good. so cool!
_________________
'88Doka JX td
'69 westy
(rip)couple bugs
(rip)three type III"s
(rip) '81 vanagon
a bunch of french stuff,and 9 motorcycles.
https://www.thesamba.com/vw/classifieds/detail.php?id=2573791 |
|
| Back to top |
|
|
merlinsbus
Samba Member
Joined: August 03, 2011
Posts: 75
Location: Portland, OR
|
| Posted: Sun Jun 02, 2019 8:02 pm Post subject: Re: Project Dugong - Syncro Bay Bus |
|
|
This weekend, after a very interesting trip to Portland in which I ran out of diesel in the Vanagon, did a lot of running to get a diesel station and make it in time to the metal supplier on time!
Yes, I made it! 3-3/4'' 4340 (COO-France) and 2-1/2'' 4340 (COO-Brazil).
Drew up a basic drawing for the new center torsion housing. Revised without a spline in it as the new plan is to press a spline section removed from the original center torsion housing.
The 4340 was too hard and big for my lathe, so back to my friends shop for this job.
That new part turned out lovely, I have not yet attempted to fit it, but if the dimensions I took are good, the part should be a slight interference fit. Off to the right you can see that one half of the center torsion housing is rusted, this is because I put it in the freezer to measure shrinkage, from 25* C to 0* C it shrunk exactly 0.1mm. This was not exactly what I was hoping for, so we settled for a regular press fit.
While at it, we also made the spline section from the original center torsion housing a press fit into the new center torsion housing. This will be pressed and welded in after I do some consulting with a local guru.
This is my spit ball idea for retaining structure in the now weakened torsion housing. Shown is the forward differential bracket from a Syncro. This part will most likely will be replaced with a mandrel bent piece of DOM that will be coped and placed on the actual tubes of the torsion housing and welded in. However, I almost feel like just using the original Syncro part for ease as it fits PERFECTLY.
_________________
"If I wanted a restored truck the most cost effective way is to buy one already done. My truck is special to me and the journey has enriched my life. VW people understand". -Glideking
"Always remember: others may hate you, but those who hate you don't win unless you hate them and then you destroy yourself" -Richard Nixon |
|
| Back to top |
|
|
alaskadan
Samba Member
Joined: January 09, 2013
Posts: 1857
Location: anchor pt. alaska
|
| Posted: Sun Jun 02, 2019 8:22 pm Post subject: Re: Project Dugong - Syncro Bay Bus |
|
|
Very cool. As i read your progress I cant help but think about the long front to back torsion bars on my little nissan truck. On the rear end of them the splined housings have an arm on them with a large long threaded bolt that allows for adjusting the tension on them. Adjustable ride in the back? You know cause what you are doing isnt hard enough  . . |
|
| Back to top |
|
|
KrisBalfe
Samba Member
Joined: December 06, 2004
Posts: 832
Location: SLC
|
| Posted: Mon Jun 03, 2019 2:49 pm Post subject: Re: Project Dugong - Syncro Bay Bus |
|
|
This is my spit ball idea for retaining structure in the now weakened torsion housing. Shown is the forward differential bracket from a Syncro. This part will most likely will be replaced with a mandrel bent piece of DOM that will be coped and placed on the actual tubes of the torsion housing and welded in. However, I almost feel like just using the original Syncro part for ease as it fits PERFECTLY.[/quote]
Great forward progress on your project 👍🏼
I like the repurposed front diff mount too! |
|
| Back to top |
|
|
merlinsbus
Samba Member
Joined: August 03, 2011
Posts: 75
Location: Portland, OR
|
| Posted: Fri Jun 14, 2019 10:54 am Post subject: Re: Project Dugong - Syncro Bay Bus |
|
|
I have not been making particular progress lately due to my machinist not having time to do the work I can't do on my lathe, but more things have been discovered via the personal favourite, trail and error.
Practice welds were done on the not yet machined inner torsion housing, this time I used a variety of welding rods with my TIG. Rods used are ER70S-2, ER70S-6 and a Nickel 55 (ENiFe-CI) ARC rod which I removed the flux from. I found the best bead was with ER70S-6 on the test subject.
I began by preheating the part with a torch and welded it using the ER70S-6 and found massive cracking along the center of the bead. I concluded the ER70S-6 was the wrong filler, so I removed all the old weld material and tried again with the Nickel 55 and still got cracking immediately after the weld. I decided to not carry on and moved my thoughts to plan B.
This is plan B in rough form, essentially an 8mm hole will be milled through both the pressed in spline section and the outer torsion housing, a pin will then be made to press fit into said hole locking the parts and negating the possibility of slippage. I am not big on the use of a key/keyway setup in this application as the spline section is a tight press fit and it would make a fuss to all press in one go. The pin will be machined from 4340 steel and perhaps hardened to help from wear or slop forming. The pin will *not* be welded in.
Lastly, I have begun the designing of the forward transaxle mountings. After a fair amount of deliberation I have decided on using the engine mounts from a 1.6TD Jetta/Rabbit/Caddy, using two in the same plane as applied in those cars. The design shown requires very little clearance between the torsion tubes and the transaxle mounting ears and I believe that as they are in the same plane as factory, vibration should be accounted for. For consideration, my engine mounts shall be hydraulic units found in Quantum and Audi 5 cylinder cars.
This is one of the 1.6TD mounts from a Jetta/Rabbit/Caddy, it measure 65mm which luckily is larger than 2.5''. Some 2.5'' DOM can easily be machine down to receive these mounts, but I am uncertain of the require press fit for engine mounts. If anyone knows, please PM or email me!
_________________
"If I wanted a restored truck the most cost effective way is to buy one already done. My truck is special to me and the journey has enriched my life. VW people understand". -Glideking
"Always remember: others may hate you, but those who hate you don't win unless you hate them and then you destroy yourself" -Richard Nixon |
|
| Back to top |
|
|
|


