| Author |
Message |
jlrftype7
Samba Member
Joined: July 24, 2018
Posts: 3577
Location: Chicago

|
 Posted: Mon Feb 03, 2020 10:17 pm Post subject: Re: Sitting for 16 years in WNC ~ What will it take Posted: Mon Feb 03, 2020 10:17 pm Post subject: Re: Sitting for 16 years in WNC ~ What will it take |
 |
|
| kaeferman wrote: |
I am still waiting on AutohausAZ to ship my ball joints and bearings for the front. I have found a few OEM parts from them on this project. They are sometimes a savings in price on what appears to be the same stuff that some of our more well known companies carry and you can get free shipping too sometimes.
Anyway jlrftype7 and Asbcate, i completely agree with you guys the brakes, steer, stop and then go safely. It s a good work order. safety first! I m a vw preservationist i guess youd say. we even put it into our clubs mission statement, if we ever finalize it. I also bought a blaze cut system for this van, but i loaned it to my buddy who just bought an 85 with all orig rubber in the engine so we figured he needed it more than me for the moment. He s planning on fuel lines soon.
On the brakes. They seem good. I listed above whats new and what i did so far. Interestingly, despite all the locked up cylinders, my lines were also still good thankfully.
jrlftype7 I wonder how difficult the e brake cable was to do?
I was surprised to get that nut on the rod to break free when i adjusted the e brake under the van. It was pretty crusty...
That questionable brake booster will be replaced with a better one, when i dig into the dash removal that looms in my future. I m actually looking forward to it because i ll get rid of a bunch of mess and get to fix more stuff. Few of the cable levers dont do anything right now and there is a smell coming from the front heater box i m not stoked about. Mouse condo comes to mind.
Heres a wish list for the next few months that i may get to do if time and the dough hold out.
Priority in decending order
Front wheel bearings (both side inner and outer)
Front upper ball joints
New tires. Size?
Drill and adapt and old set of 15in. Mercedes wheels (need to order new lugs and nuts)
Dash removal:
Clean and paint/repair as needed
Install new heater core
New fan blower
New resistor (s)?
Fix cables to levers
Install aftermarket Tach and oil pressure gauge
Wiper arms and motor?
What am i forgetting?
Carpet or something for the back, its loud back there with nothing
Windshield and seal
Rear bumper bracket and bumper, caps, i dont want to get smacked
Radio and speakers for the front doors
Boxes w 6x9s for the back
Roof rack to haul a surf board
just kidding about the board, no way a surfboard goes anywhere near this van, but maybe i ll think about a hoola girl tho
B |
I havent done the front one yet, just the 2 rear ones while I was doing everything else back there.
It was time, the factory backing plates were getting crusty with small holes from rust...  
_________________
'68 Westy- my first VW and vehicle/Bus- long gone.- sold it to a traveling Swiss couple....
'67 Type 3 Fastback, my 2nd car- gone
'69 Semi-Auto Stick Shift Beetle-gone
2017 MINI Coopers, our current DDs
84 Tin Top - Hilga....Auto |
|
| Back to top |
|
 |
kaeferman
Samba Member
Joined: April 04, 2012
Posts: 115
Location: Sylva, NC
|
| Posted: Mon Aug 31, 2020 5:56 pm Post subject: Re: Sitting for 16 years in WNC ~ What will it take? |
|
|
So i dove into the dash removal a while back and It has been bit slow but i m nearing the end here lately.
Because this van was sitting a grassy lot for years, a lot of biology had been going on inside. Specifically the mice had really enjoyed the vent box and ducts up front. Few stuff worked other than some slow wipers and the speedometer. I think i got the odometer working back when the engine was still out. Anyway with the warmer weather the smell from the mouse house under the dash in the vent was getting loud and unbearable so i started into it.
Heres the start:
I ll skip over some steps of easy stuff like taking screws out of those plastic covers around the steering column and the like. The plastic air deflector in front of the shifter doesn t even have screws. You just sort of pull it straight toward you i think.
I m assuming too that you ve been under the cover of the instrument cluster before since youve checked your brake fluid i hope. it comes off easy too just pull it up and forward.
The cluster is held in by 4 phillips screw pointing down into the dash sheet metal.
After the headlight and emergency flasher switches come out ( i sometimes unplug the wires first, other times they ll un click from the cluster frame by squeezing those tabs). you can find the two bottom screws. You have a flat plug from the harness to the circuit board on the right side to unplug and the speedo cable before the cluster will be free. Find
Be really nice to the cluster theyre super fragile and don t be surprised to find the tabs broken already, you can fix them easy with JB weld ( i did one of mine earlier in the pic above) Find a good box for it to keep it safe while its out!
After the cluster is out you start to see the trouble..
The dash is tied to the steering column with these two braces.You can only feel the 10mm bolt head and they re hateful to get out with most normal tools because they sit down in the channel Of the brace.
I was able to weld a shouldered Box end wrench to get those danged things out, because even a 1/4 drive rachet was too tall for in there. I sawed a socket in half and welded it to a box end of a 10mm. A welder is a real neat trick for any shop!
The next big job is getting the other end of those braces free from the column...
But they re smooth antitheft jobs so i used a file to start a groove that i enlarged with a sawzall. But you have to be real careful not to let the tip of the blade dig in to the dash. A variable speed trigger on a newish sawzall might be key here.
Then use a large flathead screw driver with visegrips and tap with a hammer as you do the thing and it should come out. Use the Penetrant fluid of your choice if rust happend to those bolts. You ll want new ones to replace those weird cone things so put those on the parts list.
(Alert Sambanitas might notice that hole in the cab floor and figure out that
I cheated on that those last few photos as I forgot to take those pics when i did R/Ws bolts. The above pic came from our parts van, don t worry.)
Now you can start looking for the actual dash screws along the bottom edge of the windshield. Find the correct sized large phillips and use a hammer if you have even a thought of rust. Those screws can be hard ones to get.
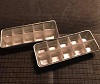
Speaking of screws I should have earlier stated that i predicted that i d have a variety of bolts and screws to manage over some period of time. So i devised a method of organizing them wirh this job that i really thing might be worth sharing. Here is it is:
Just find a box that you like and cut a collection of squares from cardboard boxes that fit in it. Keep a marker in the box and as you start disassembly and yield fastners, simply poke the screws or bolts into cardboard and label them. I used scrap welding wire to make loops to hold nuts, poking the wire through and hooking it to itself ( not in the pic above). Once its all apart, you have all the screws and bolts and all in a container to store and notes about where they all go and you can relax a little easier about trying to remember where each go and how many there were.
B
_________________
83 Westfalia wbx Idaho
84 Tintop Vanamos
formerly
71 Squareback sold
70 Westfalia lost to fire by new owner
71 Super Beetle rolled/scrapped |
|
| Back to top |
|
|
Abscate
Samba Member
Joined: October 05, 2014
Posts: 22648
Location: NYC/Upstate/ROW
|
| Posted: Tue Sep 01, 2020 2:28 am Post subject: Re: Sitting for 16 years in WNC ~ What will it take? |
|
|
Ouch put thy Sawzall down and procure thyself a Dremel.
Sawzall...bone saw
Dremel ...scalpel
The newreinforced metal cutting discs are awesome
_________________
.ssS! |
|
| Back to top |
|
|
sanchius 
Samba Member

Joined: May 03, 2007
Posts: 1451
Location: IN
|
|
| Back to top |
|
|
4Gears4Tires
Samba Member
Joined: October 08, 2018
Posts: 3028
Location: MD
|
| Posted: Tue Sep 01, 2020 6:07 am Post subject: Re: Sitting for 16 years in WNC ~ What will it take? |
|
|
| sanchius wrote: |
| Abscate wrote: |
| Sawzall...bone saw |
I generically refer to mine as the "Tactical Nuclear Weapon of Home Repair." and I'm not ashamed to admit that it occasionally gets pulled out for the odd gardening and forestry project as well. |
That, sir, is an oxy-acetylene torch.
_________________
'87 Syncro
Ferric Oxyhydroxide Superleggera Edition |
|
| Back to top |
|
|
danfromsyr
Samba Member

Joined: March 01, 2004
Posts: 15144
Location: Syracuse, NY
|
| Posted: Tue Sep 01, 2020 6:26 am Post subject: Re: Sitting for 16 years in WNC ~ What will it take? |
|
|
I do have to say, that you (well I) can just grab the cone bolts with the visegrips and they turn right off. might take a couple tries to get them to bite but they've always bit and come loose.
also those hard to reach steering brackets.. you leave them there.
they come undone with the cone head bolts.
now wait till you get to the larger #3 phillips holding the airbox onto the front of the van.. the forward threads are outside and crust over making them a $B&%$ to turn out.. 2 of them you can see behind the grill and clean the rust scale from the threads.. but 2 are inside the air deflector and you can't clean the threads.
but use a #3 long phillips.
and the heater cables and control levers.. those will be a PITA too. |
|
| Back to top |
|
|
dobryan
Samba Member

Joined: March 24, 2006
Posts: 16503
Location: Brookeville, MD
|
| Posted: Tue Sep 01, 2020 6:37 am Post subject: Re: Sitting for 16 years in WNC ~ What will it take? |
|
|
| danfromsyr wrote: |
I do have to say, that you (well I) can just grab the cone bolts with the visegrips and they turn right off. might take a couple tries to get them to bite but they've always bit and come loose.
also those hard to reach steering brackets.. you leave them there.
they come undone with the cone head bolts.
|
Same here.
_________________
Dave O
'87 Westy w/ 2002 Subaru EJ25 and Peloquin TBD
"To travel hopefully is a better thing than to arrive." Robert Louis Stevenson
MD>Canada>AK>WA>OR>CA>AZ>UT>WY>SD
https://www.thesamba.com/vw/forum/viewtopic.php?t=620646
Building a bus for travel in Europe (euroBus)
https://www.thesamba.com/vw/forum/viewtopic.php?t=695371
The Western Syncro build
https://www.thesamba.com/vw/forum/viewtopic.php?t=746794 |
|
| Back to top |
|
|
dabaron
Samba Member
Joined: June 21, 2018
Posts: 2559
Location: Philly, mang
|
| Posted: Tue Sep 01, 2020 8:58 am Post subject: Re: Sitting for 16 years in WNC ~ What will it take? |
|
|
| dobryan wrote: |
| danfromsyr wrote: |
I do have to say, that you (well I) can just grab the cone bolts with the visegrips and they turn right off. might take a couple tries to get them to bite but they've always bit and come loose.
also those hard to reach steering brackets.. you leave them there.
they come undone with the cone head bolts.
|
Same here. |
likewise. in both my Vanagons it took about 30 seconds with the vise grips to remove them. they spin out easily by hand once cracked loose.
_________________
1991 Vanagon GL Camper
i had no idea i wanted to be a mechanic
"burnin oil and cookin coils" -- Destructo
BiWerks Design, LLC |
|
| Back to top |
|
|
danfromsyr
Samba Member
Joined: March 01, 2004
Posts: 15144
Location: Syracuse, NY
|
| Posted: Tue Sep 01, 2020 9:15 am Post subject: Re: Sitting for 16 years in WNC ~ What will it take? |
|
|
ok now that a couple of us yocals put salt in your coffee.
I wanted to say no matter, you're doing a great job of highlighting your work in this rebuild effort.
don't let those with differing experiences dissuade you from continuing on this great learning path that will certainly be helpful for others in years to come.
Kudos.. and keep going.. |
|
| Back to top |
|
|
dabaron
Samba Member
Joined: June 21, 2018
Posts: 2559
Location: Philly, mang
|
| Posted: Tue Sep 01, 2020 10:02 am Post subject: Re: Sitting for 16 years in WNC ~ What will it take? |
|
|
| danfromsyr wrote: |
ok now that a couple of us yocals put salt in your coffee.
I wanted to say no matter, you're doing a great job of highlighting your work in this rebuild effort.
don't let those with differing experiences dissuade you from continuing on this great learning path that will certainly be helpful for others in years to come.
Kudos.. and keep going.. |
i have come to realize some of the things that some struggle with are no struggle and the things that are super simple and easy seem to be the problems for me.
we are all a bit nuts for trying to rescue these things, but man, that first trip once it's ironed out... whoa momma!
_________________
1991 Vanagon GL Camper
i had no idea i wanted to be a mechanic
"burnin oil and cookin coils" -- Destructo
BiWerks Design, LLC |
|
| Back to top |
|
|
kaeferman
Samba Member
Joined: April 04, 2012
Posts: 115
Location: Sylva, NC
|
| Posted: Tue Sep 01, 2020 6:52 pm Post subject: Re: Sitting for 16 years in WNC ~ What will it take? |
|
|
Thanks for all the interest in my project. It has been fun and plenty of learning too!
Abscate I have a dremel actually. Well sort of, it an old knock off named Lil Crafty, and it works great (except when it heats up) and i even have those sweet little cut off discs too. I just wish i knew why i didn t think of using them on those cone bolts. Or the trusty Visegrips either, i didn t know theyd work on them either, danfromsyr and dobryan. Good tips all around.
I call my sawzall, the carpenters eraser sometimes. It can be a precise tool if used with some discretion...or skill. I agree the acetylene torch is going nuclear big time. I m still kinda untrained on that thing. Our shop has one on loan/storage and i have only used it once.
So to clarify regarding those brackets, i had to get those out to swap in a new booster (different really, preowned actually...it looked better than mine and i was getting some questionable brake pedal stuff on the other one). Brakes have been a thing one this van, see above.
Anyway the rest of the particulars on the dash went well.
I did have to use a lot of PB blaster and hammering to get those large phillips under the window rubber to cooperate. Some of those actually hold the wiper arm assembly to the body, I learned.
The vent levers are definitely a problem, i think i remember reaching something inside the cluster hole pushing those 2 plastic pin/tab parts on the trim cover out and ended up breaking one of the plastic pins. There is a bulb to attend to there also. But the real challenge is getting those plastic lever knobs to let go.
I think i just pulled and pryed them off the metal levers:
You can see already one reason why my vent levers didnt work. The wire cable actuators are bent up. 3 of the four on this van were bent and the fourth was missing entirely, the one that goes to the rear seat floor heater valve.
Before the dash will move there are two screws sideways into the dash that hold the lever rig in place. You want to take those out first before trying to pull the dash free.
Similar to the vent lever trim, you have to pry the switches for the fans free from the dash, I think i pushed the little plate they sit in out from the inside. Then pry the plug out free from the switch. This is delicate work as the plastic can be brittle in here.
This is also a good time to remind folks that disconnecting the negative strap from the battery is a must as soon as you start into electrics. You don want to fry good parts being careless in the dash with stuff hot. I think dropping the fuse panel was helpful too on this job, so whenever you move that much electrical stuff, it would be crazy to do that with any of it hot, which it is regardless of key switch position on some circuits.
Here is a shot of once I finally got the dash free and i carefully flipped it over to see what was still attached.. the cigarette plug and something else. A few wires to disconnect and label. But you can get at that stuff now.
Once I could take the dash somewhere out of my way heres what you get:
This is a good reference shot for the relays on top of the 84 fuse panel:
Another shot of vent box:
I didn t have too much trouble out of my 6 vent box screws as danfromsyr mentioned, but i did have an impact type ratchet that i used to get those out with. That tapping always helps, but one of the tabs was broken tho, maybe it was me or maybe it was Hans on the line back in Hanover in 84? I don t know. jB weld will fix it.
After I got all those great clips off the vent box top half and the two little screws by the squirrel fan here is my reward:
The mouse condo
I guess this explains the fan not working and the bent lever wires...
B
_________________
83 Westfalia wbx Idaho
84 Tintop Vanamos
formerly
71 Squareback sold
70 Westfalia lost to fire by new owner
71 Super Beetle rolled/scrapped |
|
| Back to top |
|
|
dobryan
Samba Member
Joined: March 24, 2006
Posts: 16503
Location: Brookeville, MD
|
|
| Back to top |
|
|
danfromsyr
Samba Member
Joined: March 01, 2004
Posts: 15144
Location: Syracuse, NY
|
| Posted: Tue Sep 01, 2020 7:43 pm Post subject: Re: Sitting for 16 years in WNC ~ What will it take? |
|
|
OK so here's a tip while rebuilding and disinfecting your heater box
buy and place some 1/4" hardware cloth between the heater box and the front opening when you reseat it.. nothing short of jail bars for the mice..
I'm trying to remember that I may have put the cloth over the duct into the knee channel too.
|
|
| Back to top |
|
|
Abscate
Samba Member
Joined: October 05, 2014
Posts: 22648
Location: NYC/Upstate/ROW
|
| Posted: Wed Sep 02, 2020 2:42 am Post subject: Re: Sitting for 16 years in WNC ~ What will it take? |
|
|
That negative battery terminal reminder just desalted your coffee. You can do thousands of dollars/ time damage in a millisecond working with life stuff
As the 28th member of the 496th chapter of the OCDS I salute your bolt system. I started doing this trick about three years ago,
Exemplia gratia
Remove brake booster. Four m8, 12 mm hex head by 40 mm length.
Baggy, marked with all the above.
I come to job and find a m8 x40 hex screw. Now I know where Im missing one by just looking at my list
Added benefit, will people publish this stuff you can order good hardware from McMaster Carr before you start removing corroded fasteners
_________________
.ssS! |
|
| Back to top |
|
|
metropoj
Samba Member
Joined: April 23, 2004
Posts: 1343
|
| Posted: Wed Sep 02, 2020 4:50 am Post subject: Re: Sitting for 16 years in WNC ~ What will it take? |
|
|
| danfromsyr wrote: |
OK so here's a tip while rebuilding and disinfecting your heater box
buy and place some 1/4" hardware cloth between the heater box and the front opening when you reseat it.. nothing short of jail bars for the mice..
I'm trying to remember that I may have put the cloth over the duct into the knee channel too.
|
Damn great idea. Damn, I wish I saw this about 3 years ago when I did mine  .. ..
_________________
John.
86 TiiCo powered Westy. |
|
| Back to top |
|
|
4Gears4Tires
Samba Member
Joined: October 08, 2018
Posts: 3028
Location: MD
|
| Posted: Wed Sep 02, 2020 5:55 am Post subject: Re: Sitting for 16 years in WNC ~ What will it take? |
|
|
https://intrepidoverland.com/shop/cabin-air-control/
If you add the cabin air control, it comes with an external pest screen.
_________________
'87 Syncro
Ferric Oxyhydroxide Superleggera Edition |
|
| Back to top |
|
|
kaeferman
Samba Member
Joined: April 04, 2012
Posts: 115
Location: Sylva, NC
|
| Posted: Wed Sep 02, 2020 3:06 pm Post subject: Re: Sitting for 16 years in WNC ~ What will it take? |
|
|
Dang! Thats a good idea on the 1/4 inch hardware clothe sandwiched in the seals to the box itself. Thanks danfromsyr! I might have to add more seal maybe. I used some smallish stuff that seemed minimal. I knew I d have to do something to that front vent for the mice. I just installed that box for a second time. I guess I figured Id just fashion something for the outside, because i know they get in there or around the steering column boot on the cab floor. I guess it could come back out one more time....
This bus is not a westy, but the battery box is vented in two places on those models and i stuffed those with the stainless Choreboy brand scrubbies things on my camper to keep out the critters. I was surprised to notice those vents aren t in the tintops.
B
_________________
83 Westfalia wbx Idaho
84 Tintop Vanamos
formerly
71 Squareback sold
70 Westfalia lost to fire by new owner
71 Super Beetle rolled/scrapped |
|
| Back to top |
|
|
kaeferman
Samba Member
Joined: April 04, 2012
Posts: 115
Location: Sylva, NC
|
| Posted: Sun Sep 06, 2020 7:18 am Post subject: Re: Sitting for 16 years in WNC ~ What will it take? |
|
|
Check it!
The box came back out. I did get my new cables 3/4 done last session. Tomorrow dash goes in and i can start on my windshield. The bus must be done for the Maggie Valley show coming up in 2 weeks. I have to abandon the wheel and tire upgrade due to logistics problems drilling out my hubs.
B
_________________
83 Westfalia wbx Idaho
84 Tintop Vanamos
formerly
71 Squareback sold
70 Westfalia lost to fire by new owner
71 Super Beetle rolled/scrapped |
|
| Back to top |
|
|
kaeferman
Samba Member
Joined: April 04, 2012
Posts: 115
Location: Sylva, NC
|
| Posted: Mon Sep 07, 2020 7:50 am Post subject: Re: Sitting for 16 years in WNC ~ What will it tak |
|
|
The windshield was spider webbed from strikes during its former life or from its life sitting. At any rate I knew there was potential for rust under the seal so I believe its important for the preservation of the thing for me to pull the rubber and glass myself and deal with it properly first, then let Safelite or whoever do the install as I know they won t fix rust really more than just a coat of something if Im lucky.
I did this on my camper and got lucky. It was gorgeous virgin paint under there. On R/W i was not so lucky:
I have been practicing with the MiG welder on some pieces on body metal I cut from our old parts van. Up until now I had done just a few minor tack welds with our machine and goofed around with it some but i did consult with some pro experienced welders who gave me some key tips. Now it was time for me to learn sheetmetal welding for real though and I was sort of terrified to melt my van into poop in such a conspicuous spot. I thought I d start out welding something forgiving like a floorboard first. But this is what needs doing now, so here goes my first attempt at welding anything of any consequence on a vw. be nice.
I know that the globs are too tall to be good welding really, but i had played with the welder settings practicing to find that any more volts and blow thru was too risky, but with the colors of the metal and burning paint, I felt like I had found a decent compromise of heat and low risk of blow thru for my experience level. I I got plenty of grinder practice tho.
After several cycles of putting tall globs of metals in the holes and grinding them back off, finding questionable pin holes and rewelding globs on it. i eventually felt good enough about the shape and smoothness to prime and paint.
This is after several cycles of a primer filler and sanding with 320 i guess.
Thats Marsala red from Paint Scratch.com off GoWestys site. Its a pretty good match really and theyre formula is easy to work with. I wet blended it using lacquer thinner sparingly on a paper towel. I may try to buff it still some, i don t know. I m leaving the clear coat off since I dig the patina thing and the rest of the bus is still maturing.
We plan to try to put an old windshield back in from our parts van today i hope if I can finish the dash install. The windshield only has a tiny chip and has some minor fogging on a bottom corner, but its cheap and on hand, and right now my glass people say they can t get one without a blue shade across the top, something I m not super keen on. It may just smash on us and i ll be getting a blue stripe anyway...oh well. Wish me luck.
B
_________________
83 Westfalia wbx Idaho
84 Tintop Vanamos
formerly
71 Squareback sold
70 Westfalia lost to fire by new owner
71 Super Beetle rolled/scrapped |
|
| Back to top |
|
|
kaeferman
Samba Member
Joined: April 04, 2012
Posts: 115
Location: Sylva, NC
|
| Posted: Thu Sep 10, 2020 3:22 pm Post subject: Re: Sitting for 16 years in WNC ~ What will it take? |
|
|
The dash is in and the windshield install went well. I still have the wiper arms to spray bomb black and install, then the glove box and cluster before the electrical test and start up.
Thanks Todd for teaching me how to install a gasket windshield today. You re the man! We recycled an original Solex glass out of our old parts camper that only had a minor chip and some fog starting at the bottom. We were pretty stoked it didn t crack on us going in. We used a nylon cord and silicone spray.
I m posting some of this stuff out of order so forgive me but heres some shots of the vent box stuff I did. It took a bit of toothbrush scrubbing once it was out of the van i just hosed it down and used dish soap on it. Here it is all cleaned up;
All the flapper doors seals were dust so I bought gray foam for mounting a window A/C unit to cut new seals for the flaps. Heres how that went;
_________________
83 Westfalia wbx Idaho
84 Tintop Vanamos
formerly
71 Squareback sold
70 Westfalia lost to fire by new owner
71 Super Beetle rolled/scrapped |
|
| Back to top |
|
|
|


