| Author |
Message |
jakerot
Samba Member
Joined: August 09, 2012
Posts: 205
Location: SoCal

|
 Posted: Wed Nov 04, 2020 10:43 am Post subject: Re: Yet another buggy build, here goes........... Posted: Wed Nov 04, 2020 10:43 am Post subject: Re: Yet another buggy build, here goes........... |
 |
|
Thanks Panel! i think i likeem.
so now i have to figure out how to get them to work as turn/brake/running with only a single dual filament socket.
lots of great info here from Dale (thanks Dale!!)
https://www.thesamba.com/vw/forum/viewtopic.php?t=653352
probably going the solid state route with the tri-star unit. not the cheapest but looks like it will be easy to wire up.
other options are the 4 relay setup (cheap but potentially unreliable and involved) or buying new dual socket tail light assemblies. ($$$).
got the headlights working with hi/low column switch/relay. all good here
got tail/turn setup working with all led lights. had to add 4 diodes to the socket leads. i am sure everyone knows this but sometimes i discover things on my own which are common knowledge to others. in this case i couldnt figure out why first my flasher wouldnt flash. it was because i was using led light bulbs. switched to a led flasher and now all good.
next couldnt figure out why rear lights were working all funny. push brake petal and all 4 lights (side markers and rears) would light up. chased a gremlin for quite some time. eventually figured out voltage was leaking from one filament of the led to the other side. diodes took care of this.
now this point is probably moot since i had turn as one filament and brake as the other filament and this was not correct setup. realized, hey, where is the running light? Ut ohhhhh. back to the wiring drawing board. will have to see how the setup performs with the tri-star unit. oh well live n learn.
been messing with windshield wiper assembly. i have a 6 volt and 12 volt unit. the 12v unit i believe is defective. the rotor and stator are not coaxial. the gap is not symmetric. no way to adjust the rotor so its centered. cant figure out how it got so off center with no visible sign of damage. only conclusion is a factory defect. the 6 v one works ok so i got a 12v - 6v converter on order to slow it down a bit. however i cant figure out the wiper arms. seems like they are rotating the wrong way vs the arm angles. or maybe not? i probably have something setup wrong here or am looking at it the wrong way, but cant figure out what.
once i do i can start wiring up the dash. once dash is done and confirm everything works ok then its time to clean up the wiring and mount the fuse panel, relays, etc. |
|
| Back to top |
|
 |
jakerot
Samba Member
Joined: August 09, 2012
Posts: 205
Location: SoCal
|
| Posted: Wed Nov 04, 2020 11:13 am Post subject: Re: Yet another buggy build, here goes........... |
|
|
got seatbelts. lap belt only for now. will probably convert to 3 point eventually.
side markers needed some massaging as well. no rubber gasket. probably wont use one or try to use a small one. but these aftermarket ones are garbage. metal housing had casting marks that needed to be filed down. yellow lens bottom didnt line up with bottom of chrome metal part. used belt sander and now sits even. was thinking i need to convert these to dual filament sockets so they can be used as turn & running light, or maybe dont need to with the tri star unit? will see.
chased a horn gremlin for a while as well. couldnt figure out why when i pushed down on the steering wheel the horn would sound. ended up being a combination of things. i didnt have the inside sleeve installed on the steering shaft that goes between the shaft and the steering bearing. this was allowing the steering wheel horn donut to contact the steering column housing and ground itself. i put the sleeve in and no more play in the shaft. also not having the c clip installed on the steering shaft was allowing the steering hub to go too far down the shaft, making the gap between the donut and housing too small. and i brought the shaft out a little (thereby increasing this gap) by adjusting at the coupler and now no more steering wheel movement and a working horn. for now anyways. lets see what happens when i drive it again and hit a bump. hahaha
|
|
| Back to top |
|
|
jakerot
Samba Member
Joined: August 09, 2012
Posts: 205
Location: SoCal
|
| Posted: Wed Nov 04, 2020 11:28 am Post subject: Re: Yet another buggy build, here goes........... |
|
|
i believe (hope) i am done with the gas tank. used the POR15 system.
here is the blower setup i used to dry it out after rinsing out the metal prep. on this day it was 90F and like 15% RH. terrible day for everything, except making stuff dry.
allowed this blower to run for like 6 hours in the sun. hit all the seams with a propane torch to work out any moisture that might have worked its way into them. after emptying out the sealer, made sure to keep moving the tank around to prevent any puddles from forming. hopefully did the trick. havent filled it with gas yet but did check it for leaks with water prior to sealing and there were only a few small seeps where i could see moisture wicking out but no drips forming. assuming the sealer took care of these.
cleaned up the exterior and hit it with gray primer then a clear bed liner spray. i wanted the tank (and all the undercarriage) to be gray and could only find black, tan, or clear bed liner in a spray can. think it came out ok. but it is done, hopefully for good.
i will use a sending unit. i made a cover for the sending unit hole to use when checking for leaks and when installing the sealer.
(yes i know the filler is off center, but it is centered in the hood which is all that matters. the body / hood warped over the years so now the tank doesnt sit perfectly in the middle of the hood).
|
|
| Back to top |
|
|
jakerot
Samba Member
Joined: August 09, 2012
Posts: 205
Location: SoCal
|
| Posted: Wed Nov 04, 2020 9:55 pm Post subject: Re: Yet another buggy build, here goes........... |
|
|
ok figured out more wiper stuff. not that i really need a wiper but at least will keep the cops off my case.
so the dilemma is the wiper arms i got all park on the driver side. the 6v working wiper motor parks the arms on the passenger side. took the 12v rotor and put it in the 6v wiper assembly. works normal speed and wiper arms park fine. but they arent the right arms.
the 12 v motor has rotor stator gap isssue. rotor rubs on stator. while giving the motor some juice in what is essentially a lock rotor condition and probing around with my volt meter trying to figure out why it wouldnt spin, i might have fried some windings. probably should have removed the cap first and checked for free movement but oh well. might try to use sanding stone on drill and grind out some of the stator where it is tight to see if i can get it to spin freely. if the 12v motor is indeed shot then will use 6v assembly with 12v rotor and have to buy early beetle arms that park on the passenger side then. might have more wiper arms stashed in garage somewhere but not counting on it.
still have 12v to 6v adaptor on the way but not sure if it will allow the wipers to park properly.
perhaps there is a way to re-index the motor so the arms will park on the driver side?
probably spending more time on this than i should but...........
|
|
| Back to top |
|
|
Al Capulco
Samba Member
Joined: October 31, 2005
Posts: 532
Location: Northridge, CA.
|
| Posted: Wed Nov 04, 2020 10:45 pm Post subject: Re: Yet another buggy build, here goes........... |
|
|
| Your 12v armature should be OK, they can take a beating. The rubbing you see is a design issue. The metal housing is too malleable and over time the shaft for the armature bends causing the rubbing. You can grind down the fixed magnet and it should work for you but its not the right way to do it. Changing the housing is the best thing to do or you can carefully align the armature shaft housing. |
|
| Back to top |
|
|
jakerot
Samba Member
Joined: August 09, 2012
Posts: 205
Location: SoCal
|
| Posted: Thu Nov 05, 2020 9:56 am Post subject: Re: Yet another buggy build, here goes........... |
|
|
Thanks Al, great info
the tight gap is always in the same place. i also thought the shaft housing might have moved but the armature installed in the gearbox spins real smooth when the stator isnt there. dont feel any binding. would the deformation you mention cause the gears in the gearbox to no longer align properly, thereby causing some binding?
maybe i can put some washers under the stator on the side with the big gap to bring it more into alignment. if not ill try grinding it out a little.
definitely learning more about vw wipers than i really wanted to know. hahaha |
|
| Back to top |
|
|
jakerot
Samba Member
Joined: August 09, 2012
Posts: 205
Location: SoCal
|
| Posted: Thu Nov 05, 2020 10:12 pm Post subject: Re: Yet another buggy build, here goes........... |
|
|
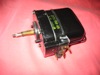
got my 4 prong dimmer relay switched to a 5 prong, allowing for a high beam flash without having the lights on. works.
used flap wheel inside the stator of the 12 v wiper motor and now spins free.
re-assembled the motor, wired up to switch while motor was on workbench and it works. 2 speeds.
ok great, now to install motor back into the wiper arm housing and should be good to go.
not so fast. the vw gods werent done with me yet...........
spent about 5 minutes tightening the collar nut that holds the wiper motor arm to the housing. finally realized the mutha fker wasnt tightening. cmon.
disassembled and realized the collar nut and threaded stem spin together. how the f is this supposed to be tightened. did i strip it somehow? is it reversed threaded?
i loosened it ok as far as i could tell. i mean, it was a little tight but i figured that was from dirt and stuff on the threads.
now it just spins, not tighten
stumped
tried removing the arm from the spline shaft but it isnt budging. put it in vice and tried hitting with a punch and all i accomplished was putting vice teeth marks on it.
i got the assembly sitting in purple degreaser now. will look at it again tomorrow. maybe try using some heat to get the arm off so i can figure out what is going on with the nut and threaded stem.
|
|
| Back to top |
|
|
jakerot
Samba Member
Joined: August 09, 2012
Posts: 205
Location: SoCal
|
| Posted: Tue Nov 10, 2020 8:12 pm Post subject: Re: Yet another buggy build, here goes........... |
|
|
ok got the wiper back together. had to wedge a flathead screwdriver in there to hold the shaft in place while tightening the collar nut.
wiper works, but wouldnt park. opened up where the points are and cleaned them up, now it parks, but not quite on the bottom.
but it parks on the passenger side as well as far as i can tell.
sooooooo......i said f this and i got my torch out and put the wiper arms in a vice and bent them in the opposite direction for passenger side parking. done. they are going to get painted anyway.
the tri star brake / turning signal line converter showed up and i got that roughed in today and it works great. does the job. now finalizing the running lights. working on converting the side markers to dual filament sockets so they can act as turn and running light. have a few ideas as to how im going to hack this. dont think the tri star unit can do this.
got dashboard mock-up started as well. trying to decide on what gauges to use. got a bunch of vdo gages but want to use vw stock speedometer. might just add oil pressure and temp gauges. i got a dual usb charging socket (in lieu of a cigarette lighter socket) which has a built in volt meter. not sure how accurate it is. will post pix soon, but making more progress...... |
|
| Back to top |
|
|
jakerot
Samba Member
Joined: August 09, 2012
Posts: 205
Location: SoCal
|
| Posted: Thu Nov 12, 2020 10:24 pm Post subject: Re: Yet another buggy build, here goes........... |
|
|
ok got the side markers converted to dual filament sockets. picked up 2 from my FLAPS. Popped out the single sockets, widened the holes with a stepper bit, the used the back side of a reamer as a punch to bend out the tabs.
|
|
| Back to top |
|
|
oprn
Samba Member

Joined: November 13, 2016
Posts: 12714
Location: Western Canada
|
| Posted: Fri Nov 13, 2020 5:01 am Post subject: Re: Yet another buggy build, here goes........... |
|
|
How cool is that?!! I like it!
By the way, I got sick of the way my wipers were parking and how they stroked so I too just put them in a vice and reconfigured them. I still need to shorten the one on the driver's side though as it wants to overlap the window frame on the extreme left of the stroke. |
|
| Back to top |
|
|
jakerot
Samba Member
Joined: August 09, 2012
Posts: 205
Location: SoCal
|
| Posted: Sun Nov 15, 2020 9:47 pm Post subject: Re: Yet another buggy build, here goes........... |
|
|
Thanks OP
well the side marker lights work now as intended.
got my dashboard mock up.
running lights work.
instrument lights work
got turn signal to work.
hi beam indicator light
had to add more diodes, this time to headlights. one on each side. voltage bleed was causing high beam indicator to be on all the time.
added diodes to make the turn signal indicator work. relay too. all from the watsons wiring thread i posted previously.
made some diodes harnesses. soldered them to female spade crimp connectors then covered with heat shrink. replaced the bulky little fuse ones i was using.
thanks fclmscott for the watsons wiring diagrams!!!
rear lights work as they should. brake, turn, running light.
got usb charging socket installed. it has a built in voltmeter. not sure how accurate it is but saves space in the dash.
going with oil pressure and oil temp gages
turn signals work as they should, with and without the running lights.
now for the fuel sender and gage in the speedo. quickly made a grounded holder for the sending unit. when powering on, the fuel gage needle moves to read half full by itself. lifting up the float moves the needle to full. lowering the float to bottoming out, back to half full. turn key off, needle goes down to empty. need to figure out whats going on here. sure its something simple im doing or not doing.
got few small odds and ends to do for the wiring, then its time to clean it all all up. now it looks like a mess.
after i figure out the fuel gage, need to get alternator light and oil pressure warning light / sender setup, then the brake circuit warning light, and thats it i think.
|
|
| Back to top |
|
|
jakerot
Samba Member
Joined: August 09, 2012
Posts: 205
Location: SoCal
|
| Posted: Fri Dec 11, 2020 6:10 pm Post subject: Re: Yet another buggy build, here goes........... |
|
|
ok ditched the lap belts in front. worked in 3pt belts now. will see if the shoulder mount stays where it is. but i like it for now. true test will be when i drive.
made some stubby mounts
made some angles for the belt and retractor to mount to.
|
|
| Back to top |
|
|
jakerot
Samba Member
Joined: August 09, 2012
Posts: 205
Location: SoCal
|
| Posted: Fri Dec 11, 2020 6:19 pm Post subject: Re: Yet another buggy build, here goes........... |
|
|
got speedo mocked up. all functions work. got matching tach. have to figure out how to fit it in.
busted the needle taking it off. replaced with shorter needle from another gauge. we will see how long it lasts.
the fuel gauge on the dash mock up is only a placeholder. going to use the one in the speedo.
figured out my gas gauge issue. didnt have vibrator connected.
eventually fount the vibrator in the box of parts i got. it had this thing on one of the connectors, inline with the power in. no continuity through it that i can tell.
removed it, now gauge works normal.
|
|
| Back to top |
|
|
jakerot
Samba Member
Joined: August 09, 2012
Posts: 205
Location: SoCal
|
| Posted: Mon Apr 19, 2021 9:05 pm Post subject: Re: Yet another buggy build, here goes........... |
|
|
ok well been busy working away on various projects, buggy included. been cleaning up the wiring. getting ready to cut them and add connectors.
been messing with the distributor, carb, and timing. buggy started driving like crap under load. put a HF hand vacuum pump to it and the advance isnt holding vacuum, is leaking down. so i swapped distributors with the yellow one i bought with the used bocar carb a while back. also found my float level was too high. swapped in a thicker gasket and the engine doesnt bog down under load like it used to. still think there are some adjustments to be made but going to leave it for now.
here are some pix of my spider web wiring starting to transform into organized wiring
|
|
| Back to top |
|
|
jakerot
Samba Member
Joined: August 09, 2012
Posts: 205
Location: SoCal
|
| Posted: Mon Apr 19, 2021 9:12 pm Post subject: Re: Yet another buggy build, here goes........... |
|
|
welded some #10 bolts as grounding studs. soaked in vinegar to remove zinc. probably going to change this one however.
more wiring cleanup
|
|
| Back to top |
|
|
jakerot
Samba Member
Joined: August 09, 2012
Posts: 205
Location: SoCal
|
| Posted: Mon Apr 19, 2021 9:15 pm Post subject: Re: Yet another buggy build, here goes........... |
|
|
and got these installed finally...........
|
|
| Back to top |
|
|
jakerot
Samba Member
Joined: August 09, 2012
Posts: 205
Location: SoCal
|
| Posted: Mon Apr 19, 2021 9:34 pm Post subject: Re: Yet another buggy build, here goes........... |
|
|
originally had my oil pressure sender and oil temp sender set up like this. didnt like it. took too long for temp sender to pick up reading in this location. bench tested the temp sender and it worked ok.
decided to relocate to the relief plug here. temp starts to rise on the gage after running for a bit so its better than before.
unfortunately threads are different sizes so had to buy new temp sender for relief plug location. now the temp sender in the T with the pressure sender is acting as a plug. this will eventually change when i switch to dual carbs. for now this is the only configuration where the oil pressure sender fits. i dont think i will be able to get another 3/4 turn on the T. dont want to crack the case here. the T is snug and isnt leaking oil so im going to leave it for now. i can probably get rid of the T altogether.
|
|
| Back to top |
|
|
jakerot
Samba Member
Joined: August 09, 2012
Posts: 205
Location: SoCal
|
| Posted: Mon Apr 19, 2021 9:55 pm Post subject: Re: Yet another buggy build, here goes........... |
|
|
got a piece of pvc conduit formed along the passenger side as a fore - aft cable conduit. will probab planning on adding side bars here eventually perhaps. i still got a pair of side pods to work with. they are not for this body style however. going to hackem up, glass em up and make em fit. have to figure how these side pods and side bars are going to interact. not now however.
once the wiring is almost done, will be cutting some of the wires and adding connectors. then the dash portion will be transferred from the dash mock up board to the actual fg hood/dash. this will help with the hood / dash installation
then the gas tank, hood, and windshield will get installed.
then im gonna drive it some more and start making a punch list.
then time to take back apart again and get ready for paint perhaps.. 
i still have to finish the rear bumper. need to determine how far back to make it project. dont want it too far, or too close. will have to cross this bridge soon, but not yet.
still need to make the side bars. i think i am going to do this later while i have the body off and upside down.
|
|
| Back to top |
|
|
jakerot
Samba Member
Joined: August 09, 2012
Posts: 205
Location: SoCal
|
| Posted: Mon Apr 19, 2021 10:07 pm Post subject: Re: Yet another buggy build, here goes........... |
|
|
now my oil pressure indicator light isnt working. it did work at one time.
determined the problem is at the sender. can jump sender terminal for the oil pressure indicator to ground and light comes on. i am thinking the sender is stuck open, not allowing ground connection. the oil pressure part of the sender is working fine i think. pressure rises and falls as rpm change. but with key on engine off the oil pressure indicator doesnt light up. so if it was a ground issue from the sender - T - case threaded connections, then im guessing the pressure part of the sender wouldnt work either. i didnt add anything to the threads. again, it worked at one time. once i take this apart i will deal with it. i know i know, with a pressure guage the indicator light isnt needed. i know i know........  |
|
| Back to top |
|
|
oprn
Samba Member
Joined: November 13, 2016
Posts: 12714
Location: Western Canada
|
| Posted: Tue Apr 20, 2021 3:13 am Post subject: Re: Yet another buggy build, here goes........... |
|
|
Wiring is my least favorite chore. Do you have a spare oil pressure sender to try?
_________________
We had the stone age, the bronze age, the industrial age and now we are in the age of mass deception and mind control for corporate profit. (The mass media age) |
|
| Back to top |
|
|
|


