| Author |
Message |
bigmau
Samba Member
Joined: May 19, 2004
Posts: 53
Location: La Mesa

|
 Posted: Mon Jul 19, 2021 12:21 pm Post subject: 1960 Dove Blue Rust Repair Posted: Mon Jul 19, 2021 12:21 pm Post subject: 1960 Dove Blue Rust Repair |
 |
|
I wanted to start a thread on my bus for myself and also if anyone is considering similar repairs. I consistently check thesamba to research something before I dive in (burlyhammer for president!). I think it is super helpful to get an idea of what you are tackling before you get into it. I consulted Barry, who's local, and he suggested a thread. I have never welded before, but I do have access to good tools, and this is my first car taking it down and building it up to this level. I've had the bus since '05 and it was rusty when I got it. I've been driving it the whole time but I put some low profile tires in the front and that's when I started to feel the bus flex at the bulkhead/b pillar. October 2020 I took it off the road and decided that it is finally time to fix it up. I'm not a purist and my end goal is to add structural integrity and to learn how to fabricate and weld on this bus.
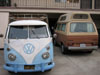
Mine is the bus on the left. Paint stripping to OG inspired by Derrick of Vallejo Steam Laundry fame. There's 9 layers of paint, so it's going to be a while. |
|
| Back to top |
|
 |
Okie Adam
Samba Member

Joined: November 07, 2003
Posts: 1347
Location: OOOOOOOOOOOOOOOOOklahoma
|
| Posted: Mon Jul 19, 2021 12:25 pm Post subject: Re: 1960 Dove Blue Rust Repair |
|
|
I've known a couple guys that have gone the not stock, add structural integrity route and I like it! Looking forward to see your bus's transformation!
_________________
Oil Capital Air Cooled
55 Wolfsburg Kombi
60 Walkthrough Kombi
62 Single Cab
66 21window
67 so42
76 Westy
64 Karmann Ghia |
|
| Back to top |
|
|
bigmau
Samba Member
Joined: May 19, 2004
Posts: 53
Location: La Mesa
|
| Posted: Mon Jul 19, 2021 1:38 pm Post subject: Re: 1960 Dove Blue Rust Repair |
|
|
Frame rust was pretty bad. I'm sure there is worse out there, but like I said, I could feel the bus flexing. The roof raingutter line was nice and straight though, probably held together by the HWE rack. 80's era repairs were some nice steel pipe and diamond plate welded into the crossmember. And typically the rust holes were filled with foam.
|
|
| Back to top |
|
|
Braukuche
Samba Member
Joined: September 03, 2004
Posts: 10997
|
| Posted: Mon Jul 19, 2021 2:02 pm Post subject: Re: 1960 Dove Blue Rust Repair |
|
|
I agree, do what needs to be done to make it stable. It would cost you a fortune to do correct repairs on it.
_________________
Go Reds! Smash state!
Retirement is here!
1956 Ghia
1959 SO-23 Westfalia
1960 double cab
1960 Baja Bug
1963 stretched double cab
1962 Golde sunroof Ghia
1963 356 B coupe
1963 Notchback
1967 21 window less rusty now |
|
| Back to top |
|
|
WildIdea
Samba Member

Joined: September 17, 2016
Posts: 928
Location: Black Hills, South Dakota
|
| Posted: Mon Jul 19, 2021 5:43 pm Post subject: Re: 1960 Dove Blue Rust Repair |
|
|
Ill be following along! Im working on a 60 dove blue camper bus myself, although not a lot of rust repair.
I fondly remember doing my first rust repair panel replacements on my first split bus. It was exhilarating and scary all at once! When the rusty cargo door rocker hit the ground I was like what have I done! I was in it for sure. I found it really satisfying watching it build back up. Your gonna have a great time going through whats in store! Cant wait to see what you do with it.
_________________
1977 Sage Green Westy
https://www.thesamba.com/vw/forum/viewtopic.php?t=691987
1965 SWR Walk-Through Standard
1960 211 Panel American Camper Conversion |
|
| Back to top |
|
|
mr white
Samba Member
Joined: October 02, 2005
Posts: 1193
Location: beautiful Oregon & Mohave County, AZ
|
| Posted: Mon Jul 19, 2021 8:02 pm Post subject: Re: 1960 Dove Blue Rust Repair |
|
|
| I plan on shooting my panels dove blue first, then welding them in. Its little patina trick on my 10/58 truck. I look forward to watching your progress. |
|
| Back to top |
|
|
bigmau
Samba Member
Joined: May 19, 2004
Posts: 53
Location: La Mesa
|
| Posted: Tue Jul 20, 2021 12:29 pm Post subject: Re: 1960 Dove Blue Rust Repair |
|
|
Right on mr. white. I like a rough, fabricated-on, look. I may go dove blue touch ups eventually, but I'm going to do the metalwork first and then decide. Probably just clearcoat or OG.
Since I'm doing metalwork, it's a good time to change back to bullets from fried eggs and little tail lights from the canned hams. Somebody at one point got their hands on a donor 67 and "upgraded" it.
More B pillar crusty-ness, pre demolition.
C-pillar crust and previous cargo rocker repairs:
Front floor and valence crust. Patches are surfboard fiberglass:
The 14" lo pros that started this mess:
Pulling hippy foam out of all the nooks and crannys:
Wire wheel grinding to expose the spot welds. Cleaned up the edges and crossmember locations:
Making the frame profile templates for the patch panels.
Fast forward and it's moved into the operating room. It's across town but it's nice to have a dedicated space for this kind of work. Got it all plumb on jack stands, no frame jig, no rotisserie. So I'm going to weld in some support bars between the frame rails before I cut everything out. Funky green arrived. Gerson seems super legit. Ended up ordering twice from him, once before floor demo and once after. Also got some autocraft UK odds and ends from CIP1. Ended up ordering just over 2 grand in metal.
|
|
| Back to top |
|
|
volkswagen60
Samba Member

Joined: August 10, 2005
Posts: 326
|
| Posted: Tue Jul 20, 2021 3:13 pm Post subject: Re: 1960 Dove Blue Rust Repair |
|
|
Great thread so far! I'll be following 
_________________
http://www.vw-trader.com |
|
| Back to top |
|
|
bigmau
Samba Member
Joined: May 19, 2004
Posts: 53
Location: La Mesa
|
| Posted: Wed Jul 21, 2021 1:43 pm Post subject: Re: 1960 Dove Blue Rust Repair |
|
|
Right on vw 60. So I do some samba research and start demo. I kind of ground a sharp section into an air chisel tip. I would have that thing munch between the crossmembers and then use a pry tip to roll up floor sections. I drilled a lot of spot welds, but then I got lazy and started popping them up with the pry tip.
I get to the back lip and it is kind of shitty. And I know I'm not going to make that factory style of pinch joint. I am also deleting the heater tubes. One day I will run a little 12V blower.
I exposed the B pillar section under the floor. Not much left there. Need more funky green. Giant bondo chunks drop out of the rocker.
C pillar is pretty bad too. Cargo rocker is this strange sheet metal chunk from a previous repair job. There are some welded sections which are hard and tough compared to demo'ing the regular metal.
|
|
| Back to top |
|
|
bigmau
Samba Member
Joined: May 19, 2004
Posts: 53
Location: La Mesa
|
| Posted: Thu Jul 22, 2021 1:47 pm Post subject: Re: 1960 Dove Blue Rust Repair |
|
|
I keep demo'ing the bulkhead. I got a nice fat klassicfab section and I'm going to use it. I drilled out the spot welds to the pedestal and make angle grinder cuts. Getting after it pretty good.
Got new outriggers, so those have got to go.
No frame jig, so I straightened the crushed part of the frame I need to keep with a crescent wrench and pipe for leverage. It moved around pretty easy. Before I cut out the front crossmember, I lay down my first welds and they are pretty nasty. But they hold. Overhead welding is hard and I have trouble getting penetration into the frame.
|
|
| Back to top |
|
|
bigmau
Samba Member
Joined: May 19, 2004
Posts: 53
Location: La Mesa
|
| Posted: Fri Jul 23, 2021 11:15 am Post subject: Re: 1960 Dove Blue Rust Repair |
|
|
Before I cut out the cargo rocker, I wanted to brace the cargo door opening. I attempted to weld a brace between the pillars, but it kind of failed in every way. I couldn't close the doors with out clearance on the brace, and I was using my harbor freight welder (110V, low setting, .035" flux core, no gas). There was a super fine line between not getting penetration and blowing holes through the thin rusty metal. I ended up not using this brace, but I did keep it around to see how much the pillars moved after removing frame sections.
I got a section of autocraft frame rail section to make my patches. It was the right profile and thickness, so I didn't have to mess with bending the thick stuff. I think it's 14ga or about .075".
My welder is terrible and my skills not up to snuff, so I had a buddy with a 220V Lincoln mig with gas tack it in after I was happy with the fit. I knew I had to shore up the frame kink section before I built up anything around it.
|
|
| Back to top |
|
|
ddutch
Samba Member
Joined: June 17, 2020
Posts: 123
Location: Nederland
|
| Posted: Sat Jul 24, 2021 6:10 am Post subject: Re: 1960 Dove Blue Rust Repair |
|
|
I admire your brave work on your beloved bus. It definitely needs some attention to the chassis to make it strong and safe again.
I would suggest to do more and stronger bracing. A piece of stripsteel only takes pulling forces but can't stand any pressure. The more metal you cut away the bigger is the risk to loose alignment of the body and the chassis. It might deform under its own weight especially since you dont use a jig to keep everything in position.
I also would like to suggest not use the chassis of your bus as a practice object for learning how to weld. You don't want incorrect or weak welds in the structural most important parts of your bus. A fair amount of welding is needed there and you want to be sure it is of good quality to be safe and strong.
Last edited by ddutch on Sat Jul 24, 2021 1:47 pm; edited 2 times in total |
|
| Back to top |
|
|
crukab
Samba Chef

Joined: December 13, 2002
Posts: 6116
Location: Vermont
|
| Posted: Sat Jul 24, 2021 6:47 am Post subject: Re: 1960 Dove Blue Rust Repair |
|
|
| ddutch wrote: |
I admire your brave work on your beloved bus. It definitely needs some attention to the chassis to make is strong and safe again.
I would suggest to do more and stronger bracing. A peice of strip steel only takes pulling forces but cant stand any pressure. The more metal you cut away the bigger is the risk to loose alignment of the body and the chassis. It might deform under its own weight especially since you dont use a jig to keep everything in position. |
This ^^^^^^^^^^^^^^^^^^^^^^^^^^^^^^^^^^^^^
_________________
Tom
My Pops:
http://www.thesamba.com/vw/forum/viewtopic.php?t=604100&highlight=
I know you will always be with me, rest in peace with no more pain. 8/13/14.....
In the yard right now:
'51 Dodge 5 window truck
'65 Bug
'66 Singlecab
'82 Rabbit Truck Diesel from CALI 
'86 Doublecab W/T
'91 Vanagon carat/wolfsbrg.Tiico
'88 Dodge Ram pickup
'11 Jetta Wagon |
|
| Back to top |
|
|
bigmau
Samba Member
Joined: May 19, 2004
Posts: 53
Location: La Mesa
|
| Posted: Mon Jul 26, 2021 1:04 pm Post subject: Re: 1960 Dove Blue Rust Repair |
|
|
I agree with you guys about the structural welding. Part of the deal with me tearing this thing apart was that my co worker is a pretty accomplished hot rod fabricator type dude. So he did all of the structural welding. I have been fabricating, fitting the panels and gaps and then we'll get down on a weld session on the weekend. Learning experience for sure. Staying focused on structural integrity.
The middle closeout was pretty roached so I cut it out and made a closeout. The front tophat kind of sets where I can build out the rest of the rockers and front crossmember location.
|
|
| Back to top |
|
|
bigmau
Samba Member
Joined: May 19, 2004
Posts: 53
Location: La Mesa
|
| Posted: Tue Jul 27, 2021 11:47 am Post subject: Re: 1960 Dove Blue Rust Repair |
|
|
The bus had been sagging on the passenger side way before I cut it apart, so I did some jacking, clamping, pillar pulling and squeezing to get it into position prior to final frame welding. I'm pretty happy with how it turned out and once it was welded, I released all the stuff and it seemed to stay put.
There were some pinholes, but once it's all boxed up with the inner sections, I feel like it is solid.
|
|
| Back to top |
|
|
BarryL 
Samba Member

Joined: November 01, 2004
Posts: 14257
Location: Casa de Oro, California
|
| Posted: Tue Jul 27, 2021 6:20 pm Post subject: Re: 1960 Dove Blue Rust Repair |
|
|
| Hello bigmau. Way to dive in with gumption. I was wondering how it was going with your bus. |
|
| Back to top |
|
|
bigmau
Samba Member
Joined: May 19, 2004
Posts: 53
Location: La Mesa
|
| Posted: Wed Jul 28, 2021 4:29 pm Post subject: Re: 1960 Dove Blue Rust Repair |
|
|
Hey Barry, life is good. Can't let a little coronavirus get you down. I'll cruise by the pad as soon as I have a runner.
There were some strange hippy stash holes in the center pedestal. I plugged a few and left a few. Not structural, so I'm letting some of them ride. Strange though. Cleaned up some of the crustier parts with a wire wheel.
While dissecting the rear section, I found some pretty rough stuff, including some frame rot below the torsion housing I didn't know I had.
With the frame in place, I started to fit the tophat, front outriggers, bulkhead and inner rockers. Samba research led me to bend the rocker tab forward to make a 3pc sandwich with the tophat flange, inner rocker and closeout tab.
The autocraft outrigger didn't line up with the tophat, length wise, so I ended up moving the outrigger flanges a bit back.
Setting the rocker tops to the I-beam and tophat plane, I begin to realize that my bus has sagged and will need some custom shit when it comes to bringing the inner and outer rocker seams together at the bottom.
In order to set the cargo rocker at the right height, it's going to be a little funky. B pillar and C pillar sections need to be at the right height, relative to inners and outers, so I have to get creative.
|
|
| Back to top |
|
|
bigmau
Samba Member
Joined: May 19, 2004
Posts: 53
Location: La Mesa
|
| Posted: Sun Aug 01, 2021 9:46 pm Post subject: Re: 1960 Dove Blue Rust Repair |
|
|
I painted the insides of the cargo rocker and stiffener before spot welding them together. A little protection because once they go together can't get in there.
Hung in the right spot relative to the lower door edges.
.
Got the short rocker all lined up. Lower C pillar fitted.
I was going to leave the long rocker, but it was too far gone, so it had to go.
Lower bulkhead section fitment. It didn't fit well at the bulge, so I had to make some pie cuts and hammer it to close the gap.
To deal with the bottom seam mismatch, I spot welded some strips to the inner rocker bottom edge. This extends it lower and I can bring the outer rockers together at the bottom seam.
|
|
| Back to top |
|
|
karl h
Samba Member

Joined: October 10, 2005
Posts: 578
Location: austria
|
|
| Back to top |
|
|
bigmau
Samba Member
Joined: May 19, 2004
Posts: 53
Location: La Mesa
|
| Posted: Thu Aug 19, 2021 10:10 pm Post subject: Re: 1960 Dove Blue Rust Repair |
|
|
Thanks Karl H. Greetings from San Diego. Some more progress pics. Before the bulkhead goes in, I need to plug some hippy holes in the pedestal. These particular welds were done with a buddy's Miller 110V flux core. .035" wire. Not exactly a stack of dimes but it gets the job done and cleans up with flapper wheels.
Then I can start to final fit the bulkhead section in place, setting all the gaps for weld. There's not much pillar flange left, but it kind of all sandwiches together with the closeout panels.
Flux core in action. This ended up being a shitload of welding. Hit it from both sides and then grind, then come back and do some pinhole filling. All while trying not to blow holes through the thin panels.
Converting back to 60 turn signals and tail lights. I been waiting a long time and collecting donor parts for this. Pretty sure I nailed the tail light location because the bottom of the original hole was still there. The bullet orientation, I'm not so sure, but time will tell when I put together the outer housing and lens.
|
|
| Back to top |
|
|
|


