| Author |
Message |
henry roberts
Samba Member
Joined: February 24, 2003
Posts: 1275
Location: australia

|
 Posted: Fri Jul 09, 2021 8:11 pm Post subject: Re: 1958 beetle, preservation and acceleration Posted: Fri Jul 09, 2021 8:11 pm Post subject: Re: 1958 beetle, preservation and acceleration |
 |
|
congrats on both counts.
any updates? |
|
| Back to top |
|
 |
Fishynos72
Samba Member

Joined: November 27, 2010
Posts: 515
|
| Posted: Sat Jul 10, 2021 4:32 pm Post subject: Re: 1958 beetle, preservation and acceleration |
|
|
| henry roberts wrote: |
congrats on both counts.
any updates? |
Thank you.
Ive got some good stuff in the works, but it's about 4 different things on the go at once.
As soon as I've seen one of them through to completion, I'll drop an update.
Unfortunately with the way of the world, a lot of things are stuck in transit or happening at snails-pace.
Hopefully it's worth the wait
_________________
Collector of all things Volkswagen, Hazet and Matra.
1972 1302
1973 type2a
1957 type11
2005 Caddy panel van
2006 Golf R32 |
|
| Back to top |
|
|
Fishynos72
Samba Member
Joined: November 27, 2010
Posts: 515
|
| Posted: Tue Jul 13, 2021 5:07 am Post subject: Re: 1958 beetle, preservation and acceleration |
|
|
Couldn't wait, so here's not a real update, as it's not showing off anything I've added to the vehicle, but some nice photos none the less
Spent the last few weeks driving the car whenever possible, weather permitting.
Mostly driving it into work, last Saturday the ramp was empty so it left me no choice.
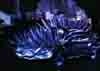
Each night I've had to experience the joys of 6 volt headlights. Really need a brighter solution.
Cleaned up the original spare wheel and replaced the random green one I had fitted. Original Olympic air-ride tyre still holding air.
So I had no choice but to fit my tool kit. It's been a long time waiting in my display cabinet. Definitely looks at home with its original paint
Hopefully not long before I can post the last few weeks worth of work.
Cheers
_________________
Collector of all things Volkswagen, Hazet and Matra.
1972 1302
1973 type2a
1957 type11
2005 Caddy panel van
2006 Golf R32 |
|
| Back to top |
|
|
Fishynos72
Samba Member
Joined: November 27, 2010
Posts: 515
|
| Posted: Sun Jul 25, 2021 2:39 am Post subject: Re: 1958 beetle, preservation and acceleration |
|
|
Not quote as far into the 'additions' for the 58 as I'd like to be.
These additions are what I was planning on having a 'big reveal' update for.
I've decided to delve properly into the 'Round Australia trial car" theme I've been skirting around.
Starting with some Melbourne made parts, Can't remember if I'd already mentioned them in this thread or not, I've had them nearly ten years waiting to be fitted.
First one is a stokes fire extinguisher, stokes would go on to supply Volkswagen Australia with re-branded extinguishers for VW accessory sales. (See the Australian Brochure below)
But that wouldn't happen until the 60's. So my extinguisher pre dates that, and is branded Stokes.
I'm not one for drilling holes in cars, but this mounting position seemed appropriate.
(Yes some carpet is on the cards, along with a headlining and a full cars' worth of door and window seals.)
Next Trial car item. I tapped into my collection of Volmac parts and plucked a suitably 'patinad' set of seat recliners out.
(The 2nd pair of recliners are for another project)
I fitted these under the guise that during a trial, this would allow the competitors to sleep in their vehicles easily. I'd also hoped they might be suitable to use at the drive in theatres. I was mistaken, you stare directly to the roof of the vehicle.
In all fairness they are surprisingly comfortable, I intend to use these for sleeping in the car at some point.
This last addition is the most involved and one that isn't finished yet.
Hell, it's not even made it onto the car yet and it's already been a month's worth of weekends to get this far.
This began roughly 6 months ago, when I started properly hunting for a set. A friend had some for sale, but I missed the opportunity.
Cut to about a month from now, and the same friend sends me a listing on the Samba.
So now I own a Maico disc brake kit.
Made in Germany by the motorcycle company Maico to generate profit within their failing business. They offered a disc brake kit for Volkswagen Type 1 and 3, 356 and a model of Peugeot.
A quick ride from Columbia and I'm greeted with this.
I'd seen a few sets of Maico brakes on cars, and then saw plenty online researching the last 6 months. But I've not seen the style of hub (that holds the disc), or calliper bracket like my set have.
Below is an example of the more common style.
Hopefully someone here knows more.
Now my kit was in need of all 'consumable' parts replaced.
I started with a sandblast and paint of the calliper brackets.
A nice little before/ after
Now the cleaning and blasting revealed all the lovely details, all the Maico logos for instance.
So began the process for searching for tradespeople to look after various aspects of this project I couldn't do myself.
I found a guy next to where I work, who was starting a laser cutting business. He'd previously made discs for ATVs and motorcycles. So he did the same for me.
I considered having the new discs Zinc plated, but was too impatient and instead went for a more modern, zinc based silver. Most of it will be taken off by the sweep of the pads anyway.
Next up was the pad securing pins. The ones that came with the brakes appear to be mismatched. One being original and very beyond use, while the other a later replacement part.
Thankfully found Paul, a man of many talents who looked after the re-manufacturing of new pins for me.
The result is two beautiful pins, that fit perfectly.
The hardness of these pins is very important. Hence beyond me and my basic tools.
This leaves the pads and callipers.
I head over to my 'usual' brake guy.
After having the pads and callipers for 3 weeks, he admits he cannot unseize one of the callipers, but the pads are ready.
I believe the pad compound is just the regular modern stuff they use on everything they do. I'll be interested to see how it performs, and if it squeals as badly as what period articles claim the Maico kits did.
Slightly deflated I took my callipers home half in pieces.
Chatting with Henry Roberts he suggested boiling the callipers in diesel to get them apart.
A quick purchase of a $30 K-mart hot plate and a cheap pot + about an hours worth of boiling and them some grease gun action; resulted in this.
See the original seal on the left, and a new example on the right. No surprise the piston was glued into place.
I had done what the brake specialist couldn't. I need to give a huge thank-you to Henry, without his advice I'd have some expensive paperweights. Maico callipers don't grow on trees.
I'm waiting on some Calliper seals and some new front wheel bearings and this dangerous project is ready for assemble.
Until then, I continue to drive the car when I can. Melbourne is currently in extended lockdown again as I type this update.
I'll continue making good use of the quiet roads while I can.
The next update wont be far off.
Cheers
_________________
Collector of all things Volkswagen, Hazet and Matra.
1972 1302
1973 type2a
1957 type11
2005 Caddy panel van
2006 Golf R32 |
|
| Back to top |
|
|
Rome
Samba Member
Joined: June 02, 2004
Posts: 9651
Location: Pearl River, NY
|
| Posted: Sun Jul 25, 2021 7:42 am Post subject: Re: 1958 beetle, preservation and acceleration |
|
|
Thank you for the details and excellent photos of the Maico brakes. In my 35 active years with ACVWs I've never seen a set in person. "Maico" would be pronounced like "Mike-oh" in German.
Did you know that Maico also built a "microcar" in the late 1950's? The Maico 500 had a rear-mounted 2-cyl. 2-stroke 452 cc engine, going thru a 4-speed transmission. https://www.lanemotormuseum.org/collection/cars/item/maico-500-1958 The featured car has Beetle pre-'61 "snowflake" taillamps adapted, as the originals were likely hard to find.
Hope you plan on fitting lockwashers under each bolt head for the hub to the carrier...
|
|
| Back to top |
|
|
Fishynos72
Samba Member
Joined: November 27, 2010
Posts: 515
|
| Posted: Sun Jul 25, 2021 3:07 pm Post subject: Re: 1958 beetle, preservation and acceleration |
|
|
| Rome wrote: |
Thank you for the details and excellent photos of the Maico brakes. In my 35 active years with ACVWs I've never seen a set in person. "Maico" would be pronounced like "Mike-oh" in German.
Did you know that Maico also built a "microcar" in the late 1950's? The Maico 500 had a rear-mounted 2-cyl. 2-stroke 452 cc engine, going thru a 4-speed transmission. https://www.lanemotormuseum.org/collection/cars/item/maico-500-1958 The featured car has Beetle pre-'61 "snowflake" taillamps adapted, as the originals were likely hard to find. |
I had seen brochures of the microcar when I was searching eBay. Very typical of a motorcycle company to produce such a vehicle.
| Rome wrote: |
Hope you plan on fitting lockwashers under each bolt head for the hub to the carrier...
|
Yes I've a bag of fresh locking washers ready. I even considered a dab of thread lock on each bolt, just in case. But that might make future servicing difficult, plus the heat of being a brake component might not go well with the thread lock.
_________________
Collector of all things Volkswagen, Hazet and Matra.
1972 1302
1973 type2a
1957 type11
2005 Caddy panel van
2006 Golf R32 |
|
| Back to top |
|
|
Fishynos72
Samba Member
Joined: November 27, 2010
Posts: 515
|
| Posted: Tue Jul 27, 2021 4:01 am Post subject: Re: 1958 beetle, preservation and acceleration |
|
|
Love it when deliveries arrive, especially ones from Wolfsburg west.
Lots of good stuff in this haul. Stuff to finish the Maico install, as well as slowly checking things off that the car is well overdue for.
Started with some headlight-to-body seals.
Then moved onto some snowflake housing to body seals. well overdue.
Look how shrunken the original seals were compared with the mark on the paintwork.
Took this as an opportunity to correct the damaged caused by overtightening the taillight brackets.
Before:
After:
All in an effort to help the lights sit and seal correctly.
I'm not used to seeing such a thick black seal outlining the taillights. Looks almost out of place at the moment. but once other seals are changed it'll all match.
I dropped the Maico callipers off for reassembly and new seals today, and once the bearings and seals arrived from WW I installed those.
So all ready to rock and roll once the callipers are finished.
Hopefully the wait isn't too long. Thankfully Melbourne is coming out of lockdown tomorrow.
_________________
Collector of all things Volkswagen, Hazet and Matra.
1972 1302
1973 type2a
1957 type11
2005 Caddy panel van
2006 Golf R32 |
|
| Back to top |
|
|
henry roberts
Samba Member
Joined: February 24, 2003
Posts: 1275
Location: australia
|
| Posted: Sun Oct 31, 2021 6:45 pm Post subject: Re: 1958 beetle, preservation and acceleration |
|
|
time for an update?
i know you have been tinkering. 😉
ps. i am on the way to my shed to work on your long long overdue care package. |
|
| Back to top |
|
|
Fishynos72
Samba Member
Joined: November 27, 2010
Posts: 515
|
| Posted: Sun Nov 21, 2021 8:50 pm Post subject: Re: 1958 beetle, preservation and acceleration |
|
|
Apologies for the delay in updating this thread.
I've a new medium for this project that's been consuming a lot of my free time.
Yes Ive been tinkering whenever I can.
I've also been hoarding parts like it's going out of fashion.
So without further delay, please see below for a taste of whats been going on recently.
Let's talk maintenance before modifications
Some long overdue was some running board repairs.
Starting with the driver's side.
Before:
Holes be gone
Thankfully no sneaky unexpected rust.
The passenger side didn't give up so easily, requiring the use of some easy-outs.
There was also a surprising amount of damage to the running board, the small rear end being split into 4 pieces.
Unfortunately I've no before photo.
Here's the results (shout-out and thank you to Mr Pete S for the trim)
Hand crimping the new rubber into the channel destroyed both my hands.
Now onto the new additions
Some 4.5" factory mesh Lucas fog lights came my way. So then I had no choice but to get the matching 7" mesh for my other fog lights
Then some backyard hackery had to happen to clear everything with the new lights and mesh stone guards.
I'm wrapped with the layout
So of course some original headlight stone mesh had to be sourced as it would be criminal not to.
These being original style guard, meant the headlights rings to be drilled.
Don't cry for the Bosch headlight rings, they're a dented twisted set I had spare. My nice set remain non-drilled.
I am wrapped with the results.
To finish up, Ive finally fitted a new interior light globe.
All the modern creature comforts.
Then the car received it's usual flogging to work on the weekend.
There's some more interesting stuff in the pipeline. I'll try to not keep the time between updates so long.
Cheers.
_________________
Collector of all things Volkswagen, Hazet and Matra.
1972 1302
1973 type2a
1957 type11
2005 Caddy panel van
2006 Golf R32 |
|
| Back to top |
|
|
Rome
Samba Member
Joined: June 02, 2004
Posts: 9651
Location: Pearl River, NY
|
| Posted: Sun Nov 21, 2021 9:10 pm Post subject: Re: 1958 beetle, preservation and acceleration |
|
|
It's gratifying to see you revive the original running boards. Is the black paint (after the welding) a rust blocker to stabilize the metal under the rubber matting?
| Quote: |
| Some 4.5" factory mesh Lucas fog lights came my way. |
Would those lenses indicate pencil beam driving lights? Fog lights usually have fluted lenses so that the light beam is scattered wide. |
|
| Back to top |
|
|
Fishynos72
Samba Member
Joined: November 27, 2010
Posts: 515
|
| Posted: Sun Nov 21, 2021 9:15 pm Post subject: Re: 1958 beetle, preservation and acceleration |
|
|
| Rome wrote: |
| It's gratifying to see you revive the original running boards. Is the black paint (after the welding) a rust blocker to stabilize the metal under the rubber matting? |
Thank you. I put the effort in to save the originals as they're the best fitment wise. The handmade ones coming from Germany are beyond my budget.
Yes there's a coat of rust converter underneath, then a wrinkle high temperature paint finish over that.
| Rome wrote: |
| Quote: |
| Some 4.5" factory mesh Lucas fog lights came my way. |
Would those lenses indicate pencil beam driving lights? Fog lights usually have fluted lenses so that the light beam is scattered wide. |
I'll have to double check the Lucas model codes for them. But I believe the 7" are driving lights as they're not fluted, and the 4.5" would he the same as again the lenses aren't fluted
_________________
Collector of all things Volkswagen, Hazet and Matra.
1972 1302
1973 type2a
1957 type11
2005 Caddy panel van
2006 Golf R32 |
|
| Back to top |
|
|
Fishynos72
Samba Member
Joined: November 27, 2010
Posts: 515
|
| Posted: Mon Feb 21, 2022 3:30 am Post subject: Re: 1958 beetle, preservation and acceleration |
|
|
Evening all,
Don't really have a great string of photos for this update.
But progress is progress
Finally decided to get a move on with these Maico
Thankfully I'd read an article documenting their backward install
Still had hiccups along the way, pads being too thick and various teething issues
But it was all worth it- just to be able to bolt the wheels up and step back
Then of course the quick jaunt to the petrol station before a test run on the freeway for work the following day.
Then what do you do once you've bolted something new to your car?
Well you go to a car show to show the other crazy people
My "car of the show" a 1938 202, and I hate french cars, at least mechanically
My car even got a few photos taken. That's always flattering.
This is the first to surface on social media thus far
Really need to sort my workspace out so I can continue to chip away at the list of items remaining.
_________________
Collector of all things Volkswagen, Hazet and Matra.
1972 1302
1973 type2a
1957 type11
2005 Caddy panel van
2006 Golf R32 |
|
| Back to top |
|
|
pastellgreen
Samba Member
Joined: January 06, 2012
Posts: 1048
Location: Germany
|
| Posted: Tue Feb 22, 2022 9:16 am Post subject: Re: 1958 beetle, preservation and acceleration |
|
|
| And how is it braking? |
|
| Back to top |
|
|
Fishynos72
Samba Member
Joined: November 27, 2010
Posts: 515
|
| Posted: Wed Feb 23, 2022 1:51 am Post subject: Re: 1958 beetle, preservation and acceleration |
|
|
| pastellgreen wrote: |
| And how is it braking? |
My opinion is a little complicated.
I believe the pads have finally cut in fairly well, but I feel I have some air still trapped somewhere in the system.
The car now brakes more like a super beetle in terms of pedal feel. I think it's stopping distance would be less also
I'm going to do a few re bleeds of the system before passing final judgement.
They do however looks very cool
_________________
Collector of all things Volkswagen, Hazet and Matra.
1972 1302
1973 type2a
1957 type11
2005 Caddy panel van
2006 Golf R32 |
|
| Back to top |
|
|
Rome
Samba Member
Joined: June 02, 2004
Posts: 9651
Location: Pearl River, NY
|
| Posted: Wed Feb 23, 2022 4:53 am Post subject: Re: 1958 beetle, preservation and acceleration |
|
|
Seeing the relatively small brake pad contact area against the disc ring, I'm not surprised that the brakes don't seem to be any more powerful than the stockers. Do you feel any wheel wobble after going over a bump or pothole? Seems the entire wheel is only supported by the adapter plate to the rear of center, which would worsen any bump input by creating a significant imbalance of the wheel until it stabilizes on a smooth road surface.
Great to see you overcame the challenges of refurbishing the parts and now have them working on your Beetle.
Amazing that such a rare US-Italian-British hybrid car, based in Chicago, Illinois made its way down to your country- the Arnolt-Bristol. Even being a right-hand drive car.
Info about this model: https://silodrome.com/arnolt-bristol-car/ |
|
| Back to top |
|
|
Fishynos72
Samba Member
Joined: November 27, 2010
Posts: 515
|
| Posted: Wed Feb 23, 2022 7:37 pm Post subject: Re: 1958 beetle, preservation and acceleration |
|
|
| Rome wrote: |
Seeing the relatively small brake pad contact area against the disc ring, I'm not surprised that the brakes don't seem to be any more powerful than the stockers. Do you feel any wheel wobble after going over a bump or pothole? Seems the entire wheel is only supported by the adapter plate to the rear of center, which would worsen any bump input by creating a significant imbalance of the wheel until it stabilizes on a smooth road surface.
|
It's as I expected given the contact patch for the discs and pads. Both are quite small.
Hub and vibration wise, I have zero issue. I'd suggest the mass or unsprung weight isn't terribly different between the two setups.
| Rome wrote: |
Great to see you overcame the challenges of refurbishing the parts and now have them working on your Beetle.
|
It took me longer to find the time to install the maico setup.
I wanted to retain as much of the age of them as possible, while having everything important consumable wise new and sorted. I can't imagine there's a great deal many sets of these brakes on cars anymore. I've yet to see another example in this casting the same as mine.
| Rome wrote: |
Amazing that such a rare US-Italian-British hybrid car, based in Chicago, Illinois made its way down to your country- the Arnolt-Bristol. Even being a right-hand drive car.
Info about this model: https://silodrome.com/arnolt-bristol-car/ |
It was an incredible collection of cars at that show.
_________________
Collector of all things Volkswagen, Hazet and Matra.
1972 1302
1973 type2a
1957 type11
2005 Caddy panel van
2006 Golf R32 |
|
| Back to top |
|
|
Fishynos72
Samba Member
Joined: November 27, 2010
Posts: 515
|
| Posted: Tue Mar 01, 2022 12:19 am Post subject: Re: 1958 beetle, preservation and acceleration |
|
|
Have been doing some odd jobs getting the car ready for the Geelong revival this coming Sunday.
(No it won't be partaking in the 1/4 mile speed trials- not really any point).
Didn't think I'd get everything sorted in time, so far so good.
Had to take the camera along on the test drive.
Yes the leather belt is a new addition- CAMS require a secondary method of bonnet latching as the factory setup is a single latch mech.
I'm sure whoever carries out the safety inspection will a few complaints should it ever come to that.
Then we move onto the second new addition.
Waited over a year for these suckers
I've had the gauges for a long time. Pretty sure some make an appearance early on in this thread.
Here they are with some paint (turns out the car is roughly a colour-bond colour)- gauges laid out how I'm running them in the car.
All sorted and installed.
Thank you to Henry for the factory grille Mesh.
Just need to find a suitable oil pressure sender now.
Hopefully get some good photos this weekend.
Cheers
_________________
Collector of all things Volkswagen, Hazet and Matra.
1972 1302
1973 type2a
1957 type11
2005 Caddy panel van
2006 Golf R32
Last edited by Fishynos72 on Thu Mar 03, 2022 4:21 am; edited 1 time in total |
|
| Back to top |
|
|
Chickensoup
Samba Member

Joined: January 06, 2018
Posts: 5368
Location: Good Hope, GA
|
| Posted: Tue Mar 01, 2022 5:18 am Post subject: Re: 1958 beetle, preservation and acceleration |
|
|
this be fo sho one of my favorite builds on the samba. Great work!
_________________
-'85 c10 5.3 LS, 222 cam, long tubes, x pipe, 3 inch spin tech's
-'05 B5.5 TDI Wagon 17in sport rims ;EGR + BSM + ASV Delete, Stage-2 Tune, straight pipe
'65 Tourist Delivery Build
'66 RIP
'69 RIP
Hosea 4:6 "My people are destroyed for lack of knowledge" |
|
| Back to top |
|
|
Fishynos72
Samba Member
Joined: November 27, 2010
Posts: 515
|
| Posted: Tue Mar 01, 2022 5:35 am Post subject: Re: 1958 beetle, preservation and acceleration |
|
|
| Chickensoup wrote: |
| this be fo sho one of my favorite builds on the samba. Great work! |
Thank you, that means a lot as I know you've followed and left comments since the beginning.
About time it got interesting.
_________________
Collector of all things Volkswagen, Hazet and Matra.
1972 1302
1973 type2a
1957 type11
2005 Caddy panel van
2006 Golf R32 |
|
| Back to top |
|
|
Fishynos72
Samba Member
Joined: November 27, 2010
Posts: 515
|
| Posted: Thu Mar 03, 2022 3:59 am Post subject: Re: 1958 beetle, preservation and acceleration |
|
|
Quick little bridging update.
Rediscovered this little jigga in a long forgotten box
So I cracked out the following
And decided to wage war on what's left of the headlining with some balustrade wire
First victory
That all sorted, I cracked out the kettle for a quick test. Probably too little too late considering it was all installed un-tested
Thankfully it's all worked a treat. Hopefully this newfound knowledge doesn't cause undue stress. Sometimes it's better not to know.
So that's two of the three gauges hooked up and working.
Need to sort out something for the oil pressure sender, as I have issues mounting it using the factory switch location while clearing the "new" fuel pump I have waiting to install.
You guys didn't really think I'd install the gauges just for show?
Test drive to work tomorrow.
Cheers
_________________
Collector of all things Volkswagen, Hazet and Matra.
1972 1302
1973 type2a
1957 type11
2005 Caddy panel van
2006 Golf R32 |
|
| Back to top |
|
|
|


