| Author |
Message |
LVGhia72
Samba Member

Joined: April 22, 2020
Posts: 282
Location: Lost Wages

|
 Posted: Sat Mar 06, 2021 6:36 pm Post subject: Re: My Fat Chick Posted: Sat Mar 06, 2021 6:36 pm Post subject: Re: My Fat Chick |
 |
|
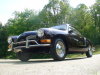
| Thanks for the advice Rome. I don't plan on using led bulbs. I replaced the turn signal bulbs with amber ones vs the clear. Much better. As far, as the front turn signals go... They are pretty beat up. Cracked, faded and some holes worn through the plastic. They are Hella. Maybe original to the car. The front turn signal lenses are pretty pricey however. I've been putting if off to address other issues. At some point in time, I'll have to bite the bullet on the lenses, gaskets, etc.. I'll look into the black marine vinyl tape. Thanks again. |
|
| Back to top |
|
 |
dv73
Samba Member
Joined: March 11, 2021
Posts: 8
Location: British Columbia
|
| Posted: Thu Mar 11, 2021 10:21 pm Post subject: Re: My Fat Chick |
|
|
dv73
With all the lifted vehicles and cell phone users these days, I am thinking perhaps the 72 to 74 ghia with bigger lights , bumpers and in bright colors are a safer alternative .
The "fat chick" lowered and dressed with some nice wheels is looking pretty sexy. |
|
| Back to top |
|
|
LVGhia72
Samba Member
Joined: April 22, 2020
Posts: 282
Location: Lost Wages
|
| Posted: Mon Aug 30, 2021 2:35 pm Post subject: Re: My Fat Chick |
|
|
It's been awhile since my last update. While the gas tank was out of the car I decided to clean it up, reseal it and replace worn hoses etc... Not done with it yet Because;
It's been too hot outside to do any work. Over 100 degrees every day. Waiting on cooler weather to work on the Ghia again.
Here is some pic's for your enjoyment 
Made in Brazil.
Rust
Rust
More Pics to follow soon. |
|
| Back to top |
|
|
jeffrey8164 
Samba Member
Joined: January 06, 2018
Posts: 3819
Location: Georgia
|
| Posted: Mon Aug 30, 2021 3:01 pm Post subject: Re: My Fat Chick |
|
|
Any progress is good progress.
Id have to look back at my photos or receipts to see if I can come up with a part number but the POR 15 folks have a gas tank kit that includes a cleaner, rust encapsulator and an epoxy coating that will prevent any further rust issues.
I used it on my new tank that already had some rust inside and it was still very clean looking some 12 years later
_________________
Volkswagen!
Turning owners into mechanics since 1938.
Let he that is without oil throw the first rod
(Compression 8.7:1) |
|
| Back to top |
|
|
LVGhia72
Samba Member
Joined: April 22, 2020
Posts: 282
Location: Lost Wages
|
| Posted: Mon Aug 30, 2021 3:30 pm Post subject: Re: My Fat Chick |
|
|
More pic's
I used KBS gas tank sealer to clean and seal the tank. There was some rust along the seams inside the tank. The inside of the tank came out like a glass coating afterwards. I also stripped and repainted the tank with epoxy paint. One mistake I made was that I stripped the paint off the tank first. Then did the tank sealing. What happened is that some of the coating got on the tank and I had to grinded it off. The coating is hard as a rock and does not come off easily. I suggest you seal the tank first. Then strip the paint off the tank etc.. That way no double work.
[img]https://www.thesamba.com/vw/gallery/pix/2211728.jpg[/img The nuts on the wire are used to shake inside the tank to remove as much rust as posssible.
[img]https://www.thesamba.com/vw/gallery/pix/2211722.jpg[/img
More pics to come. Enjoy:) |
|
| Back to top |
|
|
LVGhia72
Samba Member
Joined: April 22, 2020
Posts: 282
Location: Lost Wages
|
| Posted: Mon Aug 30, 2021 3:34 pm Post subject: Re: My Fat Chick |
|
|
| jeffrey8164 wrote: |
Any progress is good progress.
Id have to look back at my photos or receipts to see if I can come up with a part number but the POR 15 folks have a gas tank kit that includes a cleaner, rust encapsulator and an epoxy coating that will prevent any further rust issues.
I used it on my new tank that already had some rust inside and it was still very clean looking some 12 years later |
Thanks, Jeffery for the inspirational words. I sealed the tank with KBS coatings. |
|
| Back to top |
|
|
Marcdeb
Samba Member

Joined: May 22, 2019
Posts: 3036
Location: Vermont
|
|
| Back to top |
|
|
LVGhia72
Samba Member
Joined: April 22, 2020
Posts: 282
Location: Lost Wages
|
| Posted: Tue Aug 31, 2021 10:14 am Post subject: Re: My Fat Chick |
|
|
| Marcdeb wrote: |
| Nice job. Hope it cools off so you can get back to work. I can't deal with heat at all. Good thing I live in Vermont. |
Thanks Marc . It's been a long brutal hot summer. Some week's, it was 117 degrees. That's in the shade. I'm itching to get back to work on the Ghia. Also go driving around.
I know it can get brutal cold in Vermont during the winter. I lived in upstate New York when I was stationed at Griffiss AFB back in the day. 200 inches of snow, -25 degrees below zero, wind chill of -50 degrees below zero. I guess it's a trade off. The hot or the cold weather. |
|
| Back to top |
|
|
LVGhia72
Samba Member
Joined: April 22, 2020
Posts: 282
Location: Lost Wages
|
| Posted: Sun Sep 26, 2021 2:48 pm Post subject: Re: My Fat Chick |
|
|
I thought to myself, it's not too hot out today. 95 degrees. I need to get at least one thing done on the Ghia. I was wrong about it not being too hot. But, I did get one thing done.
Something easy and quick. I replaced the steering coupler disc, otherwise known as the steering rag joint. While the gas tank is still out of the car.
I will try each day to get something done. Since it's not to hot. LOL Anyway; Here's some Pic's.
Old disc
Old disc
Old disc, maybe original?
New
New
New
New installed
New installed |
|
| Back to top |
|
|
sputnick60
Samba Moderator

Joined: July 22, 2007
Posts: 3916
Location: In Molinya Orbit
|
| Posted: Sun Sep 26, 2021 4:51 pm Post subject: Re: My Fat Chick |
|
|
Just flagging a potential issue with modern rubber couplings.... Some observers have noted the electrical resistance can be quite low with some of these. Since the convoluted horn wiring for these Ghias depends on the electrical isolation of this part, you should get a multimeter set in the ohms range and measure how high the resistance is. If it is conductive, the horns will sound all the time and you'll go nuts wondering why. Worth checking now
Nicholas
_________________
'66 Karmann Ghia Cabriolet...
'65 Porsche 356C Coupe...
2005 Mecedes Benz C180 Kompressor Estate
Stop dead photo links! Post your photos to The Samba Gallery! |
|
| Back to top |
|
|
rbsurfguy
Samba Member

Joined: August 10, 2008
Posts: 1757
Location: Fairfax, Northern Virginia Formerly Huntington Beach, SoCal
|
| Posted: Sun Sep 26, 2021 6:05 pm Post subject: Re: My Fat Chick |
|
|
Where would you put the probes, on opposing bolts, the same bolt and nut? I have this same coupler with a ground wire from one bolt crossed over to an opposing bolt, so want to make sure I don't have the same problem.
Jeff
_________________
1971 Ghia convertible (Body off rebuild)
2019 VW Atlas 4Motion
2012 Passat-Sold
See my build on The Samba at:
Jeff's 71 Vert Restoration/Reassembly http://www.thesamba.com/vw/forum/viewtopic.php?t=6...highlight= |
|
| Back to top |
|
|
sputnick60
Samba Moderator
Joined: July 22, 2007
Posts: 3916
Location: In Molinya Orbit
|
| Posted: Sun Sep 26, 2021 11:58 pm Post subject: Re: My Fat Chick |
|
|
| rbsurfguy wrote: |
Where would you put the probes, on opposing bolts, the same bolt and nut? I have this same coupler with a ground wire from one bolt crossed over to an opposing bolt, so want to make sure I don't have the same problem.
Jeff |
Thats covered in the first page of the getting your horns working thread. Theres a photo showing how. Look in the stickies for the best how to threads.
Nicholas
_________________
'66 Karmann Ghia Cabriolet...
'65 Porsche 356C Coupe...
2005 Mecedes Benz C180 Kompressor Estate
Stop dead photo links! Post your photos to The Samba Gallery! |
|
| Back to top |
|
|
rbsurfguy
Samba Member
Joined: August 10, 2008
Posts: 1757
Location: Fairfax, Northern Virginia Formerly Huntington Beach, SoCal
|
| Posted: Mon Sep 27, 2021 3:56 am Post subject: Re: My Fat Chick |
|
|
Noted, thank you Sir. I have a new horn relay, but it is always good to check anyway, the way things are made today!
Jeff
_________________
1971 Ghia convertible (Body off rebuild)
2019 VW Atlas 4Motion
2012 Passat-Sold
See my build on The Samba at:
Jeff's 71 Vert Restoration/Reassembly http://www.thesamba.com/vw/forum/viewtopic.php?t=6...highlight= |
|
| Back to top |
|
|
LVGhia72
Samba Member
Joined: April 22, 2020
Posts: 282
Location: Lost Wages
|
| Posted: Mon Sep 27, 2021 10:32 am Post subject: Re: My Fat Chick |
|
|
| sputnick60 wrote: |
Just flagging a potential issue with modern rubber couplings.... Some observers have noted the electrical resistance can be quite low with some of these. Since the convoluted horn wiring for these Ghias depends on the electrical isolation of this part, you should get a multimeter set in the ohms range and measure how high the resistance is. If it is conductive, the horns will sound all the time and you'll go nuts wondering why. Worth checking now
Nicholas |
Thanks Nicholas. I seem to remember a post in the forums about that problem.
I hate to admit, but the Ghia has no horns etc.. It was like that when I bought the car. Another area to work on.
No horns, at least there is a bracket and some bolts. |
|
| Back to top |
|
|
LVGhia72
Samba Member
Joined: April 22, 2020
Posts: 282
Location: Lost Wages
|
| Posted: Thu Sep 30, 2021 5:18 pm Post subject: Re: My Fat Chick |
|
|
Worked on the Electric fuel pump today. It's located below the gas tank on the passenger side of the car.
Some issues with the fuel pump were the fittings were too big. I wanted to use German braided 5mm hose and it would not fit the large fittings.
The wiring was all jacked up. Some PO used plastic wire nuts to connect the wiring.
There is no safety relay. So if the engine cuts out, the fuel pump will continue to run.
Fuel pump. See the plastic wire nut?
The large fittings
The adapters I used
Adapters
Check fit with 5mm hose. Loctite to seal the fittings from leaks.
I'll post more of the wiring issues in another post. |
|
| Back to top |
|
|
rbsurfguy
Samba Member
Joined: August 10, 2008
Posts: 1757
Location: Fairfax, Northern Virginia Formerly Huntington Beach, SoCal
|
| Posted: Thu Sep 30, 2021 5:55 pm Post subject: Re: My Fat Chick |
|
|
I installed an electric fuel pump in my Ghia as well and had the same problem, had to use the line reducers as well to connect from the tank, and to the line running through the tunnel. As for the controller, I purchased this fuel pump controller made specifically for VW's https://www.revolutionelectronics.com/Products/Fuel_Pump.html
Instructions are very clear and they send you everything to connect including wiring that runs all the way to the rear in order to connect to the coil which should allow the pump to shut off when the engine dies. Not sure if it's the perfect solution, but it had others' approval when hooking up an electric fuel pump.
Just my 3 cents.
Jeff
_________________
1971 Ghia convertible (Body off rebuild)
2019 VW Atlas 4Motion
2012 Passat-Sold
See my build on The Samba at:
Jeff's 71 Vert Restoration/Reassembly http://www.thesamba.com/vw/forum/viewtopic.php?t=6...highlight= |
|
| Back to top |
|
|
Ian Godfrey
Samba Member
Joined: September 25, 2006
Posts: 1137
Location: Melbourne Australia
|
| Posted: Thu Sep 30, 2021 7:58 pm Post subject: Re: My Fat Chick |
|
|
| i'm another vote for the revolution electronics one, I used VW/Audi/Porsche fuel pump relays for a time but they don't last long. and the wiring is more complex |
|
| Back to top |
|
|
LVGhia72
Samba Member
Joined: April 22, 2020
Posts: 282
Location: Lost Wages
|
| Posted: Fri Oct 01, 2021 9:47 am Post subject: Re: My Fat Chick |
|
|
Thanks, Jeff and Ian for the link and info on the fuel pump relay. I've been looking at several of them online. Which of course, I don't know if the are good or bad. I will most likely go with the revolution electronics one.
The wiring on the fuel pump is quite simple. 2 wires, one is a ground the other is a hot lead. The hot lead on mine is connected to a hot wire on the brake light switch on the master cylinder. It only gets power when the key is on. The ground is just simply attached to the body of the car. The wiring on the master cylinder brake light switches is my next item to sort out.
Some pic's;
|
|
| Back to top |
|
|
rbsurfguy
Samba Member
Joined: August 10, 2008
Posts: 1757
Location: Fairfax, Northern Virginia Formerly Huntington Beach, SoCal
|
| Posted: Fri Oct 01, 2021 3:03 pm Post subject: Re: My Fat Chick |
|
|
My fuel pump has the same two wires. If I remember correctly, will have to take a look to confirm, one of the Revolution wires splices into the tachometer. I replaced my non-working clock with an ISP West 52mm tach that fits the clock spot. I don't think it's mandatory to have a tach, but I think it adds to the shutdown mode.
Post some pics, when you have them, how you mount your fuel sender and filter. I have pics somewhere on my build page, Which I copied from Jeffrey8164's set up.
Jeff
_________________
1971 Ghia convertible (Body off rebuild)
2019 VW Atlas 4Motion
2012 Passat-Sold
See my build on The Samba at:
Jeff's 71 Vert Restoration/Reassembly http://www.thesamba.com/vw/forum/viewtopic.php?t=6...highlight= |
|
| Back to top |
|
|
LVGhia72
Samba Member
Joined: April 22, 2020
Posts: 282
Location: Lost Wages
|
| Posted: Sat Oct 02, 2021 9:54 am Post subject: Re: My Fat Chick |
|
|
Jeff, I may of forgotten to post some pictures of the fuel tank restoration/repair.
The fuel sending unit is the stock VW one. All I did was replace the gasket. As it was working fine when it was in the car.
Fuel filters, technically I have 3. The stock bronze mesh strainer that goes inside the gas tank. It was missing when I took the tank apart. The fuel pump also has a filter on the inlet. Lastly, the stock Vw filter located in the engine compartment which I plan to move under the body, by the transmission.
I looked at the wiring diagram for the Revolution fuel relay. I thought to myself if I have to run a wire from the negative side of the coil to the front of the car, I should add a tachometer. Which I don't have. I kind of like the big monster tachometers. Also, my clock does not work. I will keep the information you provided in my VW notebook for future reference. Thanks.
Some Pic's;
Stock fuel sender
Fuel sender
Bronze fuel strainer and new fuel outlet
The red outline is the fuel filter on the fuel pump |
|
| Back to top |
|
|
|


