| Author |
Message |
smithprocess
Samba Member

Joined: April 09, 2021
Posts: 70
Location: Bay Area, California

|
 Posted: Sat Jan 22, 2022 11:25 pm Post subject: Adding a 4th door to a Doka Posted: Sat Jan 22, 2022 11:25 pm Post subject: Adding a 4th door to a Doka |
 |
|
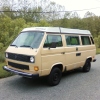
Im in progress on a complete refresh on my Syncro Doka (build thread here) and I recently finished a 4th door conversion. When I started researching the process of the 4th door conversion there was very little info on the web, save for a few Samba posts with very little details and photos, so I decided to fully document the process in photos and words of my conversion. Big thanks to Marco from Buslab who was incredibly helpful to me over the phone answering some questions before I started cutting.
So, heres my version of an end-to-end how-to for anyone looking to add a 4th door to a T3 Doka. I have done a net total of 1 conversion, the one youre about to see, so Im not implying Im an expert, just showing my experience and learnings on the project, and I hope this helps someone out there!
List of Posts
-------
Tools
- Welder (I used a tig but mig would work too)
- 4.5 Angle grinder + flap discs, and cutoff wheels
- 2 right angle pneumatic angle grinder (not 100% required, but super nice to have, assuming you have an air compressor)
- Sawzall
- Spot weld cutting bit
- Body filler and paint
Last edited by smithprocess on Sat Jan 22, 2022 11:50 pm; edited 2 times in total |
|
| Back to top |
|
 |
smithprocess
Samba Member
Joined: April 09, 2021
Posts: 70
Location: Bay Area, California
|
| Posted: Sat Jan 22, 2022 11:26 pm Post subject: Re: Adding a 4th door to a Doka |
|
|
Sourcing a door
This seems a little strange to include in a how-to, but I found it to be one of the most difficult steps in the whole process so it warrants discussion. Depending on where youre located in the world this will be easier or harder. Im in California and VW Dokas were never even imported here, let alone 4-door models so I knew my sourced 4th door and frame would have to come from overseas.
You will need the frame too - there is so much little metal and trim and weather seal channel and bracing that you will need. Of course you could fabricate all that yourself, but I would not consider that when you can find a door and frame to buy.
So knowing that youll need the whole frame and door, the best bet (for adding a door to the left side - aka a left hand drive vehicle) is to start your search in places where VW exported right hand drive vehicles. Those right hand drive vehicles will have the rear door on the left side. Just what you need.
My searches ranged all over South Africa, the UK and Australia. I focused my searches on trucks that seemed way worse for wear, or that were being sold for scrap or very cheap already. I had a few leads show up in SA, but none panned out. Fast forward a few months of searching and I saw a very rusty Doka but with what looked like a solid rear door show up on eBay UK - the price was low so I placed a bid for the whole truck and messaged the seller right then that I was only interested in the door (and frame) if hed be willing to cut it out for me should I win. I was outbid at the last minute (the whole rusty truck sold for ~$900 USD), and I never heard anything back from the seller. I was bummed, but figured the search would go on. A few weeks later the eBay seller messaged and said that the buyer fell through and if I still wanted the door and frame, he had his torch ready to start cutting! Boom! We worked out a deal and I ended up paying him $750 for the door and his time to cut it out. Shipping to the US cost me another $350. $1,100 is not cheap, but also... its a 4th door on my Doka. Theres no price limit for cool AND functional.
Last edited by smithprocess on Sat Jan 22, 2022 11:52 pm; edited 1 time in total |
|
| Back to top |
|
|
smithprocess
Samba Member
Joined: April 09, 2021
Posts: 70
Location: Bay Area, California
|
| Posted: Sat Jan 22, 2022 11:26 pm Post subject: Re: Adding a 4th door to a Doka |
|
|
Prep your donor for new life
My particular donor door came with a metal panel instead of a window, so there were little tack welds to cut out on that. If you sourced a door with a window you can basically skip this step and move on.
Window panel removed
I was super lucky to get all the little bits, even the hinge covers with my donor door
|
|
| Back to top |
|
|
smithprocess
Samba Member
Joined: April 09, 2021
Posts: 70
Location: Bay Area, California
|
| Posted: Sat Jan 22, 2022 11:27 pm Post subject: Re: Adding a 4th door to a Doka |
|
|
Close your eyes and cut your Doka
First I removed the window from my truck - some screw drivers, paint stirring sticks, and gentle pushes and itll pop right out
Clean canvas ready to [gulp] chop
No turning back - this is where you pull out the sawzall and go to town
Trim down and over and back up, and youve got a basic opening! Woot! Note I used short 4 sawzall blades to make sure I didnt cut into anything inside the truck - alternatively you could remove the rear seat and seat belt first but youll still need to be cautious not to cut through weather seal channel thats in there on the top corners and right side.
At this point you can really start to see whats there and whats not. Peeking up in the top left corner you can see the corner brace for under where the weather seal channel goes is there already - its on the right side as well.
I like to mark spot welds before I drill them with a paint pen, just makes it easier to get into a rhythm of drilling welds and not wondering where they are or finding the next divot in the metal once you get to drilling. Note here how youll have spot welds to drill inside the truck too. The amount of paint and body required is significant work which I was not totally anticipating
There is a little lip on the floor that must be removed. You can see the spot welds circled in paint pen below
Keep peeling away the remainder of the panel, drilling spot welds... and more spot welds
Bottom lip removed
Nearly there - little more metal to remove
Top right corner brace and a little of the right side weather seal channel that is already buried in the door waiting for you.
|
|
| Back to top |
|
|
smithprocess
Samba Member
Joined: April 09, 2021
Posts: 70
Location: Bay Area, California
|
| Posted: Sat Jan 22, 2022 11:27 pm Post subject: Re: Adding a 4th door to a Doka |
|
|
Brace it and hang it
Now that the canvas of the truck is cleaned, its finally time to prop the door in there, exciting! I used this moment to sharpie some lines on my truck where the hinges naturally fell, just to get me close for the next steps.
I cut out rough shapes from the donor frame where the hinges bolt in - there is bracing behind this sheet metal that you will need to harvest so be careful not to cut through that.
I then held those cut pieces up where I had my sharpie lines (not visible in this photo because theyre behind the scrap sheet templates), and I marked the holes with a paint pen.
It is important when you actually center punch and drill these holes in the truck to account for the thickness of the sheet metal - youre marking and measuring ON TOP of the sheet which is pushing the holes out away from your truck by that thickness - meaning: you should mark with paint pen, and then center punch inboard on your truck a bit from the dead center of those.
You will need complete access inside your B column, so cut out a patch panel.
You can see here the bracing piece that youll harvest from the donor door frame. I held it in place by actually putting the hinge bolts into it to make sure it was aligned.
You can see here the rosette welds above and in the middle of the hinge bolts - this is essential to add strength to the bracing piece since youll not be able to weld it exactly as the factory did to the inner framing piece inside the B column.
A good step drill is a beautiful thing for making clean holes in sheet metal
The bottom bracing piece going in and a good view of the 3 rosette weld points that I added on the face of the door jamb around the hinge bolt holes.
Now for the latch plate. This is the section I cut out of my donor frame. There is a floating insert that is threaded for the bolts that I had removed in this photo.
Extract the latch plate brace by cutting the 4 spot welds that hold it in.
To align the latch plate I got my door hung how I wanted and flush and then put the latch plate and aluminum spacer block onto the door, then shut the door and scribed around the profile in the door jamb.
The cut out to insert the latch plate into the trucks C column, and the holes drilled for the new rosette welds.
And finally hung, plumb, and latching!
Then its time to seal up the cuts youve made in your B column and latch plate area.
Not the prettiest, but... thats why god invented bondo (read: thats what I get for trying to weld such a large gap in sheet metal, should have made another patch panel that accounted for the gap from the grinder wheel)
Last edited by smithprocess on Sun Jan 23, 2022 11:20 am; edited 1 time in total |
|
| Back to top |
|
|
smithprocess
Samba Member
Joined: April 09, 2021
Posts: 70
Location: Bay Area, California
|
| Posted: Sat Jan 22, 2022 11:28 pm Post subject: Re: Adding a 4th door to a Doka |
|
|
Seal it up tight
This step in my experience was the most technically difficult of them all. Its just tedious. Removing spot welds, and prying pieces apart without damaging them... its a lot. Not to mention needing to have a delicate hand when welding them back into your Doka.
First remove the headliner strip, you guessed it - more spot welds to drill.
There is a lot to extract here. Cut along the red lines and you should be good. On the right side youll want to completely cut that weather strip channel off from your donor door - at least thats how I did it. Then I just butt-welded the channel onto my truck with a series of tacks.
There are spot welds up under the roof overhang that hold the whole top weather strip channel piece in - drilling those is best done by flipping the donor door over and going nice and slow.
These corner pieces need to be extracted on both sides.
I found this to be the best way to remove them. Notice the brass poking through - the factory brazed these here, so I opted to flip them over and just grind until the rear brace metal disintegrated. A little further down you can see them welded back into the truck.
The lower weather seal channel on my donor was completely crust.
I cut out a small section of the lower channel that was in decent-ish shape and took it over to my friend Matts shop, Seret Speed where he has a large metal brake and a better bead roller than I do.
Then with that shape Matt was able to make me a 29 duplicate of it that you can see below.
Laying out the lower channel and cleaning up for new rosette welds.
Lower channel welded in - note here that the filler / waxy / putty stuff that factory puts in in the corners will have to go at the bottom. It was tricky to remove to get a good weld, but with a scraper, knife and wire brush I got there.
Butt-welded weather seal channel tacked in on the left side.
Offering up the top seal channel
Top corner welds in like so.
Door strap check point getting ready to go to its new home.
Last edited by smithprocess on Sun Jan 23, 2022 11:42 am; edited 2 times in total |
|
| Back to top |
|
|
smithprocess
Samba Member
Joined: April 09, 2021
Posts: 70
Location: Bay Area, California
|
| Posted: Sat Jan 22, 2022 11:28 pm Post subject: Re: Adding a 4th door to a Doka |
|
|
Make a powdery bondo mess all over the laundry room you call a workshop (DIY fabric softener?)
Assume youll need to paint the entire B and C columns, the rocker under the door, and the roof overhang as well as the interior.
I decided to body fill the spots in the door jamb where I drilled out the factory spot welds - lot of work to detail sand all that out but when the door is opened I didnt want to see a lot of drill marks up and down the jamb.
Not going to go super in depth here, but just figured for continuity I would show a couple photos of body filling, sanding and painting the donor door.
First layer of final color primer. Almost there!
|
|
| Back to top |
|
|
smithprocess
Samba Member
Joined: April 09, 2021
Posts: 70
Location: Bay Area, California
|
| Posted: Sat Jan 22, 2022 11:29 pm Post subject: Re: Adding a 4th door to a Doka |
|
|
Lock it down
Not directly related to the door conversion, but hey if Im gonna do it, Im gonna do it all the way. I have already keyed my treasure chest and other three doors to match my ignition so I had to have this one match too.
Remove all the wafers and springs.
Cleaned up and ready to start re-keying (the pile of wafers on the right are my extras if needed)
To re-key I like to put all springs back in, and then work through the wafers one by one until finding matches for my key profile as I go.
First success! Youll know youre good to move to the next wafer when you can put your key in and not feel overhang of the wafer on either side.
This is what a no-go looks like. First wafer is good (flush), second is not (overhanging).
All wafers in and sitting flush.
All the parts ready to go back together.
The spring in the doka rear handle fits over the tumbler square end and then you position the arms of the spring on either side of the little tab for return pressure.
Finally tap the roll pin back in, and bobs your uncle. 4 doors, 1 key.
|
|
| Back to top |
|
|
smithprocess
Samba Member
Joined: April 09, 2021
Posts: 70
Location: Bay Area, California
|
| Posted: Sat Jan 22, 2022 11:29 pm Post subject: Re: Adding a 4th door to a Doka |
|
|
Fabricate a door card and call it done!
I made a door card out of 1/8 ABS to match the rest of the interior.
and... thats a wrap!
The end
Hope somebody finds this useful. Enjoy your new human entrance portal - I know Im going to!
-Jared Smith - https://smithprocess.com |
|
| Back to top |
|
|
Schnippzle
Samba Member
Joined: February 04, 2021
Posts: 288
Location: Swede in London, UK
|
| Posted: Sun Jan 23, 2022 3:24 am Post subject: Re: Adding a 4th door to a Doka |
|
|
An excellent log and fantastic work.
_________________
1988 Caravelle - FB25B - Syncro converted
2016 MB E63 AMG S - The daily driver
2019 Harley Davidson FXFBS Fat Bob - The leisure |
|
| Back to top |
|
|
4Gears4Tires
Samba Member
Joined: October 08, 2018
Posts: 3028
Location: MD
|
| Posted: Sun Jan 23, 2022 8:18 am Post subject: Re: Adding a 4th door to a Doka |
|
|
That's some excellent fabrication. Great post.
_________________
'87 Syncro
Ferric Oxyhydroxide Superleggera Edition |
|
| Back to top |
|
|
DuncanS
Samba Member
Joined: October 17, 2013
Posts: 4583
Location: New Hampshire
|
| Posted: Sun Jan 23, 2022 10:55 am Post subject: Re: Adding a 4th door to a Doka |
|
|
Unbelievable. That's about 4,000 more hours than I ever imagined. I assumed that all one needed to do was cut the B and C pillars and weld the ones that came with the door back in. Did the original fixed glass fit in the door or was it smaller?
I'm curious about the elapsed calendar time from the first cut to finished with paint and ready to drive. Maybe not the door card, but everything else. Musta been months.
Were there ever 4 door Dokas built? Maybe already addressed at some point in the two threads.
Fantastic job. Wonder what it would cost Jay Leno to have someone good enough to do all this? Gillions.
Duncan |
|
| Back to top |
|
|
Crankey
Samba Member

Joined: July 11, 2004
Posts: 2658
|
| Posted: Sun Jan 23, 2022 11:07 am Post subject: Re: Adding a 4th door to a Doka |
|
|
Pretty sweet there.
What did you do to protect any raw metal inside the cavities after welding ? Omni directional spray wand ?
Sure looks like original fit and function after paint. 👍 |
|
| Back to top |
|
|
smithprocess
Samba Member
Joined: April 09, 2021
Posts: 70
Location: Bay Area, California
|
| Posted: Sun Jan 23, 2022 11:23 am Post subject: Re: Adding a 4th door to a Doka |
|
|
| DuncanS wrote: |
...
I'm curious about the elapsed calendar time from the first cut to finished with paint and ready to drive. Maybe not the door card, but everything else. Musta been months.
Were there ever 4 door Dokas built? Maybe already addressed at some point in the two threads.
Duncan |
For me it was about 8 days from first cut to final paint, and that's only squeezing in one weekend and 2-3 hours a night after work. Ready to drive is another thing in my case since I have everything ripped out from under my truck replacing / powder coating / restoring it all.
There were 4 door Dokas made, they were called Tristars and they are $$$$ |
|
| Back to top |
|
|
smithprocess
Samba Member
Joined: April 09, 2021
Posts: 70
Location: Bay Area, California
|
| Posted: Sun Jan 23, 2022 11:25 am Post subject: Re: Adding a 4th door to a Doka |
|
|
| Crankey wrote: |
Pretty sweet there.
What did you do to protect any raw metal inside the cavities after welding ? Omni directional spray wand ?
Sure looks like original fit and function after paint. 👍 |
Honestly just paint. There is really nothing here that you don't have access to paint after you get it all cut out |
|
| Back to top |
|
|
MsTaboo
Samba Member

Joined: June 02, 2006
Posts: 4087
Location: East Kootenay, British Columbia
|
| Posted: Sun Jan 23, 2022 11:42 am Post subject: Re: Adding a 4th door to a Doka |
|
|
Nice work! Makes the Doka more usable. 
| smithprocess wrote: |
| DuncanS wrote: |
Were there ever 4 door Dokas built? Maybe already addressed at some point in the two threads.Duncan |
There were 4 door Dokas made, they were called Tristars and they are $$$$ |
There were some regular Dokas with a fourth door ordered as an option.
Why VW didn't just build all Dokas with four doors is a mystery. Just how much were they really saving on the sale price? 
_________________
Currently:
'90 Syncro Westy 3 knob w/Zetec
The information age has morphed into the age of disinformation and willful ignorance. Agnotology!
Help the fight against Truth Decay.
Defend democracy, support Ukraine. |
|
| Back to top |
|
|
sanchius 
Samba Member

Joined: May 03, 2007
Posts: 1451
Location: IN
|
|
| Back to top |
|
|
Jake de Villiers
Samba Member

Joined: October 24, 2007
Posts: 5911
Location: Tsawwassen, BC
|
|
| Back to top |
|
|
MayorMcCheese
Samba Member
Joined: October 07, 2009
Posts: 658
Location: Lancaster PA
|
| Posted: Sun Jan 23, 2022 12:12 pm Post subject: Re: Adding a 4th door to a Doka |
|
|
| Cool, I didn't realize it was so relatively easy |
|
| Back to top |
|
|
Crankey
Samba Member
Joined: July 11, 2004
Posts: 2658
|
| Posted: Sun Jan 23, 2022 12:17 pm Post subject: Re: Adding a 4th door to a Doka |
|
|
| smithprocess wrote: |
| Crankey wrote: |
Pretty sweet there.
What did you do to protect any raw metal inside the cavities after welding ? Omni directional spray wand ?
Sure looks like original fit and function after paint. 👍 |
Honestly just paint. There is really nothing here that you don't have access to paint after you get it all cut out |
Hmm that's surprising. Good to know though. Always thought a doka was a smugglers dream and border inspection nightmare.
Really cool to see this full write up with pictures. All I had seen prior was this...
https://www.vw-tristar.com/tristar.airride.htm
so your work and documentation is a real nice addition to the samba. |
|
| Back to top |
|
|
|


