| Author |
Message |
Mid West Dubber
Samba Member

Joined: July 11, 2011
Posts: 315
Location: Natimuk, VICTORIA, AUSTRALIA

|
 Posted: Fri Feb 04, 2022 2:33 am Post subject: Re: Rusty's '63 11 window Posted: Fri Feb 04, 2022 2:33 am Post subject: Re: Rusty's '63 11 window |
 |
|
Cross member in front of the beam removed and front section of the heater tube removed to make it easier to strip and sandblast. Left a few areas as they will either be getting replaced or getting more attention when i get to them. Stripped, blasted, rust treated and primed. Much cleaner under here now.
|
|
| Back to top |
|
 |
Mid West Dubber
Samba Member
Joined: July 11, 2011
Posts: 315
Location: Natimuk, VICTORIA, AUSTRALIA
|
| Posted: Fri Feb 11, 2022 2:24 am Post subject: Re: Rusty's '63 11 window |
|
|
Sandblasting showed that the metal behind the cross member was very pitted and had some rust holes. Cut the section out and replaced before welding in the new panel.
|
|
| Back to top |
|
|
AirBus
Samba Member

Joined: February 04, 2008
Posts: 290
Location: Holland
|
| Posted: Fri Feb 11, 2022 7:46 am Post subject: Re: Rusty's '63 11 window |
|
|
Great topic! Keep up the good work!!  
_________________
VW T1 1964 - Mouse Grey - Pearl White
Bagged, Porsche steeringrack/brakes..IRS, T1 1915cc |
|
| Back to top |
|
|
Mid West Dubber
Samba Member
Joined: July 11, 2011
Posts: 315
Location: Natimuk, VICTORIA, AUSTRALIA
|
| Posted: Fri Feb 18, 2022 10:40 pm Post subject: Re: Rusty's '63 11 window |
|
|
Cable guide tubes going in. Started with the heater cables. Removed the tap sections are rewelded like factory to avoid seeing the join. Welded back in, just need to grind back the welds.
Clutch and accelerator tubes also installed. Flared the front part of the clutch tube as per factory. I have had the cables running through to make sure the bends weren't too tight. Front and rear cross members welded in place and welds ground back.
|
|
| Back to top |
|
|
Kb65single
Samba Member
Joined: July 24, 2019
Posts: 271
Location: Obxnc
|
| Posted: Sun Feb 20, 2022 8:29 am Post subject: Re: Rusty's '63 11 window |
|
|
Really nice work! I can tell that there is a lot of thinking and planning going on. I'm sure it will turn out great. I wouldn't want the job of cleaning out your garage space that's going to take some time  . Keep at it step by step, I'm really enjoying this build. . Keep at it step by step, I'm really enjoying this build.
Ken |
|
| Back to top |
|
|
Mid West Dubber
Samba Member
Joined: July 11, 2011
Posts: 315
Location: Natimuk, VICTORIA, AUSTRALIA
|
| Posted: Sun Mar 06, 2022 1:42 am Post subject: Re: Rusty's '63 11 window |
|
|
Cargo floor is welded in. Still some welding around the heater tubes to finish off but I am happy it's in. Used a tip from a mates build thread of drilling into the i beams to get the weld to penetrate slightly better. Plently of drilling, plenty of welding and grinding...
|
|
| Back to top |
|
|
Mid West Dubber
Samba Member
Joined: July 11, 2011
Posts: 315
Location: Natimuk, VICTORIA, AUSTRALIA
|
| Posted: Mon Mar 14, 2022 12:12 am Post subject: Re: Rusty's '63 11 window |
|
|
Drivers side seat rail was rusted out underneath. I had bought some seat rails which came with the wheel tub sheet metal still attached. At first i thought this was going to be a straight forward, mark it out, cut it and weld it in. But closer inspection showed rust between the rail and wheel tub on the donor metal.
Lucky I had the sheet metal from the passenger side donor as well. Although it was a mirror image I was able to section it and weld it back in bit by bit.
All ground back and ready to sort out installing the seat rail...
|
|
| Back to top |
|
|
Mid West Dubber
Samba Member
Joined: July 11, 2011
Posts: 315
Location: Natimuk, VICTORIA, AUSTRALIA
|
| Posted: Thu Mar 24, 2022 2:10 pm Post subject: Re: Rusty's '63 11 window |
|
|
Seat rail repair is pretty much finished. Still some grinding to do but its solid again.
Sandblasted the rail and had to make new plates that mount between the rail and wheel arch. Fiddly job getting them lined up but happy with the result. I will post a final pic once its in primer.
|
|
| Back to top |
|
|
ddutch
Samba Member
Joined: June 17, 2020
Posts: 125
Location: Nederland
|
| Posted: Thu Mar 24, 2022 7:48 pm Post subject: Re: Rusty's '63 11 window |
|
|
| Very impressive work! Although it's under the seat, it will look factory original after paint, and I like that. |
|
| Back to top |
|
|
Mid West Dubber
Samba Member
Joined: July 11, 2011
Posts: 315
Location: Natimuk, VICTORIA, AUSTRALIA
|
| Posted: Fri Apr 01, 2022 3:19 am Post subject: Re: Rusty's '63 11 window |
|
|
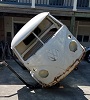
Front panel is off. Stripping and sandblasting paint on the bulkhead, wheel tubs, front floor, dash and inner front structure. This is the last of the sandblasting that will be done in the shed. Had a massive clean up in the shed which was refreshing.
|
|
| Back to top |
|
|
wardvwracer
Samba Member

Joined: July 19, 2002
Posts: 489
Location: De Pere, WI
|
| Posted: Wed Apr 06, 2022 6:02 pm Post subject: Re: Rusty's '63 11 window |
|
|
What a great build - nice work. Really nice work. I'm knee deep into my own 63 11-window standard and have enjoyed it for the most part. Your work here is inspiring.
Thanks for sharing.
_________________
David Ward
ACME Berrien Buggy Street/Strip racer build
1963 Single Cab
1969 Beetle Convertible
63 11-Window Kombi Bus
Cornpanzers |
|
| Back to top |
|
|
Mid West Dubber
Samba Member
Joined: July 11, 2011
Posts: 315
Location: Natimuk, VICTORIA, AUSTRALIA
|
| Posted: Fri Apr 15, 2022 3:46 am Post subject: Re: Rusty's '63 11 window |
|
|
Wanted to get the steering box raise done ready for the inner front valance to be put in place. I decided to fabricate a new box section instead of the usual cut and shift. I had two sections of 2.2mm steel folded up and got to work with the raise. I had originally purchased a wagenswest raise kit and I used the template to trace the angle that the box needed to follow as it went up and back. Original crush tube used for the clutch pedal pivot. All welded together and ready to install.
|
|
| Back to top |
|
|
Mr Margaret Scratcher
Samba Member
Joined: February 10, 2013
Posts: 246
Location: Cambridge UK
|
| Posted: Sat Apr 16, 2022 12:33 pm Post subject: Re: Rusty's '63 11 window |
|
|
| Mid West Dubber wrote: |
| Mr Margaret Scratcher wrote: |
| Mid West Dubber wrote: |
Right side battery tray required some slight adjustments...
|
I think I'm going to have a similar thing on the 12V tray I have for my 66 - was what you did to pul the corner radius in so that the outer edge would sit flush against the inside of the side of the rear corner? |
Yes that is correct, I ran a cut off wheel around the radius and tacked it in place until I was happy with how the shape fit the inside of the rear corner |
Me again, complete noob here - how do you cut around a radius with a cutoff wheel? Just hold it at an angle?
Many thanks
EDIT: found this after I posted:
Link
|
|
| Back to top |
|
|
LAGrunthaner
Samba Member

Joined: March 18, 2007
Posts: 5509
Location: 1st Coast
|
| Posted: Sun Apr 17, 2022 4:56 am Post subject: Re: Rusty's '63 11 window |
|
|
Wow I love this video, I never gave it a thought to slowly use my angle grinder to cut a circle. Looking forward to trying it out!
_________________
American Red Cross Safe And Well:
https://www.redcross.org/about-us/news-and-events/...bsite.html
Maui Roadsters 
www.mauiroadsters.com
http://www.oacdp.org
| Lind wrote: |
| Have you considered simply starting with a nicer bus? I don't know what your skills are, but the race is easier if you can see the finish line. If you are not a runner, don't start off doing a marathon. |
|
|
| Back to top |
|
|
Mid West Dubber
Samba Member
Joined: July 11, 2011
Posts: 315
Location: Natimuk, VICTORIA, AUSTRALIA
|
| Posted: Thu Apr 21, 2022 2:57 am Post subject: Re: Rusty's '63 11 window |
|
|
| Mr Margaret Scratcher wrote: |
| Mid West Dubber wrote: |
| Mr Margaret Scratcher wrote: |
| Mid West Dubber wrote: |
Right side battery tray required some slight adjustments...
|
I think I'm going to have a similar thing on the 12V tray I have for my 66 - was what you did to pul the corner radius in so that the outer edge would sit flush against the inside of the side of the rear corner? |
Yes that is correct, I ran a cut off wheel around the radius and tacked it in place until I was happy with how the shape fit the inside of the rear corner |
Me again, complete noob here - how do you cut around a radius with a cutoff wheel? Just hold it at an angle?
Many thanks
EDIT: found this after I posted:
Link
|
I also find using a small cut off wheel in a dremel to do a neat job as well |
|
| Back to top |
|
|
Mid West Dubber
Samba Member
Joined: July 11, 2011
Posts: 315
Location: Natimuk, VICTORIA, AUSTRALIA
|
| Posted: Thu Apr 21, 2022 2:57 am Post subject: Re: Rusty's '63 11 window |
|
|
Trail fitting the lower valance which was modified to suit the steering box raise. Reused the wiring hole from the original bracket that was cut out.
Left side A pillar welded in and ground back..
Stripped all the green paint off the lower inner valance...
Right hand side A pillar welded in place...
Plug weld holes drilled and valance installed...
|
|
| Back to top |
|
|
Mid West Dubber
Samba Member
Joined: July 11, 2011
Posts: 315
Location: Natimuk, VICTORIA, AUSTRALIA
|
| Posted: Sun May 08, 2022 2:46 am Post subject: Re: Rusty's '63 11 window |
|
|
Passenger side dog leg time. This KF dog leg required some extra attention on the inner and outer. This definitely wasn't my favourite part of the build and still have the right side ahead of me.
Trial fit...
Green paint removed...
drilled and dimpled as per the original dogleg. Also did the top one but didn't get a pic..
Modified the inner as the shape was way off...
|
|
| Back to top |
|
|
Mid West Dubber
Samba Member
Joined: July 11, 2011
Posts: 315
Location: Natimuk, VICTORIA, AUSTRALIA
|
| Posted: Thu May 19, 2022 10:32 pm Post subject: Re: Rusty's '63 11 window |
|
|
Left side front floor repair
|
|
| Back to top |
|
|
Mid West Dubber
Samba Member
Joined: July 11, 2011
Posts: 315
Location: Natimuk, VICTORIA, AUSTRALIA
|
| Posted: Fri May 27, 2022 2:46 am Post subject: Re: Rusty's '63 11 window |
|
|
Drivers side dog leg. This dog leg was way out of shape and did not even come close to matching the curve of the door gap. Cut through both of the curves, repositioned and rewelded. Very time consuming but happy with the final result. Still a tiny bit of welding and grinding to be finished off.
Small repair to the edge before installing the dog leg...
|
|
| Back to top |
|
|
Mid West Dubber
Samba Member
Joined: July 11, 2011
Posts: 315
Location: Natimuk, VICTORIA, AUSTRALIA
|
| Posted: Sun May 29, 2022 1:12 am Post subject: Re: Rusty's '63 11 window |
|
|
Repaired the bottom edge of the wheel tub and got the drivers side front floor welded in.
|
|
| Back to top |
|
|
|


