| Author |
Message |
Clatter
Samba Member

Joined: September 24, 2003
Posts: 7537
Location: Santa Cruz

|
 Posted: Wed Mar 23, 2022 2:22 pm Post subject: Re: Electrical Upgrades - Early Car Posted: Wed Mar 23, 2022 2:22 pm Post subject: Re: Electrical Upgrades - Early Car |
 |
|
| Chip wrote: |
| LEDs in the bucket and Lucas would be fine. What do you have for turn signals right now? |
Thanks for your input, Chip.
Rears are your LEDs, and I'm also going to run your flasher.
Wasn't sure if i should put these LED 'bulbs' just in the Lucas lights,
Or if maybe it would be good to also put them in the bottom of the headlight bucket?
If so, should i wire them in series or parallel?
Flasher won't care?
Always just ran those yellow incandescent bulbs in the headlight bucket
and oftentimes people wouldn't see them.
Seems like 'more is better' with signaling to the Facebook/texting "drivers" out there.
That also brings me to the question..
"What is that bulb in the bottom of the headlight bucket for, anyways?" 
Don't tell me it actually helps the headlight work correctly...
_________________
Bus Motor Build
Whats That Noise?!? |
|
| Back to top |
|
 |
Chip 
Samba Member
Joined: July 19, 2008
Posts: 969
Location: Utah
|
| Posted: Wed Mar 23, 2022 4:06 pm Post subject: Re: Electrical Upgrades - Early Car |
|
|
| Clatter wrote: |
| Chip wrote: |
| LEDs in the bucket and Lucas would be fine. What do you have for turn signals right now? |
Thanks for your input, Chip.
Rears are your LEDs, and I'm also going to run your flasher.
Wasn't sure if i should put these LED 'bulbs' just in the Lucas lights,
Or if maybe it would be good to also put them in the bottom of the headlight bucket?
If so, should i wire them in series or parallel?
Flasher won't care?
Always just ran those yellow incandescent bulbs in the headlight bucket
and oftentimes people wouldn't see them.
Seems like 'more is better' with signaling to the Facebook/texting "drivers" out there.
That also brings me to the question..
"What is that bulb in the bottom of the headlight bucket for, anyways?"
Don't tell me it actually helps the headlight work correctly... |
Just wire the LEDs like the stock bulbs. Are the Lucas lights what you currently have mounted on the fender for turn signals. They should just wire like stock, one wire to each light from the turn signal switch, maybe another wire to ground, stock lights ground to the fender.
The headlight bucket bulbs are a running light. First stop on your headlight switch, they are not a turn signal. They do frequently get changed to turns when people shave the peanuts for a more Euro look.
The relay I sent will be just fine with LEDs at all 4 corners, it may not like having a standard bulb in the dash though, I've seen that cause some strange behaviors recently, but only with 4 corner LED installs. If you run into funky blinking issues when you test, that's a likely cause. I have a solution now, that I didn't have at the beginning of the year when you ordered this stuff. Feel free to contact me if you need any help with that.
If you plan to run both the Lucas lights and the others in the headlight as turns, you'll want to wire in parallel. Series will split the voltage between them, and that is not what you want to do. |
|
| Back to top |
|
|
Clatter
Samba Member
Joined: September 24, 2003
Posts: 7537
Location: Santa Cruz
|
| Posted: Thu Mar 24, 2022 9:26 am Post subject: Re: Electrical Upgrades - Early Car |
|
|
Thanks to some help on the Oval forum i got the headlight seal figured out.
Who would ever guess that the small seal here stretches around the headlight lense to about the same size as the big one? 
Maybe i should just put the parking light back like it goes in the headlight,
And run the LEDs just in the Lucas turns.
And leave out these fancy-pants HIDs with their flashy metal case..
Bet you the H4s will be good enough if they're properly sussed out, right?
_________________
Bus Motor Build
Whats That Noise?!? |
|
| Back to top |
|
|
Clatter
Samba Member
Joined: September 24, 2003
Posts: 7537
Location: Santa Cruz
|
| Posted: Sun Jun 26, 2022 9:33 am Post subject: Re: Electrical Upgrades - Early Car |
|
|
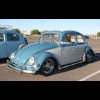
OK, Figured I'd update this thread after a long hiatus..
Several things in this project turned into a protracted fight,
And I'll put the details down for anyone who might want to try these things one day.
First off, my Man Brent came by.
They fly him all over the world to work on Scanning Electron Microscopes,
And he was able to help me sort my wiring! 
Not many guys out there willing to do crap like this.
Big big thanks to my brother.
This whole thing was getting off the rails and into the ditch.
_________________
Bus Motor Build
Whats That Noise?!? |
|
| Back to top |
|
|
Clatter
Samba Member
Joined: September 24, 2003
Posts: 7537
Location: Santa Cruz
|
| Posted: Sun Jun 26, 2022 9:46 am Post subject: Fuel Pump |
|
|
First thing being a PITA was the fuel pump.
The idea here is to have the fuel pump on a relay for reliability and to take off loads,
But also have it switched, so i can turn it off.
Sometimes i want to run the float bowls dry, like before pulling the carbs, or if the car is going to sit for a long time.
Had a wiring diagram i worked up that got posted here earlier.
This is WRONG. it will NOT work:
Here's how the fuel pump controller directions say to do it:
After tearing my hair, the Revolution Electronics people were nice enough to send me a solution.
The toggle switch was really throwing a wrench in the works..
Here's the final iteration that functions correctly.
I'm using a relay to heat up my other relays under the back seat.
That way i can pull a fuse to disable it all, isolate loads, etc.
Here's the little jumper we soldered up to go on the fuel pump relay as per the revised plan:
Man, that was a PITA to figure out.
Brent helped me power thru this for a whole long day..
Super glad to get it sussed out.
With the crappy ethanol fuel they sell these days,
It's great to have a solution to gummed-up carbs!
_________________
Bus Motor Build
Whats That Noise?!? |
|
| Back to top |
|
|
Clatter
Samba Member
Joined: September 24, 2003
Posts: 7537
Location: Santa Cruz
|
| Posted: Sun Jun 26, 2022 9:55 am Post subject: Line Lock |
|
|
Here's another thing that wanted to fight that i had all wrong.. 
Having the line-lock on a toggle to disable it when not in use seems a good idea, right?
Hey, let's have an indicator light so we know it's active, too!
Easy, right?
Wrong..
The included instructions don't seem too complex:
Here's the WRONG diagram i worked up:
After much back/forth a revised wiring scheme was hatched;
This one actually worked:
Now, you can toggle on the system, the light will glow, and the button will work.
Afterwards, you toggle the system off, the light goes out,
And accidentally pushing the button won't cause your front brakes to not be available...
_________________
Bus Motor Build
Whats That Noise?!? |
|
| Back to top |
|
|
Clatter
Samba Member
Joined: September 24, 2003
Posts: 7537
Location: Santa Cruz
|
| Posted: Sun Jun 26, 2022 10:11 am Post subject: More Line Lock |
|
|
Here's a few things learned doing my first line lock..
Kind of OT but not really.
Tried to do the plumbing in a neat enough way,
Running it clear of other things.
After putting the whole car together and testing it out, I'm thinking it has air trapped.
Pretty sure the bubbles are staying up in the 'high' spots of these lines.
Them being higher in elevation than the master reservoir can't help, either.
Cracking some fittings during the bleeding process is likely to help,
But boy, what a PITA with the tank installed.
Nextime I'll make sure it's 100% bled before installing and filling the fuel tank.
Something else i din't really think thru..
When i saw the Speed Dawg button it seemed a great way to line lock:
Then put the burnout squirt on a button under the dash..
Well...
When you're doing a burnout the car creeps forward a bit and you want to keep adding water.
If you're holding the line lock button with your right hand and you use your left to reach under the dash and add more water,
How you gonna hold on to the wheel?
Can't use your knee because your feet are both real busy with gas and clutch.
I'm going to be putting the line lock button on the steering wheel to the left.
That way you can hold the line lock button and the steering wheel with the left hand,
And we'll put the squirter button on the shifter.
That way you can keep your hands where they go to operate the car while locking -and- squirting.
I'll probably use the hole i drilled to toggle the squirter system on/off.
With the button on the shifter handle, it's just too easy to accidentally push,
Especially in a panic stop situation.
So there you have it.
Dumb newbie mistakes.
Hopefully someone will learn from this before being stupid like me.
_________________
Bus Motor Build
Whats That Noise?!? |
|
| Back to top |
|
|
Clatter
Samba Member
Joined: September 24, 2003
Posts: 7537
Location: Santa Cruz
|
| Posted: Sun Jun 26, 2022 10:27 am Post subject: LED Lights |
|
|
Man, there's a bunch of brainless fucks driving around these days..! :snipersmile:
SO many times they don't even see a light.
They can't -afford- to pay attention!
/rant
Here's a great solution to help - Chip B's LED taillight conversion.
https://www.thesamba.com/vw/classifieds/detail.php?id=892796
These require the use of an LED indicater light in your speedo,
As well as a special solid-state flasher can.
Details included in the kit:
Old rotten/cracked black inner lens parts get tossed and the new LED board goes in its place.
Got some new seals and trim rings from WW while at it,
As well as a couple better OG lenses.
Also wanted to move my turn bulbs from the running light position in the bottom of the headlight buckets to some Lucas L488s.
The bottom of the headlight buckets will be running lights as originally now.
Was going to do both, but the LEDs in the Lucas lights seem bright enough for the brainless to see we'll hope.
I'd been waffling back and forth about how best to do this and where exactly to put my new turn lights,
But luckily Brent came around and slapped me for being a waffling Sally and dug right in.
Since I'm running t-bars i put 'em a -smidge- lower than the horn grills woulda been.
If i'd a had bumpers they woulda been a bit higher... If. 
Dunno WTF with these goofy-ass Brit connectors.. We just stuck a bullet in 'em.
Lucas, Prince of Darkness!
They're nice and bright for now! 
If only these other drivers were...
_________________
Bus Motor Build
Whats That Noise?!? |
|
| Back to top |
|
|
Clatter
Samba Member
Joined: September 24, 2003
Posts: 7537
Location: Santa Cruz
|
| Posted: Sun Jun 26, 2022 10:45 am Post subject: Ignition Details |
|
|
Also included in this adventure is an upgrade to CDI ignition.
Got an MSD 6A off crankslist for $20 and my man Damon gave me a Blaster SS coil for free.
Big thanks to Jeff for giving me this goofy idea.
https://www.thesamba.com/vw/forum/viewtopic.php?t=732536
Using an older Bosch SVDA with Pertronix module to drive it.
Soldered up a solid rotor, added big spiral-wound Taylor 8.2 wires, and used non-resistor plugs gapped bigger to .035.
It worked great until it didn't. Got my money's worth! 
Using the Pertronix to trigger it all seems so straightforward in the literature doesn't it?
Not so fast...
There's the alternator back-feed issue to solve - that we started this whole thread with:
We (Brent) ended up soldering in my diode to fit under the dash.
It got soldered directly to the wire.
Then it got buried under shrink-wrap and attached to the idiot light.
Seems strong enough and out of the weather.
If it needs replaced there's enough wire to snip it and do again a couple times.
Another issue was my non-functioning tach.
Turns out the VDO needed the ($100  ) MSD 8920 adaptor box. ) MSD 8920 adaptor box.
It came with an adhesive backing so i just stuck it onto the pan over next to the battery.
I'm over this project already.
What works works.
And what doesn't, we'll fix it later.
_________________
Bus Motor Build
Whats That Noise?!? |
|
| Back to top |
|
|
Dale M.
Samba Member

Joined: April 12, 2006
Posts: 20377
Location: Just a tiny bit west of Yosemite Valley
|
| Posted: Sun Jun 26, 2022 10:54 am Post subject: Re: Electrical Upgrades - Early Car |
|
|
Be sure to create a binder with all your electrical sketches.... Keep the ones the actually work and correctly designate whats in car and shred ones that do not work... You may need them next week....
_________________
Fear The Government That Wants To Take Your Guns" - Thomas Jefferson.
"Kellison Sand Piper Roadster" For Street & Show.
"Joe Pody Sandrover" Buggy with 2180 for Autocross (Sold)
============================================================
All suggestions and advice are purely my own opinion. You are free to ignore them if you wish ... |
|
| Back to top |
|
|
Clatter
Samba Member
Joined: September 24, 2003
Posts: 7537
Location: Santa Cruz
|
| Posted: Sun Jun 26, 2022 11:21 am Post subject: Re: Electrical Upgrades - Early Car |
|
|
So, in conclusion..
There are a LOT of things you can do to an early car if you want to modernize the electricals.
Doing it like i did where it's either hidden, or stock in appearance makes it harder.
A Painless or similar kit would be much easier and probably last longer and give less grief.
But,
"Beauty Knows NO Pain"! 
Already done to this car was a 12V conversion plus:
Alternator - integral regulator
Wiring Works harness
12V wiper conversion armature
12V bulbs
Gauges - Fuel, tach, oil pressure, oil temp, CHT
Starter button
Hard start relay
What i did in this latest project:
Horn - new horn, new button kit (no relay - i never use the horn)
Dome light - needed door switches and wires connected
Gauge lights - fresh correctly-colored wires and new bulbs and holders clean
Light switch - from WW - old one was crusty
Dimmer switch - from WW - old one was crusty
License light - just needed paint scraped away for ground
Front turns - Lucas L488s with LED bulbs from Amazon
Rear turns/tails - from ChipB also his flasher and indicator bulb
H4 headlight conversion - ac.net. mostly the switch pieces being fresh
Burnout squirt - windshield washer tank/pump/nozzles, button under dash
Hurst Line lock - Speed Dawg button, indicator light and disarm toggle
CDI - MSD 6A with Blaster SS and 8920 tach adaptor
Stuff all got put on relays with fresh feed wires and fuses/box
It's been a long journey, but i can say it's nice to have everything actually working on the car like it's sposeta.
Some things I'd like to add might be Telford's light switch saver,
but i might just add LEDs to the gauge lights instead.
Also the H4s headlights i have are cheapies, so to take loads off i might upgrade to some nicer LED H4s.
If/when they ever come back in stock..
http://vwparts.aircooled.net/H4-LED-Headlight-Bulb-Conversion-Kit-PAIR-p/h4-led-kit.htm
That HID kit i showed earlier was just too confusing, and too much drilling/hacking.
I'll probably try those on my Bus, where there's a better place to mount the boxes and all.
Anyways,
Big thanks to everyone who contributed time and wisdom.
Most all of these improvements came from the forum here somewhere.
Big thanks to Damon and Brent.
Takes a village.. 
_________________
Bus Motor Build
Whats That Noise?!? |
|
| Back to top |
|
|
Clatter
Samba Member
Joined: September 24, 2003
Posts: 7537
Location: Santa Cruz
|
| Posted: Sun Jun 26, 2022 11:26 am Post subject: Re: Electrical Upgrades - Early Car |
|
|
| Dale M. wrote: |
| Be sure to create a binder with all your electrical sketches.... Keep the ones the actually work and correctly designate whats in car and shred ones that do not work... You may need them next week.... |
Oh yeah.. For sure.
The good ones are put away and the bad ones are gone.
And i needed them last week, because my free coil decided to fail.
Who would ever guess??
_________________
Bus Motor Build
Whats That Noise?!? |
|
| Back to top |
|
|
Chip
Samba Member
Joined: July 19, 2008
Posts: 969
Location: Utah
|
| Posted: Sun Jun 26, 2022 1:20 pm Post subject: Re: Electrical Upgrades - Early Car |
|
|
| Sounds like quite the journey! Thanks for documenting everything! Looks great! |
|
| Back to top |
|
|
Clatter
Samba Member
Joined: September 24, 2003
Posts: 7537
Location: Santa Cruz
|
| Posted: Sun Jun 26, 2022 3:14 pm Post subject: Re: Electrical Upgrades - Early Car |
|
|
| Chip wrote: |
| Sounds like quite the journey! Thanks for documenting everything! Looks great! |
Thanks Chip,
I really appreciate your help getting the LED light situation sussed out.
I'm sure it's been no small amount of work doing those lights.
Right now I'm shopping on Amazon for some LED H4 bulbs to replace the halogen headlight bulbs in there now.
Can't help but worry the loads are too heavy. Bet those halogens are taxing the old wiring.
Planned on doing some relays like a late model but figured I'd just take the loads down with some LEDs instead.
Since ac.net is out, I'm on Amazon and that place is like the flea market in a bad part of town.
It's starting make ebay seem classy lately..
I'd pay a premium to get some LED H4s that fit the early Beetle headlights for sure.
Same with LED gauge lights and the dome light.
Groping around, buying some random crap from Amazon, only to be stuck with the wrong stuff sucks.
Maybe you have already worked thru the junk and know what to get?
I'd be happy to pay a premium to get parts that actually work.
I'm sure there's plenty of others who feel the same.
Don't care what it costs. Make it worth your time.
Would love to skip the routine of "buy and return" (or just keep because PITA).
_________________
Bus Motor Build
Whats That Noise?!? |
|
| Back to top |
|
|
Chip
Samba Member
Joined: July 19, 2008
Posts: 969
Location: Utah
|
| Posted: Tue Jun 28, 2022 7:50 am Post subject: Re: Electrical Upgrades - Early Car |
|
|
| Clatter wrote: |
| Chip wrote: |
| Sounds like quite the journey! Thanks for documenting everything! Looks great! |
Thanks Chip,
I really appreciate your help getting the LED light situation sussed out.
I'm sure it's been no small amount of work doing those lights.
Right now I'm shopping on Amazon for some LED H4 bulbs to replace the halogen headlight bulbs in there now.
Can't help but worry the loads are too heavy. Bet those halogens are taxing the old wiring.
Planned on doing some relays like a late model but figured I'd just take the loads down with some LEDs instead.
Since ac.net is out, I'm on Amazon and that place is like the flea market in a bad part of town.
It's starting make ebay seem classy lately..
I'd pay a premium to get some LED H4s that fit the early Beetle headlights for sure.
Same with LED gauge lights and the dome light.
Groping around, buying some random crap from Amazon, only to be stuck with the wrong stuff sucks.
Maybe you have already worked thru the junk and know what to get?
I'd be happy to pay a premium to get parts that actually work.
I'm sure there's plenty of others who feel the same.
Don't care what it costs. Make it worth your time.
Would love to skip the routine of "buy and return" (or just keep because PITA). |
I wish I had advice to share. This is a road I've never actually been down, yet. There have been some advertised here for quite a few years
https://www.thesamba.com/vw/classifieds/search.php?username=vintagecarleds§ion%5B%5D=70
I have zero experience with the product or the seller, the products do look nice, they do seem to have a decent range of offerings as far as performance and price goes. Kind of an expensive gamble, but probably worth looking into. |
|
| Back to top |
|
|
j-dub
Samba Member
Joined: November 09, 2003
Posts: 865
Location: Phoenix, AZ
|
|
| Back to top |
|
|
Lingwendil
Samba Member

Joined: February 25, 2009
Posts: 3988
Location: Antioch, California, a block from the hood
|
| Posted: Tue Jun 28, 2022 8:33 am Post subject: Re: Electrical Upgrades - Early Car |
|
|
^ I was just about to recommend those, there are also a bunch of highly rated LED conversions on Amazon that are worth a try.
I ran a set from Beamtech in my 96 Civic and they were honestly a huge improvement, been thinking of giving them another shot for the Hella H4 housings I run in the super. Past experience was less than favorable but its been several years since I tried LEDs in the 7" VW style housings.
_________________
73 super beetle thread http://www.thesamba.com/vw/forum/viewtopic.php?t=649622 Back on the Road!
Modify your Kadrons for SVDA http://www.thesamba.com/vw/forum/viewtopic.php?p=8115884#8115884
Cast iron VJU4BR8 SVDA reference thread- https://www.thesamba.com/vw/forum/viewtopic.php?t=...mp;start=0
Need replacement filters for original Kadron aircleaners? WIX #42087 is a perfect fit, as is Napa Gold #2087! |
|
| Back to top |
|
|
nextgen
Samba Member
Joined: August 19, 2004
Posts: 6022
Location: CONGERS, N.Y.
|
| Posted: Tue Jun 28, 2022 9:16 am Post subject: Re: Electrical Upgrades - Early Car |
|
|
The biggest problems I have been finding is the VW Factory connectors!!
They get corroded over the years
Just replaced the rear lights connectors on both sides. Back up, signal, stop and just rear lights.
I have been removing them and using crimp connectors.
All so really helpful are the wire code stick on strips.
You can get those at Home depot.
I have been selling my Shield in the beginning just for the wet climates .
This time of year I sell more in California for the winds from dust storms, but the east coast is the worst for corrosion
("Hey Joe!
Thank you so much for sending me these. What's funny is that the guys in the office received the box before I did and immediately went and tried it on their cars.
Pretty cool stuff and I like the fact that even though it doesn't rain much here, we get the Santa Ana winds blowing a lot and leaves and crud fly into the vents, especially into those cars that are just sitting in backyards. So these will come in handy for some of the local crew.
Thanks again Joe
Hope all is well on your side of the country.
Best regards)
xxxxxxxxxxxxxx
Hot VWs Magazine
1520 Brookhollow #39
Santa Ana, CA 92705
_________________
email: [email protected]
The TYPE IV UPRIGHT CONVERSION MANUAL
BEETLE MAGNETIC DEFLECTOR SHIELDS
LETS TALK DUBS https://www.youtube.com/results?search_query=joe+cali+ghia https://letstalkdubs.libsyn.com/ep-200-joe-cali-ty...qI3xJTCzjs |
|
| Back to top |
|
|
nextgen
Samba Member
Joined: August 19, 2004
Posts: 6022
Location: CONGERS, N.Y.
|
|
| Back to top |
|
|
W1K1
Samba Member

Joined: March 04, 2004
Posts: 4916
Location: Southern AB
|
| Posted: Tue Jun 28, 2022 11:35 am Post subject: Re: Electrical Upgrades - Early Car |
|
|
| Quote: |
I'm going to be putting the line lock button on the steering wheel to the left.
That way you can hold the line lock button and the steering wheel with the left hand,
And we'll put the squirter button on the shifter.
That way you can keep your hands where they go to operate the car while locking -and- squirting. |
I found a wiring diagram years ago for using the horn button for the line lock, so there was a small dash switch that flip flopped a relay from horn, to line loc. It worked really well
_________________
http://www.thesamba.com/vw/archives/manuals/jim_martin_engine_build.php
1973 super
1965 squareback 1500E
1971 bay window westy- subi swap |
|
| Back to top |
|
|
|


