| Author |
Message |
63Ragtop NZ
Samba Member
Joined: December 04, 2007
Posts: 895
Location: West Auckland

|
 Posted: Wed Mar 08, 2017 12:26 pm Post subject: Re: My 63 Ragtop Posted: Wed Mar 08, 2017 12:26 pm Post subject: Re: My 63 Ragtop |
 |
|
So Summer has officially ended and still no red paint on this thing! 
But never fear, I'm on it!! I've been spending what feels like every waking moment and many when I should be sleeping working on this thing, I'm beginning to understand why car paint jobs are so flippin expensive!
Time, lots and lots of time.
So after giving the shed a mighty clean up and tidy, thinning out the heard of pushbikes down to a manageable number and shoving anything unneeded under the house, I began with dressing down the old welds on the sunroof graft.
and then the bog.
So much sanding.
then decided to bare metal the dash and tidy up the rest of the inside.
check out the factory spot welds.
the reason for this was to remove all the shitty old glue that I had spread about holding the carpets in place, as I wanted to get a nice coat of paint every where.
looking much better after some etch.
I even managed to get a couple days off work as I was on a roll!
moved onto the underside, which apart from the bottom corners on the front firewall, needed no bog at least!
also heaps and heaps of tiny small things like bogging up the spot welds under the engine air vents, smoothing out the welds where I grafted said vent panel into the roof and the front scuttle graft aswell, the A pillars, the front wheel wells......   
At this point my fingers are numb and my skin feels like 180T sandpaper, are we having fun yet?!
But seeing it all coming together in one colour.
that is pretty cool.
fantastic motivation.
You gotta keep on pushin, you gotta keep on pushin!
time to crank up the beast!
this side was tricky, the hood release tube is right smack in the way.
got it stick in place evenchually.
and then the one on the scuttle.
spot welder was making a bit of a mess out of this one(it may have been the operator) so I had to MIG up a few wee holes here and there.
and bog and sand and etch.....
another chunk done.
need to start seam sealing but it would appear that the tube I used on the chassis has seam sealed its self inside the tube, fuck it, I'd only used a quarter of the fucking thing!
I cut the tube open and did the under side bits here.
not very pretty, but it will keep out the weather.
seams about right, I went to paint the gray primer on the inside of the trunk, got half way and ran out of air, went to finish it tonight and I'd run out of thinners, and now the seam sealer.
Ah well, I've been meaning to update you guys so there you are. 
_________________
If you can't join them, beat them! |
|
| Back to top |
|
 |
soupcups 
Samba Member
Joined: May 08, 2014
Posts: 221
Location: Huntington Beach
|
| Posted: Wed Mar 08, 2017 8:29 pm Post subject: Re: My 63 Ragtop |
|
|
| Still watching and still impressed. Can't wait to see the finished project. What color ? |
|
| Back to top |
|
|
wcfvw69
Samba Purist

Joined: June 10, 2004
Posts: 13389
Location: Arizona
|
| Posted: Wed Mar 08, 2017 10:14 pm Post subject: Re: My 63 Ragtop |
|
|
Damn.. I'm exhausted looking at all that work you're doing!
And you're on point with the high cost of paint and body work. Even a small bug takes hours and hours and hours of sanding, sanding some more and then some more again.
I got a quote to paint my 67 bug. I'd take it to the shop with the body stripped of everything not needing to be painted. The quote was $7 grand to fix some minor dings and dents and then paint it.
After spending what seemed like hundreds of hours painting it myself, I should of paid the $7k! 
_________________
Contact me at [email protected]
Follow me on instagram @sparxwerksllc
Decades of VW and VW parts restoration experience.
The Samba member since 2004.
**Now rebuilding throttle bodies for VW's and Porsche's**
**Restored German Bosch distributors for sale or I can restore yours**
**Restored German Pierburg fuel pumps for sale or I can restore yours**
**Restored Porsche fuel pumps or I can restore yours**
**Restored Porsche distributors or I can restore yours** |
|
| Back to top |
|
|
63Ragtop NZ
Samba Member
Joined: December 04, 2007
Posts: 895
Location: West Auckland
|
| Posted: Tue Mar 21, 2017 12:23 pm Post subject: Re: My 63 Ragtop |
|
|
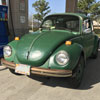
It's going be a deep red, I didn't want any orange in it.
Got some more thinners and got the front under bonnet/boot painted next.
tried to get a good coverage on everything.
over the years many stone chips had done a number on the paint under the arches.
one more wire wheel dead.
had a crack at heat shrinking some of the mess I'd made of the front quarter, worked a wee bit, stopped it popping in and out so easy.
bog time!
I spent Monday, Tuesday and Wendnesday night last week from about 9pm once the kids were sorted and the next day organized, sanding, sanding and sanding till about 1 or 2 am.
And finally on Thursday night.
a bit of etch.
followed by...
just the engine bay and the front valance to prime.
but that will have to wait till it's off the spit as I still need to spot weld the bonnet seal strip on both valances as the frame it's bolted to is in the way.
still needs heaps of work, found a few dips and bumps after the paint went on, needs lots of sandpaper marks filled in/sanded out, but I should be able to do the seam sealing and smash some red on the bum soon!
_________________
If you can't join them, beat them! |
|
| Back to top |
|
|
EMPIImp69
Samba Member

Joined: April 17, 2006
Posts: 3374
Location: Dirty Jersey
|
| Posted: Wed Mar 22, 2017 6:00 am Post subject: Re: My 63 Ragtop |
|
|
Looking good man, lots of work. I'm right about where you are with mine. Same shit, sanding scratches, high and low spots to fill..hopefully get paint on it this spring.
_________________
1963 Ragtop Bug |
|
| Back to top |
|
|
63Ragtop NZ
Samba Member
Joined: December 04, 2007
Posts: 895
Location: West Auckland
|
| Posted: Sun Apr 02, 2017 3:53 am Post subject: Re: My 63 Ragtop |
|
|
ha, thats funny, I'm pushing to get this done this autumn.
had a busy week and weekend, got the first couple coats of red on the car.
did the bottom and the inside and dash,pretty pleased with it, did one coat on saturday, missed a couple spots, worst thing that happened was sweat running out of my glove on the wet paint, bugger it! gave it a wipe with thinners and it came really nice on the second coat today. Got a few small runs but stoked with it. not bad for a rookie!
_________________
If you can't join them, beat them! |
|
| Back to top |
|
|
63Ragtop NZ
Samba Member
Joined: December 04, 2007
Posts: 895
Location: West Auckland
|
| Posted: Mon Apr 10, 2017 10:12 pm Post subject: Re: My 63 Ragtop |
|
|
This is my life now.
sanding sanding and more sanding.
had to buy some more Autothane primer filler, 4lts used up already, all the small removable parts are primed, working on the doors, then the front fenders, going to take the shell off the spit this weekend so I can finish up the front and back ends, aiming to have it all done by the end of the month, BUT, my work is relocating at the end of the month and have just started paying us Monthly(broke ass) the Mrs is filling in for her charge nurse who has just resigned and is working full time for the next month and a half not to mention the boys Rugby is starting soon, we're going away in the school holidays and all the other normal day to day shit like mowing the lawns and other diy crap still needs to be done!
Fuuuuuuk.
YeaHaw!!!
_________________
If you can't join them, beat them! |
|
| Back to top |
|
|
HUGO bOSS
Samba Member
Joined: April 27, 2008
Posts: 2602
Location: Madeira Island - Portugal
|
|
| Back to top |
|
|
EMPIImp69
Samba Member
Joined: April 17, 2006
Posts: 3374
Location: Dirty Jersey
|
| Posted: Sun Apr 16, 2017 5:06 am Post subject: Re: My 63 Ragtop |
|
|
Nice man, what kind of paint you using?
_________________
1963 Ragtop Bug |
|
| Back to top |
|
|
63Ragtop NZ
Samba Member
Joined: December 04, 2007
Posts: 895
Location: West Auckland
|
| Posted: Tue Apr 18, 2017 2:23 pm Post subject: Re: My 63 Ragtop |
|
|
the etch is Tetracure P10, grey primer is Autothane 1K primer filler and the top coat Selemix(ppg)Fastdry Enamel Red (tractor paint! lol) and a cheap ($130) china Wellmade Gun.
if it all turns to shit I'm just going to rub it down and call it patina.
_________________
If you can't join them, beat them! |
|
| Back to top |
|
|
63Ragtop NZ
Samba Member
Joined: December 04, 2007
Posts: 895
Location: West Auckland
|
| Posted: Tue Apr 18, 2017 7:41 pm Post subject: Re: My 63 Ragtop |
|
|
bit more progress.
body on wooden stand.
doors bogged and primed.
fenders bogged and primed
took a lot of work, many late nights, all day Sunday and half of Monday.
A little tip, don't try welding 6 fenders together to make two, so much work to make them look good
Still heaps to go!
life looks like this now.
time to finish up the shell and get those valance's done!
_________________
If you can't join them, beat them! |
|
| Back to top |
|
|
Beetlebaum
Samba Member
Joined: December 04, 2008
Posts: 2181
Location: Virginia Beach, VA
|
|
| Back to top |
|
|
63Ragtop NZ
Samba Member
Joined: December 04, 2007
Posts: 895
Location: West Auckland
|
| Posted: Wed Apr 19, 2017 9:26 pm Post subject: Re: My 63 Ragtop |
|
|
see the two sets of nuts and bolts going though the RHS? Those.
I also made a couple large square and thick washers up that go on top of the shells body mounts to spread the load, just in case.
Hope that helps.
pointless photo.
hung the front fenders, almost looks like a car!
Started work on the front valance.
_________________
If you can't join them, beat them! |
|
| Back to top |
|
|
63Ragtop NZ
Samba Member
Joined: December 04, 2007
Posts: 895
Location: West Auckland
|
| Posted: Sun May 21, 2017 10:39 pm Post subject: Re: My 63 Ragtop |
|
|
okay so going back a wee bit, I had to find all the bits and bobs from their hiding places.
made sure the new lights worked
had to make a few small repairs
shut up! it might work!!!
got the front seal holder on and bare metaled the whole thing, kinda had to as there was much missing.
extreme close up
got some mud mudded on.
started on the rear
I hope I never have to do these again, very tricky, not 100% happy with the back one but, its done now.
also repaired the very top points of the rear valance, when I removed it all those years ago, I'd had to drill out a spot weld right on the tip of both sides,
so I had left it in the toohardbasket till now, welded it up and ground it down in a few minutes really, guess I have learned a few tricks on this project?[/list]
_________________
If you can't join them, beat them! |
|
| Back to top |
|
|
63Ragtop NZ
Samba Member
Joined: December 04, 2007
Posts: 895
Location: West Auckland
|
| Posted: Sun May 21, 2017 10:43 pm Post subject: Re: My 63 Ragtop |
|
|
This!
is my new best friend.
don't leave those chrome knuckle guard things on your car to long!
thats a bunch of rust and a small hole in a stupid ass place.
primer on small things.
_________________
If you can't join them, beat them! |
|
| Back to top |
|
|
63Ragtop NZ
Samba Member
Joined: December 04, 2007
Posts: 895
Location: West Auckland
|
| Posted: Sun May 21, 2017 10:48 pm Post subject: Re: My 63 Ragtop |
|
|
Last bit of the old red paint getting sanded down.
and be gone!
going back looking at the old pic of the sides it looked okay, after I worked it over with the 2x4 it needed alot of work, I must have but a good 8 hours into each door and quater panel in this thing.
getting closer and closer to top coat!
finished up at about 6pm, temp was dropping, gun was blocking up and spraying like shit, hopefully it will be okay.
last little bit under the tank/beam mounts.
ALL PRIMED!
_________________
If you can't join them, beat them! |
|
| Back to top |
|
|
63Ragtop NZ
Samba Member
Joined: December 04, 2007
Posts: 895
Location: West Auckland
|
| Posted: Sun May 21, 2017 10:51 pm Post subject: Re: My 63 Ragtop |
|
|
I've been having some trouble with the logistics of painting all the parts on this car, I had planned on painting it all apart then assembling it, but I just don't have the room or enough panel stands. So the next idea is to paint the insides of everything, fender and doors,paint the inner fenders etc, hang the fenders loosely, fit the doors and then the bonnet and engine lid wil have a stand each. Sound about right?
_________________
If you can't join them, beat them!
Last edited by 63Ragtop NZ on Sun May 21, 2017 11:03 pm; edited 2 times in total |
|
| Back to top |
|
|
63Ragtop NZ
Samba Member
Joined: December 04, 2007
Posts: 895
Location: West Auckland
|
| Posted: Sun May 21, 2017 10:51 pm Post subject: Re: My 63 Ragtop |
|
|
and then on Sunday.
holy shit painting a car takes ages!!!
this was about 5 hours work, sanding down all the insides of the bonnet, engine lid and all four fender.
I was hoping the do the insides of the doors aswell but didn't have enough time.
I don't think I used any filler inside these panels because why? except for the engine lid around the vents, so the finish isn't great and the bonnet had to lay on some cardboard on the floor. less than ideal but its all shiny and red and thats the main thing!
_________________
If you can't join them, beat them! |
|
| Back to top |
|
|
EMPIImp69
Samba Member
Joined: April 17, 2006
Posts: 3374
Location: Dirty Jersey
|
| Posted: Mon May 22, 2017 6:34 am Post subject: Re: My 63 Ragtop |
|
|
| 63Ragtop NZ wrote: |
holy shit painting a car takes ages!!!
|
Yea that's why body shops get an arm and a nut for the work they do. Just think about all the money your saving doing it yourself. Looks good
_________________
1963 Ragtop Bug |
|
| Back to top |
|
|
soupcups
Samba Member
Joined: May 08, 2014
Posts: 221
Location: Huntington Beach
|
| Posted: Mon May 22, 2017 7:14 am Post subject: Re: My 63 Ragtop |
|
|
My god man. You've almost built a whole car from the ground up. Your welding jobs are awesome. Looking great. I'm getting ready for paint right now. Could you send me some of that motivation you have to get mine sanded ? Better yet you're hired. What are you gonna undercoat the fender wells with if you do at all ?
Excellent work young man. |
|
| Back to top |
|
|
|


