| Author |
Message |
targis58
Samba Member
Joined: July 11, 2006
Posts: 539
Location: sunnyvale,ca

|
 Posted: Mon Jan 28, 2008 7:58 pm Post subject: weekend headrest installation on westy bed seat project Posted: Mon Jan 28, 2008 7:58 pm Post subject: weekend headrest installation on westy bed seat project |
 |
|
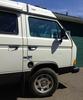
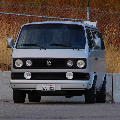
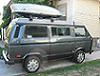
from ideas that I got from some of you guys out there, I was able to picture waht I was gonna do about headrest installation on westy bed seat and did it last weekend. I am so happy that now I have the headrests for my kids and feel so much safer. my van is one step closer to the way it sould have been already in the first place and thanks guys for good ideas..
|
|
| Back to top |
|
 |
1621
Samba Member
Joined: May 15, 2006
Posts: 2174
|
| Posted: Mon Jan 28, 2008 8:48 pm Post subject: |
|
|
Looks great! It's a good feeling getting some extra protection for the kiddos. If you don't already have them, check into the three point belts for the rear from GoWesty.
_________________
'85 Westy |
|
| Back to top |
|
|
targis58
Samba Member
Joined: July 11, 2006
Posts: 539
Location: sunnyvale,ca
|
| Posted: Mon Jan 28, 2008 8:59 pm Post subject: |
|
|
| 1621 wrote: |
| Looks great! It's a good feeling getting some extra protection for the kiddos. If you don't already have them, check into the three point belts for the rear from GoWesty. |
hehe.. you read my mind. that was exactly what my next plan was. then i am gonna do something about tthat seat so that it reclines a little for better comfort.I am looking for some hardwares to modify that |
|
| Back to top |
|
|
BoneStock67
Samba Member

Joined: January 27, 2006
Posts: 439
Location: New Jersey
|
| Posted: Tue Jan 29, 2008 10:08 am Post subject: |
|
|
Looks great.
How about some details about how you did it?
_________________
1986 Wolfsburg Westfalia Weekender 2.1L stock
1967 Beetle, now becoming my daily driver again, after a long rest in the garage
"There are two possible outcomes: if the result confirms the hypothesis, then you've made a measurement. If the result is contrary to the hypothesis, then you've made a discovery. -Enrico Fermi |
|
| Back to top |
|
|
ProvoCyclist
Samba Member
Joined: December 07, 2004
Posts: 593
Location: Murray, Utah
|
| Posted: Tue Jan 29, 2008 10:40 am Post subject: |
|
|
I did the same thing on mine, its easy like cake. The holes are already in the top of the seat, just feel around and youll hit them. I just ordered the plastic things and the clips from the dealer. Cut a little X in the fabric, shove the plastick thing down until it clicks in. Its keyed, so theres only one way itll go in. I filed the stop notch on the headrests some so theyd come out when i needed to make the bed.
_________________
Clark
Current: 1986 Tintop GL 2wd, stock 2.1L, manual trans, Flash Silver LP7Y.
Past: 1985 Sunroof GL, 2wd, Subaru 3.3L, manual trans, resprayed to Diamond Silver L97A |
|
| Back to top |
|
|
markz2004
Samba Member
Joined: November 13, 2007
Posts: 944
Location: Portland, OR
|
| Posted: Tue Jan 29, 2008 10:49 am Post subject: |
|
|
Did you use the front headrest posts as a template/example for the notches you created?
Any pictures would be appricated.
_________________
87 Westy, 250k GW 2.4 - 2.0  , 16" wheels , 16" wheels |
|
| Back to top |
|
|
targis58
Samba Member
Joined: July 11, 2006
Posts: 539
Location: sunnyvale,ca
|
| Posted: Tue Jan 29, 2008 12:49 pm Post subject: |
|
|
| ProvoCyclist wrote: |
| I did the same thing on mine, its easy like cake. The holes are already in the top of the seat, just feel around and youll hit them. I just ordered the plastic things and the clips from the dealer. Cut a little X in the fabric, shove the plastick thing down until it clicks in. Its keyed, so theres only one way itll go in. I filed the stop notch on the headrests some so theyd come out when i needed to make the bed. |
I don't know which seat you worked on but in westy bed, there is no hole there. when yo u take apart the seat there is just plywood and foam that you need to create wholes with pipes. I am gonna get the pix i took which is in my phone now and i will post it this evening |
|
| Back to top |
|
|
ckissick
Samba Member
Joined: August 22, 2006
Posts: 498
Location: Bay Area
|
| Posted: Tue Jan 29, 2008 1:07 pm Post subject: |
|
|
Thanks. I've been wanting to do this for a long time. I never thought it would be easy to do. Looking forward to the pics.
_________________
Charlie
1950 Beetle
1983 Westfalia
1989 syncro Tristar
1966 Porsche 912
1989 Beck Spyder
2007 GTI Fahrenheit |
|
| Back to top |
|
|
ProvoCyclist
Samba Member
Joined: December 07, 2004
Posts: 593
Location: Murray, Utah
|
| Posted: Tue Jan 29, 2008 1:35 pm Post subject: |
|
|
| targis58 wrote: |
| ProvoCyclist wrote: |
| I did the same thing on mine, its easy like cake. The holes are already in the top of the seat, just feel around and youll hit them. I just ordered the plastic things and the clips from the dealer. Cut a little X in the fabric, shove the plastick thing down until it clicks in. Its keyed, so theres only one way itll go in. I filed the stop notch on the headrests some so theyd come out when i needed to make the bed. |
I don't know which seat you worked on but in westy bed, there is no hole there. when yo u take apart the seat there is just plywood and foam that you need to create wholes with pipes. I am gonna get the pix i took which is in my phone now and i will post it this evening |
Oh, well, yeah,  that will make a difference! my van has a rock n roll/z-bed. Sorry! that will make a difference! my van has a rock n roll/z-bed. Sorry!
_________________
Clark
Current: 1986 Tintop GL 2wd, stock 2.1L, manual trans, Flash Silver LP7Y.
Past: 1985 Sunroof GL, 2wd, Subaru 3.3L, manual trans, resprayed to Diamond Silver L97A |
|
| Back to top |
|
|
targis58
Samba Member
Joined: July 11, 2006
Posts: 539
Location: sunnyvale,ca
|
| Posted: Tue Jan 29, 2008 6:46 pm Post subject: |
|
|
ok..
I used a donor seat (middle bench seat) that I got from craigslist and took headrests, retainer clips and guides out. I went homedepot and purchased 1/4-1 1/2 machine screws, locking washer, nuts, and big diameter washers that have little bigger than1/4 inch hole in them. then from plumbing department got 2 foot long precut pvc pipe that fits the headrest guide-sorry I dont remember the size of the pipe but I think it was 3/4" and a bag of pipe straps
picture will explain rest of the part
back side of the seat. washers are different size cuz I miss counted the washer so I had to use smaller washer supplied from my tool shed.
front of the plywood
carefully position where you wanna have the rest and drill holes and fasten them. I used pvc pipe over galvanized one because it is easier to cut and modify but still very strong(with this short length I think it s strong enuf).
sorry pictures are not that clear I only had my phone camera at that time.
after fastening all the pipes, cover the fabrics and staple back to normal position. find the pipes with your finger by feeling around it, make x cut, then push the guides in thats it. oh by the way I modified the guides and the pipes little bit so that guides slide in to the pipes and also get locked in so that guides don't rotate around once they are in the pipes..
if I wasn't clear on some part just pm me with detail question. |
|
| Back to top |
|
|
1621
Samba Member
Joined: May 15, 2006
Posts: 2174
|
|
| Back to top |
|
|
|


