| Author |
Message |
thesatelliteguy
Samba Member

Joined: January 06, 2007
Posts: 1515
Location: Santa Rosa CA

|
 Posted: Mon Jan 18, 2021 10:28 am Post subject: Re: Satellite Guy's build page Posted: Mon Jan 18, 2021 10:28 am Post subject: Re: Satellite Guy's build page |
 |
|
Ohh....yeah.... 
Strange how that happened... 
What a coincidence!
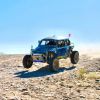
A screen shot from my phone of a photo album containing roll cage ideas. lol
_________________
Toyotas are so bumpy it makes me sick, literally.
My build Page http://www.thesamba.com/vw/forum/viewtopic.php?t=383878 |
|
| Back to top |
|
 |
thesatelliteguy
Samba Member
Joined: January 06, 2007
Posts: 1515
Location: Santa Rosa CA
|
|
| Back to top |
|
|
Bad_chopper
Samba Member
Joined: August 15, 2012
Posts: 295
Location: Portland, or
|
| Posted: Mon Jan 18, 2021 1:18 pm Post subject: Re: Satellite Guy's build page |
|
|
yeah, i did the same thing, i got a few ideas from that same page as well. i stole a lot of ideas from a friends bug as well. just so you know, your Subaru swap was inspiration for me so just returning the favor lol
_________________
my build page http://www.thesamba.com/vw/forum/viewtopic.php?t=536267 |
|
| Back to top |
|
|
thesatelliteguy
Samba Member
Joined: January 06, 2007
Posts: 1515
Location: Santa Rosa CA
|
| Posted: Sun Jan 24, 2021 7:41 am Post subject: Re: Satellite Guy's build page |
|
|
Glad i could inspire you Mr. Chopper!
I cut holes in the floor and dropped the cage, then fully welded the tops of the overhead tubes.
I drilled some holes in the dash and front fire wall then ran some tubing forwards. I really like that front end in the last pic i posted of the gray baja. I tried copying but didn't take note to how low the bend was on those upper bars coming from the A pillar. So my upper bar is a lot higher now. And it wasn't until i had it tac welded and got the cage unbolted and moved back into a position to fully weld that my girlfriend came out and said, "Is the hood going to fit with those tubes in the way?"
A quick test fit and she was spot on.
I guess the hood is getting cut. Looking back now, i kind of wish i would have taken the time to do it right. Im afraid that the distance between these upper tubes and the beam will be too much, and won't provide adequate support for the top tube of the beam.
After i got these 4 tubes welded in I took some measurements and found that my frame head was in fact bent. No surprise, i bent a beam a while back.
So, i laid out my dimensions on the concrete floor, snapped some chalk lines on the floor and proceeded to cut off the frame head. I then cut and welded a 1/4" plate to the opening, as well as reinforced the sides with some 1/8" steel plate.
Today I'm thinking i should cut and weld in the lower door bars. That way the A pillar is kind of locked into place and wont let the front move around when i go to install the beam. Also attaching to the frame head will help prevent movement. i decided to use beam clamps instead of welding the beam to the cage, so i order those last night. As soon as those come in i can mount the beam and start playing with setting up the geometry. i also realized that I can start mounting the seats, so i ordered the seat sliders last night too. But those wont be here until next weekend so I'm kind of dead in the water until then, then ill be slammed with a bunch of things to do.
_________________
Toyotas are so bumpy it makes me sick, literally.
My build Page http://www.thesamba.com/vw/forum/viewtopic.php?t=383878 |
|
| Back to top |
|
|
Bad_chopper
Samba Member
Joined: August 15, 2012
Posts: 295
Location: Portland, or
|
| Posted: Sun Jan 24, 2021 5:05 pm Post subject: Re: Satellite Guy's build page |
|
|
interested in seeing how you attached those front bars to your interior cage. thats close to what i was thinking about doing.
_________________
my build page http://www.thesamba.com/vw/forum/viewtopic.php?t=536267 |
|
| Back to top |
|
|
thesatelliteguy
Samba Member
Joined: January 06, 2007
Posts: 1515
Location: Santa Rosa CA
|
| Posted: Mon Jan 25, 2021 6:43 pm Post subject: Re: Satellite Guy's build page |
|
|
Heres some close ups of the upper bars passing through the dash to the A pillar. I ended up having just barely enough room to unbolt the cage and moved it backwards to fully weld the tube.
_________________
Toyotas are so bumpy it makes me sick, literally.
My build Page http://www.thesamba.com/vw/forum/viewtopic.php?t=383878 |
|
| Back to top |
|
|
thesatelliteguy
Samba Member
Joined: January 06, 2007
Posts: 1515
Location: Santa Rosa CA
|
| Posted: Wed Jan 27, 2021 9:05 am Post subject: Re: Satellite Guy's build page |
|
|
I got some more work done yesterday. Just a few tubes.
Then i started using tape to explore ideas about bracing.
Im a little concerned with how high those upper tubes (coming off the A pillar) are in relation to the lower tubes. They're about 17.5" apart, center to center.
The beam tubes are about 5" center to center. So that means about a 12" brace for the beam. Looking at similar designs, it looks like the same tube is a lot closer to the beam than mine is. Notice on Adrenaline Junkys cage, the distance from the top beam tube to the upper bar in question.
Or, am i being over concerned?
_________________
Toyotas are so bumpy it makes me sick, literally.
My build Page http://www.thesamba.com/vw/forum/viewtopic.php?t=383878 |
|
| Back to top |
|
|
dustymojave
Samba Member

Joined: January 07, 2007
Posts: 5802
Location: Lake LA, Mojave Desert, SoCal
|
| Posted: Wed Jan 27, 2021 5:36 pm Post subject: Re: Satellite Guy's build page |
|
|
Remember to join the X or Vee so they meet the crossbar together, not separate.
It looks like .120 wall tube. Those front tubes do NOT need to be .120 wall. .095 wall has been used for many decades with good success. It doesn't need to be massive.
The tubes from the upper bars down to the top of the beam in Adrenaline Junky's Baja are 1" tube, That's a little small for supporting the beam. I would use 1.5" for the rear ones.
The forward ones can be 1" as they are braces for the bumper.. Again, .095 wall is fine. It's actually better if the front bumper is NOT massive or even terribly strong. it's best if it collapses a little before the structure to the beam does. Better protection than if the whole car takes a hit like an army tank. Let it be a "bumper" rather than a battering ram.
_________________
Richard
Offroading VW based cars since 1965
Tech Inspection 1963 - 2012 SCCA/SCORE/HDRA/MORE/MDR +
Retired from building Bajas, Fiberglass Buggies and Rails in the Mojave Desert. Also Sprints & Midgets, Dry Lakes, Road Race cars. All types New and Vintage
SoCalBajas Member
Kicked Cancer's A$$...1st and 2nd round...Fight ain't over yet. |
|
| Back to top |
|
|
thesatelliteguy
Samba Member
Joined: January 06, 2007
Posts: 1515
Location: Santa Rosa CA
|
| Posted: Thu Jan 28, 2021 7:44 am Post subject: Re: Satellite Guy's build page |
|
|
Good eye Dusty! Yes it is .120 I completely forgot about that aspect. Unfortunately I already bought the .120 wall tube and have about a stick and a half left. I wonder if my steel supplier might let me exchange a 120 wall for some 095. It would be nice to save some weight.
As for the bumper, I understand what your saying. Make a crumple zone.
_________________
Toyotas are so bumpy it makes me sick, literally.
My build Page http://www.thesamba.com/vw/forum/viewtopic.php?t=383878 |
|
| Back to top |
|
|
thesatelliteguy
Samba Member
Joined: January 06, 2007
Posts: 1515
Location: Santa Rosa CA
|
| Posted: Thu Jan 28, 2021 7:57 am Post subject: Re: Satellite Guy's build page |
|
|
I got the beam mounted last night. I wanted to use beam clamps but the vertical supports between the beam tubes was in the way. So it looks like Im welding the beam to the chassis.
I cycled the suspension and it looks like I have about 12.5 of possible wheel travel. I got the coilover out of storage and it seems like they will be just barely sticking out of the hood.
A lot of little mock ups and testing to make sure things will fit.
Today Ill get down to business bracing the beam.
_________________
Toyotas are so bumpy it makes me sick, literally.
My build Page http://www.thesamba.com/vw/forum/viewtopic.php?t=383878 |
|
| Back to top |
|
|
thesatelliteguy
Samba Member
Joined: January 06, 2007
Posts: 1515
Location: Santa Rosa CA
|
| Posted: Sat Jan 30, 2021 6:00 pm Post subject: Re: Satellite Guy's build page |
|
|
I got the beam braced today, as well as started to try and find where to locate my shocks. I have a little more bracing to do in the front, but locating the shocks and finding out that I actually have 14.5 of usable travel was a lot more fun then bracing! Im really stoked to find that Im getting a little more travel then I had previously thought.
So, Im playing around with how to mount the shock and I came up with this idea. I know its good to have double shear on the bolts for coilovers, but Im wondering if this might be over kill. Id be using 1.5 x.120 tubing. I also have a die for the bender for 3/4 tubing so that is also an option.
Im open to suggestions.
_________________
Toyotas are so bumpy it makes me sick, literally.
My build Page http://www.thesamba.com/vw/forum/viewtopic.php?t=383878 |
|
| Back to top |
|
|
JWHracing
Samba Member
Joined: September 17, 2008
Posts: 234
Location: Mesa, AZ
|
| Posted: Mon Feb 01, 2021 11:32 am Post subject: Re: Satellite Guy's build page |
|
|
I would run the outer hoop towards down towards the ends of the beam. then the inner hoop to the upper front end tubes you just added.
What length shocks are you running, they look short. I would also turn the reservoir around towards the back.
_________________
65 Baja - Class 5 Unlimited Race Car
2021 STORR Pro Air Cooled Buggy Champion
2019 AZOP Unlimited Buggy Champion
2017 SADR 1300 Class Champion
2016 AZOP Limited Buggy Champion
Currently "retired" from racing |
|
| Back to top |
|
|
thesatelliteguy
Samba Member
Joined: January 06, 2007
Posts: 1515
Location: Santa Rosa CA
|
| Posted: Mon Feb 01, 2021 4:45 pm Post subject: Re: Satellite Guy's build page |
|
|
They are 10 shocks. I measured travel at the shock mount on the trailing arms and it showed 10. Thats before I put limits on its travel. So I feel confident they will work. Whats your thoughts.
The tie rod hits the reservoir with it on backwards. Im not really keen on these piggyback reservoirs. I didnt know any better at the time and they were a good deal.
Is this what youre referring to for bracing the shocks ?
I changed up the way I had my shocks temporarily mounted. This way was a lot more stout.
After some moving around and cussing I found a spot that gave good clearance and good use of travel. I set the shocks rubber bumper and the bump stop to contact at almost the same time with the bump stop taking a little more of the load.
What is a good way to attach the shock eyelet to the tubing?
Ive seen this done before and I think it will work. But Im hesitant about the thickness of the washer. Should it be thicker? And welded to the INSIDE of the tube?
It should be noted that those notches in the tube are crap and for temporary mock up only.
_________________
Toyotas are so bumpy it makes me sick, literally.
My build Page http://www.thesamba.com/vw/forum/viewtopic.php?t=383878 |
|
| Back to top |
|
|
JWHracing
Samba Member
Joined: September 17, 2008
Posts: 234
Location: Mesa, AZ
|
| Posted: Mon Feb 01, 2021 5:12 pm Post subject: Re: Satellite Guy's build page |
|
|
I would move what you have going to the beam further towards the center. to me the ideal thing is the outer hoop of the shock tower goes towards the outside edge of the beam.
As the shock sits, how long is the shaft sticking out? they still look short to me.
Are you on instagram?
_________________
65 Baja - Class 5 Unlimited Race Car
2021 STORR Pro Air Cooled Buggy Champion
2019 AZOP Unlimited Buggy Champion
2017 SADR 1300 Class Champion
2016 AZOP Limited Buggy Champion
Currently "retired" from racing |
|
| Back to top |
|
|
dustymojave
Samba Member
Joined: January 07, 2007
Posts: 5802
Location: Lake LA, Mojave Desert, SoCal
|
| Posted: Tue Feb 02, 2021 2:14 am Post subject: Re: Satellite Guy's build page |
|
|
That top shock mount should be a piece of thick wall tubing that the 1/2" bolt is a snug fit inside of. Like 1" OD x .250 wall. Or at least 3/4" OD x .120 wall. Just using a washer welded to the end of the 1.5" tube is asking for it to break real quick. Use grade 8 fine thread bolts for shock mounts in final assembly.
I suggest that you add braces to the outer end of the lower tube of the beam from the point where the bottom rail meets the vertical by the front bulkhead of the body. I've seen several Bajas and buggies with the beam bent where the rails meet them like yours is now.
That temp tube to support the upper shock mount was pretty good as it was. I would extend a rear brace to the top shock mount from that junction of the lower frame rail with the vertical by the front bulkhead, same junction described for the beam brace. 1" x .095 wall will work for shock mount tubing.
_________________
Richard
Offroading VW based cars since 1965
Tech Inspection 1963 - 2012 SCCA/SCORE/HDRA/MORE/MDR +
Retired from building Bajas, Fiberglass Buggies and Rails in the Mojave Desert. Also Sprints & Midgets, Dry Lakes, Road Race cars. All types New and Vintage
SoCalBajas Member
Kicked Cancer's A$$...1st and 2nd round...Fight ain't over yet. |
|
| Back to top |
|
|
thesatelliteguy
Samba Member
Joined: January 06, 2007
Posts: 1515
Location: Santa Rosa CA
|
| Posted: Tue Feb 02, 2021 7:57 am Post subject: Re: Satellite Guy's build page |
|
|
| JWHracing wrote: |
I would move what you have going to the beam further towards the center. to me the ideal thing is the outer hoop of the shock tower goes towards the outside edge of the beam.
As the shock sits, how long is the shaft sticking out? they still look short to me.
Are you on instagram? |
I like the idea of the outer hoop going directly to the beam. That makes the most amount of sense from a physics view point. Are you thinking the outer hoop is just one tube? Like an upside down J? Suggestions on the rear tube of the outer hoop?
As for the inner hoop.
...aww crap I got to go to work. Ill get back to you guys ASAP. Thank you so much for all these suggestions. I really appreciate it as it makes me feel more confident about building this thing.
You guys give me hope!!!
_________________
Toyotas are so bumpy it makes me sick, literally.
My build Page http://www.thesamba.com/vw/forum/viewtopic.php?t=383878 |
|
| Back to top |
|
|
JWHracing
Samba Member
Joined: September 17, 2008
Posts: 234
Location: Mesa, AZ
|
| Posted: Tue Feb 02, 2021 9:43 am Post subject: Re: Satellite Guy's build page |
|
|
The way my car is designed is it is a single hoop for the inner hoop, and basically an upside down J for the outer. Then in front of the shock is a dimple-die plate that joins the two hoops together. There is nothing coming from the outer mount towards the rear. I haven't found its that necessary and would make taking the shock off kind of a pain.
_________________
65 Baja - Class 5 Unlimited Race Car
2021 STORR Pro Air Cooled Buggy Champion
2019 AZOP Unlimited Buggy Champion
2017 SADR 1300 Class Champion
2016 AZOP Limited Buggy Champion
Currently "retired" from racing |
|
| Back to top |
|
|
thesatelliteguy
Samba Member
Joined: January 06, 2007
Posts: 1515
Location: Santa Rosa CA
|
| Posted: Tue Feb 02, 2021 5:36 pm Post subject: Re: Satellite Guy's build page |
|
|
Pictures speak a thousand words. I see what your saying now.
However, if my shocks are plumb, they seem to be about flush with the end of the beam. I suppose I could lean the upside down "J" outwards a little bit. Or i could lean the coilover in a bit. Are your coilovers plumb or are they leaning in a bit?
I just checked and the shocks are 10" with a 1/2" rubber bumper.
I am on instagram, but never use it bc i couldn't figure it out haha.
ok ok ok, i think i have a few things to address before i continue with shock location.
First, are these adequate bump stops? (keep in mind the shock will be set to assist as a bump stop.)
One contacts at 22" off the ground (measured at the wheels), the other contacts at 22 7/8". I don't like that 7/8" different. Its screwing me up with mounting the shocks. So one is going to get cut off and relocated so that its in sync with the other. Unless i should just ditch them completely for something else?
Second, I think I need to make better shock mount tubes before i go any further.
As Dusty mentioned, a 1" OD, .250" wall tube with a 1/2" grade 8 bolt through it would be ideal for attaching the top of the shock.I could use 1" material to attach the shock mount tube to the chassis, but i wont be putting any bends in it bc i don't have a 1" die. So i could use 1" OD .250" wall as a shock mount, then attach it to the chassis with 1.5" OD .120 wall tube, but I am skeptical to connect a 1" OD tube to a 1.5" OD tube.
So instead Im thinking 1.5" OD .120 wall tube with a 1/4" thick washer welded to the inside of the tube and a 1/2" hole drilled in that washer. (obviously ill be making my own washers.)
Also, as Dusty mentioned, more bracing to the beam is required.
_________________
Toyotas are so bumpy it makes me sick, literally.
My build Page http://www.thesamba.com/vw/forum/viewtopic.php?t=383878 |
|
| Back to top |
|
|
JWHracing
Samba Member
Joined: September 17, 2008
Posts: 234
Location: Mesa, AZ
|
| Posted: Wed Feb 03, 2021 10:00 am Post subject: Re: Satellite Guy's build page |
|
|
Personally I would get rid of those bump stops. To me they look like they would bend/break very easy on a hard hit. Then it would transfer a load into the arm which could cause a premature failure in the arm and that's not a good thing either.
I use the rubber bumper on my shocks for the bump stop. The key for this being okay is proper shock set up and tuning, correct spring rates, and the right cross over adjustment for the lower spring engagement.
_________________
65 Baja - Class 5 Unlimited Race Car
2021 STORR Pro Air Cooled Buggy Champion
2019 AZOP Unlimited Buggy Champion
2017 SADR 1300 Class Champion
2016 AZOP Limited Buggy Champion
Currently "retired" from racing |
|
| Back to top |
|
|
JWHracing
Samba Member
Joined: September 17, 2008
Posts: 234
Location: Mesa, AZ
|
| Posted: Wed Feb 03, 2021 10:04 am Post subject: Re: Satellite Guy's build page |
|
|
I would stick to the 1" OD tube for the shock bolt bung. My towers use two pieces of 1.5 x .095 bent, with the 1" bung welded in between the two, and then a piece of 1" x 1/8 plate as a gusset over the top to help keep things together. A piece of .250 1" for the bolt bung will be much stronger than 1.5" with washers welded in it.
_________________
65 Baja - Class 5 Unlimited Race Car
2021 STORR Pro Air Cooled Buggy Champion
2019 AZOP Unlimited Buggy Champion
2017 SADR 1300 Class Champion
2016 AZOP Limited Buggy Champion
Currently "retired" from racing |
|
| Back to top |
|
|
|


