| Author |
Message |
Altema
Samba Member
Joined: June 20, 2010
Posts: 2903
Location: Lower Michigan

|
 Posted: Wed Jul 21, 2010 12:12 am Post subject: Ghia high flow air cleaner Posted: Wed Jul 21, 2010 12:12 am Post subject: Ghia high flow air cleaner |
 |
|
Can you really have your cake and eat it?
Yep 
I've been doing flow testing on various intake components to see what's what, with some interesting results. The stock air cleaner can become a problem above 3000 RPM by not providing enough airflow for 1600cc or larger modified engines. Because of this, I decided to track down the restriction points in the stock air cleaner system.
Note: The stock intake manifold does not flow very well in the upper RPM ranges unless you add a 3/4 inch "A" shaped splitter inside the horizontal pipe right where it joins the downpipe from the carb. I went with an EMPI intake manifold that already has this internal change, but looks fairly stock except for the aluminum carb mounting flange.
The first test was a typical paper element in a chrome air cleaner stuck on the carb. Engine now revs cleanly to 5000rpm, but there is no directional transition for the air; it comes in the sides of the housing, then crashes into all the other air molecules being sucked in, then makes a 90 degree turn down the carb and immediately meets the venturi. No room to radius the transition or add a short velocity stack.
Test two was re-installing the OEM style pipe that connects the original air cleaner to the carb. The main purpose of this test was to see if the pipe was a restriction, and also the see if the elbow gave more direction to the flow than when the air cleaner was mounted directly to the carb. The answers were no, it was not a significant restriction, and yes, it did improve the flow direction into the carb. Result of this last item was more low and mid range torque, and better part-throttle response.
Test three was re-installing the original air cleaner, testing, then adding a triangular cutout beneath the neck of the snorkel to increase available airflow. The cutout is hidden and brings the airflow capability of the snorkel to 300% of the original. Results showed that the cutout removed the snorkel restriction, but that the remaining restrictions were internal to the oil bath air cleaner.
In conclusion, the element filter flowed better than the oil bath air cleaner, the hidden cutout sucessfully removed the snorkel restriction, and the stock rubber pipe between the air cleaner and carb helped rather than hurt drivability.
Now I had to choose between letting the engine breathe, or keeping the dead-stock appearance of the original air cleaner, so I chose both by incorporating a performance filter element hidden inside the OEM air cleaner housing. A few photos outlining the job are below, but it should be noted that I did use a fine cutting wheel to slice the bottom of the canister open so it could be tack-welded back on. Making the cut higher up would improve flow, but I did not want to make a second cut that would make it more difficult to undo. I can't think of any reason to go back other than making it a purely show car or muesem piece. The new filter element flows better, filters better, and I keep the OEM damper and the preheater. Best part is that you can't tell unless you take it apart.
For Chad who wanted a step by step, here you go!
Parts and supplies:
Spectre P3 Cone filter, part number 9132
Rubberized weatherstripping, 3/4 inch wide, 7/16 inch thick, about 20 inches long.
Dish detergent or suitable degreaser
Tools you will need:
Screwdriver for removing hose clamps, and for removing the messy original elements.
Dremel or similar device with cutting wheels. You will probably need more than one cutting wheel, I used up at least a half dozen of the little ones.
Safety goggles.
Work gloves.
Pan for used oil.
Newspaper so you don't make a mess on the garage floor
Nylon detailing brush (or an old tooth brush) for scrubbing the housing.
Plastic bag to store messy parts.
1. Remove the air cleaner to carb hose.
2. Remove the preheater hose.
3. Unlatch the two lower spring clamps and remove the air cleaner from the car. Set the oil breather hose aside.
4. Unlatch the three spring clamps holding the air cleaner housing halves together and lift the top half off. Let it drain into the pan for a few minutes.
5. After the top half of the housing drains, wipe off any remaining oil and set it aside.
6. Pour out the oil from the lower half of the housing into the oil pan. There is a small opening in the bottom ring to drain the oil trapped there, but it will take a little while. You can prop the housing on something to let it drain while you work on the upper half. Put it where it is not likely to get tripped over!
7. Take the upper half to a suitable work area, and put on the goggles and gloves. Cutting wheels send debris flying, and can sometimes break while spinning. I have a friend with one eye to remind me of tool safety. The newly cut edge will be sharp as well, but not as sharp as some of the existing edges already on the stock unit.
8. Mark a line around the lower part of the upper housing, about 1/2 inch from the bottom. Do not include the metal disc on the very bottom in your measurement.
9. With the housing on it's side, begin cutting along the line, making a complete circle.
10. Remove the bottom of the housing and set it aside.
11. Remove the two elements from the housing and place in a plastic bag.
What are these? Horsehair biscuits?
Looking up into the housing after biscuit removal.
12. Take the cutoff wheel or a file and remove the burrs from the cut edge.
13. Time to get that oil out! Apply your degreaser of choice, scrub with the brush and rinse. The housing needs to be free of oil, expecially the perforated mesh.
14. Wipe dry and set aside the housing
15. This is a good time to get the lower air cleaner housing that has been draining, and give it a good washing. Don't forget inside of the snorkel.
16. Wipe dry the lower housing, and place it upside-down on your work surface for surgery.
17. On the underside of the snorkel, on the flat part just before the preheater tube, mark out a triangle.
18. Using the cutoff wheel, cut out the triangular section. I used a drill to open up the corners, but that is optional.
This is how the cutout will look when the air cleaner is installed in the car.
Here is the new element. It has the maximum surface area that will fit inside the stock housing
19. Time to prep the new filter element. I cut the neck off using a Dremel, but whatever your method, do not cut off the pink portion. That is bonded to the element. The height of the new filter almost perfectly matches the space inside the original housing.
20. The remaining rubber can be peeled up and removed. This will be our sealing surface that contacts the new rubber seal inside the housing.
21. Install the rubber seal inside the top of the upper housing. You will notice that some of the perforated holes are right on the edge, but some areas are blank. Start applying the strip in a blank area to reduce the possibility of leakage where the ends of the seal join.
This is the new rubber seal installed in the upper housing. It should be tight against the edge.
22. Time to button things up! Place the new filter element inside the upper housing. You should install it with the housing upside down to make sure it is centered properly. With the element centered in the housing top, place the housing bottom in position, press down to compress the seal, then latch the spring clamps.
Filter element in place...
And clamped together. Now it is ready to flip over and install in the car.
Last edited by Altema on Fri Oct 01, 2010 2:01 pm; edited 1 time in total |
|
| Back to top |
|
 |
bdenny1010
Samba Member

Joined: May 25, 2010
Posts: 67
Location: Julian, CA
|
| Posted: Wed Jul 21, 2010 3:25 pm Post subject: |
|
|
Slicker than snot on a doorknob!!! Thanks, Bookmarked
_________________
My wife and my Ghia are both half German and half Italian. They are both beautiful and treat me well if I give them the attention they need! |
|
| Back to top |
|
|
retrowagen
Samba Member
Joined: October 11, 2004
Posts: 1856
|
| Posted: Wed Jul 21, 2010 4:25 pm Post subject: |
|
|
How did you measure airflow on the various test configurations?
_________________
David Ruby
President, Karmann-Ghia World Club |
|
| Back to top |
|
|
Altema
Samba Member
Joined: June 20, 2010
Posts: 2903
Location: Lower Michigan
|
| Posted: Wed Jul 21, 2010 5:56 pm Post subject: |
|
|
| retrowagen wrote: |
| How did you measure airflow on the various test configurations? |
For this application it was based on performance. When your engine starts running out of power at 4000rpm, then you make a change and that same engine pulls strongly to 5000rpm, you've found your problem.
The aftermarket filter attached to the connecting pipe became the one that worked best, and from there it was modifying the necessary parts to achieve the same performance with the OEM housing and new filter. Very time consuming (started on Friday, ended on Sunday night), but I think it was worthwhile. Just fixing a system with inadequate flow is pretty easy compared to going after maximum flow... you just make it so it meets the needs
In times past, I've set up bench testers with a vacuum/boost gauge, then used a shop vac to provide the flow. You do it for enough years and it becomes easy to the point of where you can just look and see problem areas. I guess my interest in this came back in the early days of racing. I did not want a hood scoop because I had to drive the race car on the street, and did not want to be challenged by every boy racer out there, or be noticed by the police. Sooo, that car had these fresh air vents under the dash, and I plumbed the passenger side so that all the air from the base of the windshield went back through the firewall and a 5 1/4 pipe fed all that air under pressure to the 360 police interceptor V8. It was hidden, had no problems with rainwater, and the car was undefeated on the street for two years. I kept the system when I got smart and went to the track instead, took home the winners check more than a few times at Detroit dragway and Milan.
My current daily driver also has a custom built CAI that took a whole lot more testing than the Ghia! Problem with that one is that it was computer controlled (speed/density) system, so changes in flow to the exhaust had to be matched in proportion to any changes in the intake system. I drove for several month with gauges and wires hooked up to the car, and had to do several revisions. It worked well enough that the car is now the fastest car of its type on record with a stock production engine.
Paul |
|
| Back to top |
|
|
hudsonce
Samba Member

Joined: January 29, 2010
Posts: 506
Location: Hagerstown, MD
|
| Posted: Mon Aug 23, 2010 7:05 am Post subject: |
|
|
Paul:
Thank you very much for sharing your instructions. I have 2 questions:
First, did you have to weld the bottom part of the top half of the housing back on? Seems like it needs to stay open in order for the air flow to work?
Second, did you mount the weatherstrip in the top of the housing with the adhesive backing facing the actual metal housing? or with the adhesive facing the air filter?
Chad |
|
| Back to top |
|
|
borninabus
Samba R&D Dept.

Joined: May 18, 2006
Posts: 4536
Location: Arizona Highways
|
| Posted: Mon Aug 23, 2010 9:54 am Post subject: |
|
|
nice post 
that should help my zenith get the air it's asking for.
_________________
88 Van WBX, A/T - 13 JSW TDI 6M/T - 2012 Touareg TDI Sport |
|
| Back to top |
|
|
Altema
Samba Member
Joined: June 20, 2010
Posts: 2903
Location: Lower Michigan
|
| Posted: Mon Aug 23, 2010 2:25 pm Post subject: |
|
|
| hudsonce wrote: |
Paul:
Thank you very much for sharing your instructions. I have 2 questions:
First, did you have to weld the bottom part of the top half of the housing back on? Seems like it needs to stay open in order for the air flow to work?
Second, did you mount the weatherstrip in the top of the housing with the adhesive backing facing the actual metal housing? or with the adhesive facing the air filter?
Chad |
Hi Chad, the filter is cone shaped with the smaller end touching the bottom of the housing after the top and bottom halves are clamped together. The air comes in through the normal opening, goes through the filter, then through the perforated mesh to the upper compartment of the air cleaner housing, then out of the exit pipe. No welding was involved, I cut off the one part and stored it. I'll put together a cutaway diagram to show how the air flows inside the unit.
The weatherstrip adhesive is facing the metal housing. I thought about sticking it to the filter, but it seals better the other way. That seal is important so that no air gets to the engine without being filtered. Plus, if I need to change the filter, I don't have to replace the weatherstrip.
Paul |
|
| Back to top |
|
|
Bruce Amacker
Samba Member

Joined: December 26, 2007
Posts: 1786
Location: Cleveland, Ohio
|
| Posted: Mon Aug 23, 2010 2:59 pm Post subject: |
|
|
I was out of town during the original thread and somehow missed it. This intrigues me and I need to put more time and effort into whether my engine may also be starving for air at higher RPM. I did do a single road test with the inlet hose off and did not feel any substantial difference but I might have also been misled.
I need to get a wideband to see if there is any difference in A/F with/without air cleaner. I might end up doing just what you have done here. I like the high flow-stock look aspect of this.
What was the mfr and PN of the filter you used?
Thanks!
_________________
'66 Deluxe Bus
'65 Standard Bus
Build threads:
'66- http://www.leakoil.net/forum/viewtopic.php?f=23&t=2888&sid=54d8dedfb3822f99c7f2ea430cb4e856
'65- http://leakoil.net/forum/viewtopic.php?f=23&t=4263 |
|
| Back to top |
|
|
Altema
Samba Member
Joined: June 20, 2010
Posts: 2903
Location: Lower Michigan
|
| Posted: Tue Aug 24, 2010 9:44 am Post subject: |
|
|
| Bruce Amacker wrote: |
| What was the mfr and PN of the filter you used? |
That would be Spectre P3 Cone filter, part number 9132.
I tried to find one that was plug and play, but none of them were the right size in my local suppliers. |
|
| Back to top |
|
|
fastinradford
Samba Member
Joined: June 08, 2008
Posts: 2895
Location: Athens Ohio
|
| Posted: Tue Aug 24, 2010 3:24 pm Post subject: |
|
|
how are you measuring "flow direction:?
_________________
95 jetta 5spd, (first waterpumper vw)
the nice 74 Ghia, (of course the fiance drives that one).
My mk1 jetta 1.6d
"It'd still be like my grandads old broom though, original, only 3 new heads and two new handles" -Marv [UK] |
|
| Back to top |
|
|
Altema
Samba Member
Joined: June 20, 2010
Posts: 2903
Location: Lower Michigan
|
| Posted: Tue Aug 24, 2010 6:25 pm Post subject: |
|
|
| fastinradford wrote: |
| how are you measuring "flow direction:? |
Measurements were results based. Aside from that, you just follow established principals of flow dynamics. For example, a 90 degree turn in a pipe will flow less CFM (cubic feet per minute) than a pipe that curves gradually. Also, a radiused edge will flow better than straight edges, and the smoother the transition from one surface or component, the better. This is the reason velocity stacks and port matching work well
Paul |
|
| Back to top |
|
|
Altema
Samba Member
Joined: June 20, 2010
Posts: 2903
Location: Lower Michigan
|
| Posted: Tue Aug 24, 2010 10:10 pm Post subject: |
|
|
Chad, here's that diagram I mentioned. It's a little crude since I whipped it up in paintbrush, but it shows a side view of the air cleaner, and how the filter is positioned so the air flows only through the filter element.
Paul
|
|
| Back to top |
|
|
borninabus
Samba R&D Dept.
Joined: May 18, 2006
Posts: 4536
Location: Arizona Highways
|
| Posted: Wed Aug 25, 2010 6:25 am Post subject: |
|
|
so i cut the hole in my a/c neck...
it didn't turn out as pretty as the one pictured here 
but it did make a difference in high end flow--the bus will now pull strong up to 50mph in 3rd--whereas before it would start loosing steam at about 40.
basically eliminated some off idle stumble i was having at low rpm and a bit of jumpyness i was having under light loads when up in the main circuit.
all around a great improvement in driveability (not that the zenith didn't purr before) but it sure eliminated some minor tuning issues that i was thinking were related to the accel pump.
i may have to go all the way with the paper element install next.
i never thought the day would come when i would start hacking up perfectly good german parts 
but...
my situation is a bit unique in that i am using a carb that flows more than twice that of a PICT and i have it plumbed into the stock a/c.
thanks for the great write up, Altema. i have one question:
the filter you are using is an oil type, reusable (think k&n) or is it the kind you just replace when it gets dirty?
_________________
88 Van WBX, A/T - 13 JSW TDI 6M/T - 2012 Touareg TDI Sport |
|
| Back to top |
|
|
70 140
Samba Member
Joined: September 22, 2002
Posts: 8471
Location: Ontario Canada
|
| Posted: Wed Aug 25, 2010 7:11 am Post subject: |
|
|
| Interesting idea. I like that it retains the warm air intake hose. |
|
| Back to top |
|
|
Altema
Samba Member
Joined: June 20, 2010
Posts: 2903
Location: Lower Michigan
|
| Posted: Wed Aug 25, 2010 10:38 am Post subject: |
|
|
| borninabus wrote: |
i have one question:
the filter you are using is an oil type, reusable (think k&n) or is it the kind you just replace when it gets dirty? |
It is an oiled element which can be cleaned and re-oiled. It will be a while before it gets dirty enough to need cleaning... it's a huge filter for our engine size in terms of surface area, and that's a good thing!
Regarding cutting good German parts, I can respect that, and that is why I chose that spot for the opening: Can't see it unless you are hunting for it, and easy to fix if you want to undo it. Same for cutting the bottom of the inside housing, to put it back you just weld the part back on, grind, and paint.
Another consideration is that air cleaners are not as scarce as some other parts because they are usually pulled off and cast aside, replaced by some aftermarket unit like the $12 chrome unit I had for a while. Now the original looking unit is back in place, purists who look under the decklid respond with a satisfied smile, and I don't have to struggle down freeway ramps
Paul |
|
| Back to top |
|
|
cool karmann collected
Samba Member

Joined: November 23, 2008
Posts: 631
Location: Oxford, U.K.
|
| Posted: Wed Aug 25, 2010 1:06 pm Post subject: |
|
|
Interesting. thats a nice mod, can't see any downsides to it. Obviously neither did VW when they redesigned the 1600 bus air filter in the mid 70's. They kept the elbow but replaced the oil bath with a plastic box containing a replaceable square element. It still has the warm up valve (with better control) and it's possible to buy hi-flo elements off the shelf.
I fitted one to my 71 bus when I replaced the engine, it's not designed to fit the semi-round pedestal but a giant zip-tie keeps it place nicely I find.
I bought a second one recently as a spare, but may attempt to see if I can get it to fit my ghia (when I've welded in the new heater channels of course  ) )
Ant
|
|
| Back to top |
|
|
hudsonce
Samba Member
Joined: January 29, 2010
Posts: 506
Location: Hagerstown, MD
|
| Posted: Mon Sep 06, 2010 5:35 am Post subject: |
|
|
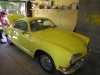
I finally got this new air filter system installed in my 68 Ghia!
I had inherited the very stupid looking round air filter on top of the carb from PO. I found an oil bath at a swap meet for $5!  After cleaning and cutting it, I just put quick spray paint on it. Then i found the elbow to connect to the carb for $10. I'm pretty sure it's off a bus, but it fits good enough. I drove it about 100 miles with the new system on, and it seems to work fine. My questions are: Should I just hook up the oil connection here even though I'm not using oil bath anymore? After cleaning and cutting it, I just put quick spray paint on it. Then i found the elbow to connect to the carb for $10. I'm pretty sure it's off a bus, but it fits good enough. I drove it about 100 miles with the new system on, and it seems to work fine. My questions are: Should I just hook up the oil connection here even though I'm not using oil bath anymore?
Will it still work OK even though this flap seems to be broken? The flap still opens if you push this with your hand.
Can I just leave this hole open?
As crappy as this looks, it is still a million times the better than the Wal-Mart style filter that WAS on the car, held in place with electrical tape. |
|
| Back to top |
|
|
CLKWRK
Samba Member

Joined: October 02, 2001
Posts: 566
Location: Toronto
|
|
| Back to top |
|
|
Altema
Samba Member
Joined: June 20, 2010
Posts: 2903
Location: Lower Michigan
|
| Posted: Sat Sep 11, 2010 12:15 pm Post subject: |
|
|
| hudsonce wrote: |
| My questions are: Should I just hook up the oil connection here even though I'm not using oil bath anymore? |
Yes. That hose is actually a breather line, not an oil supply line for the cleaner. It ventilates crankcase blowby.
| hudsonce wrote: |
| Will it still work OK even though this flap seems to be broken? The flap still opens if you push this with your hand. |
Yes, just make sure you wire it so you get fresh air like Clkwrk mentioned, not preheated air. If your heat riser pipes are disabled, let me know since that means a change in the program
| hudsonce wrote: |
| Can I just leave this hole open? |
Yes, it is before the filter, so any air drawn from here will get filtered before the engine breathes it. I'm not sure what it's original function was since I have not seen that particular model air cleaner, but perhaps someone else can chime in.
| hudsonce wrote: |
| As crappy as this looks, it is still a million times the better than the Wal-Mart style filter that WAS on the car, held in place with electrical tape. |
Funny you should mention tape; when the tow truck dropped mine off after I bought it, the hose to the carb was held together by duct tape 
Paul
PS: Sorry for the late response, I just found the email notice today about this post being replied to... |
|
| Back to top |
|
|
Altema
Samba Member
Joined: June 20, 2010
Posts: 2903
Location: Lower Michigan
|
| Posted: Sat Sep 11, 2010 12:23 pm Post subject: |
|
|
Oh, just a quick question: Is there any type of door or flap on that rectangular opening? I just realized that it bypasses the flow damper in the snorkel. The flow damper is the flap that is connected to the arm with the weight on it (separate from the preheater flap), and it's important on some models to help stay away from any flat spots.
Paul |
|
| Back to top |
|
|
|


